Bunny Cotton Craft: Fluffy Easter Bunny DIY for Kids
If you’re looking for a simple, adorable, and budget-friendly craft to do with your kids this spring, this Bunny Cotton Craft is a must-try. It’s soft, fluffy, and irresistibly cute—perfect for Easter, spring break boredom busters, or a cozy afternoon at home.
This craft is especially great for younger kids because it focuses on sensory play, fine motor skills, and creativity. Plus, it uses easy-to-find materials you probably already have at home.
Whether you’re a parent, teacher, or caregiver, this DIY bunny craft is a fun way to celebrate the season while making something memorable.
What to Know About This Bunny Cotton Craft
There’s something magical about turning simple materials like cotton balls and paper into a fluffy bunny. Here’s why this craft is such a hit:
- Kid-friendly and easy – Perfect for preschoolers and elementary-aged kids
- Minimal prep required – No complicated steps or special tools
- Budget-friendly – Uses inexpensive materials
- Great for Easter décor – Display your bunny on the fridge, bulletin board, or wall
- Encourages creativity – Kids can customize colors, faces, and details
This craft also doubles as a sensory activity thanks to the soft texture of the cotton balls—kids love the tactile experience!
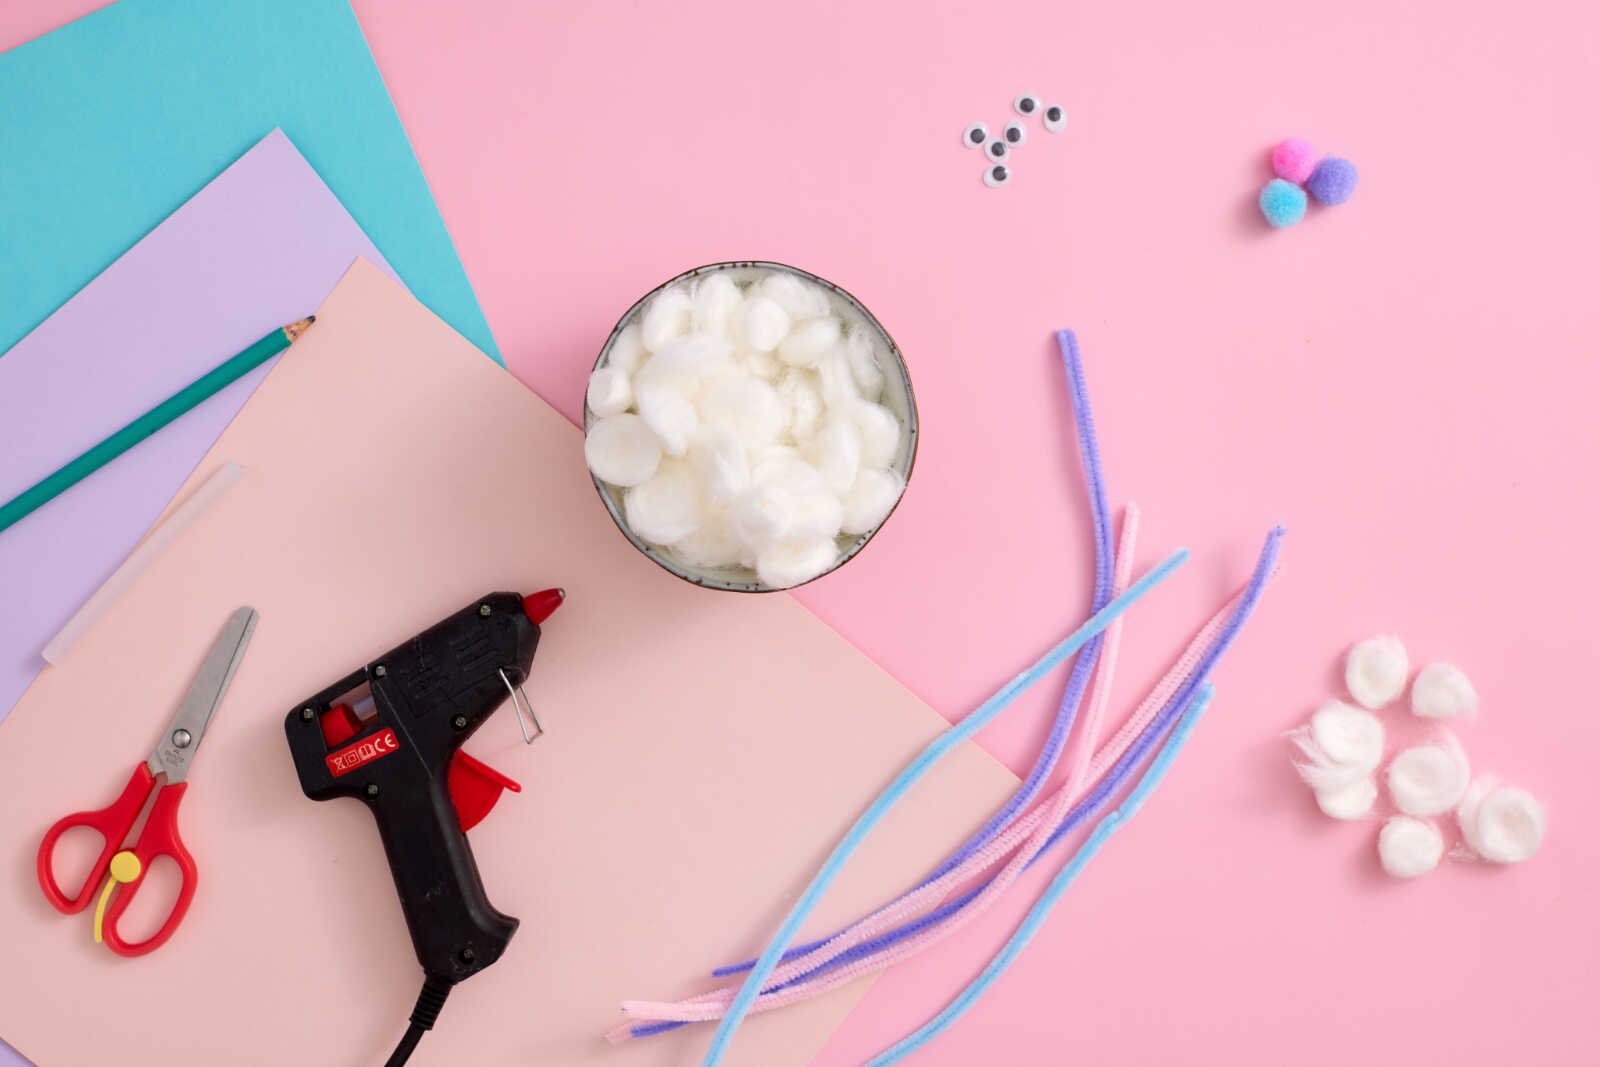
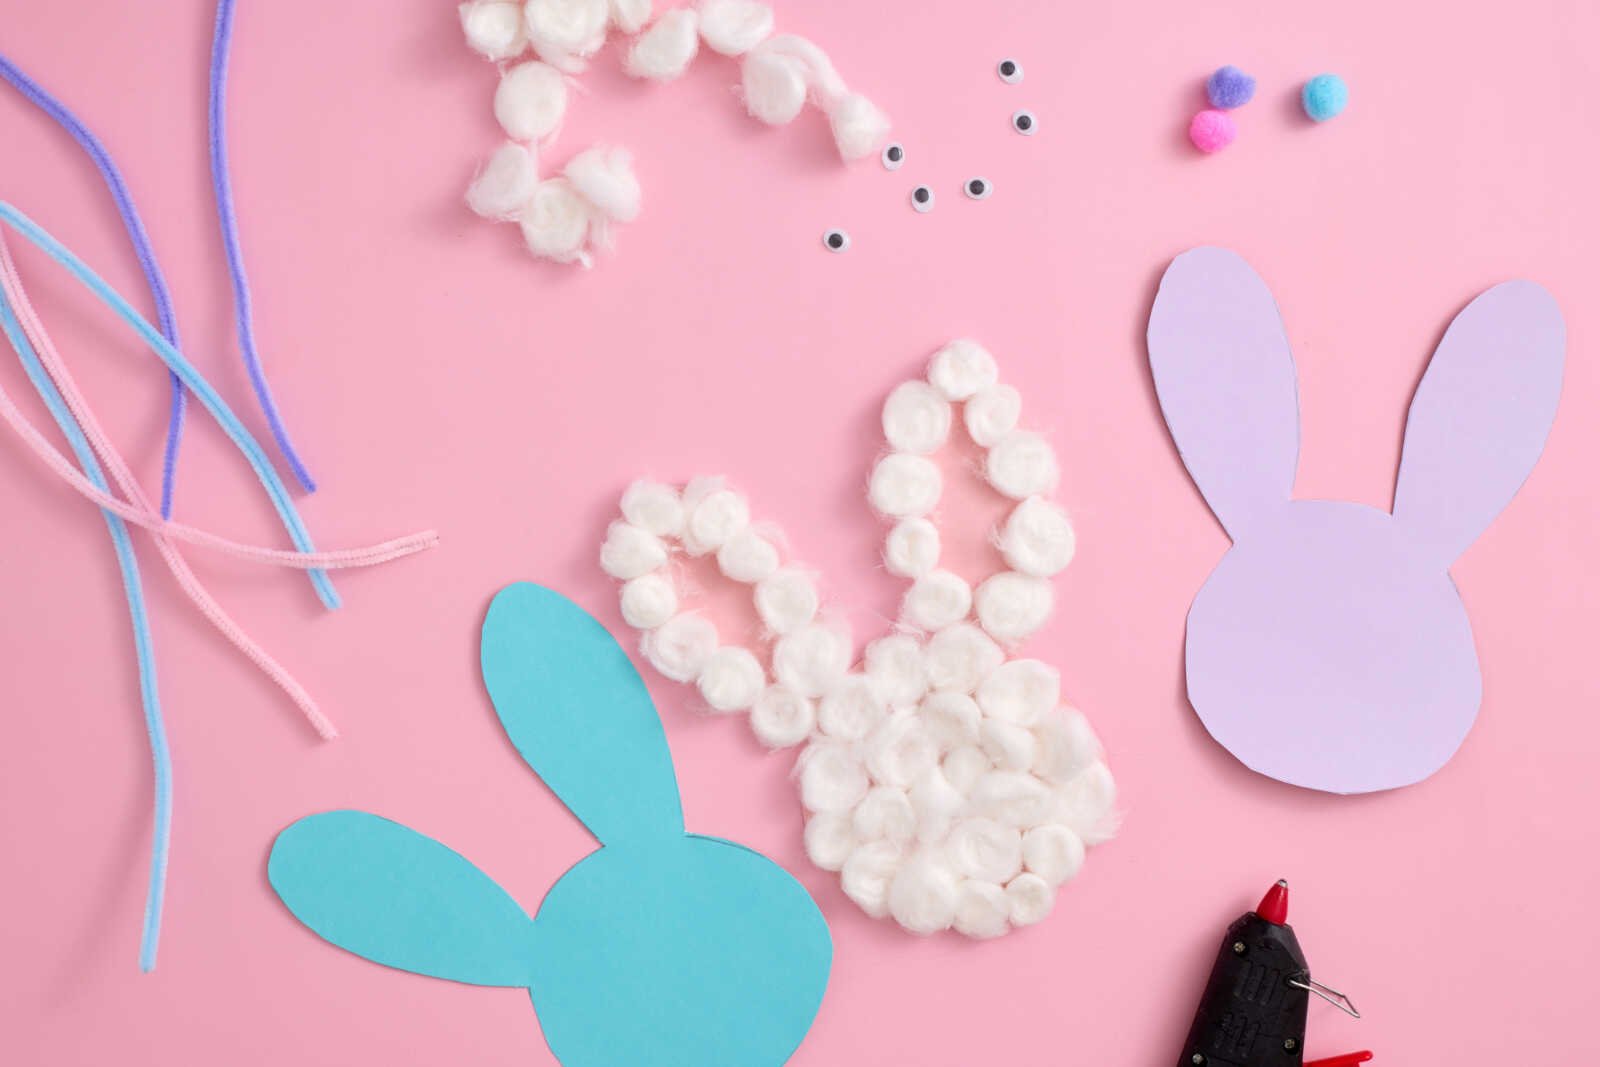
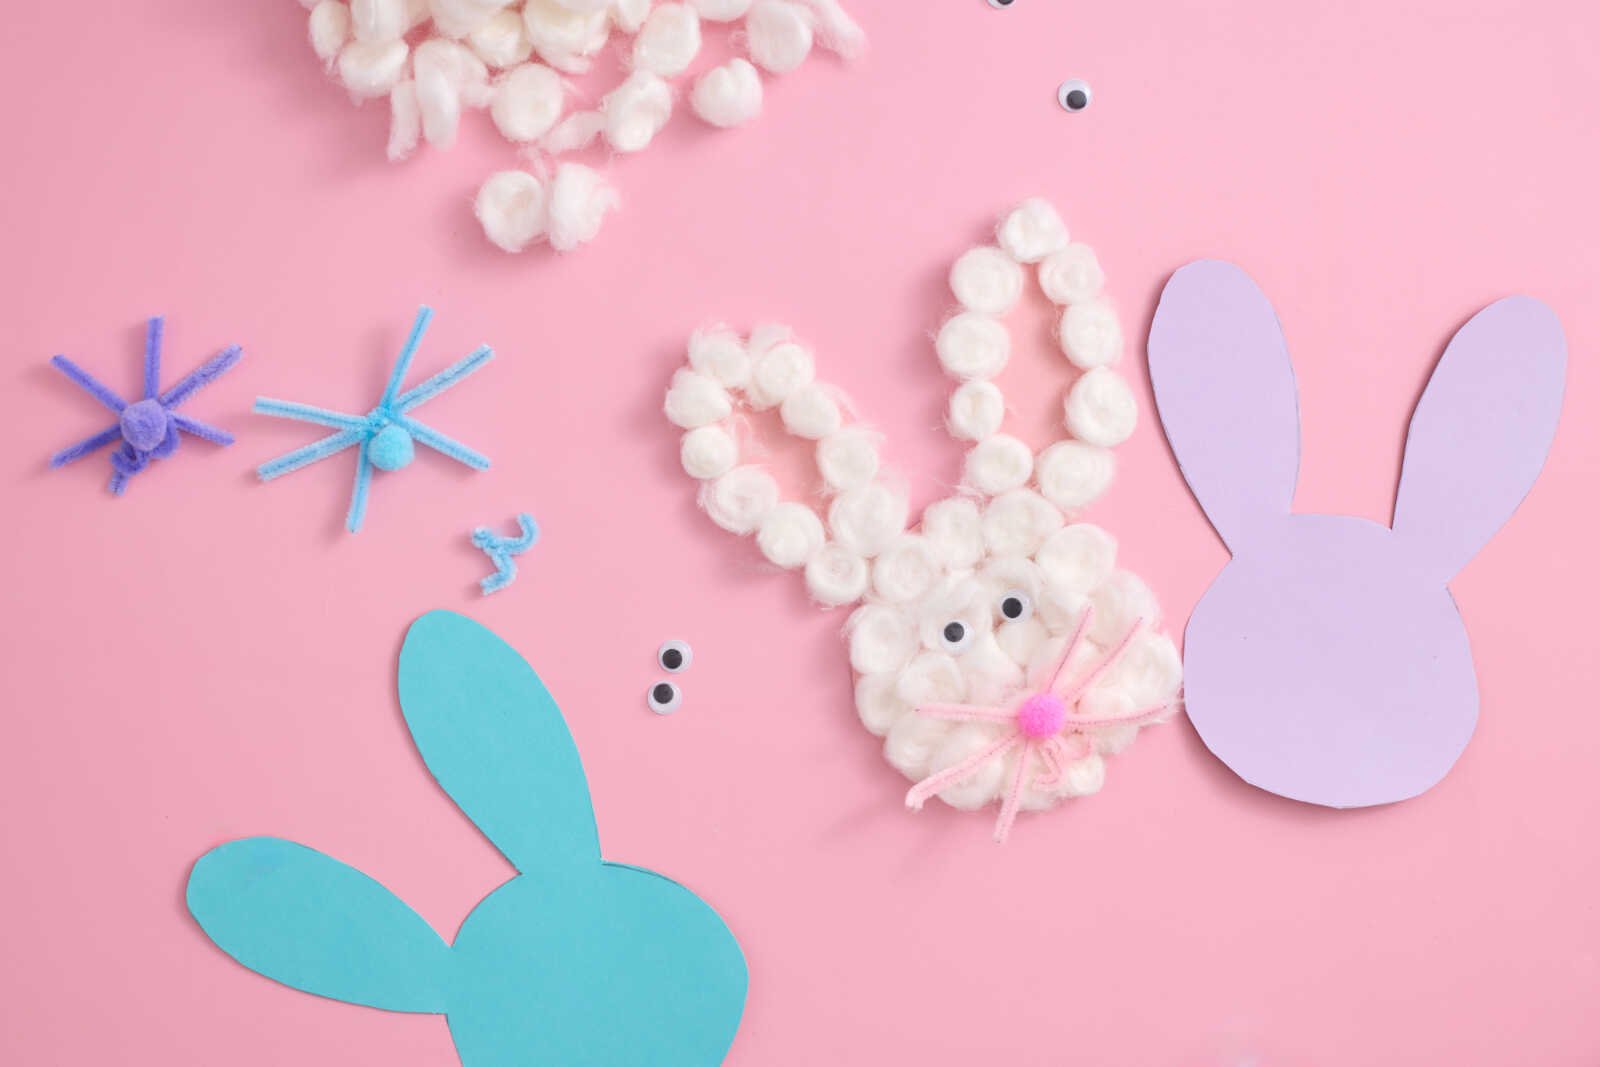
Materials You’ll Need
Before you start, gather all your supplies so the crafting process is smooth and fun.
Materials:
- Cotton balls (20–40 pieces)
- Colored cardstock
- PVA glue or hot glue
- Googly eyes
- Small pom-pom for the nose
- Pipe cleaners for whiskers
Tools:
- Scissors
- Pencil
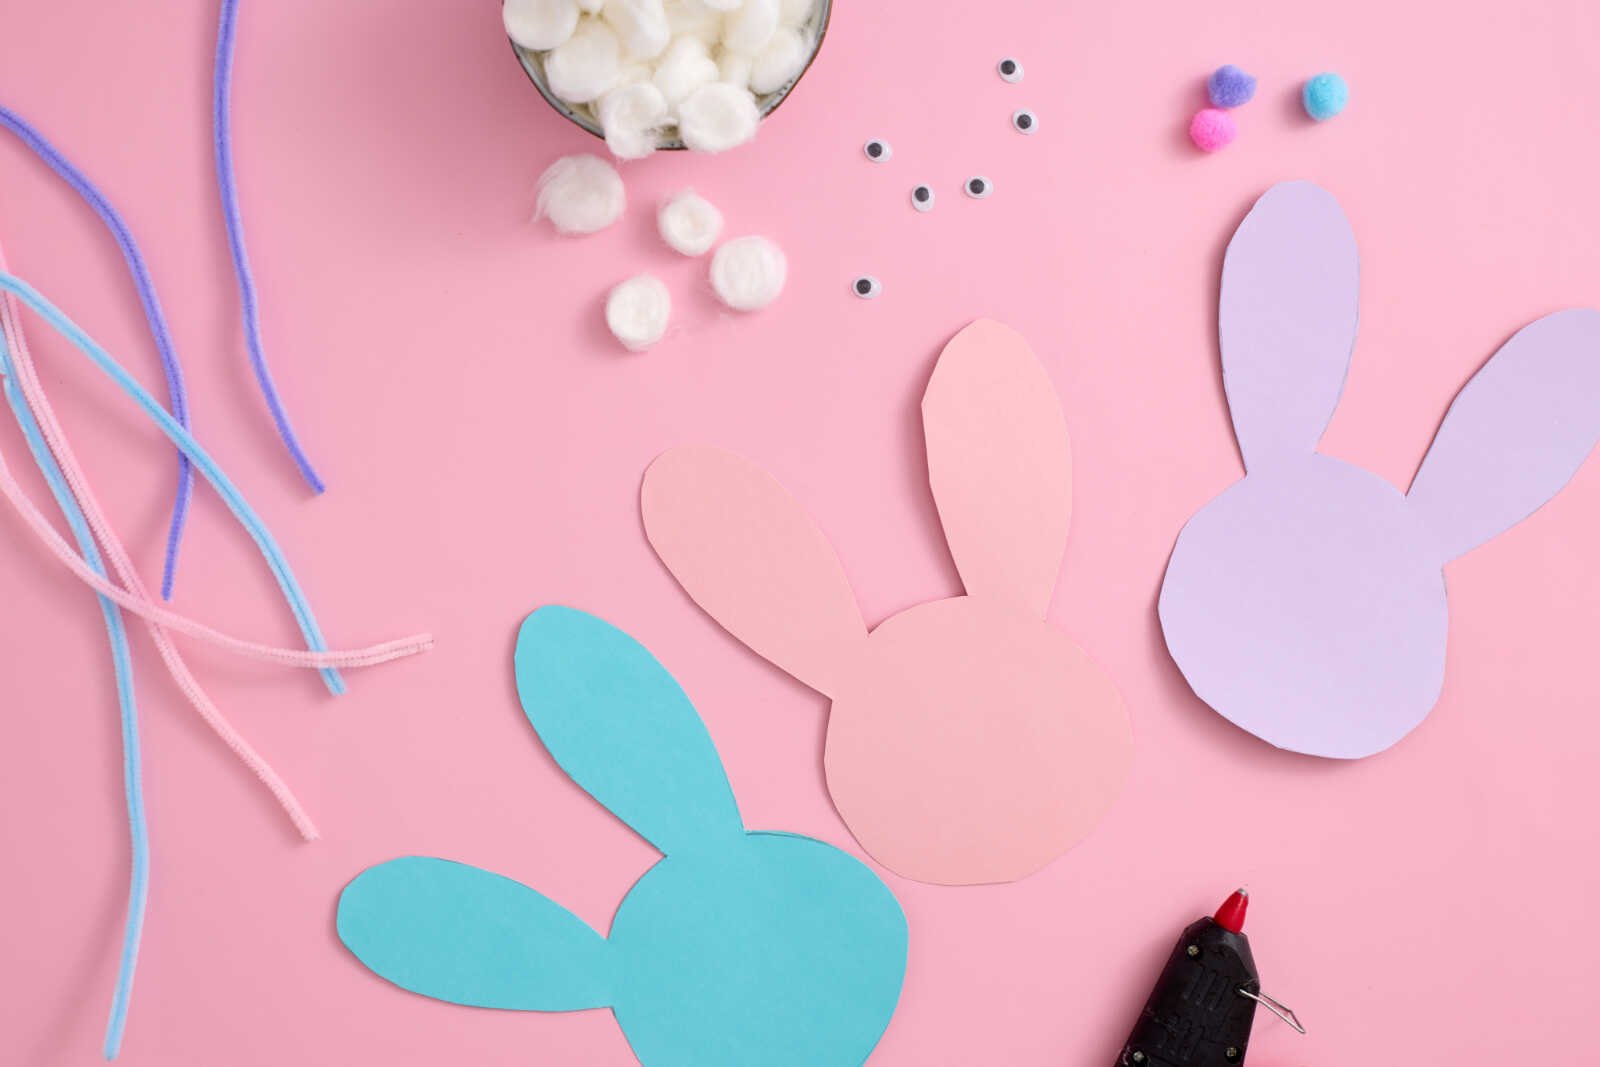
How to Make a Bunny Cotton Craft
Follow these simple steps to create your own fluffy bunny masterpiece.
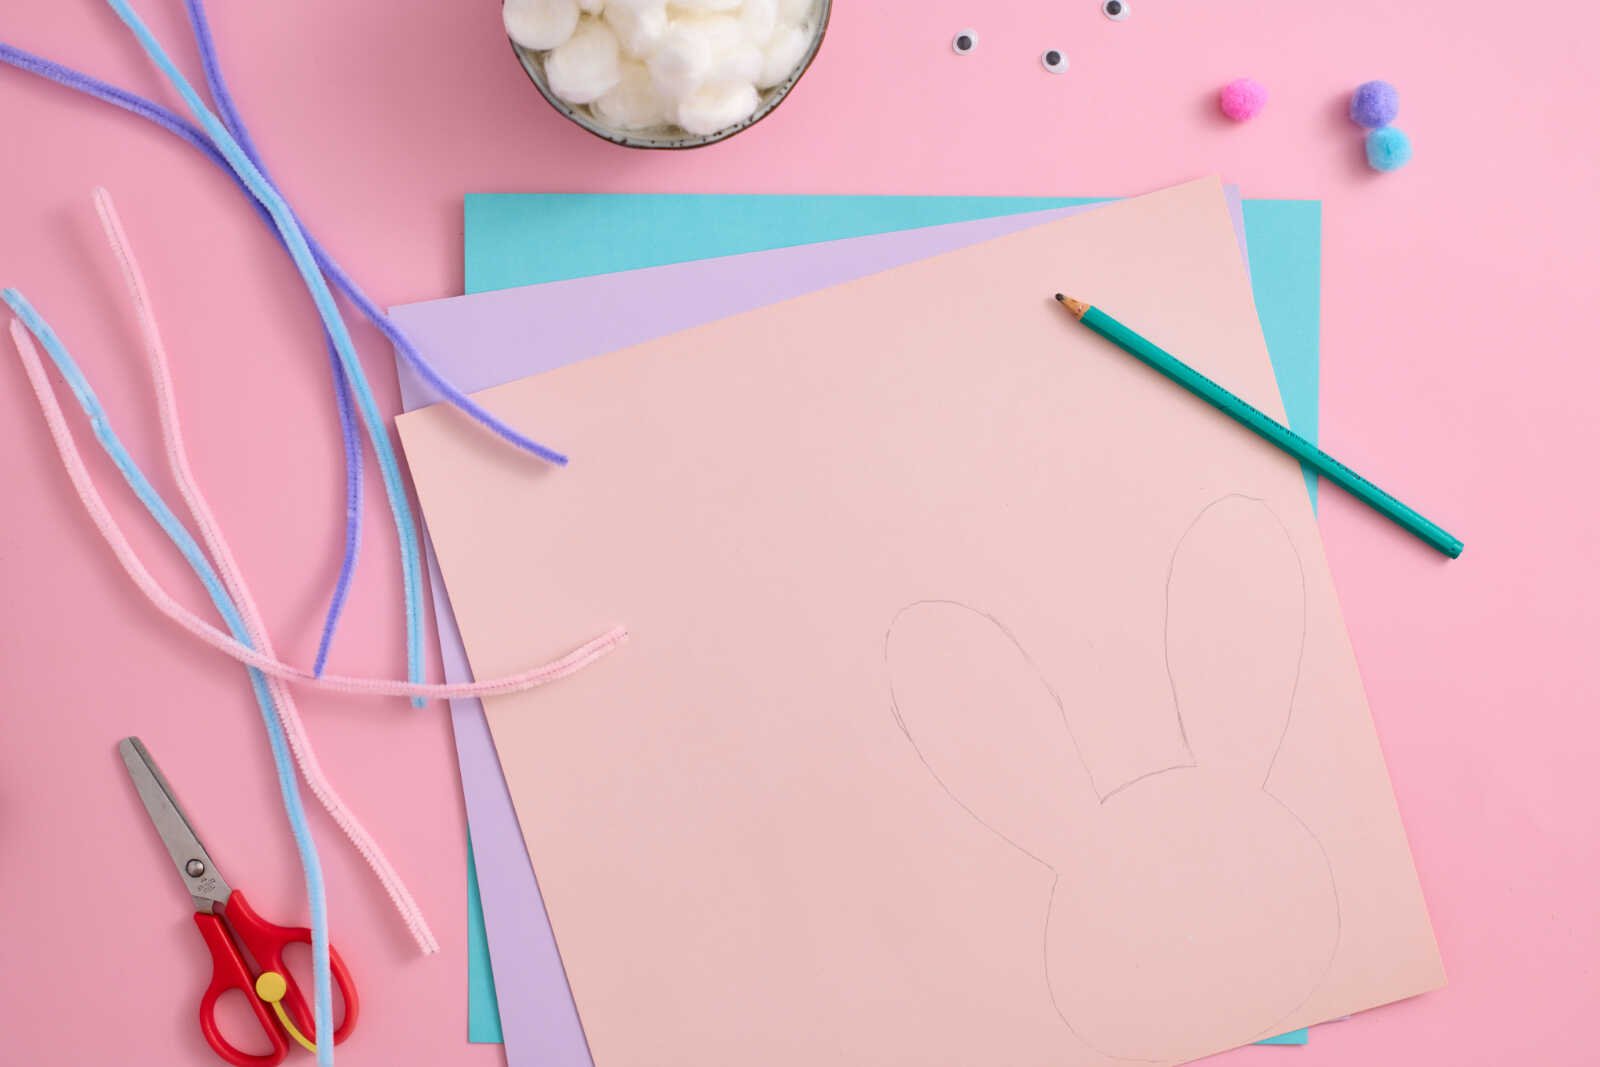
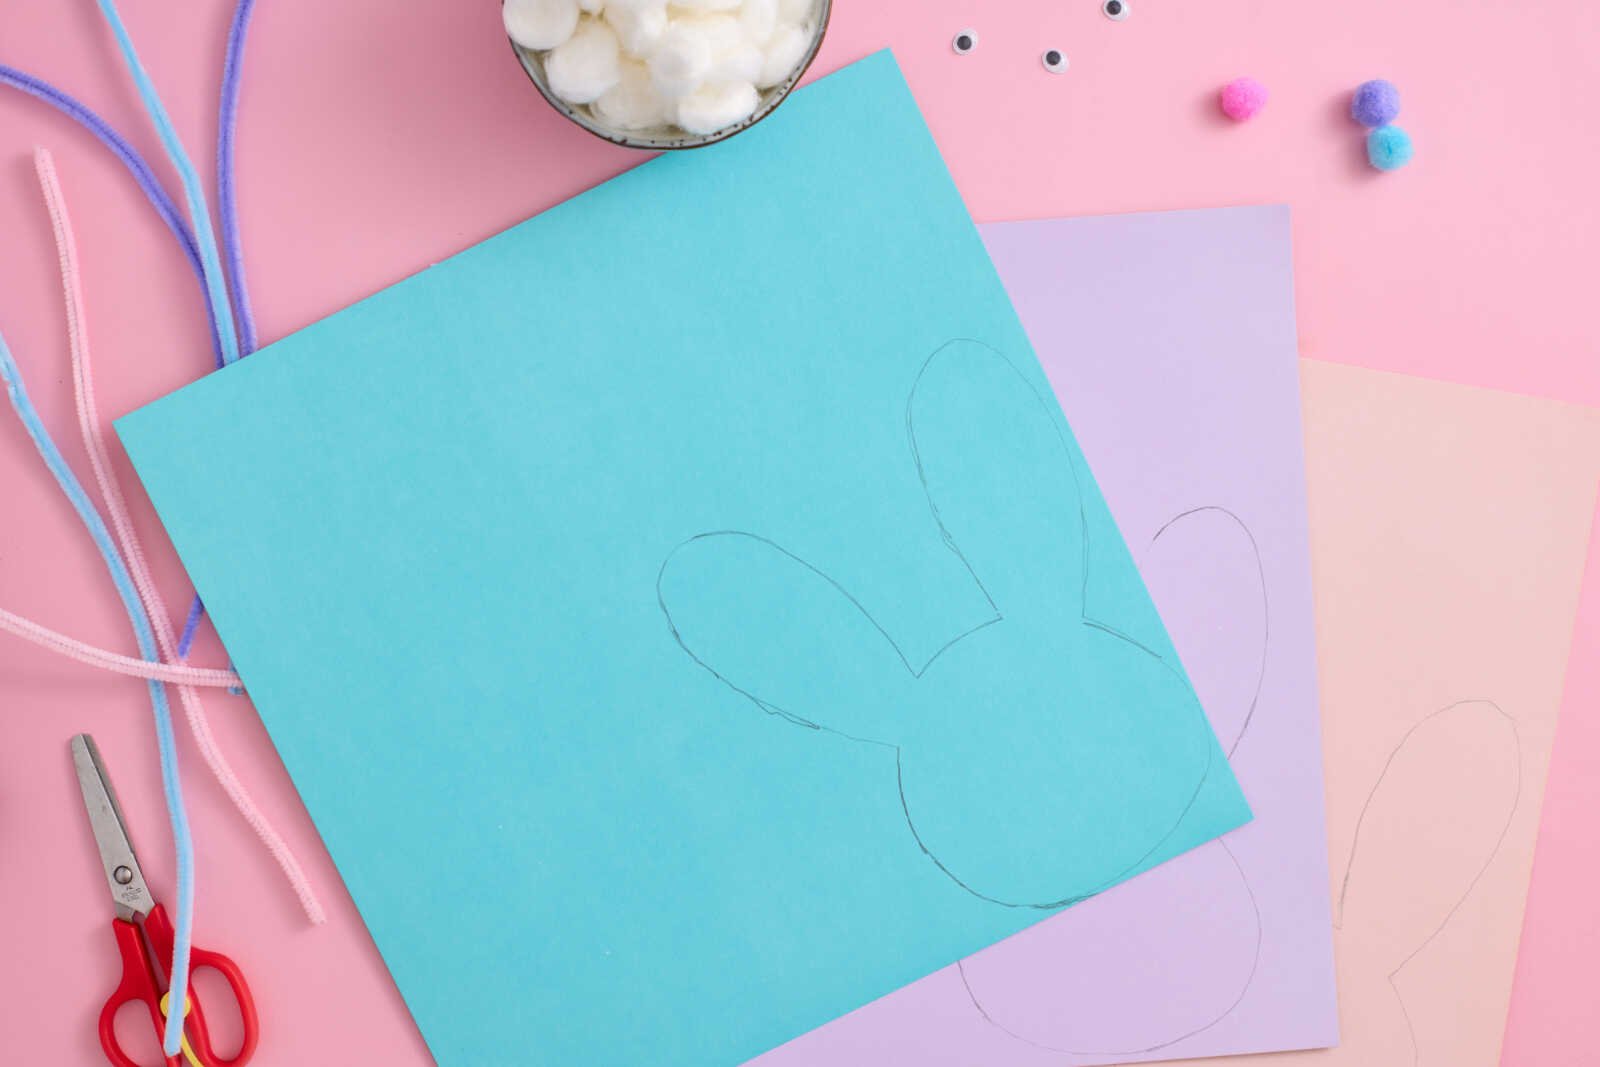
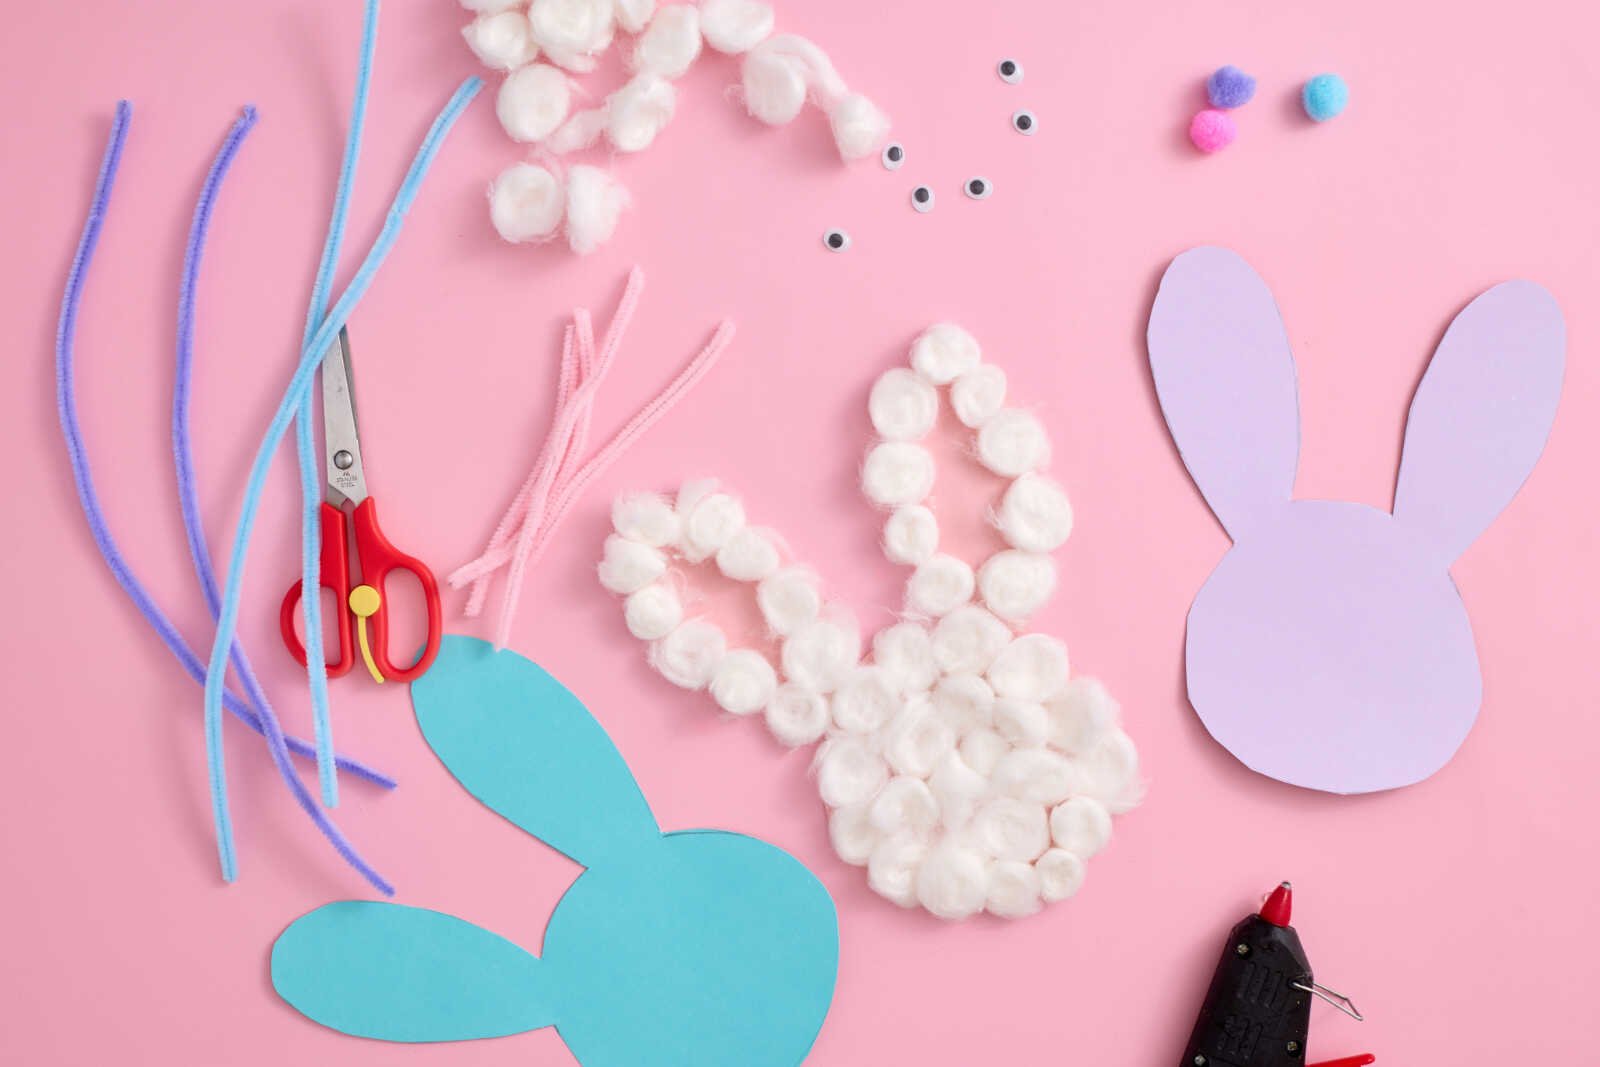
Step 1: Prepare the Base
Start by creating the shape of your bunny.
- Draw a bunny head silhouette with long ears on a piece of colored cardstock
- You can freehand the shape or lightly sketch it first with a pencil
- Carefully cut out the bunny shape using scissors
Tip: If you’re working with younger kids, pre-cut the bunny shape for them to make things easier.
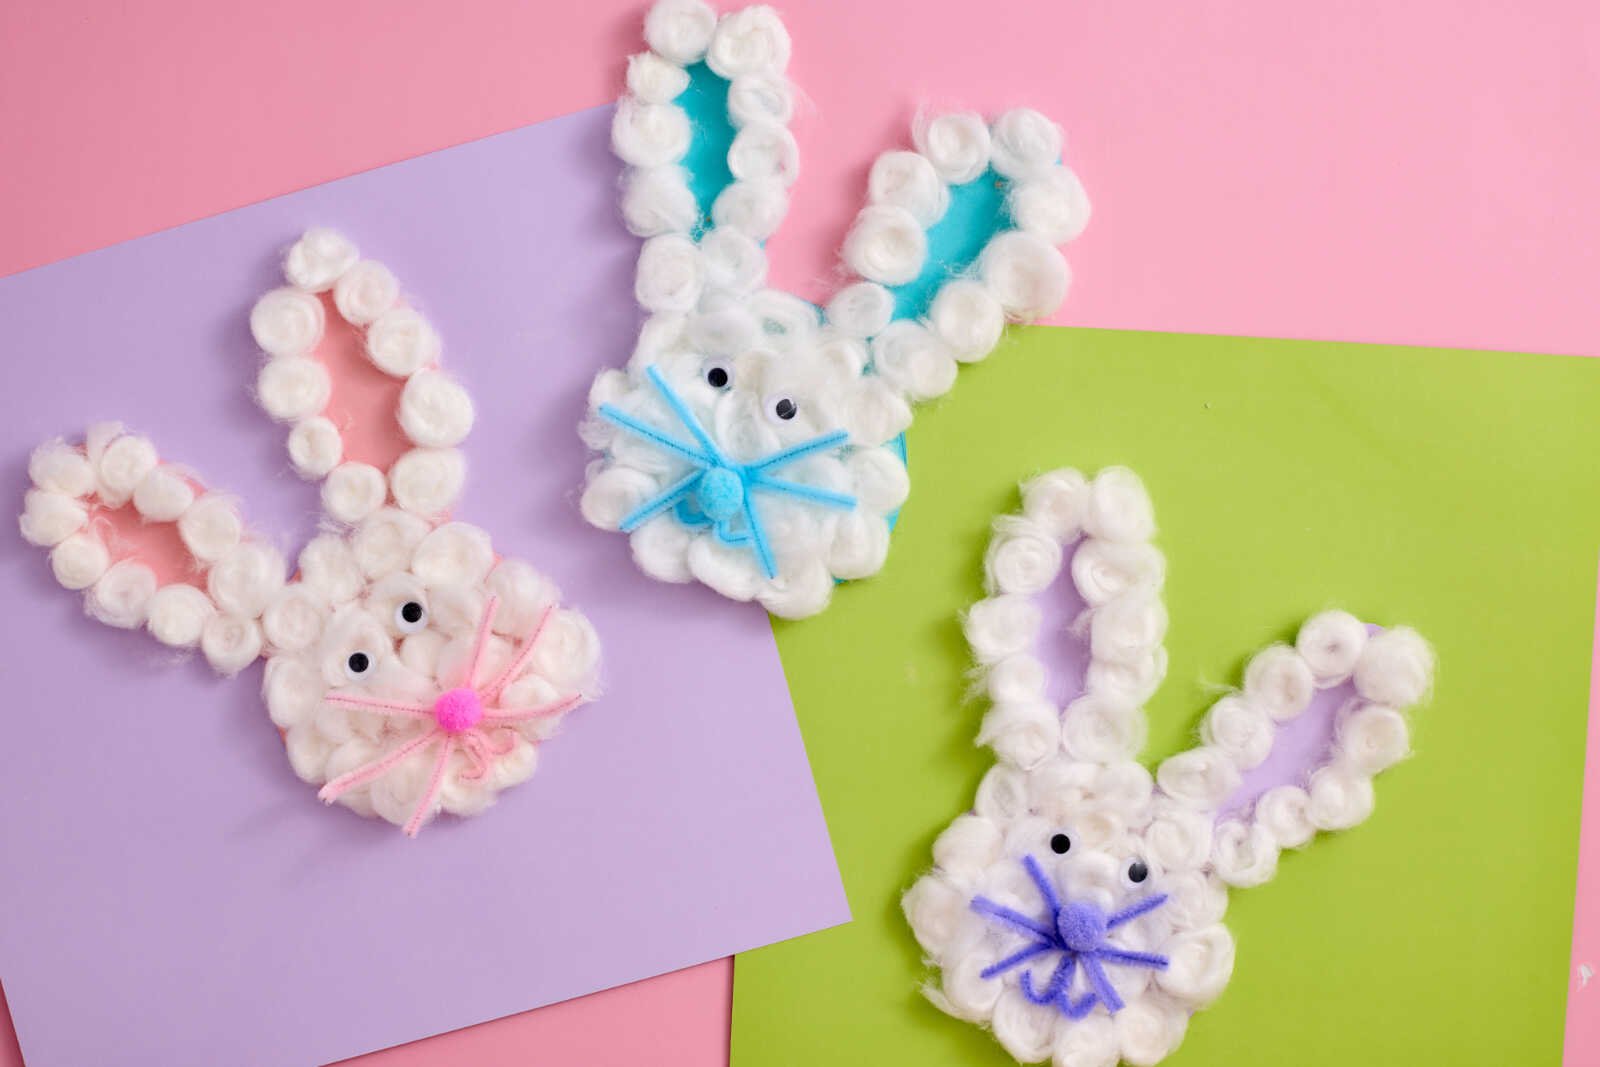
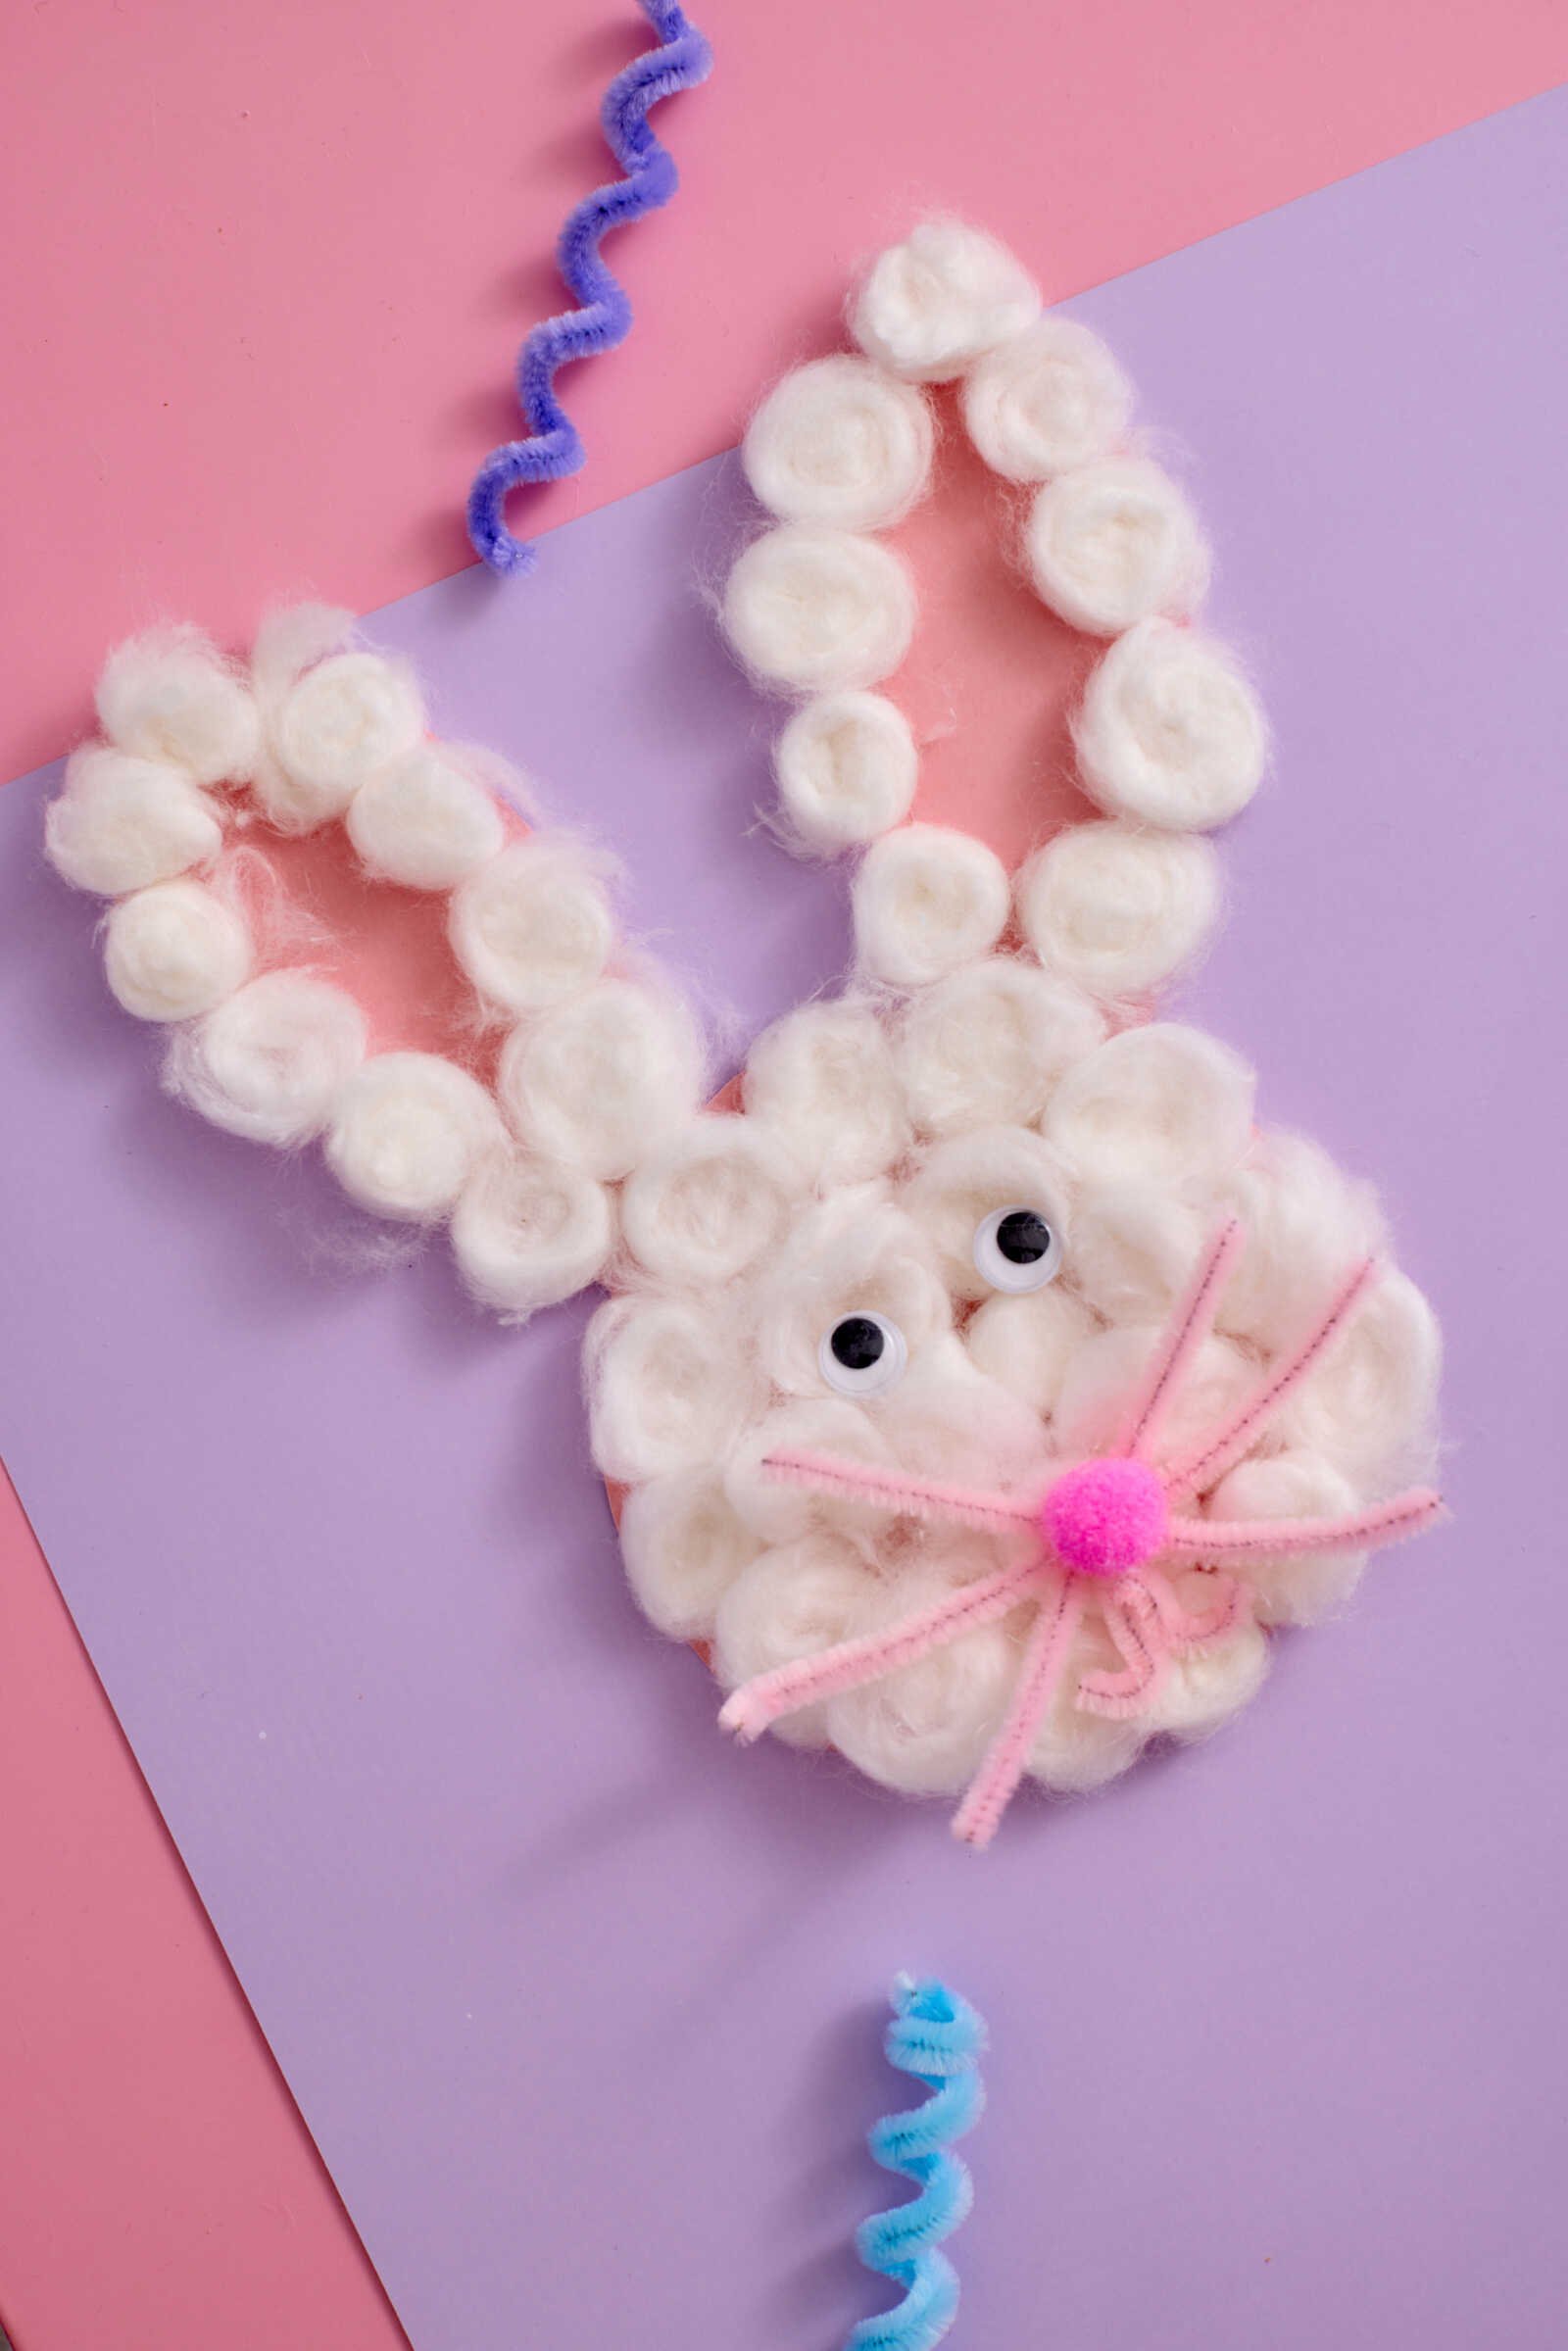
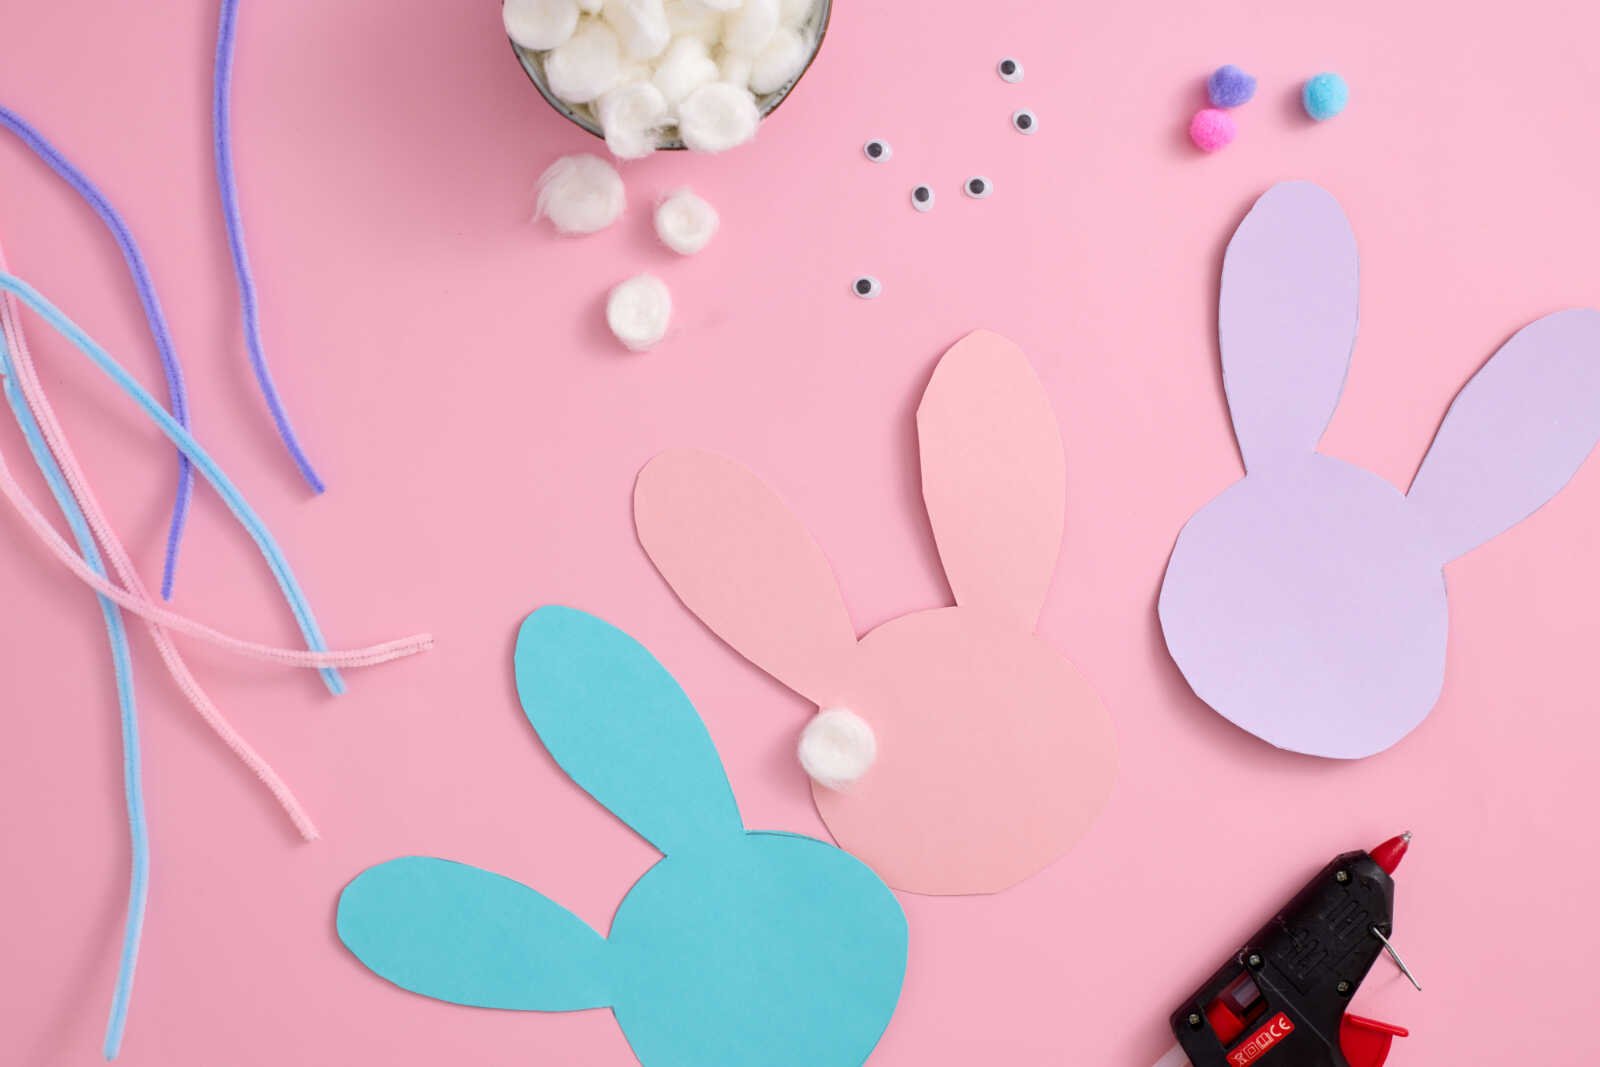
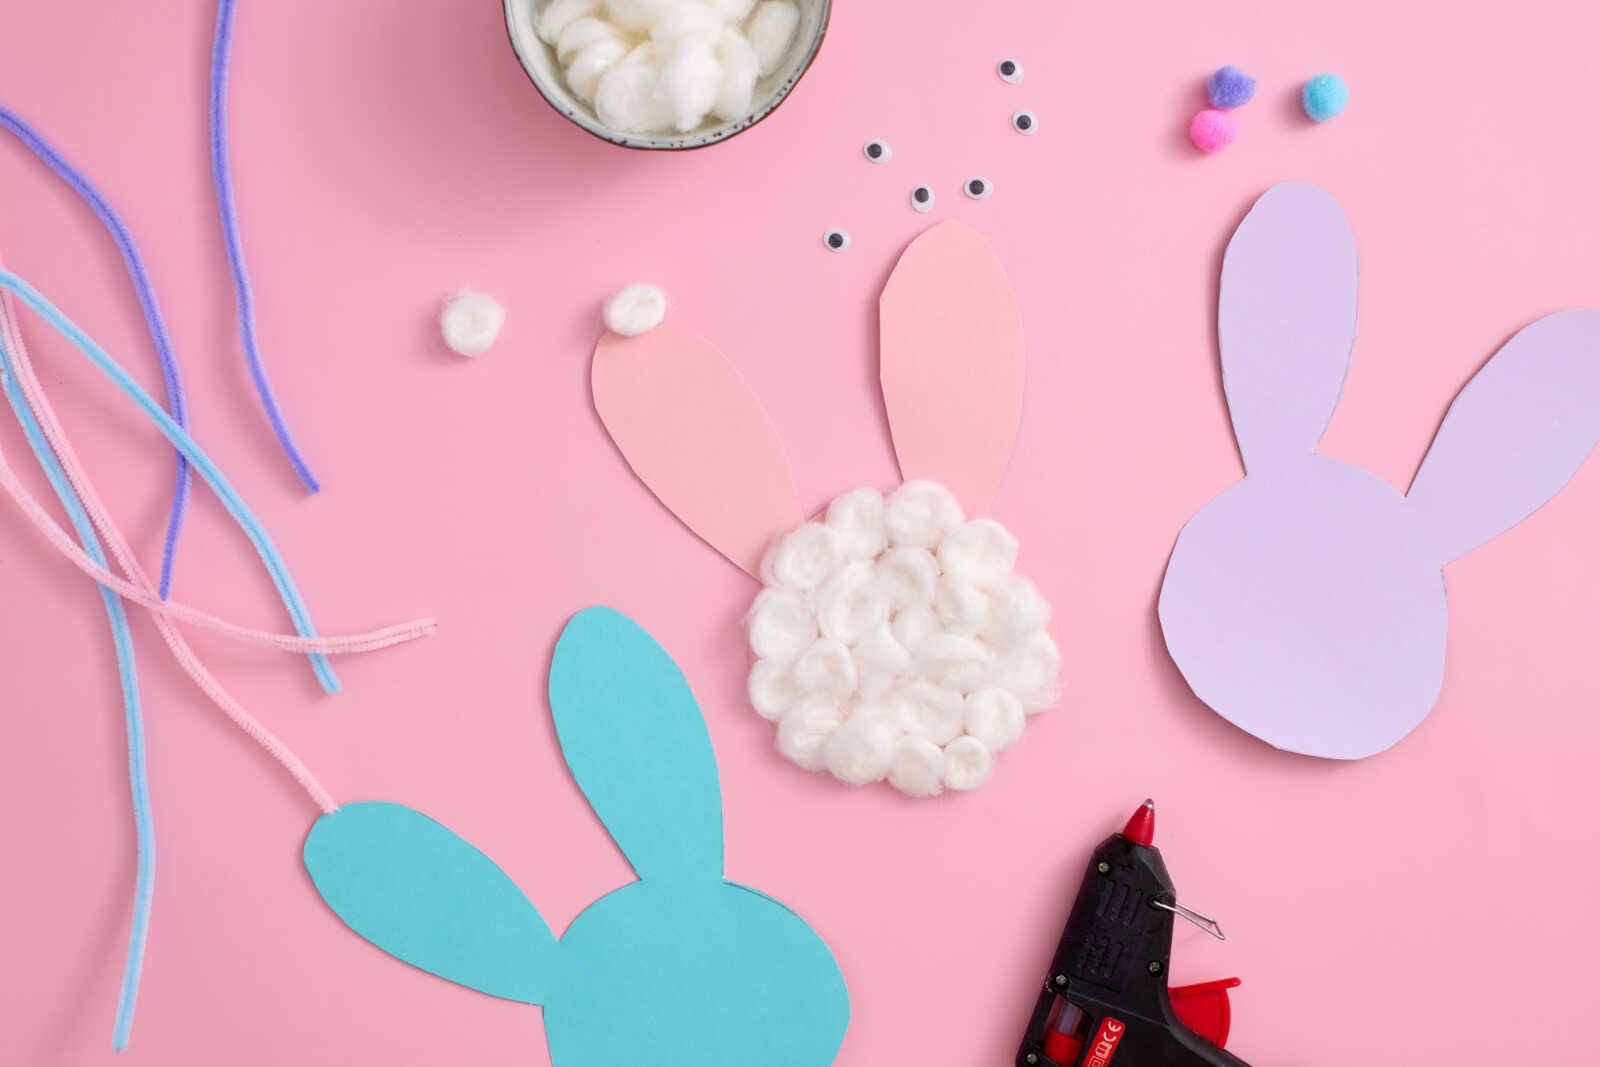
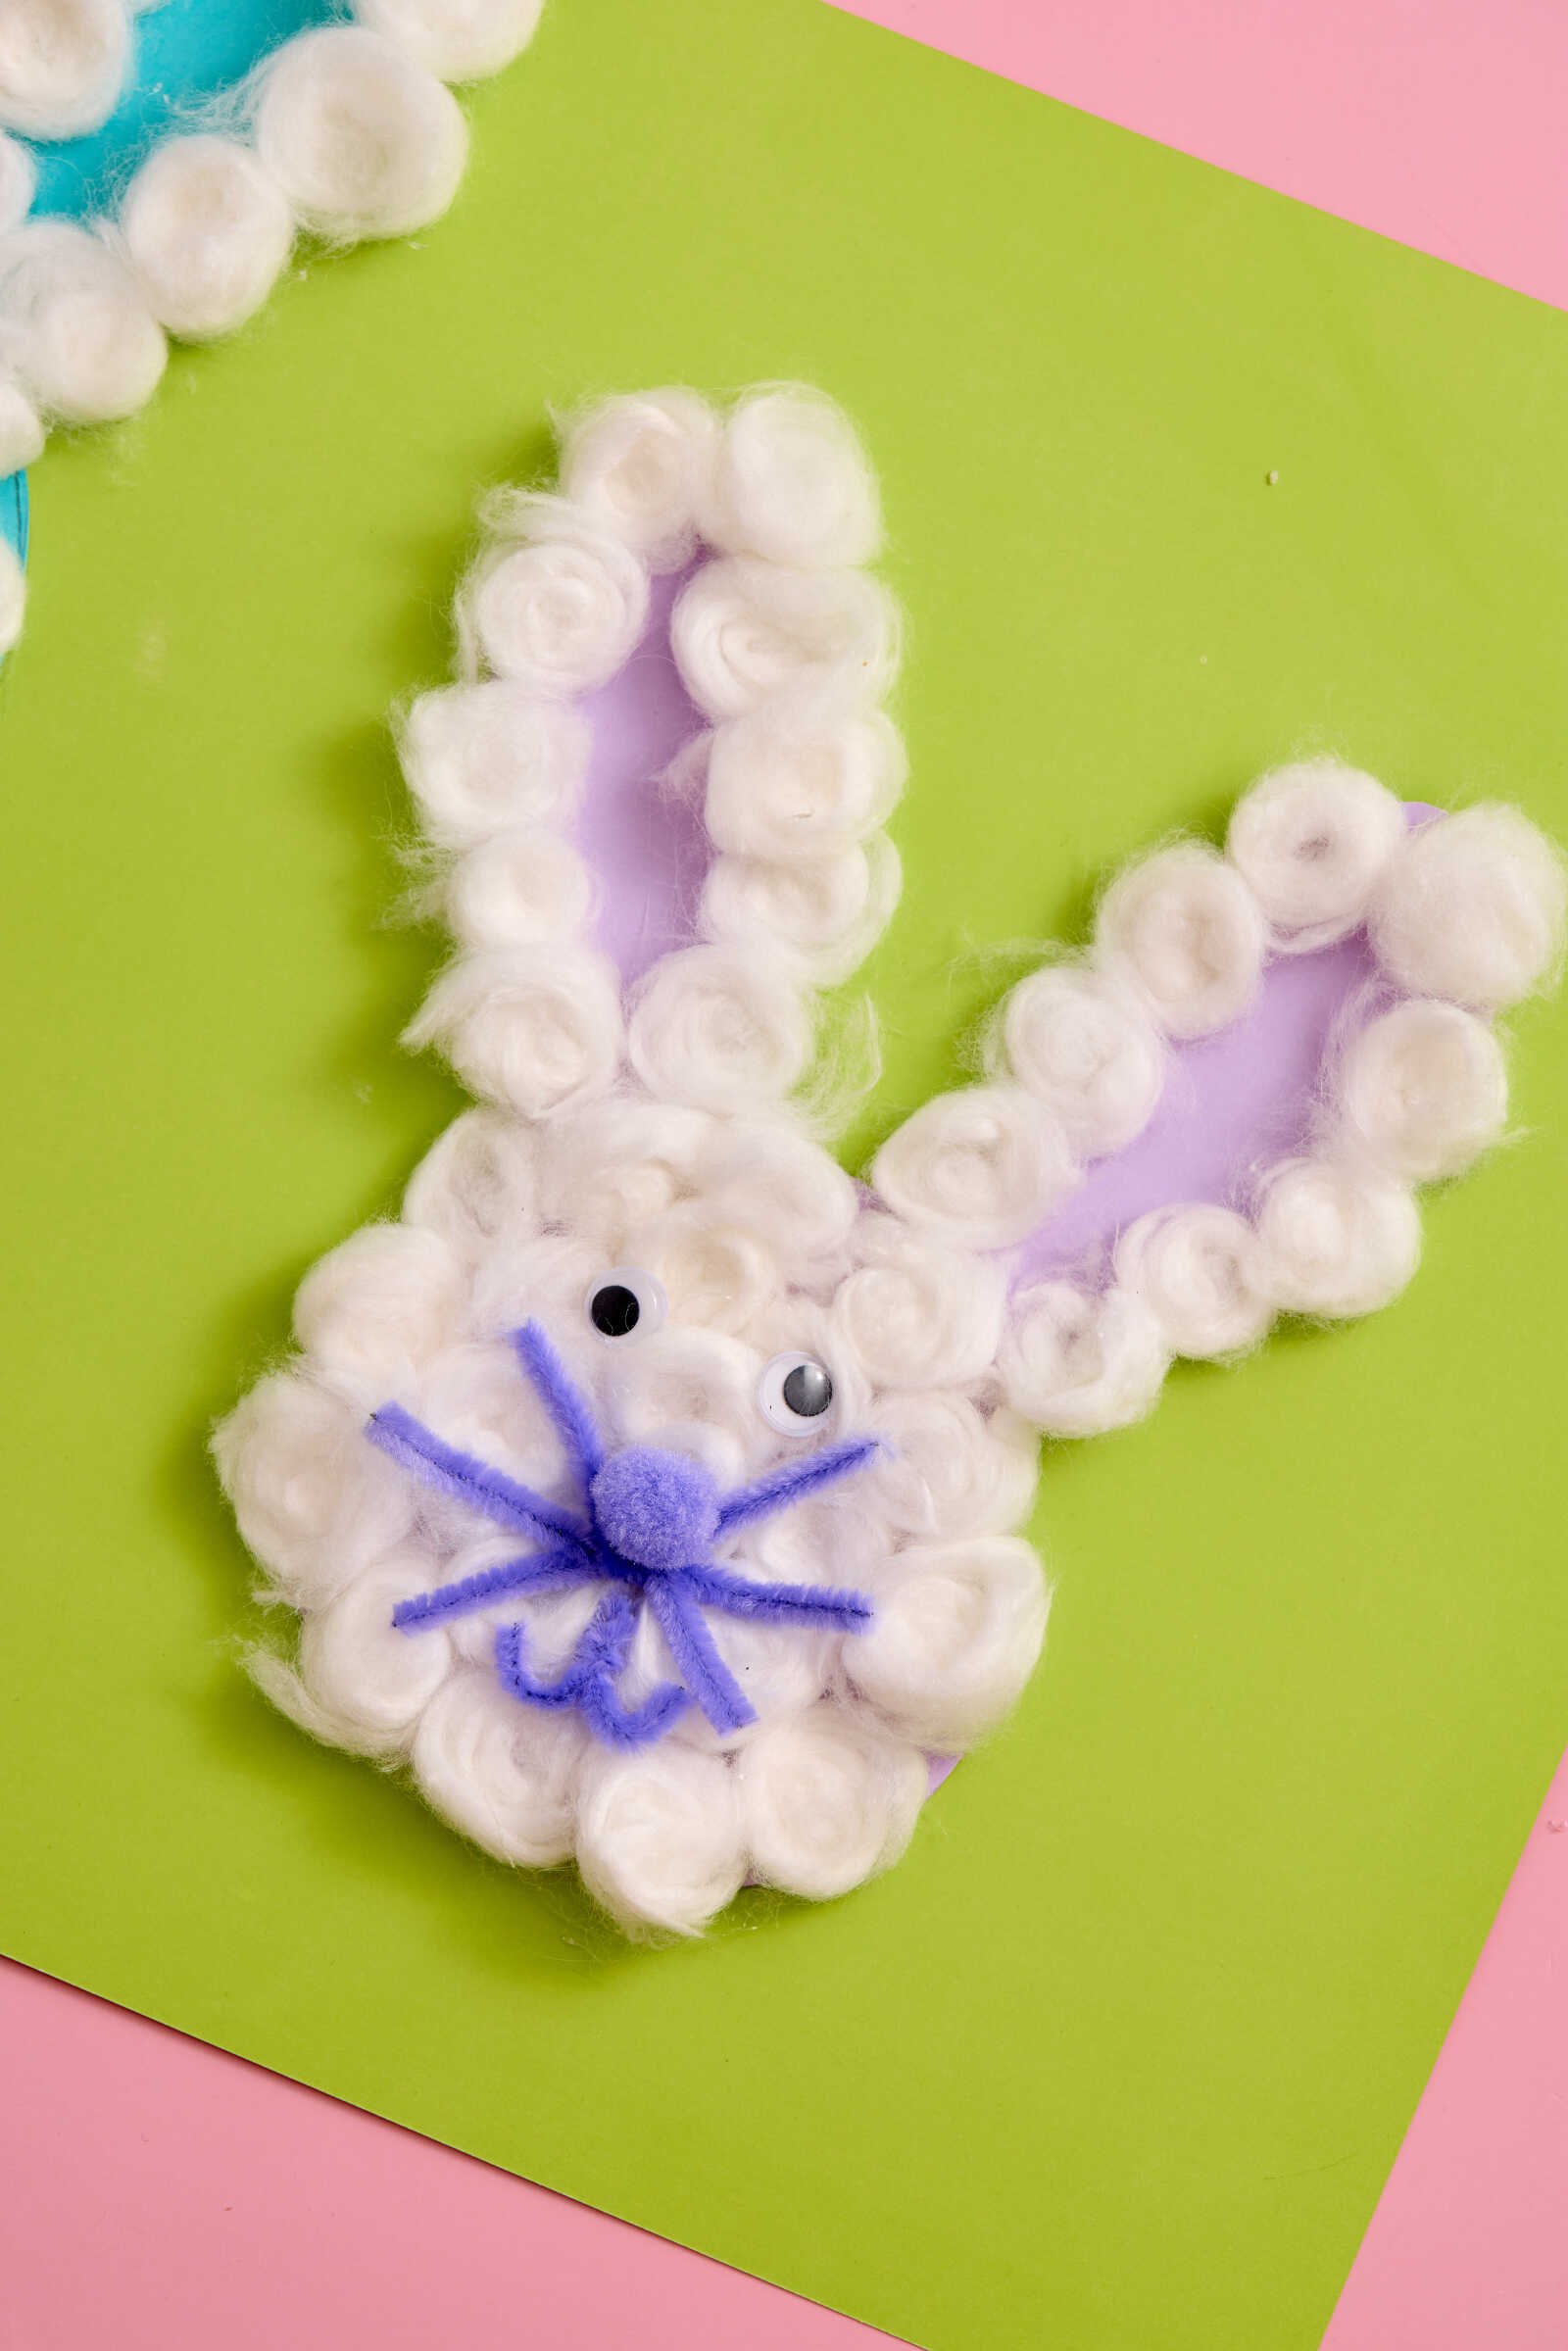
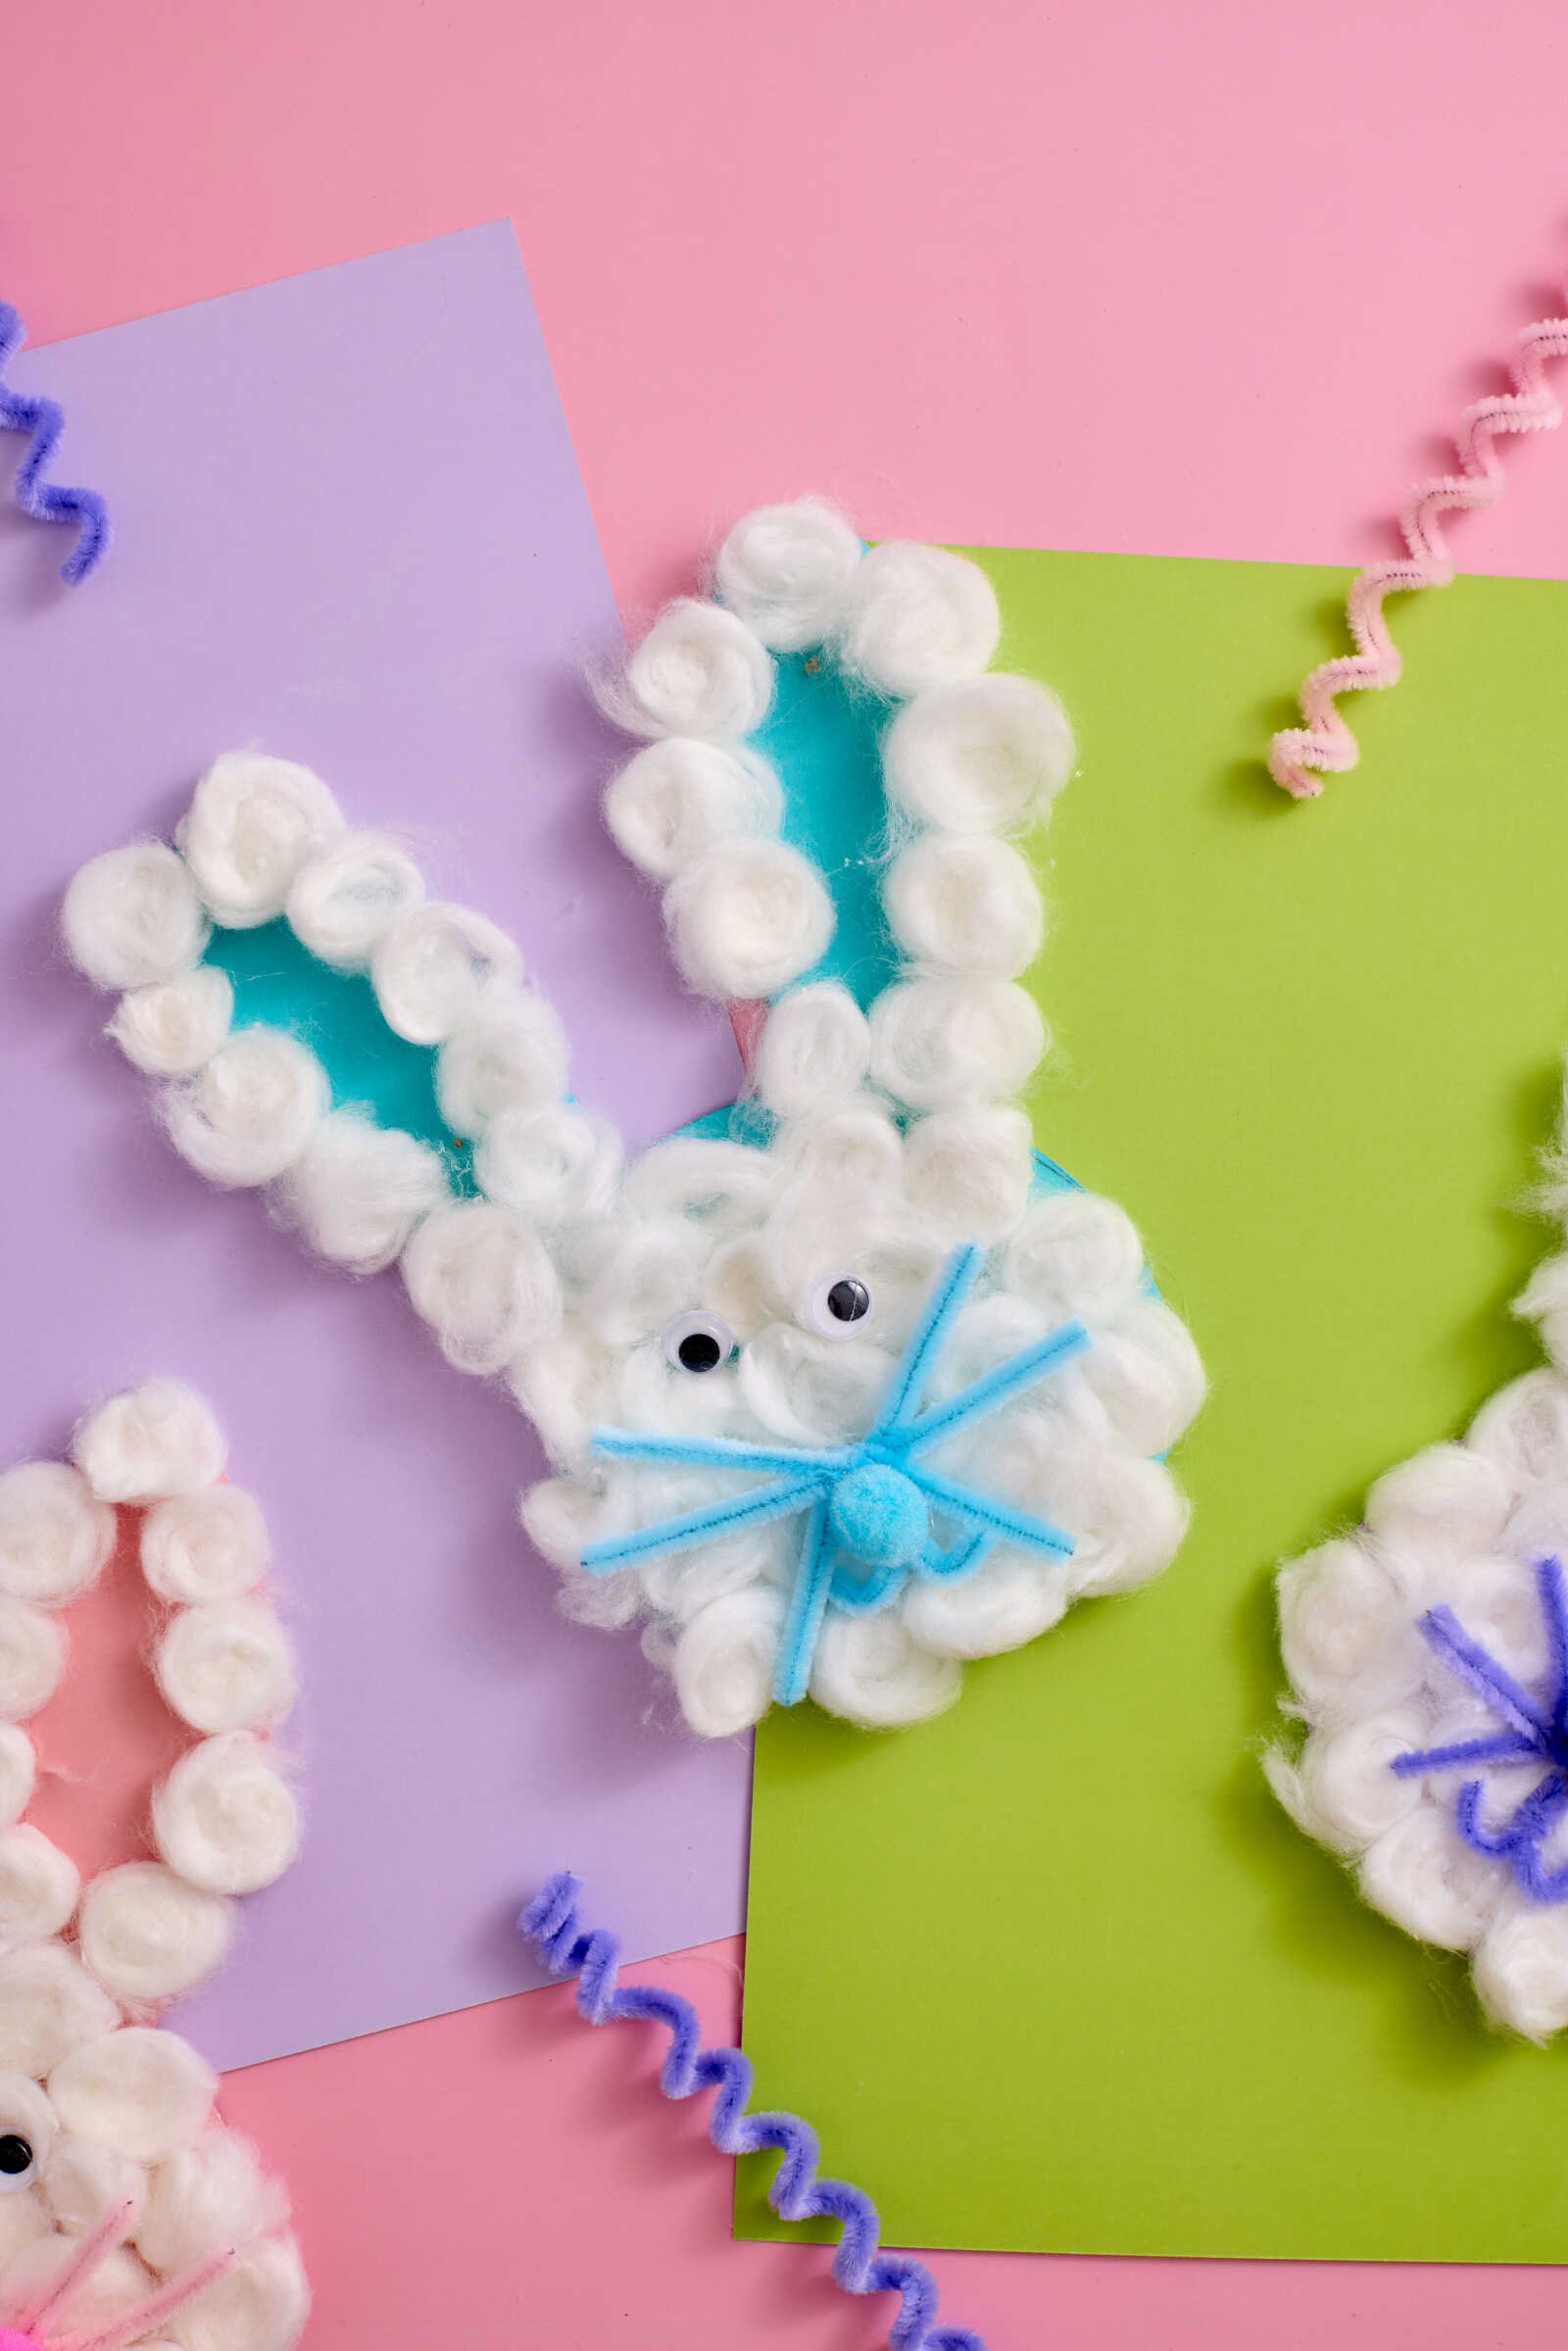
Step 2: Attach the Cotton Balls
Now it’s time to bring your bunny to life with fluffy texture.
- Apply glue across the entire surface of the bunny head and ears
- Press cotton balls onto the glue, covering every inch
- Place them close together so no cardstock shows through
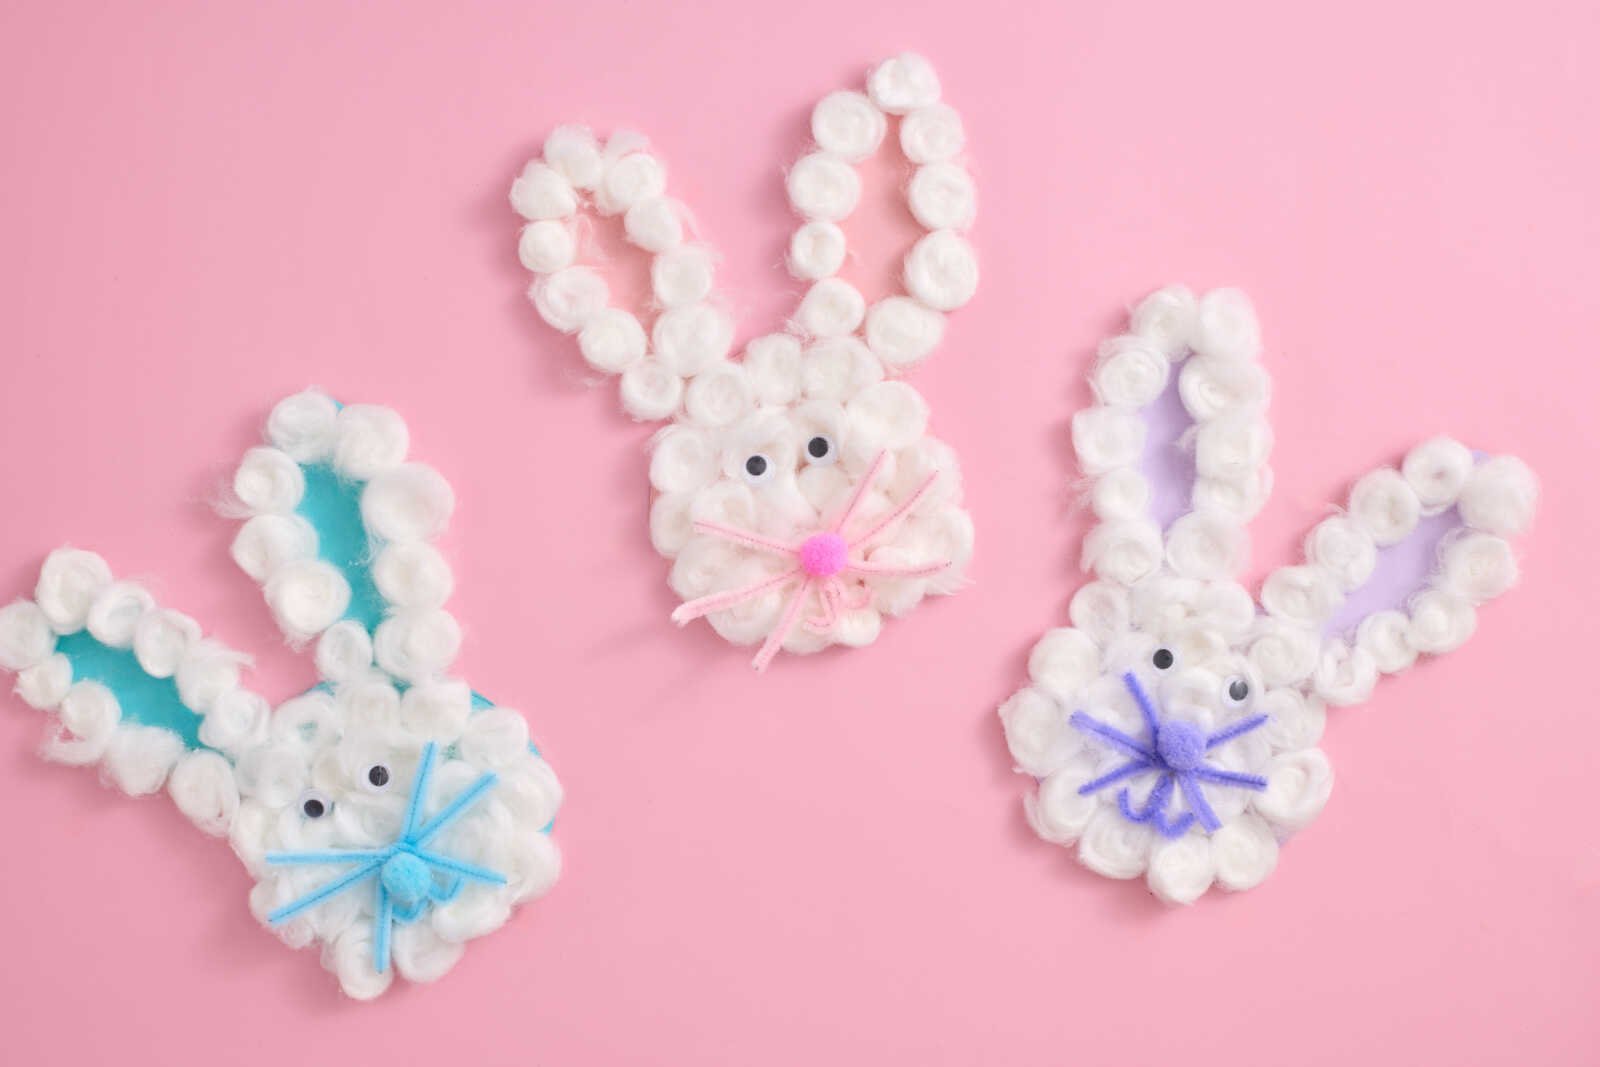
This step is where the magic happens—your bunny will instantly look soft and cuddly!
Pro Tip: For a fuller look, gently pull apart some cotton balls to make them stretch and fill gaps.
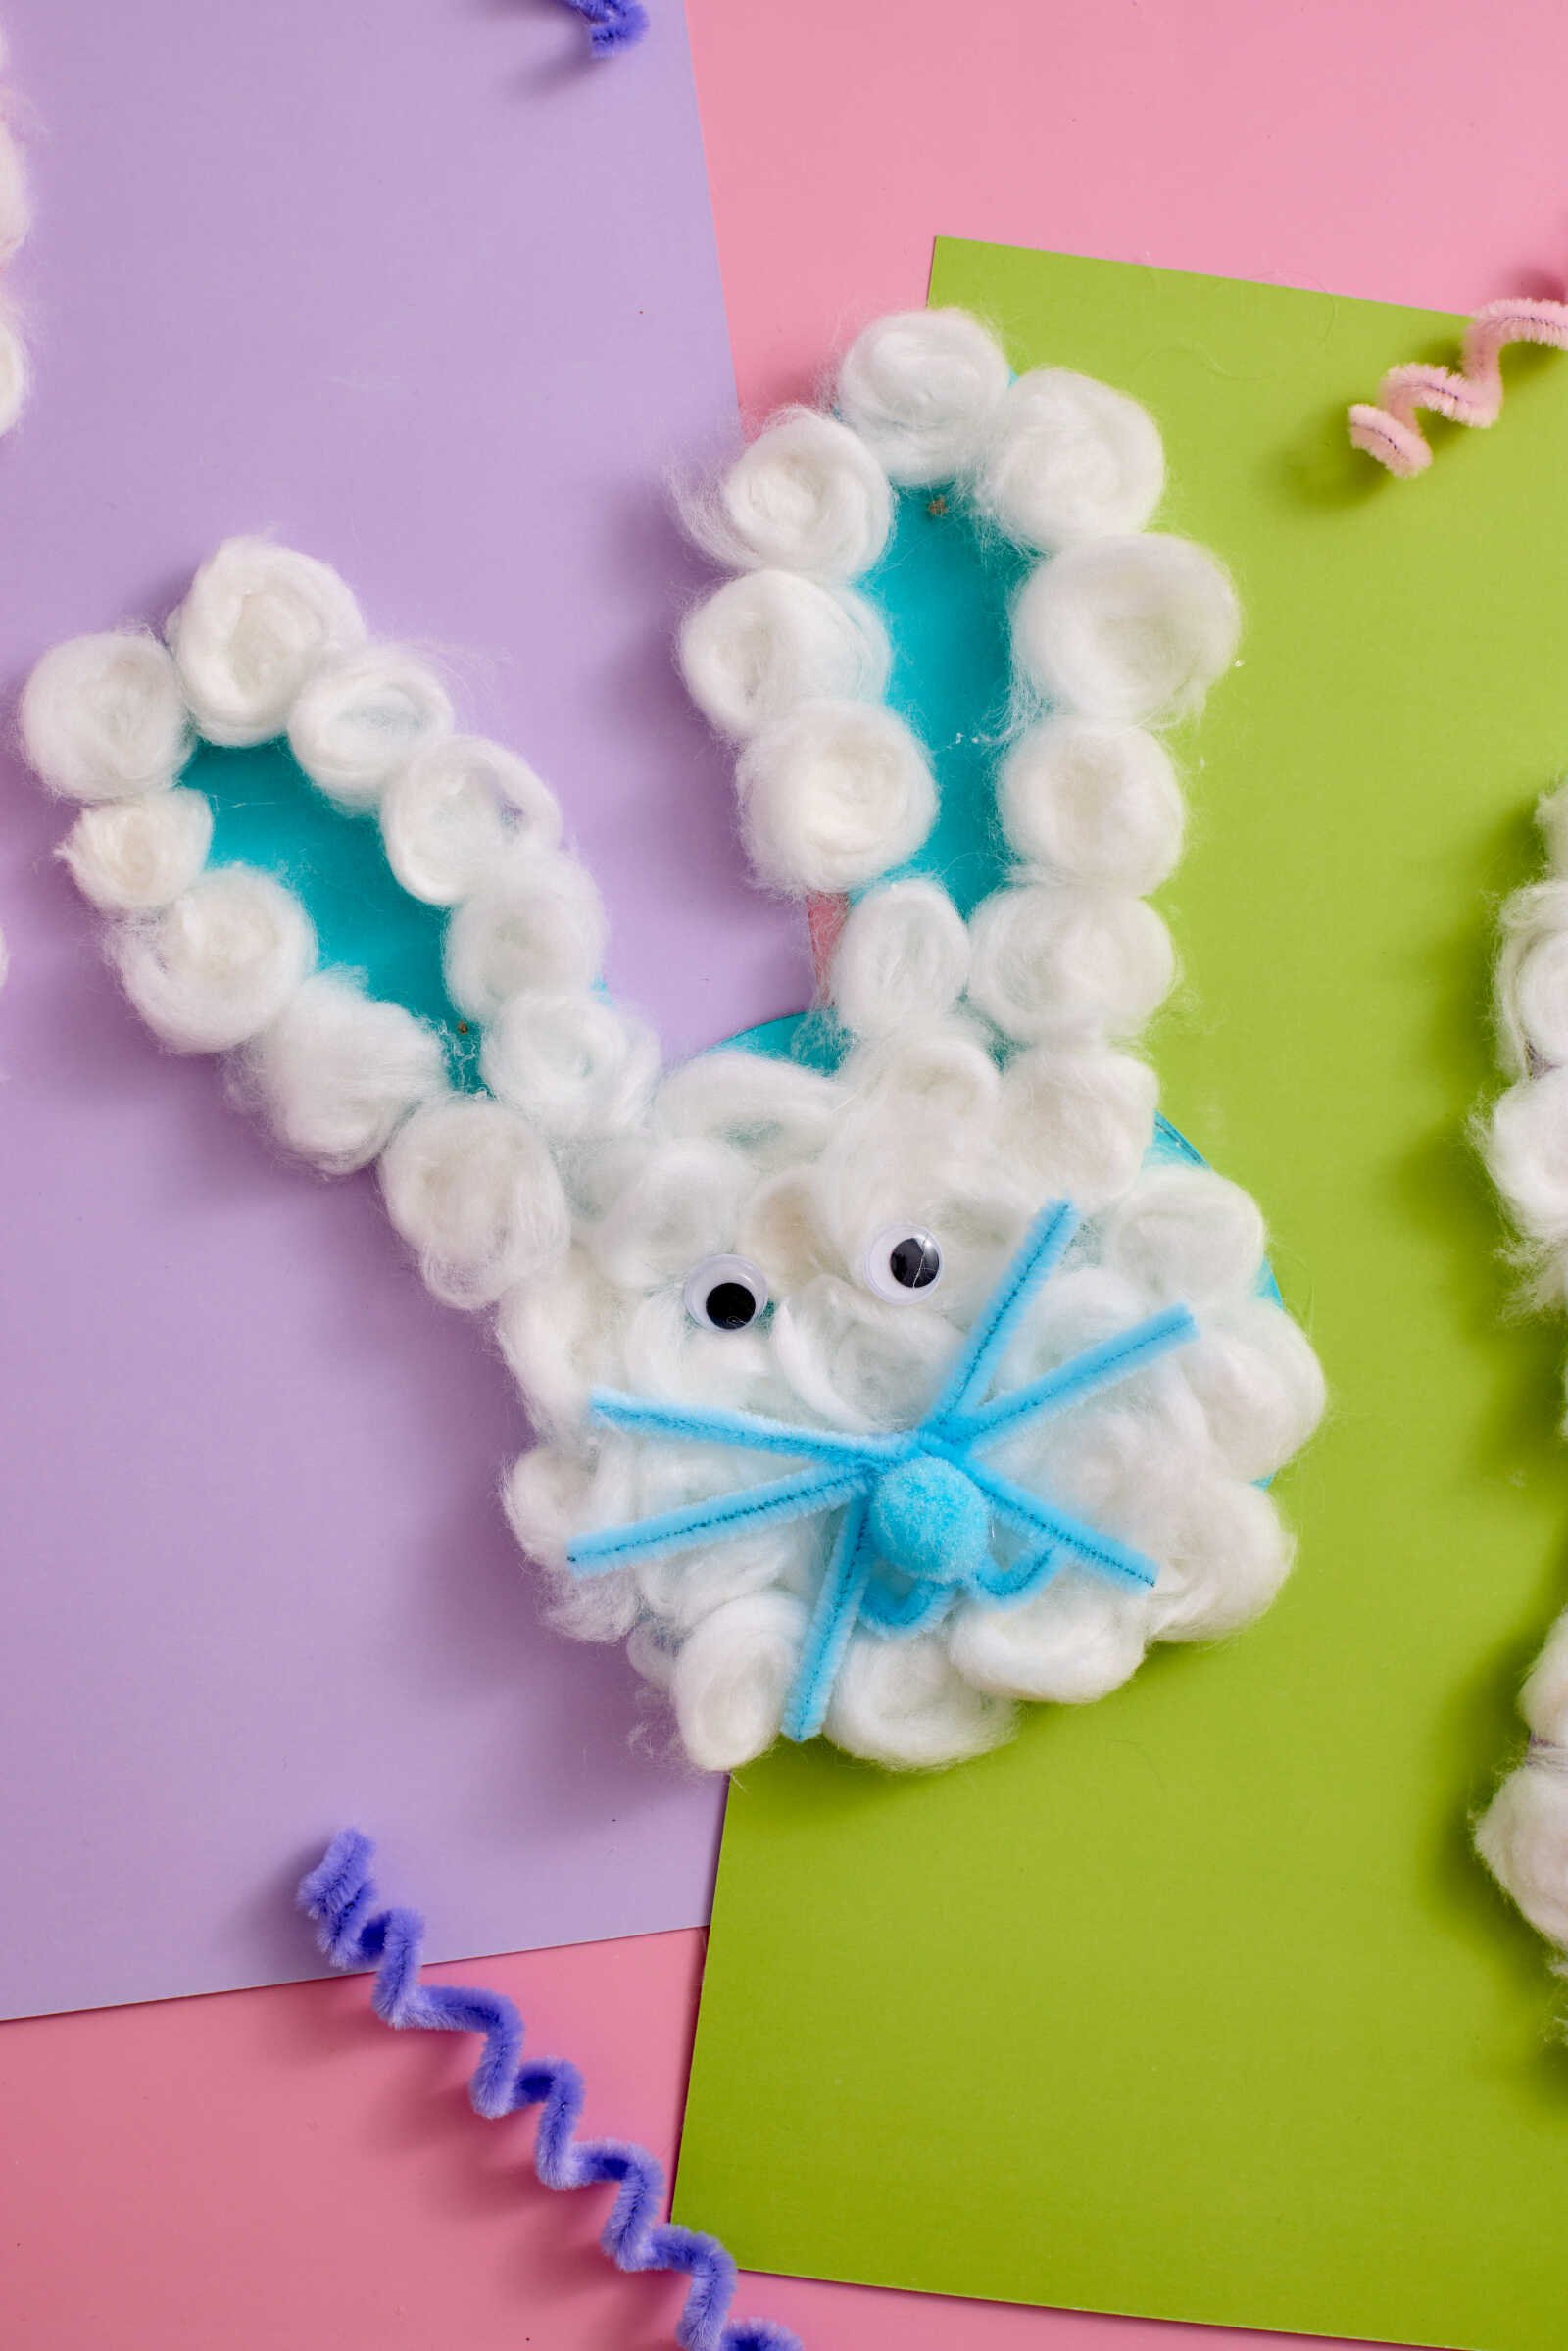
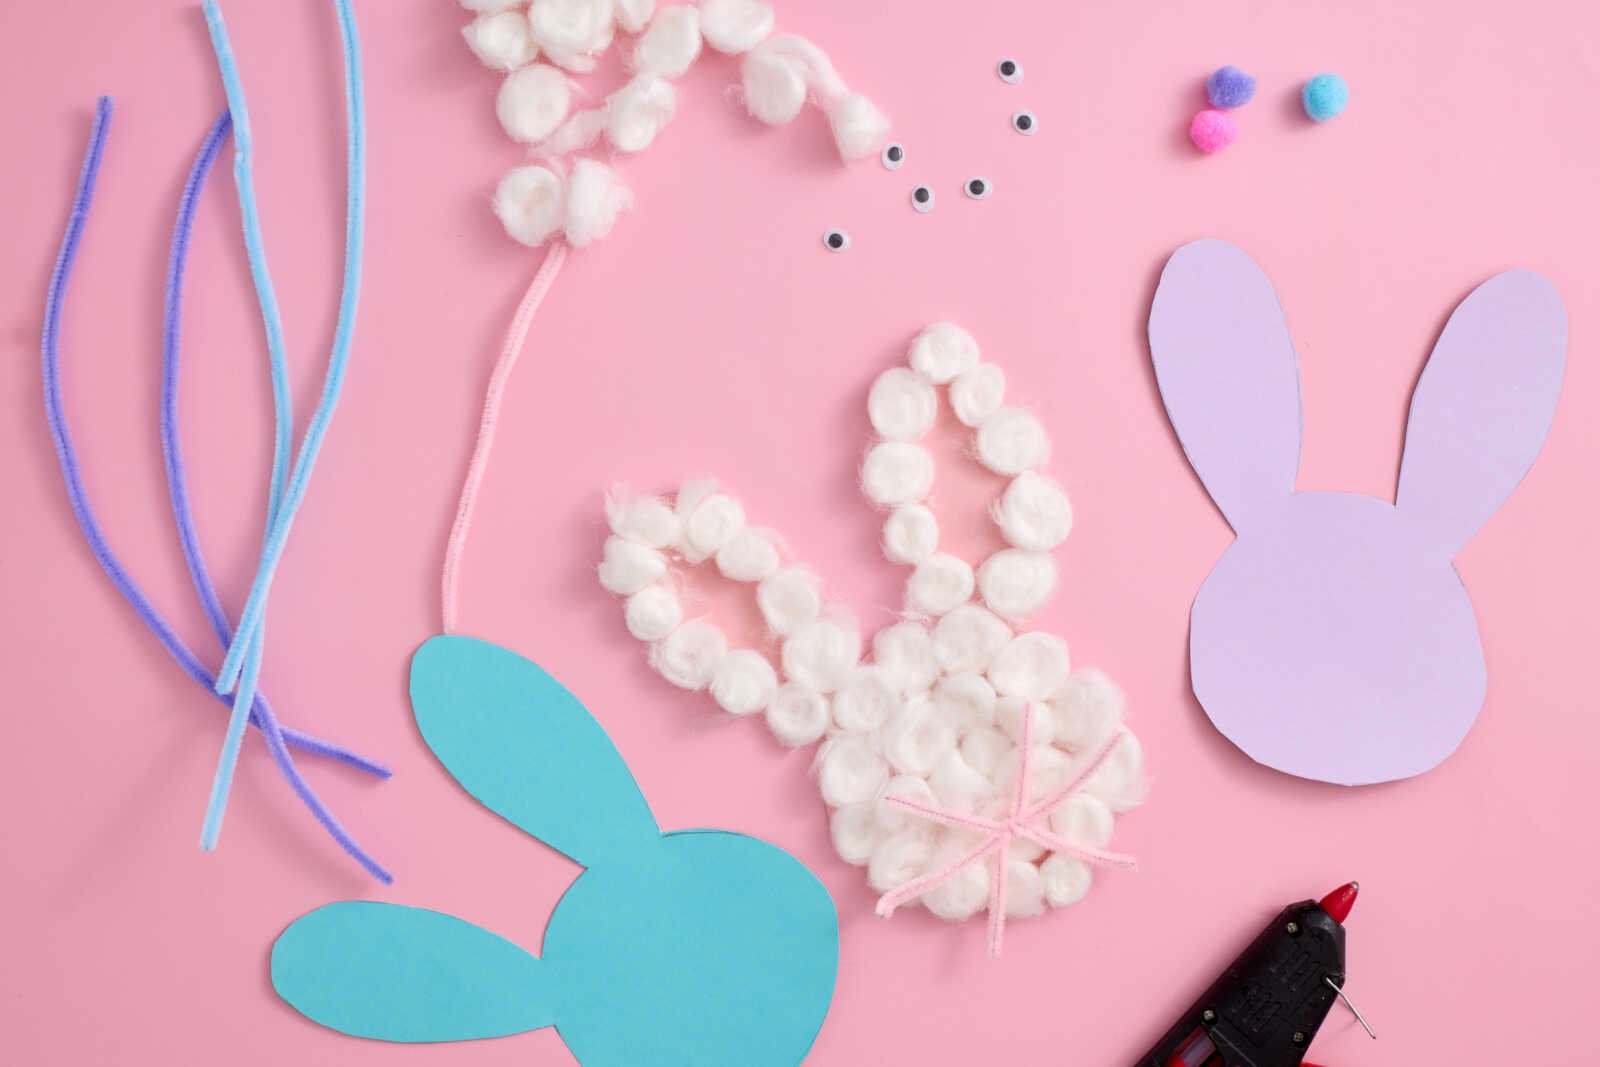
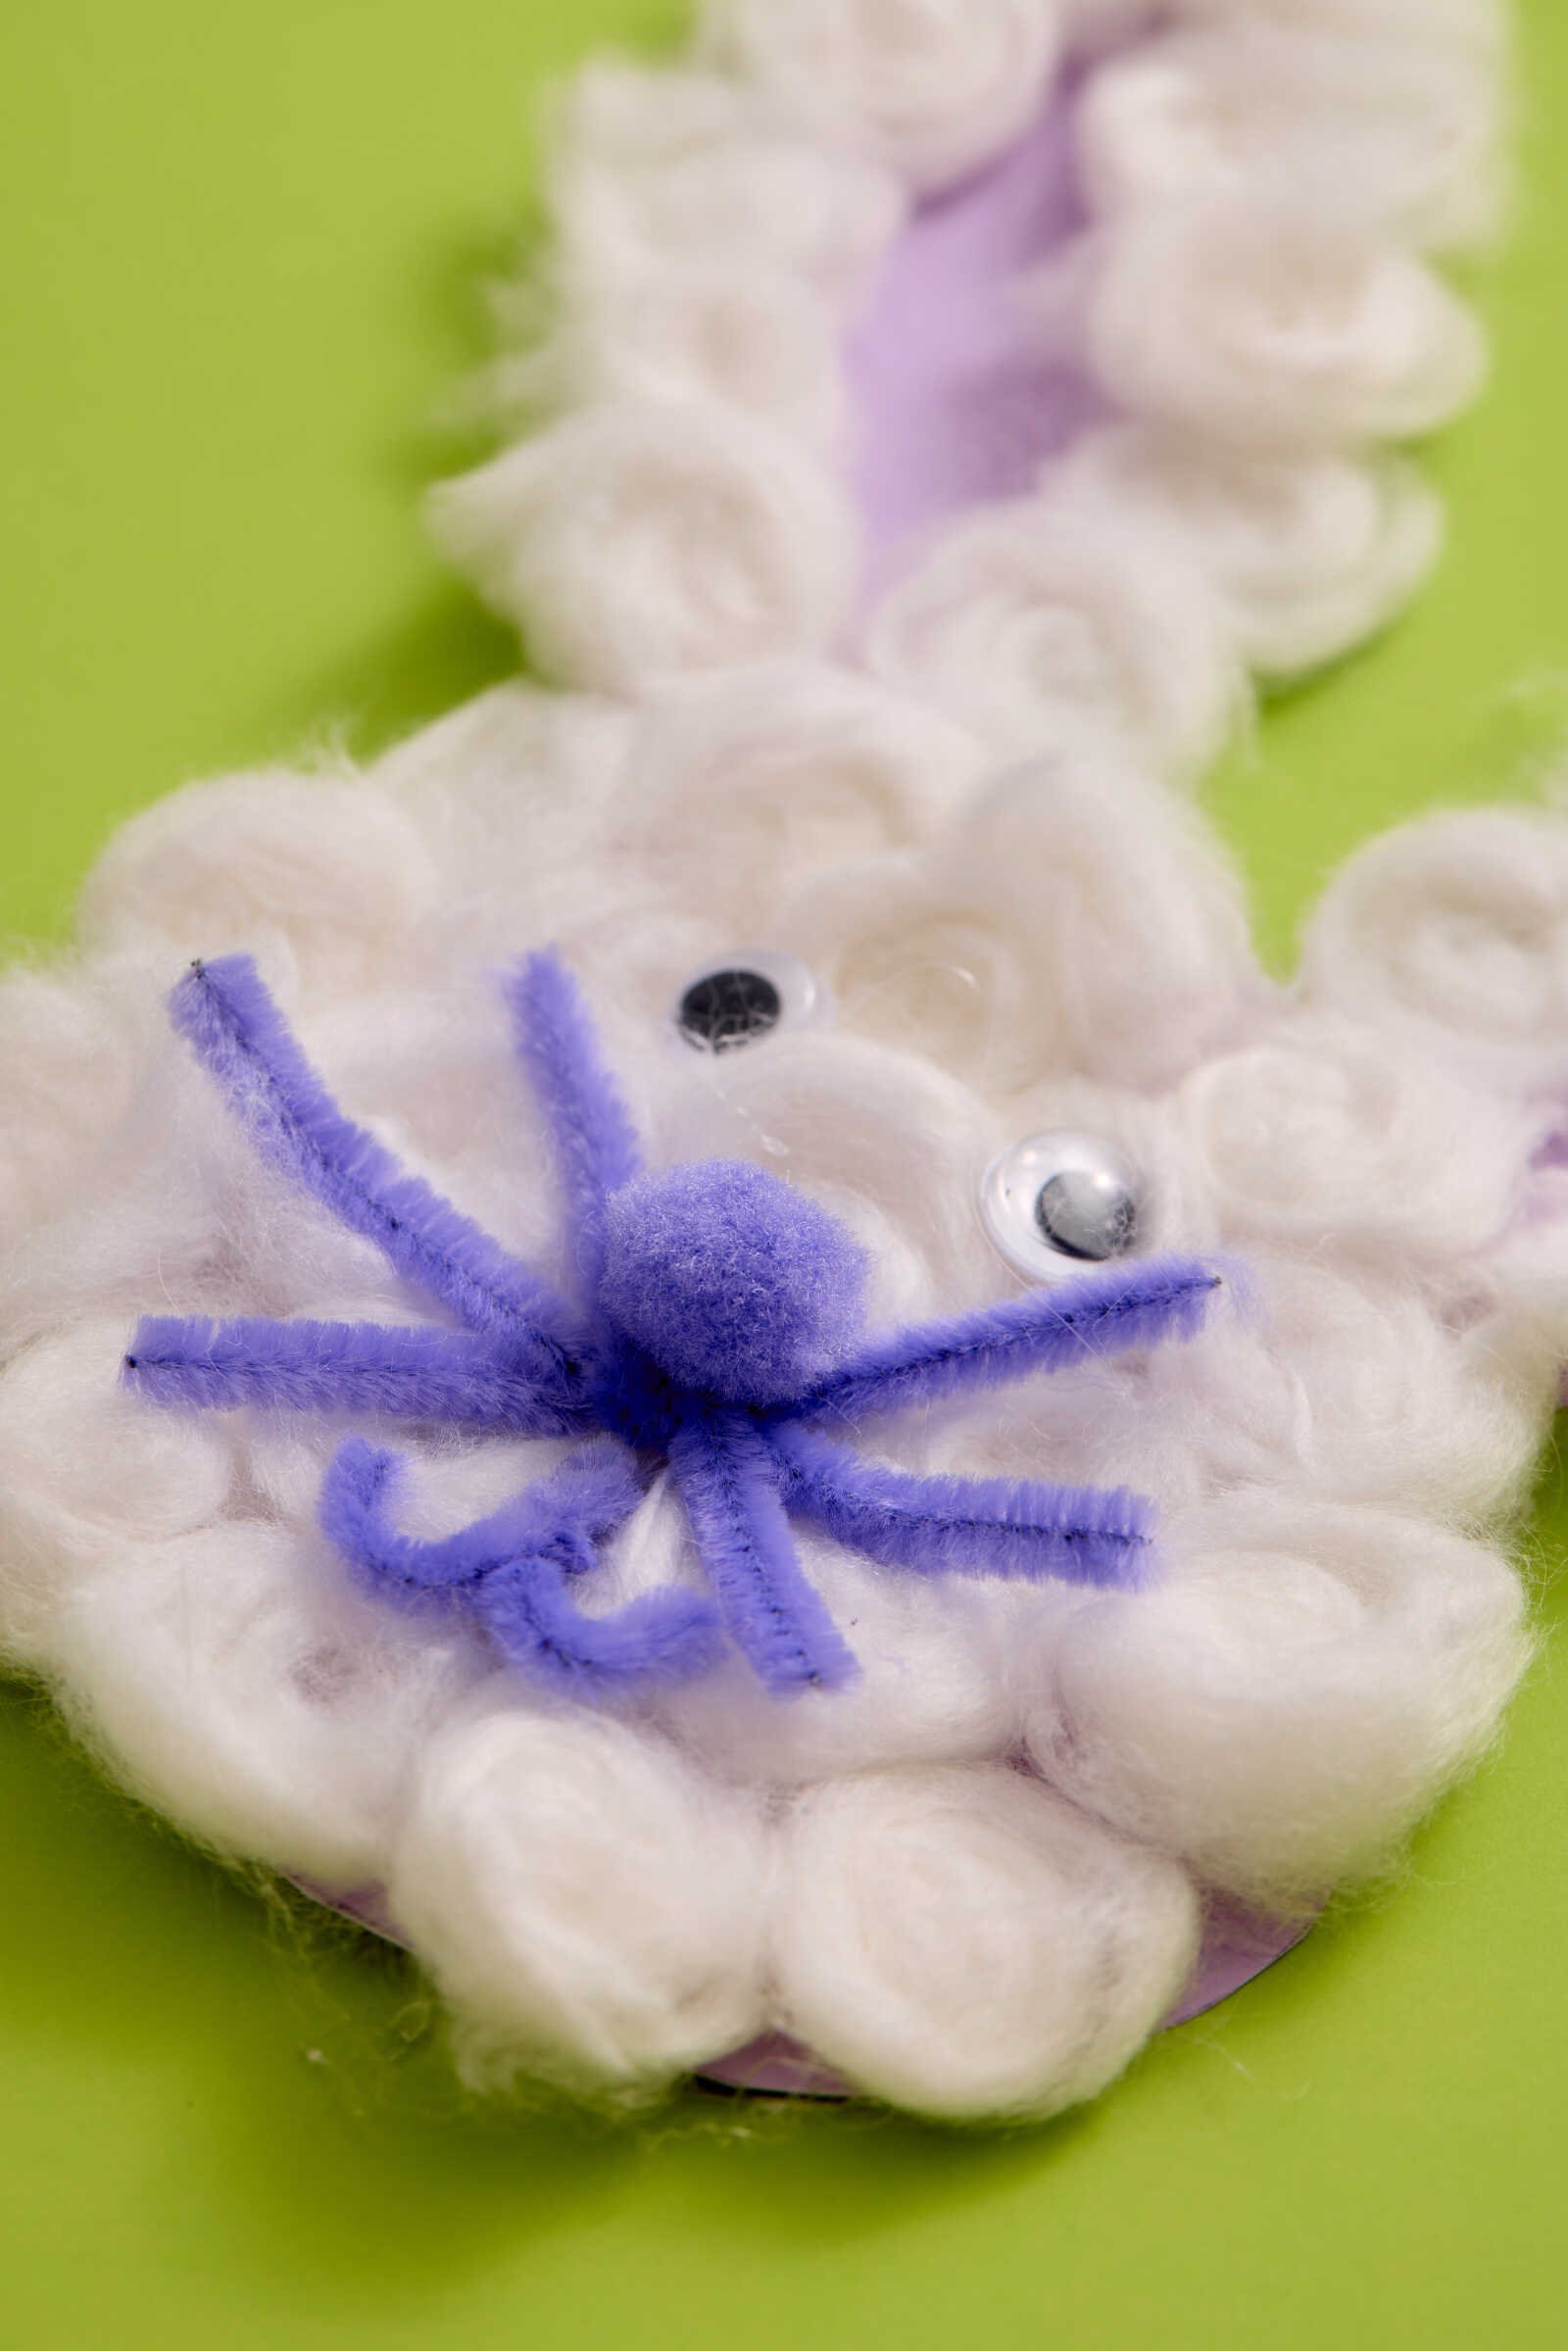
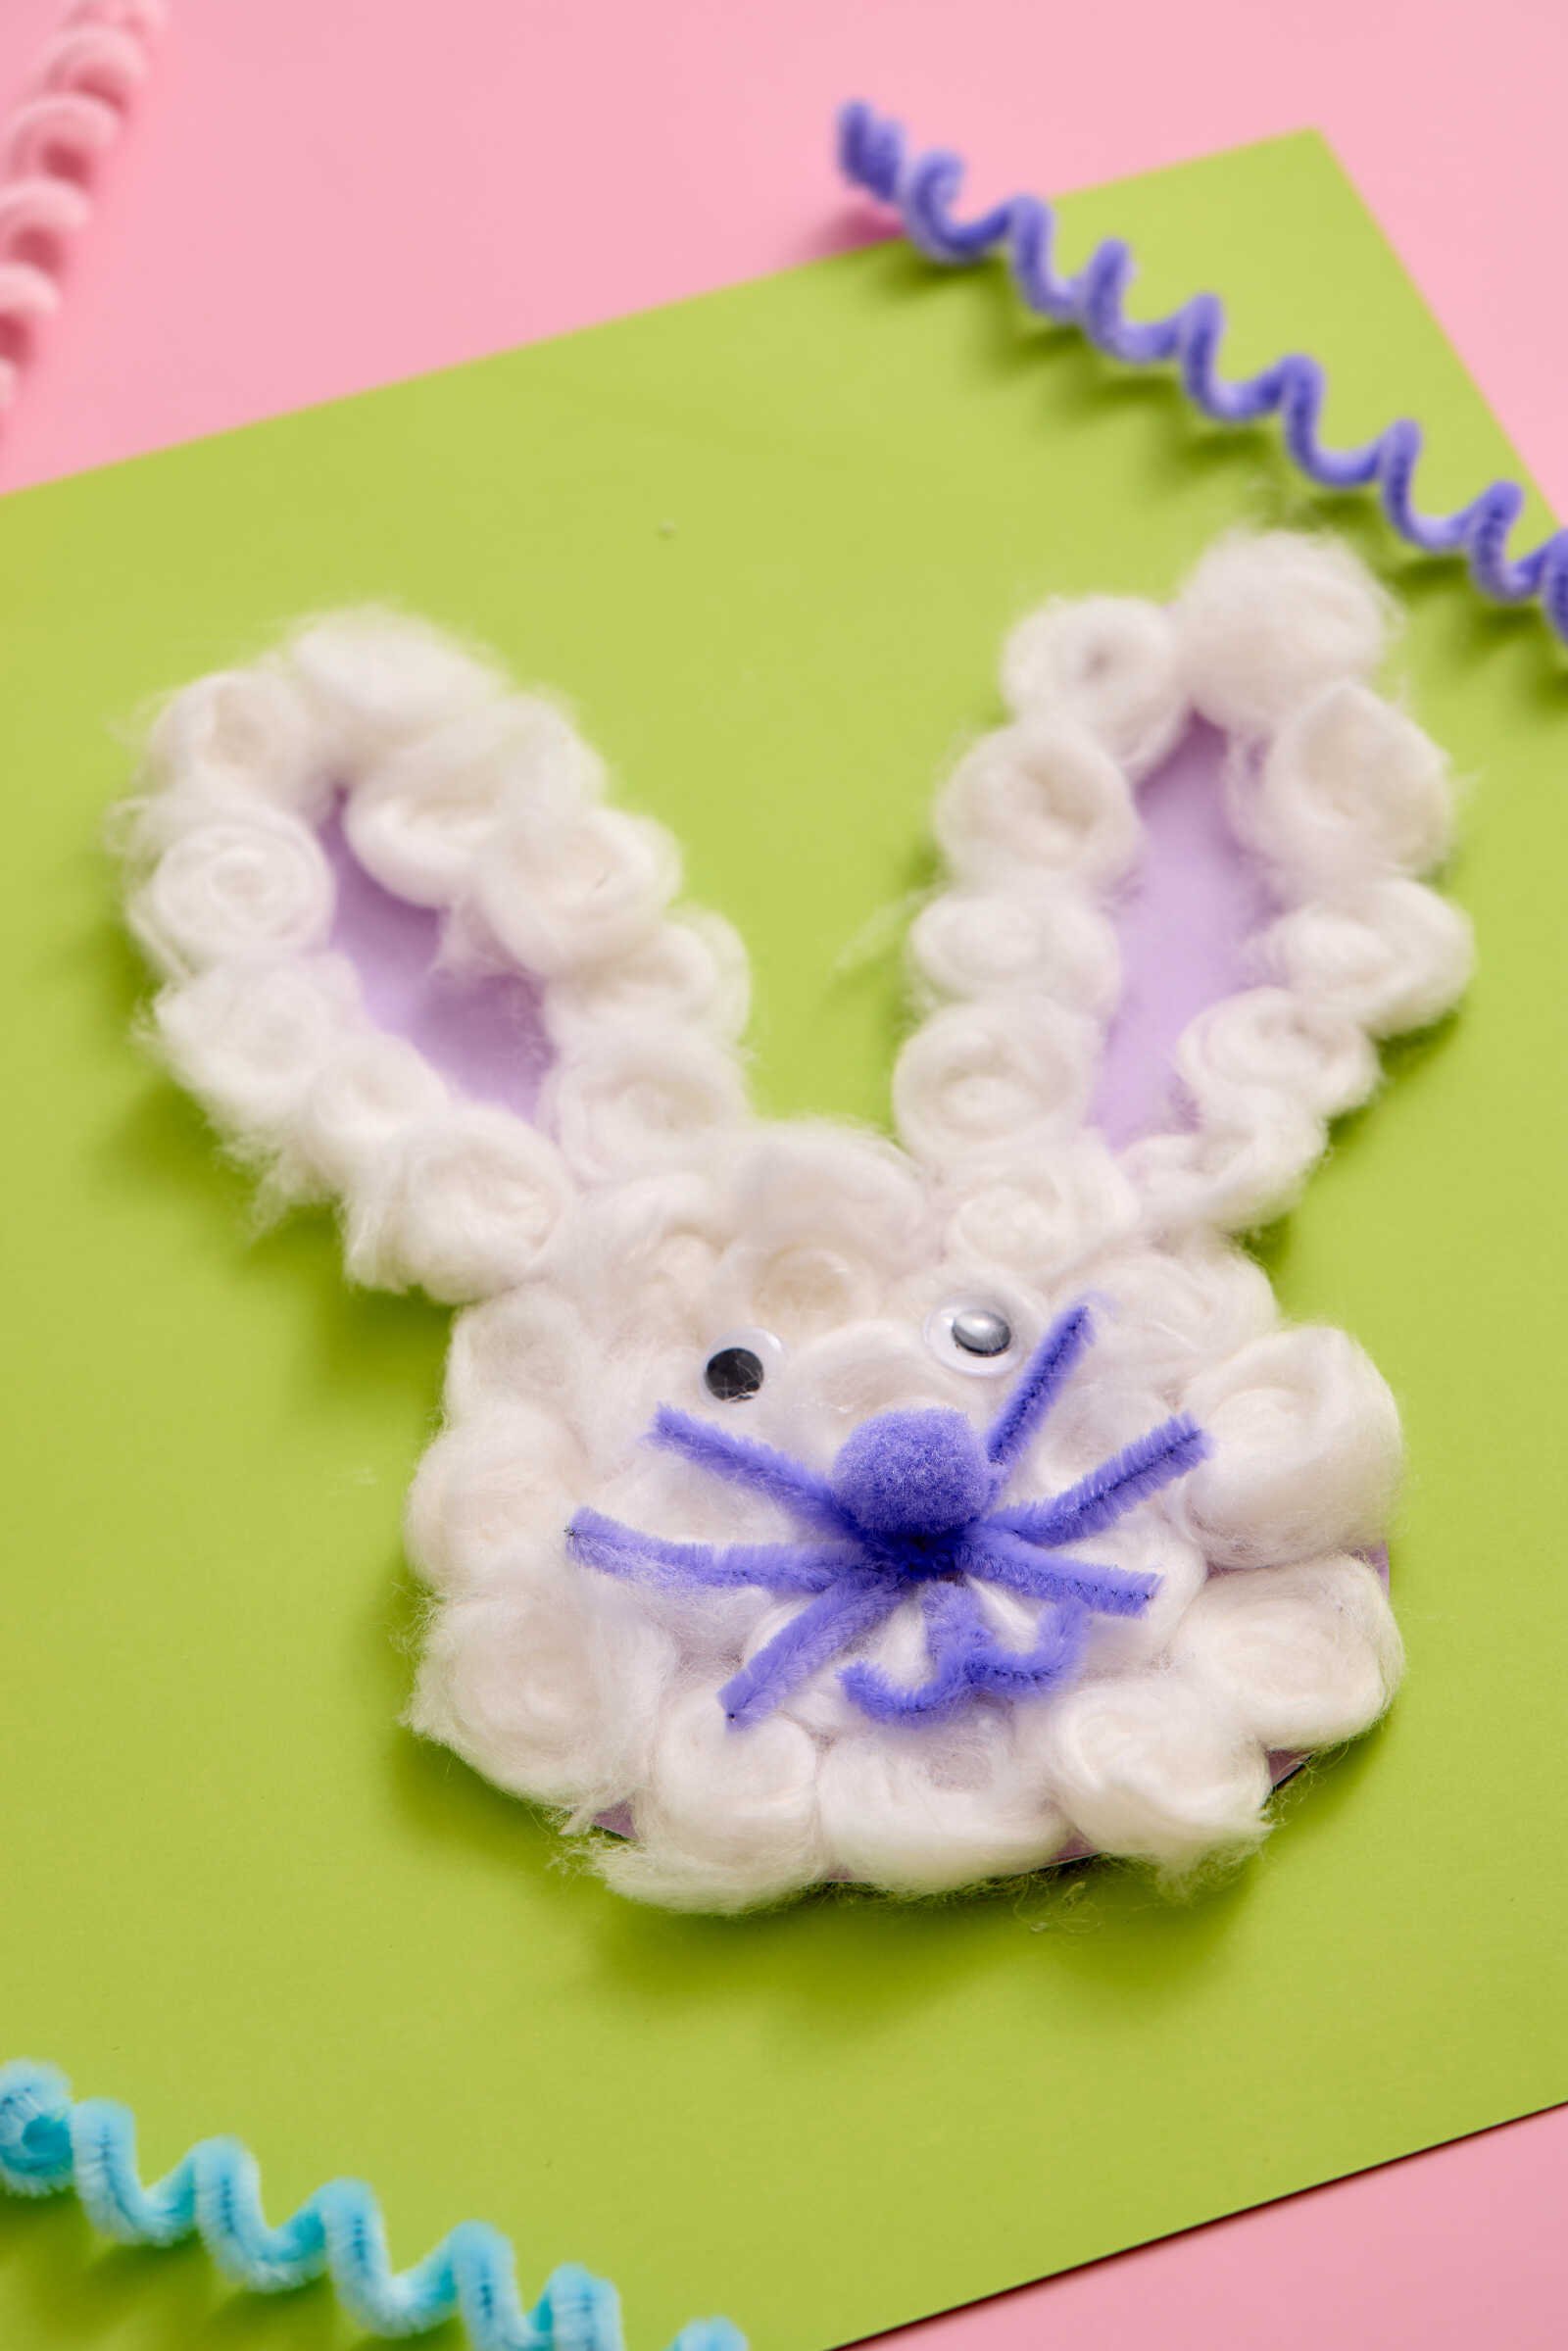
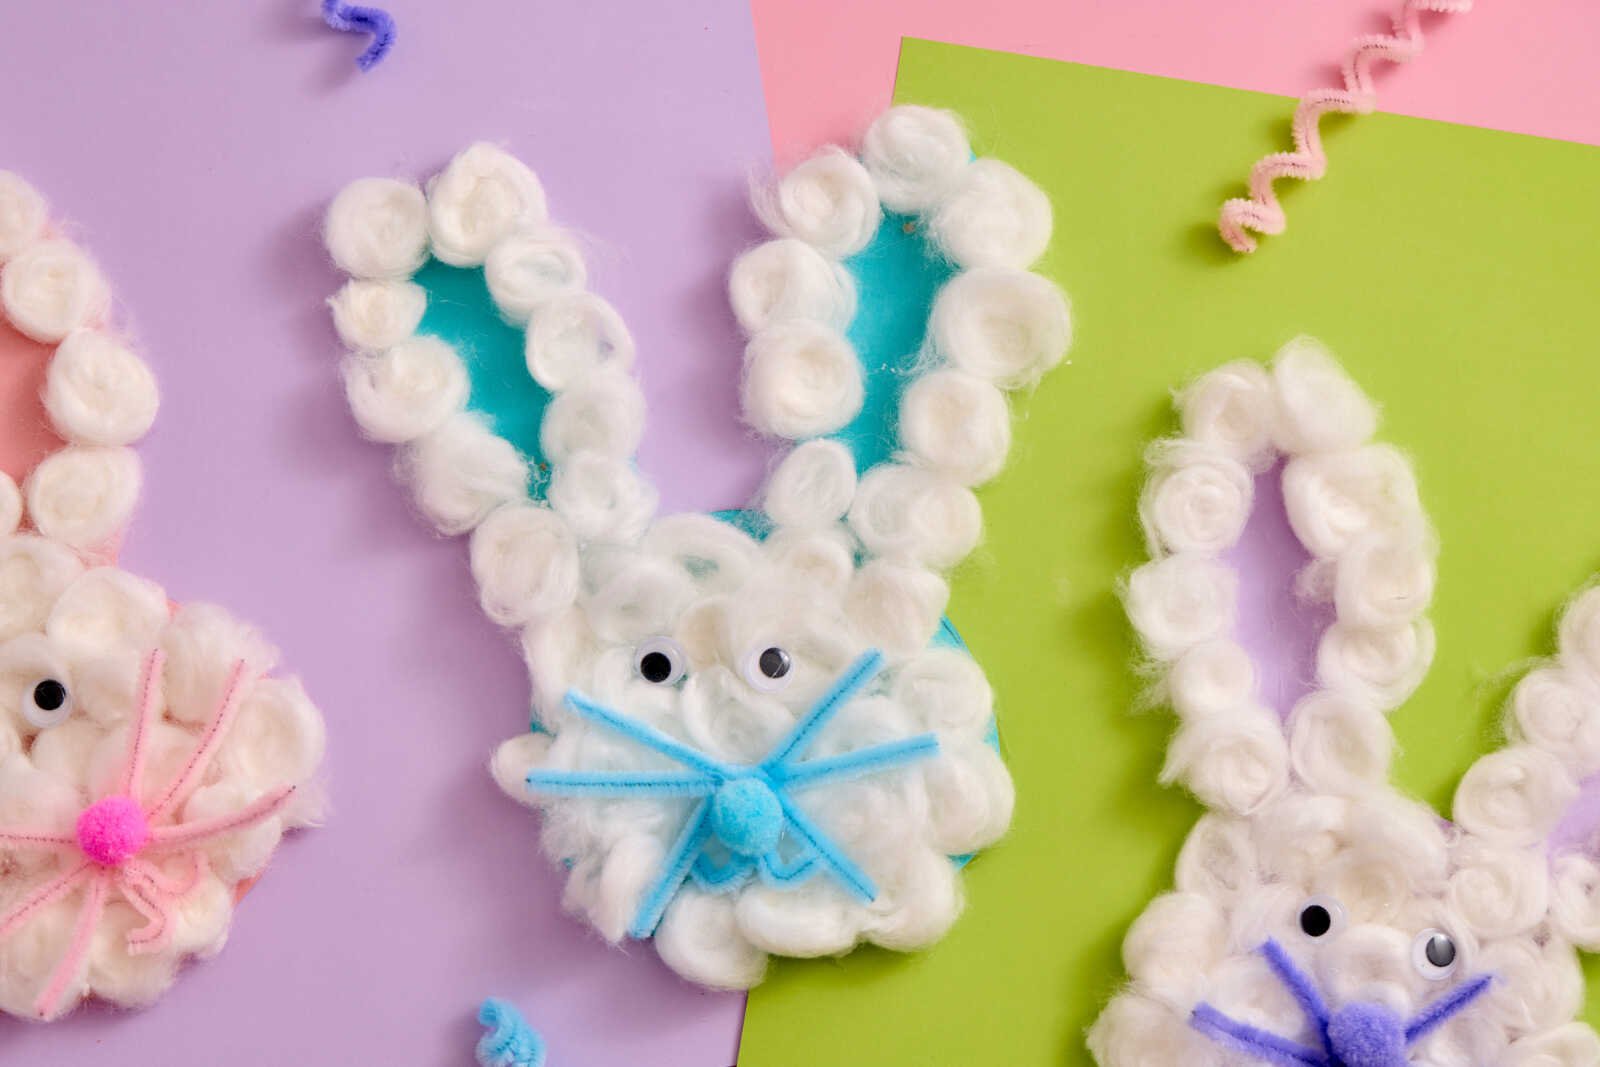
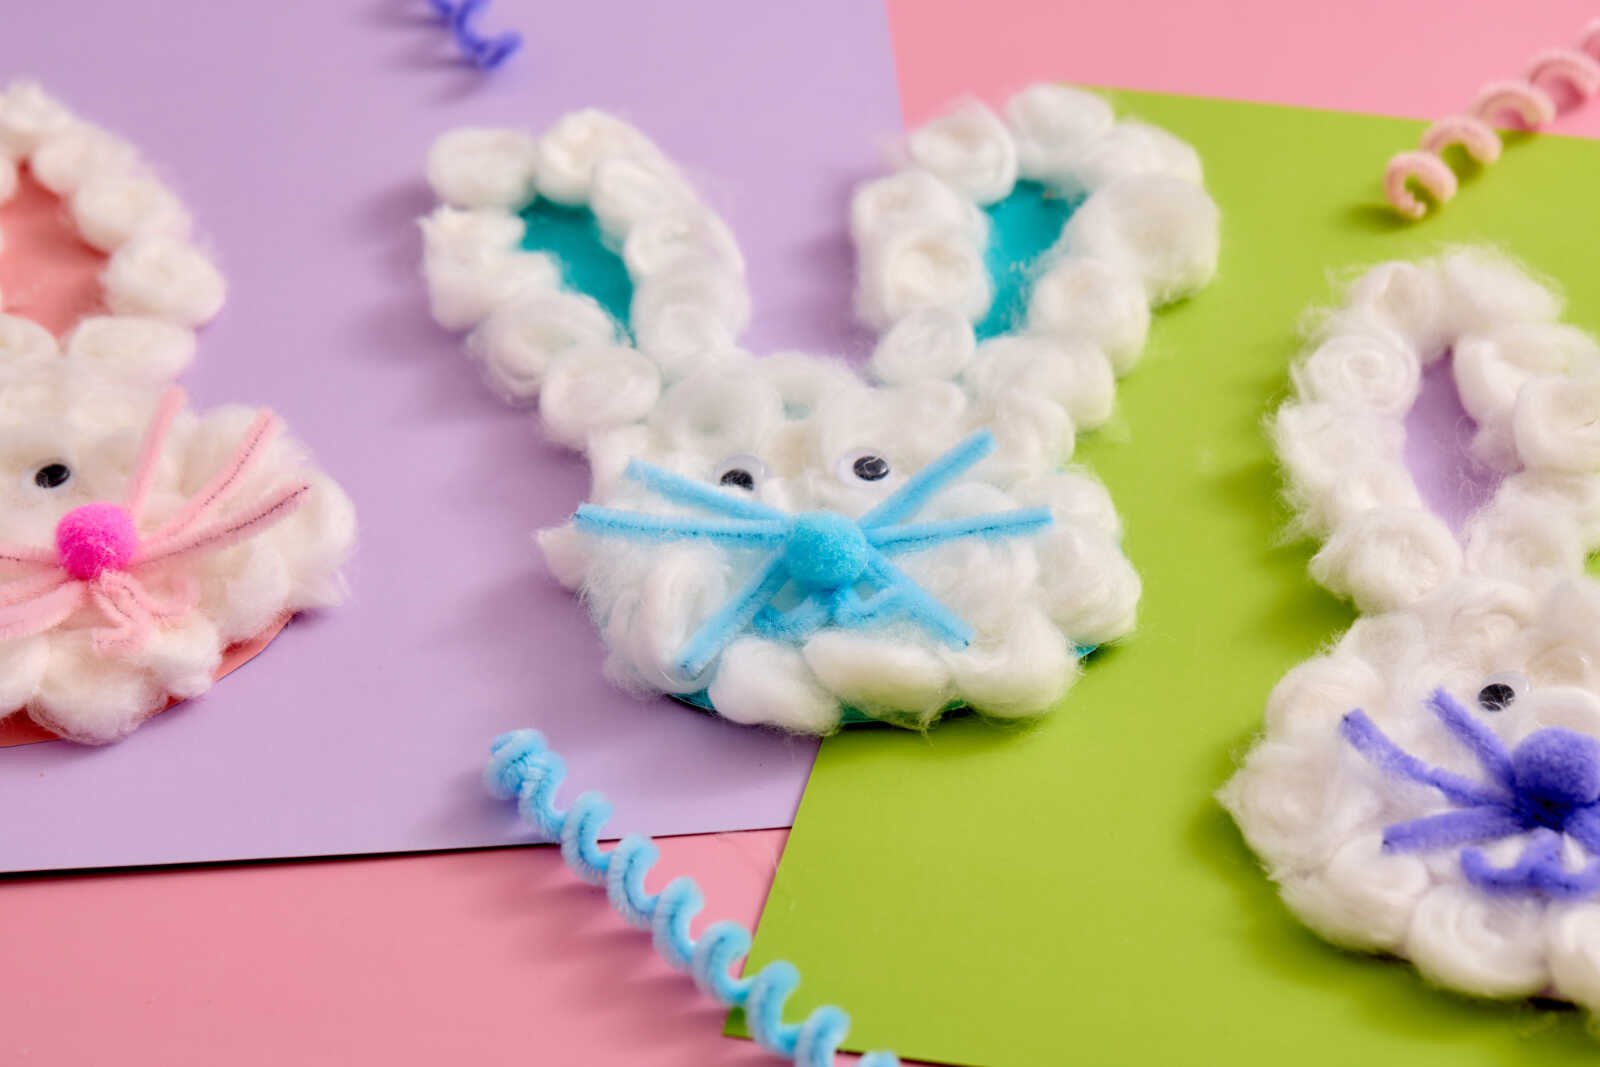
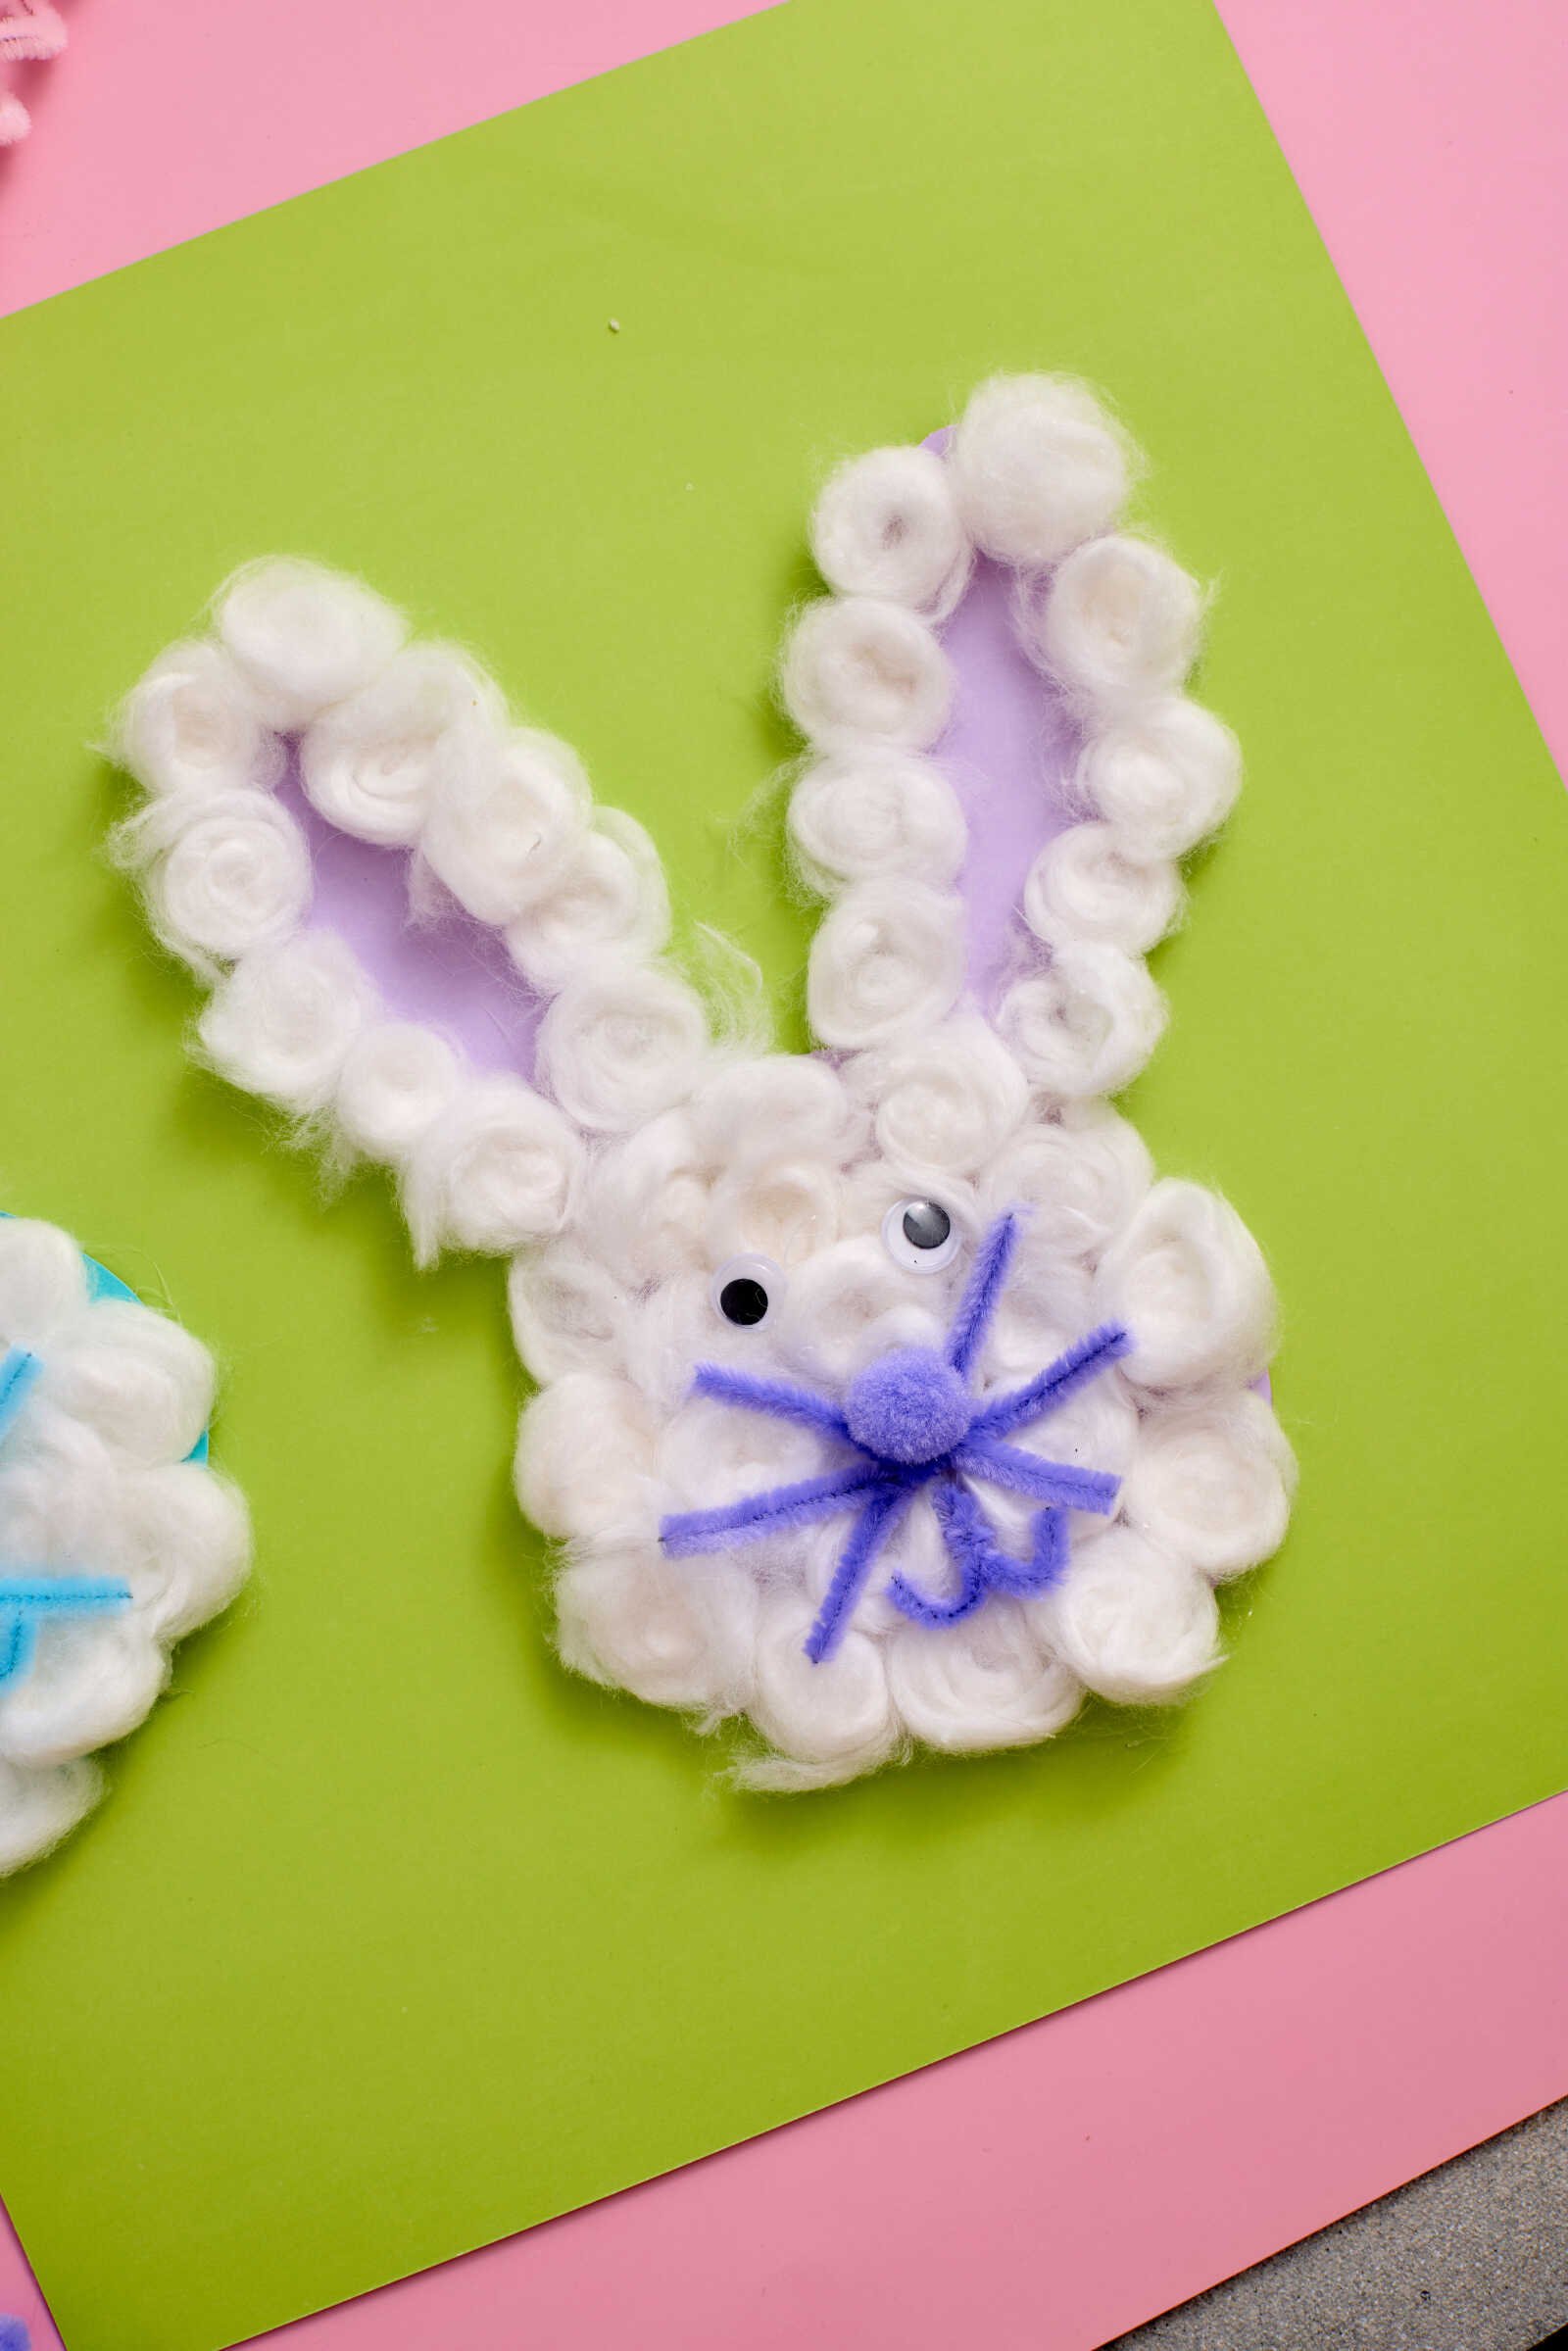
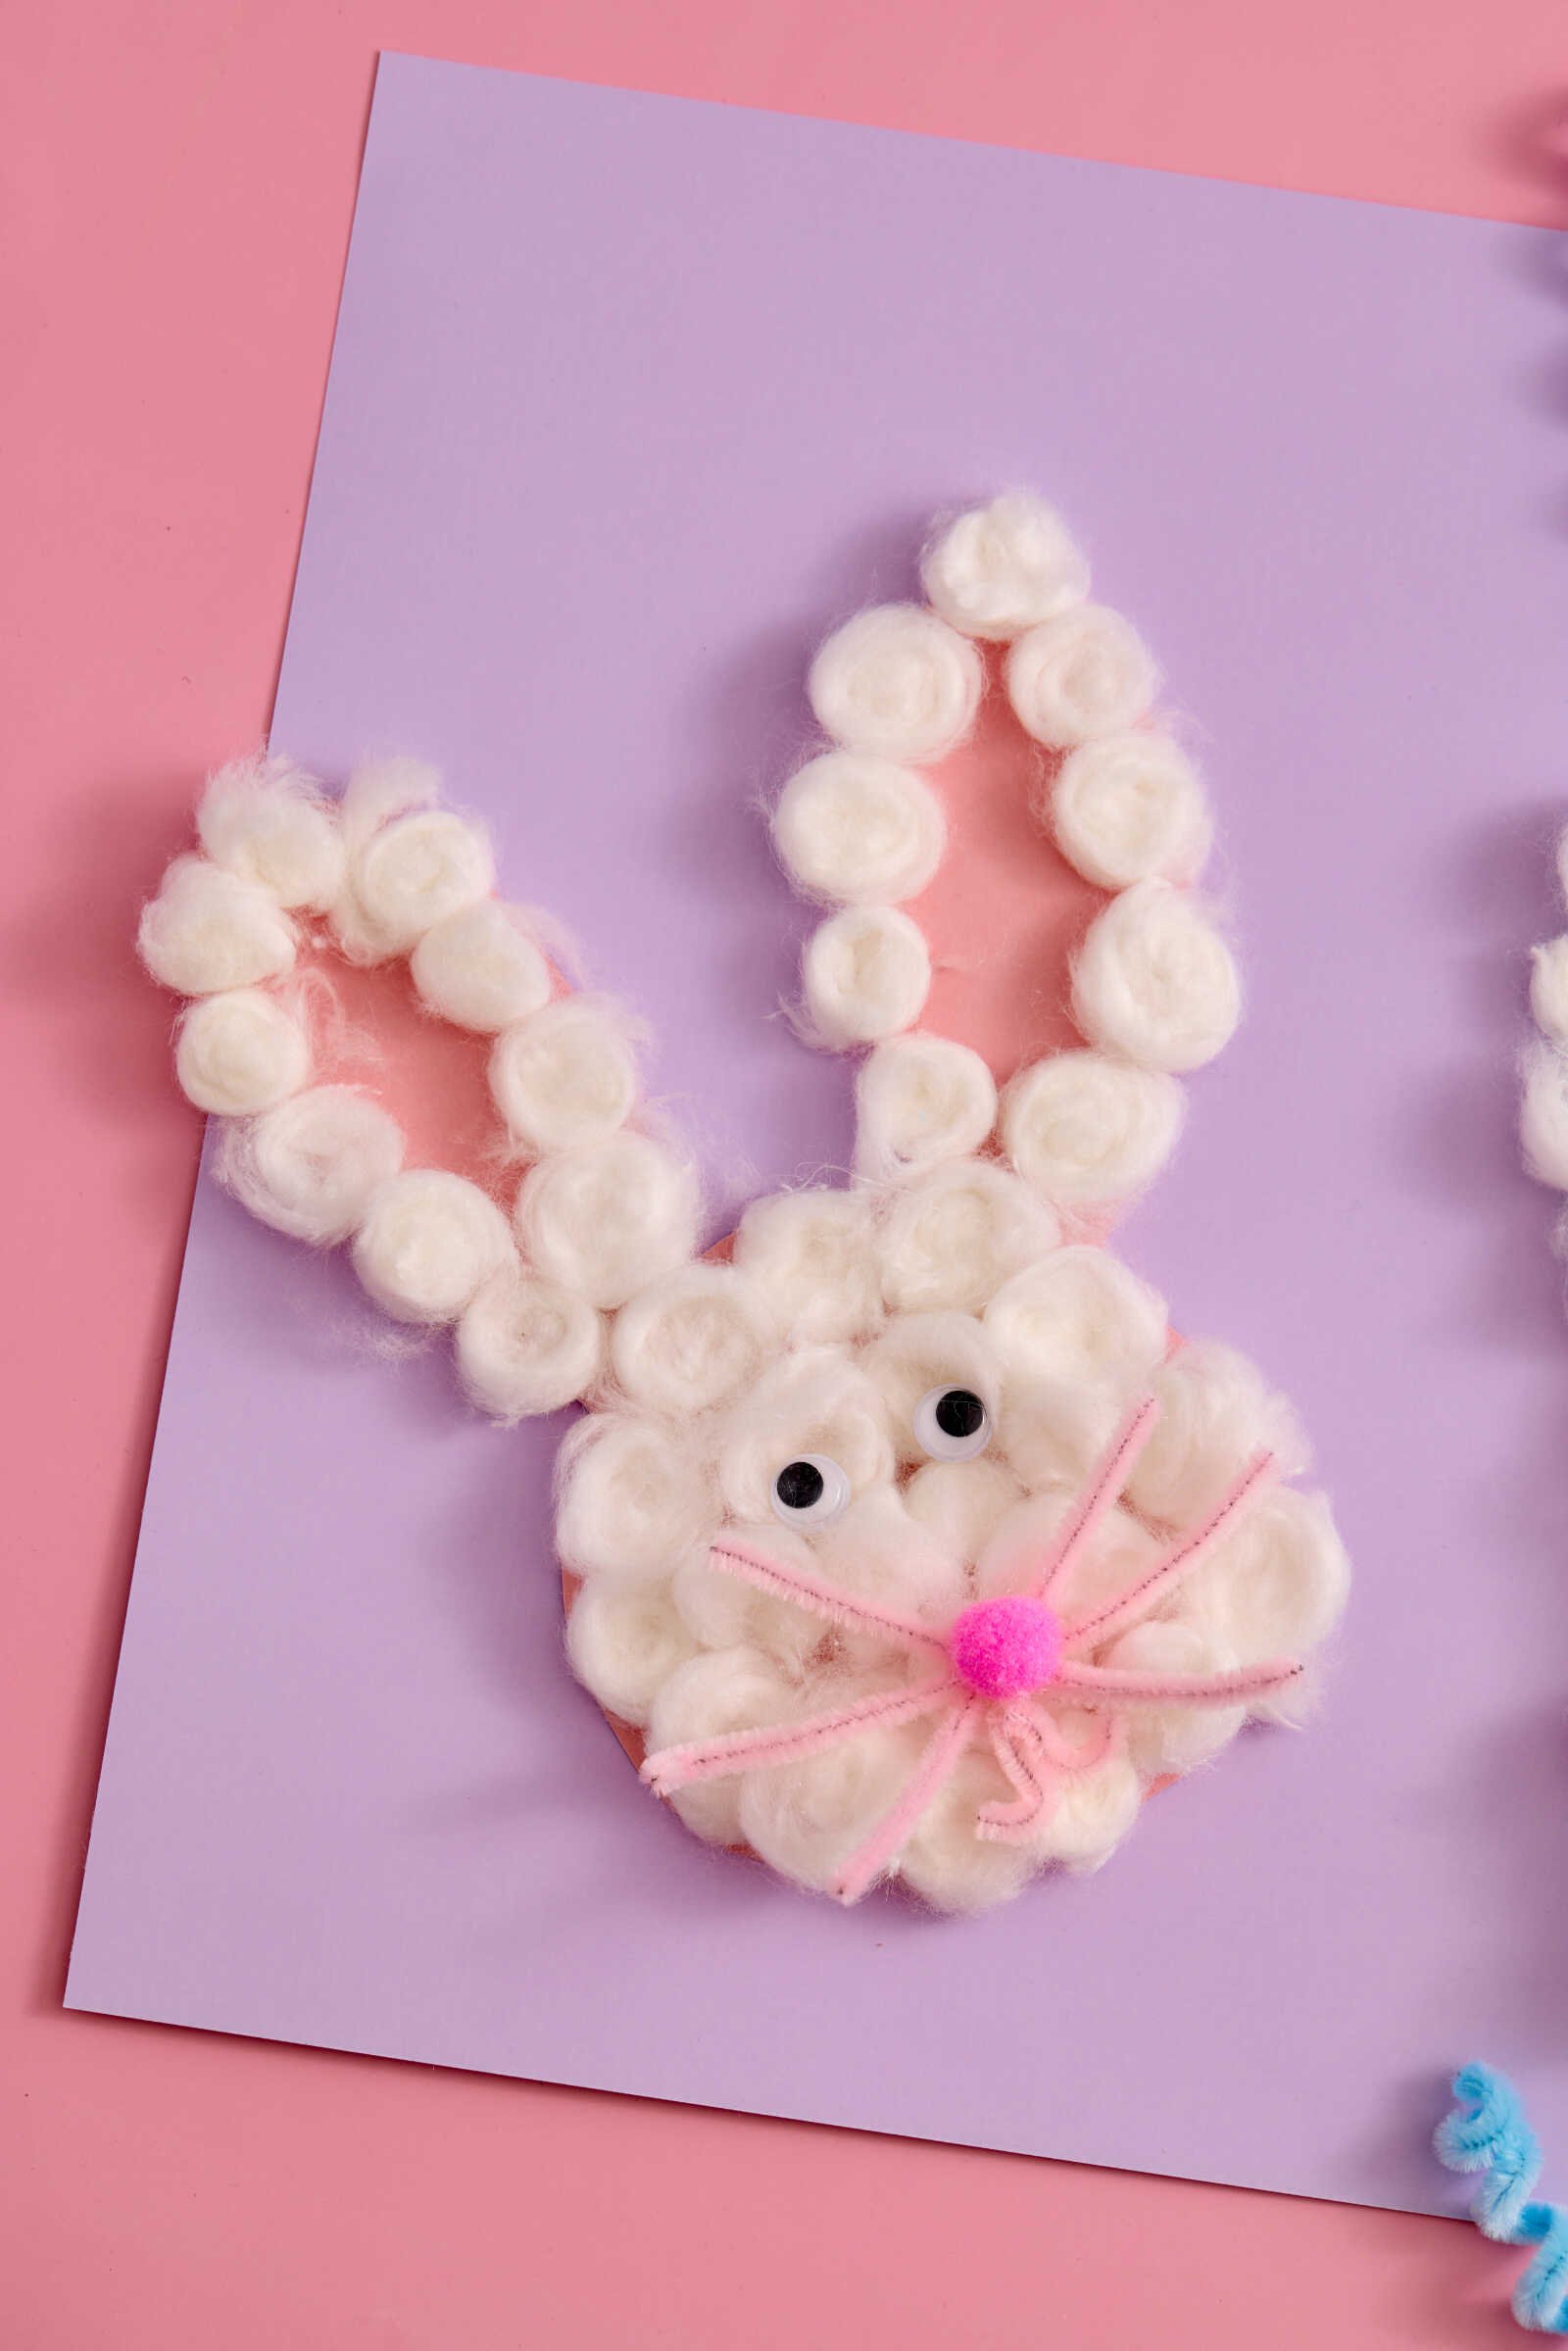
Step 3: Create the Face
Add personality and charm with a cute bunny face.
- Glue on the googly eyes near the center of the face
- Attach a small pom-pom as the nose
- Cut pipe cleaners into short pieces and glue them on as whiskers
You can arrange the whiskers in a fan shape on each side of the nose for a classic bunny look.
Optional: Draw a small smile under the nose using a marker for extra cuteness.
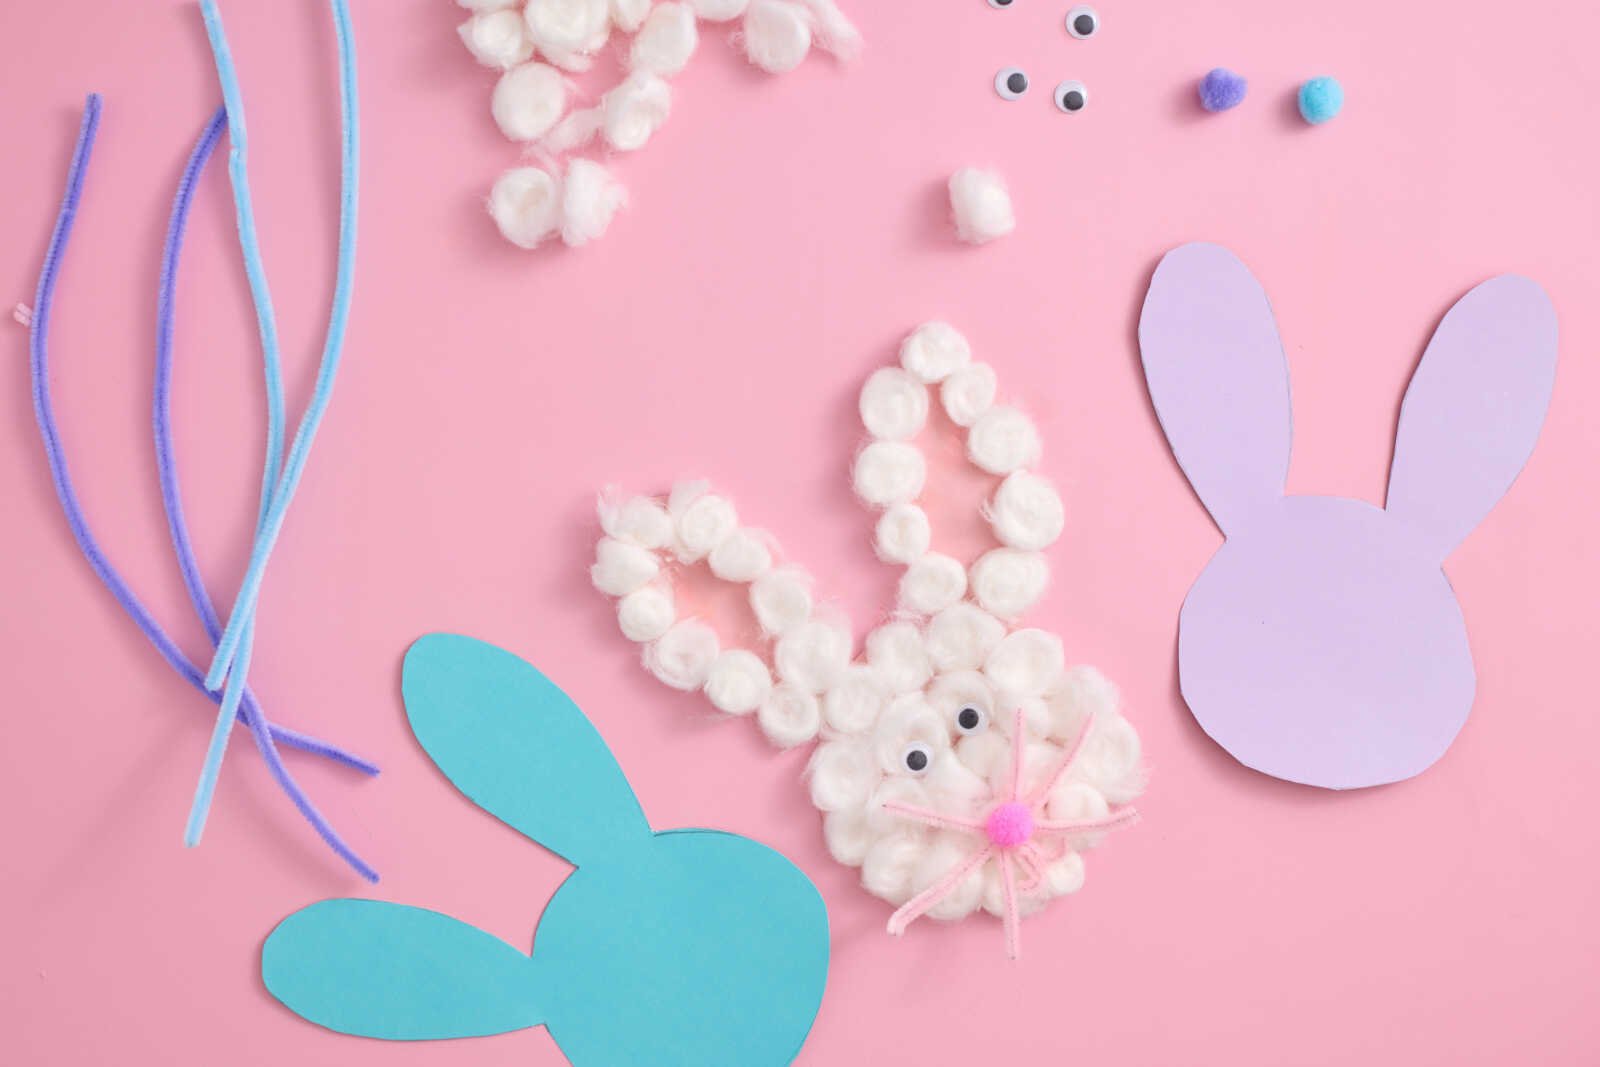
Step 4: Finishing Touches
Let everything set so your bunny stays intact.
- Allow the glue to dry completely before handling
- Check that all pieces are secure
- Gently fluff the cotton balls if needed
Once dry, your bunny is ready to display!
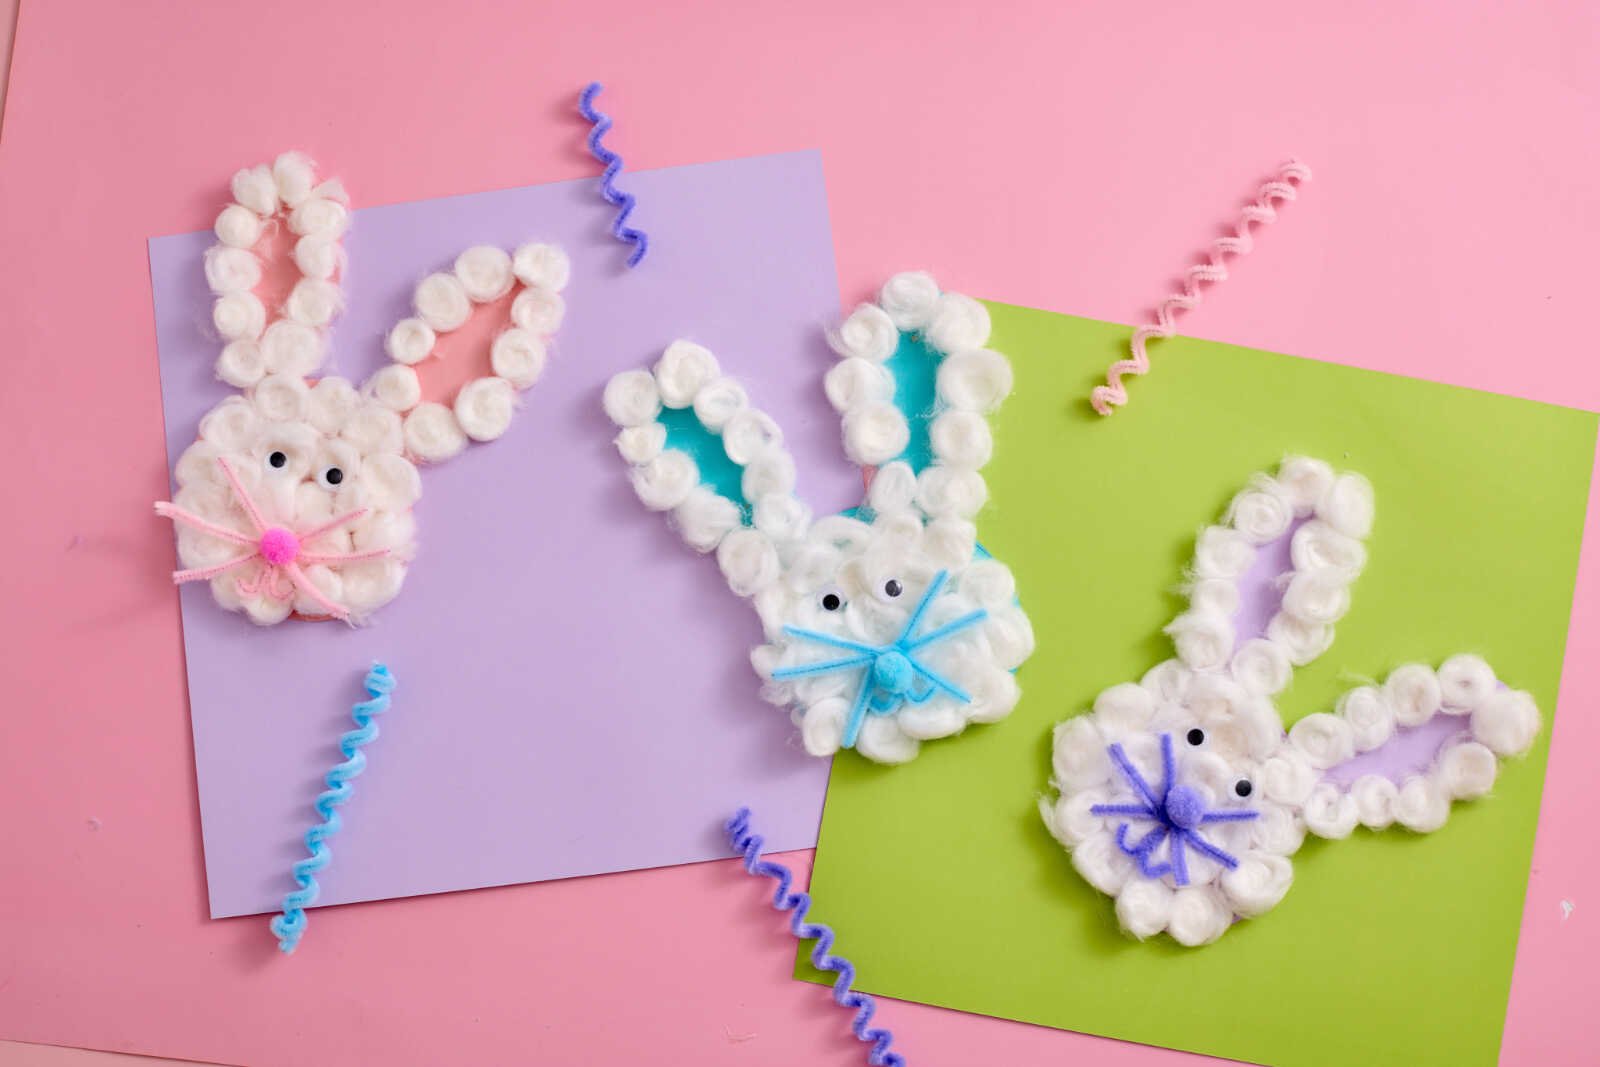
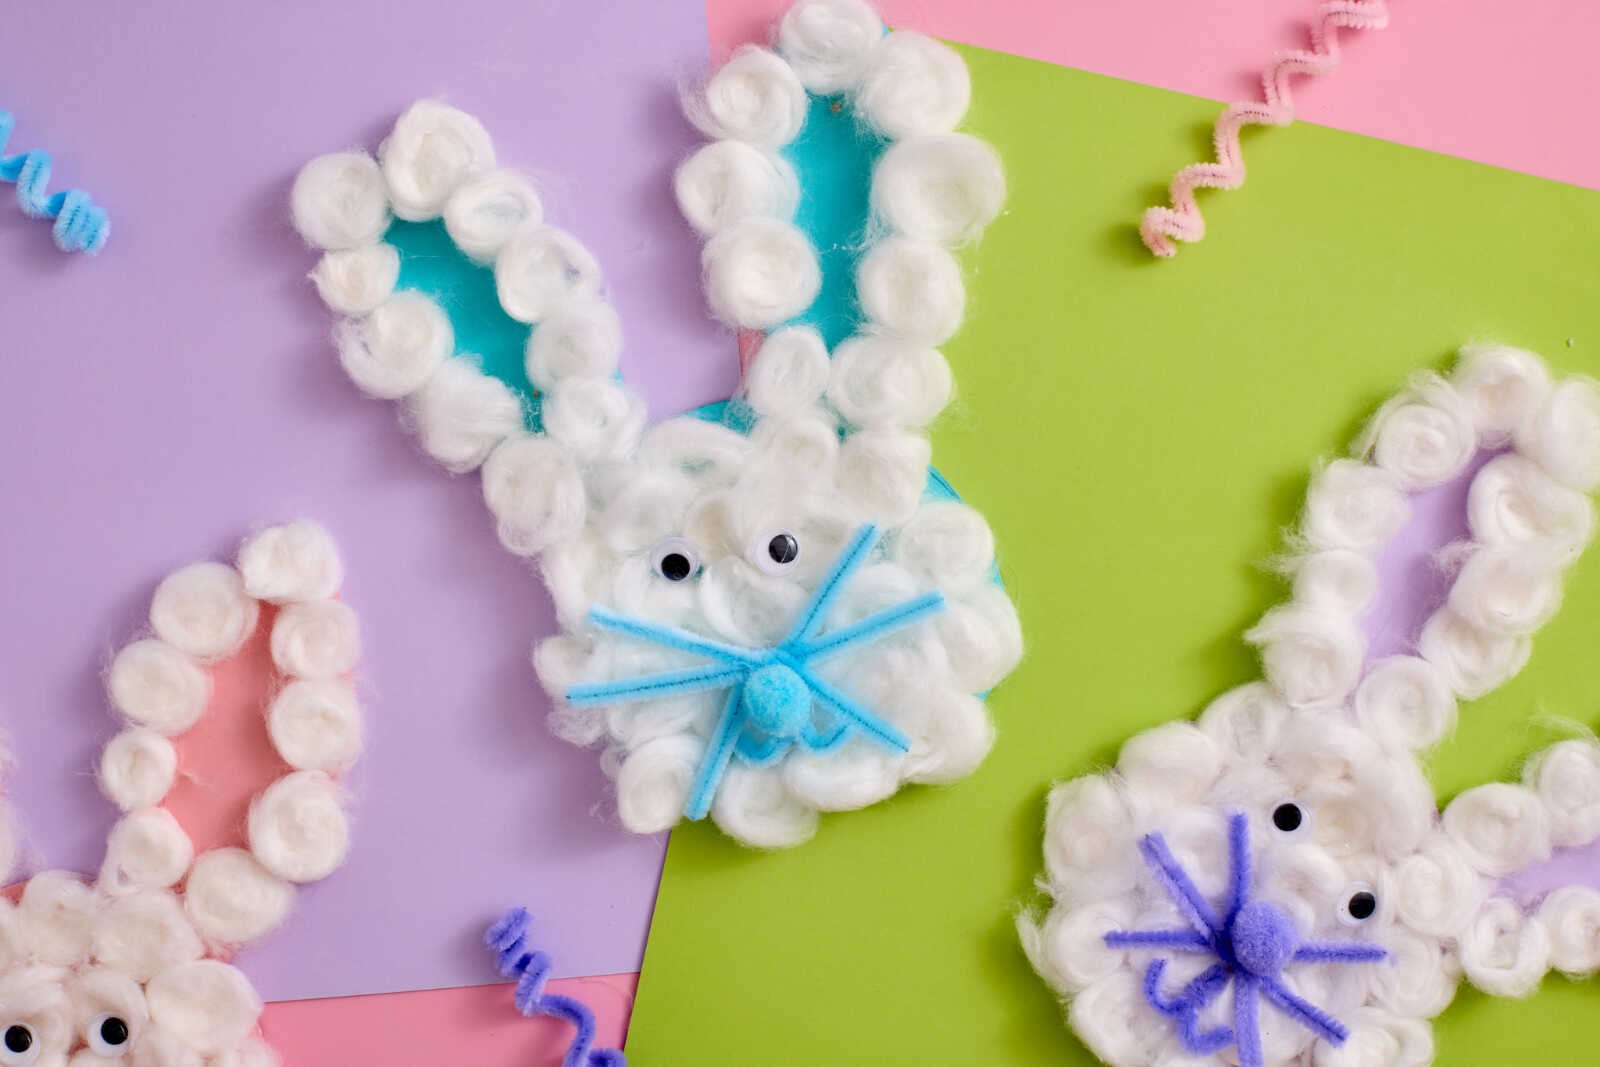
Creative Variations to Try
Once you’ve made one bunny, your kids will probably want to make more. Here are some fun ways to mix things up:
1. Colorful Bunnies
Use pastel or bright-colored cardstock for a playful spring vibe.
2. Rainbow Cotton Bunnies
Lightly tint cotton balls with washable paint or food coloring before gluing them on.
3. Glitter Bunny
Add a sprinkle of glitter over the cotton balls while the glue is still wet for a sparkly finish.
4. Bunny Family
Create multiple sizes—baby bunnies, parent bunnies, and even a whole bunny family scene.
5. Hanging Decoration
Punch a hole at the top and add string to turn your bunny into an Easter ornament.
Educational Benefits for Kids
This Bunny Cotton Craft isn’t just fun—it’s also a great learning activity.
Fine Motor Skills
Placing cotton balls and small craft pieces helps strengthen hand-eye coordination.
Sensory Play
The soft, fluffy texture of cotton balls provides a calming sensory experience.
Creativity & Imagination
Kids can design their bunny however they like, boosting creativity.
Following Instructions
Step-by-step crafting helps kids learn sequencing and focus.
Tips for a Stress-Free Craft Time
Crafting with kids doesn’t have to be messy or overwhelming. Here are a few helpful tips:
- Set up a crafting station with all materials ready
- Use washable glue for easy cleanup
- Protect surfaces with newspaper or a craft mat
- Supervise scissors and hot glue when needed
- Let kids be creative—perfect doesn’t matter!
When to Make This Craft
This Bunny Cotton Craft is perfect for so many occasions:
- Easter celebrations
- Spring break activities
- Classroom craft projects
- Rainy day boredom busters
- Playdates or homeschool art time
It’s also a great addition to Easter baskets or as a handmade gift for grandparents and teachers.
Display Ideas
Once your bunny is complete, don’t just tuck it away—show it off!
- Hang it on the fridge with magnets
- Add it to a spring bulletin board
- Use it as part of Easter décor
- Tape it to a window for a festive touch
- Create a full Easter craft wall with multiple designs
Frequently Asked Questions
How many cotton balls do I need per bunny?
You’ll typically need 20–40 cotton balls, depending on the size of your bunny and how fluffy you want it.
Can I use regular school glue?
Yes! PVA glue (like school glue) works perfectly. Just allow extra drying time.
Is this craft safe for toddlers?
Yes, with supervision. Pre-cut the shapes and avoid hot glue for younger children.
Can I make this without googly eyes?
Absolutely—draw eyes with a marker or cut them out from paper.
Final Thoughts
This Bunny Cotton Craft is one of those simple, joyful projects that kids absolutely love. It combines creativity, sensory play, and hands-on fun into one adorable Easter activity.
What makes this craft truly special isn’t just the finished bunny—it’s the time spent creating together. Whether you’re crafting at the kitchen table, in a classroom, or during a weekend play session, these little fluffy bunnies become sweet memories.
So grab your cotton balls, glue, and cardstock—and get ready to create the cutest bunny ever!