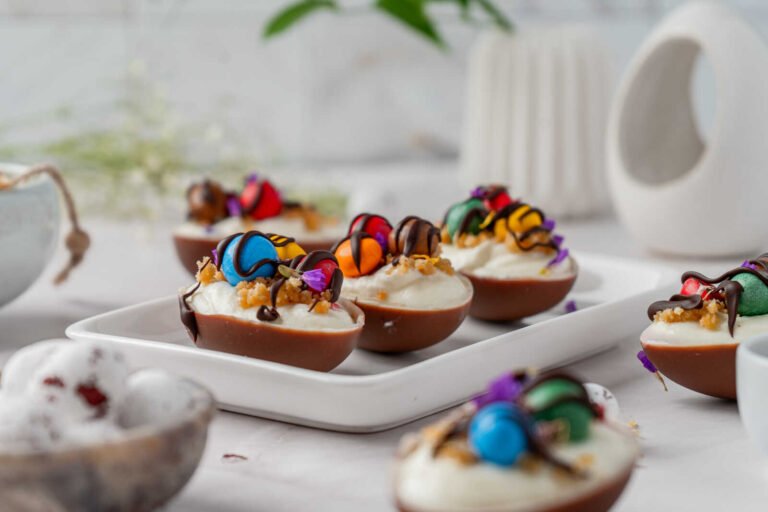
Mini Springtime Cheesecake Tarts – Cute Pastel Sweet Treats!
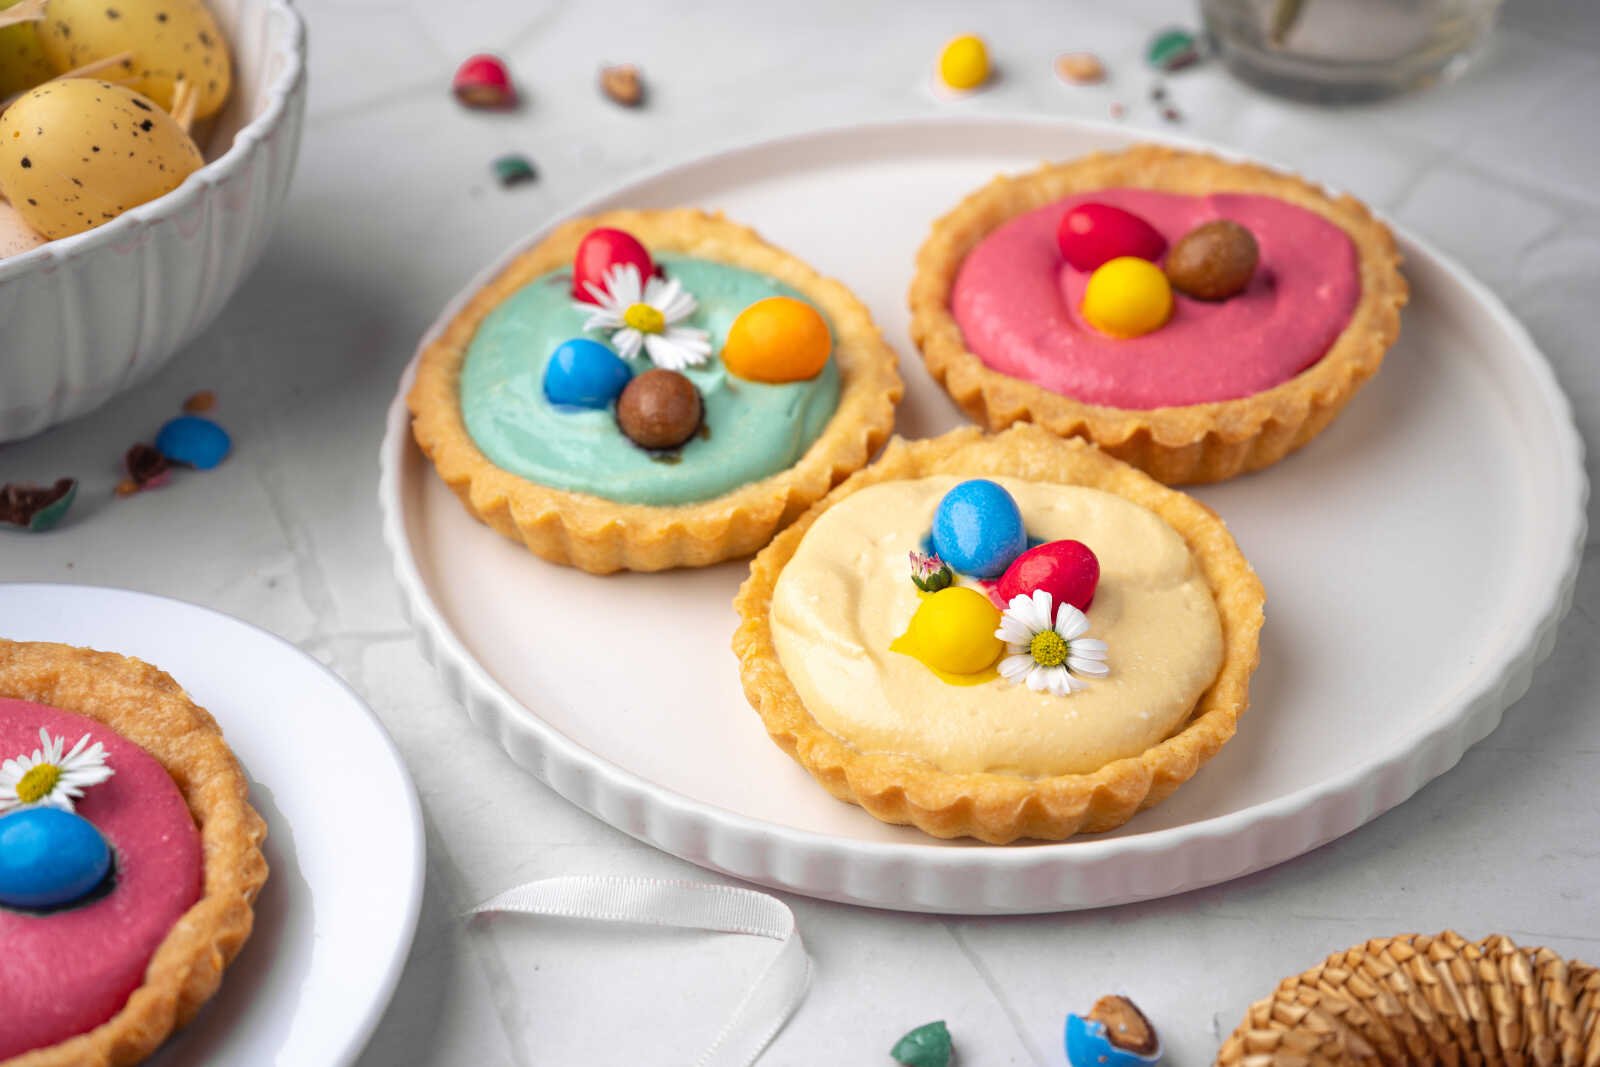
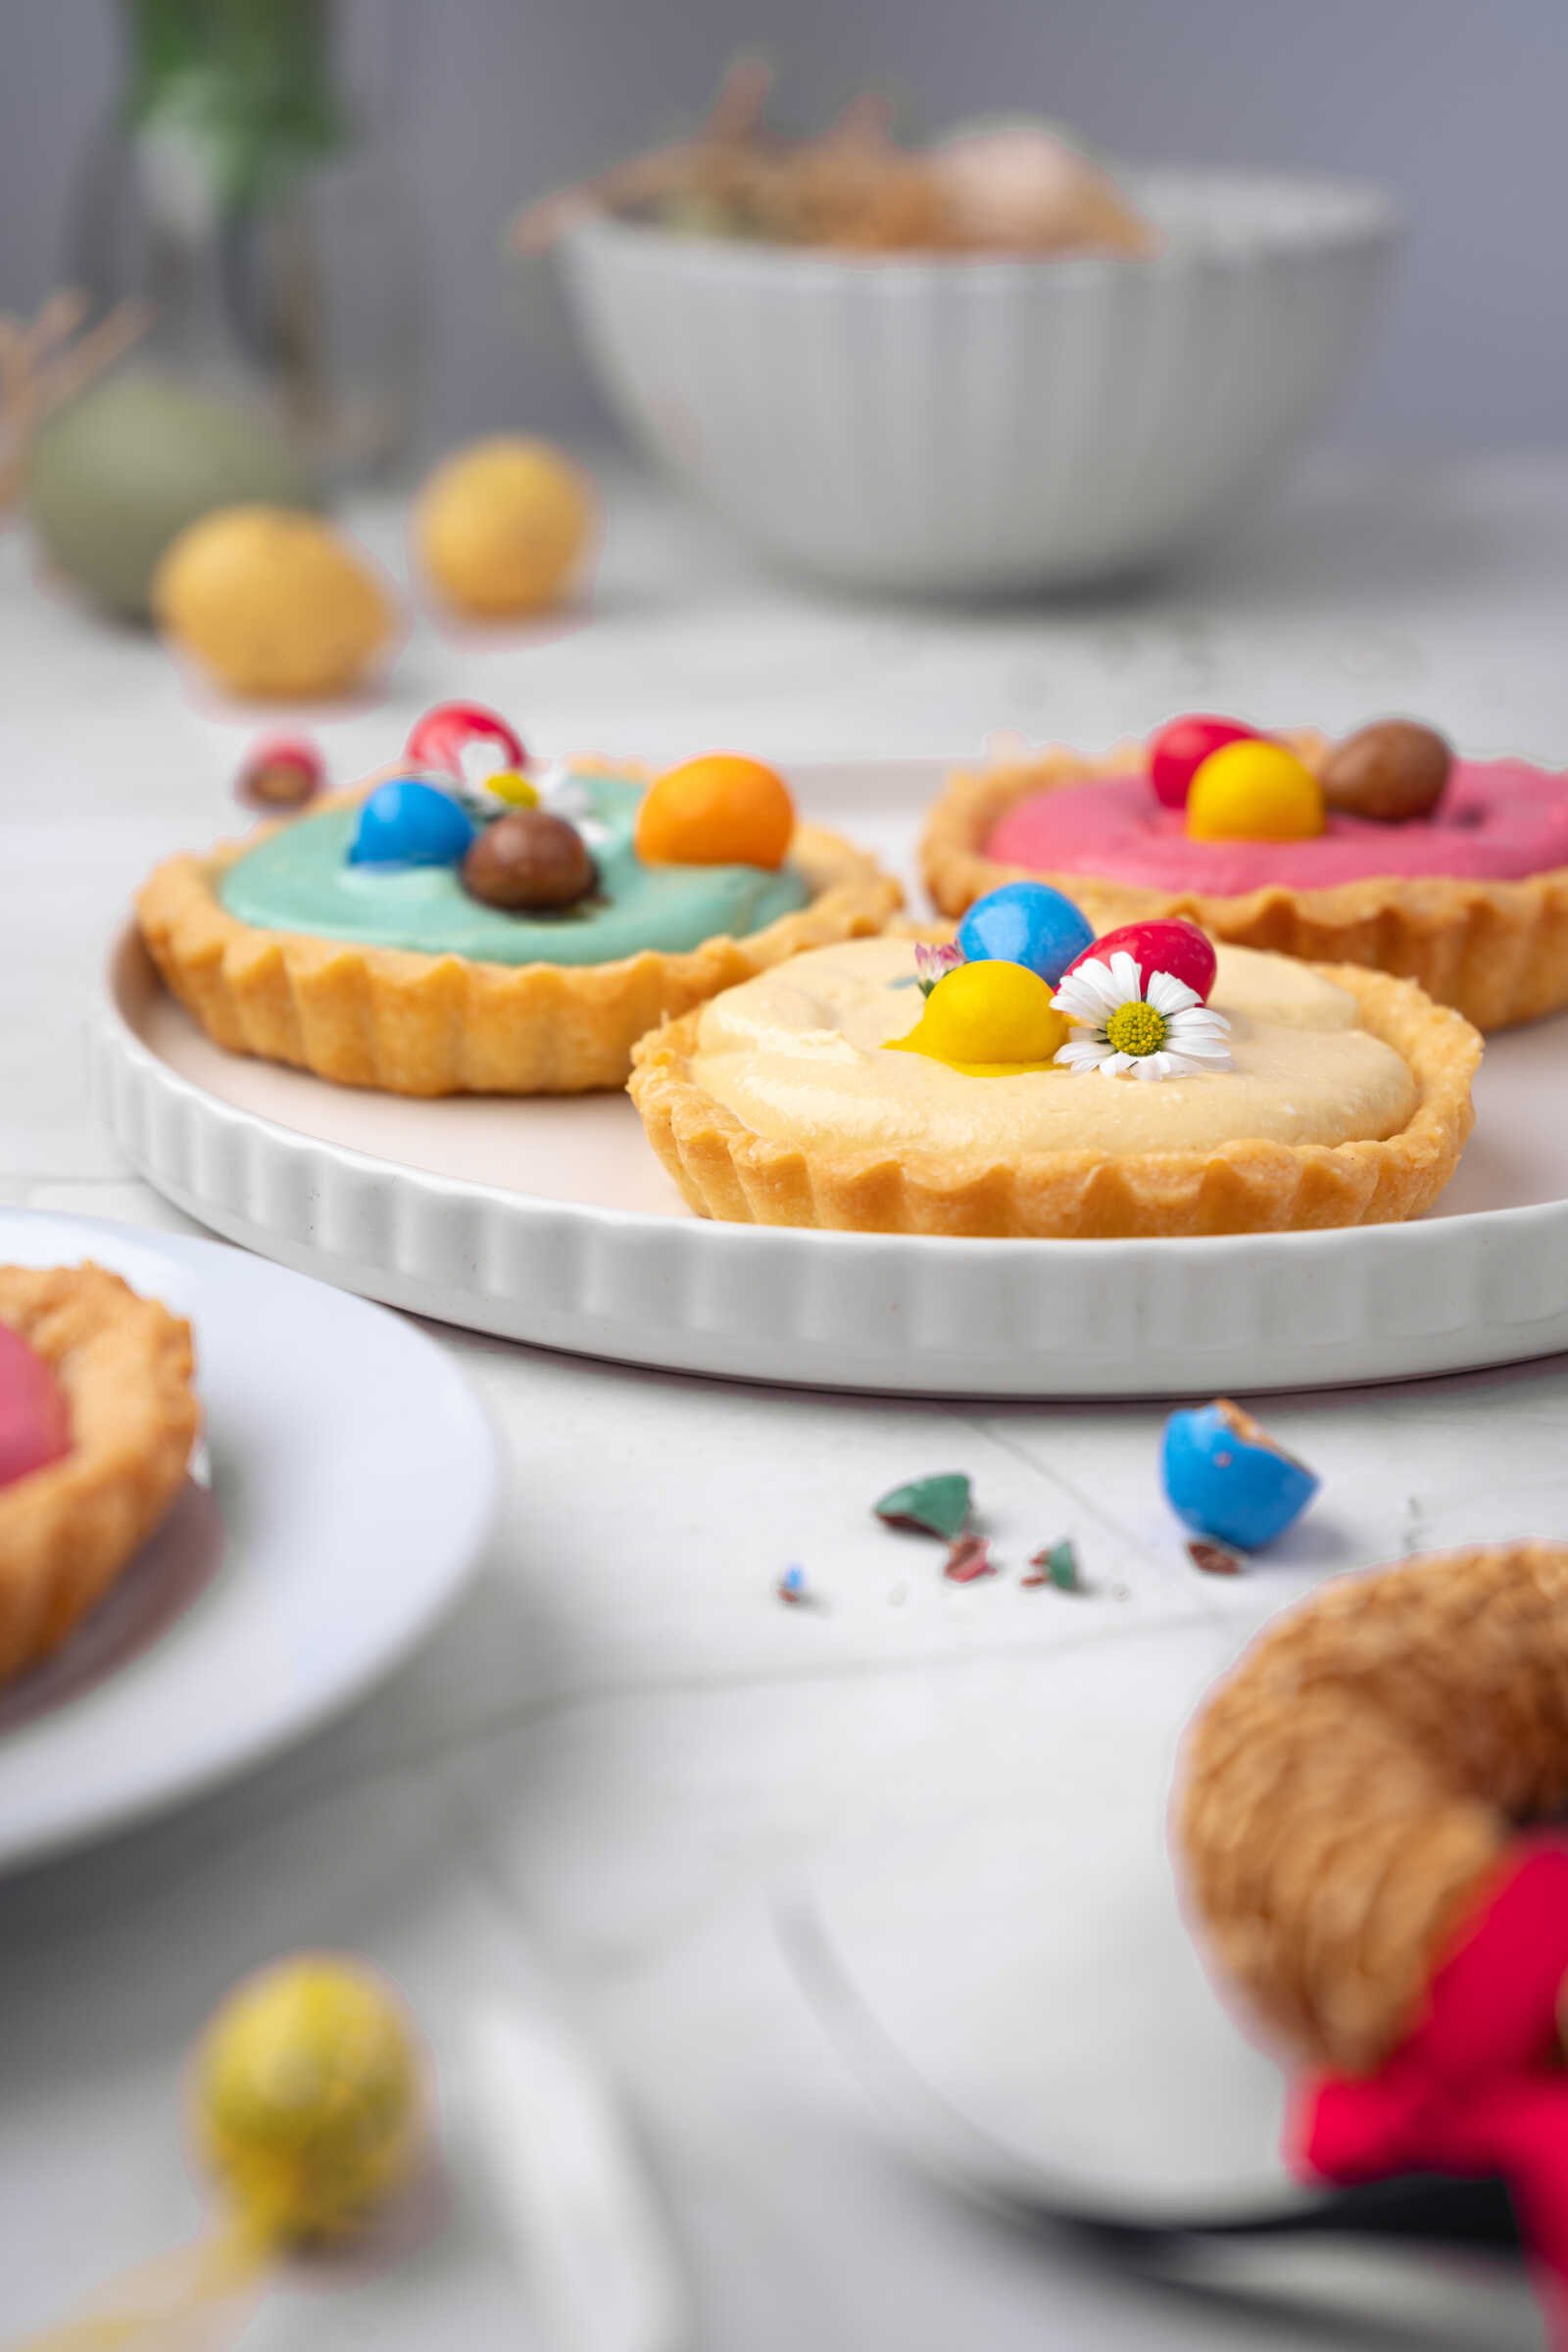
When spring arrives, it brings bright colors, fresh flavors, and plenty of reasons to bake something beautiful. These Mini Springtime Cheesecake Tarts are the perfect dessert to celebrate the season. With a buttery sweet pastry crust and a creamy no-bake cheesecake filling in soft pastel colors, these charming little tartlets look just as lovely on an Easter dessert table as they taste.
Whether you’re planning an Easter brunch, spring baby shower, Mother’s Day gathering, or a garden party, these mini cheesecake tarts add a cheerful seasonal touch. The delicate tart shell provides a crisp contrast to the silky cheesecake filling, while pastel food coloring and decorative toppings like mini chocolate eggs or edible flowers give them a festive springtime look.
The best part? These individual tarts can be made ahead of time, making them perfect for busy hosts who want an impressive dessert without last-minute stress.
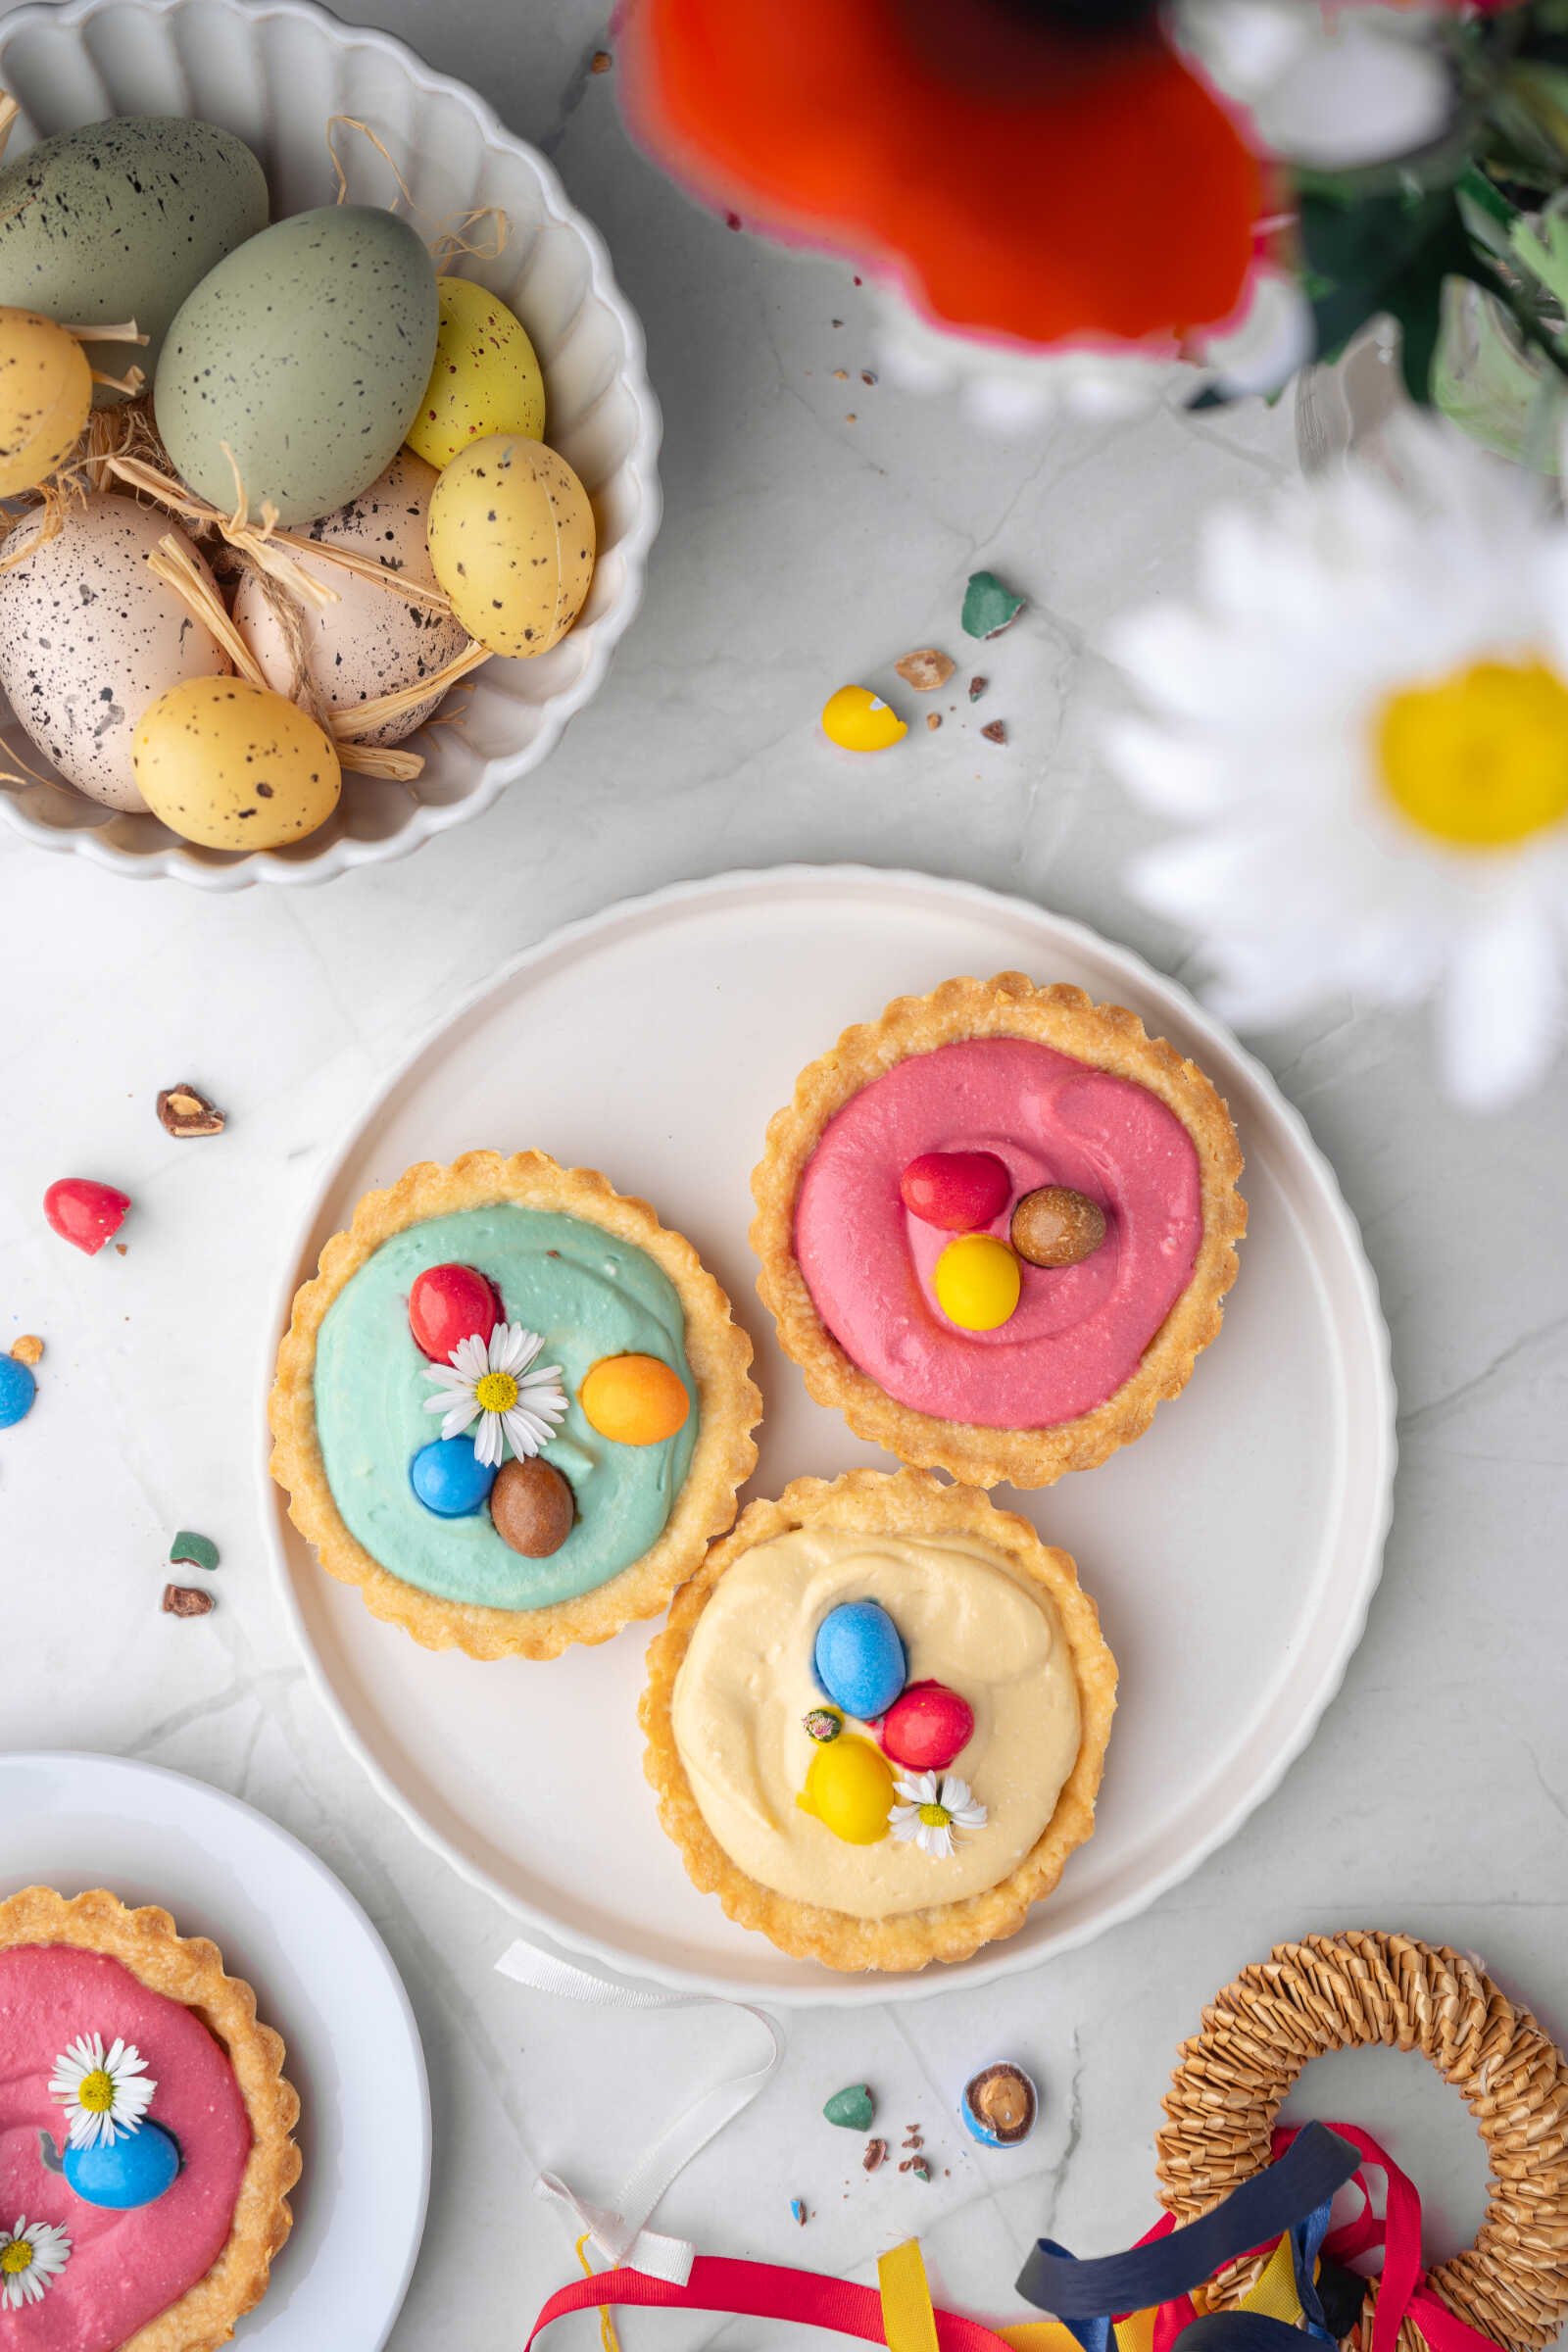
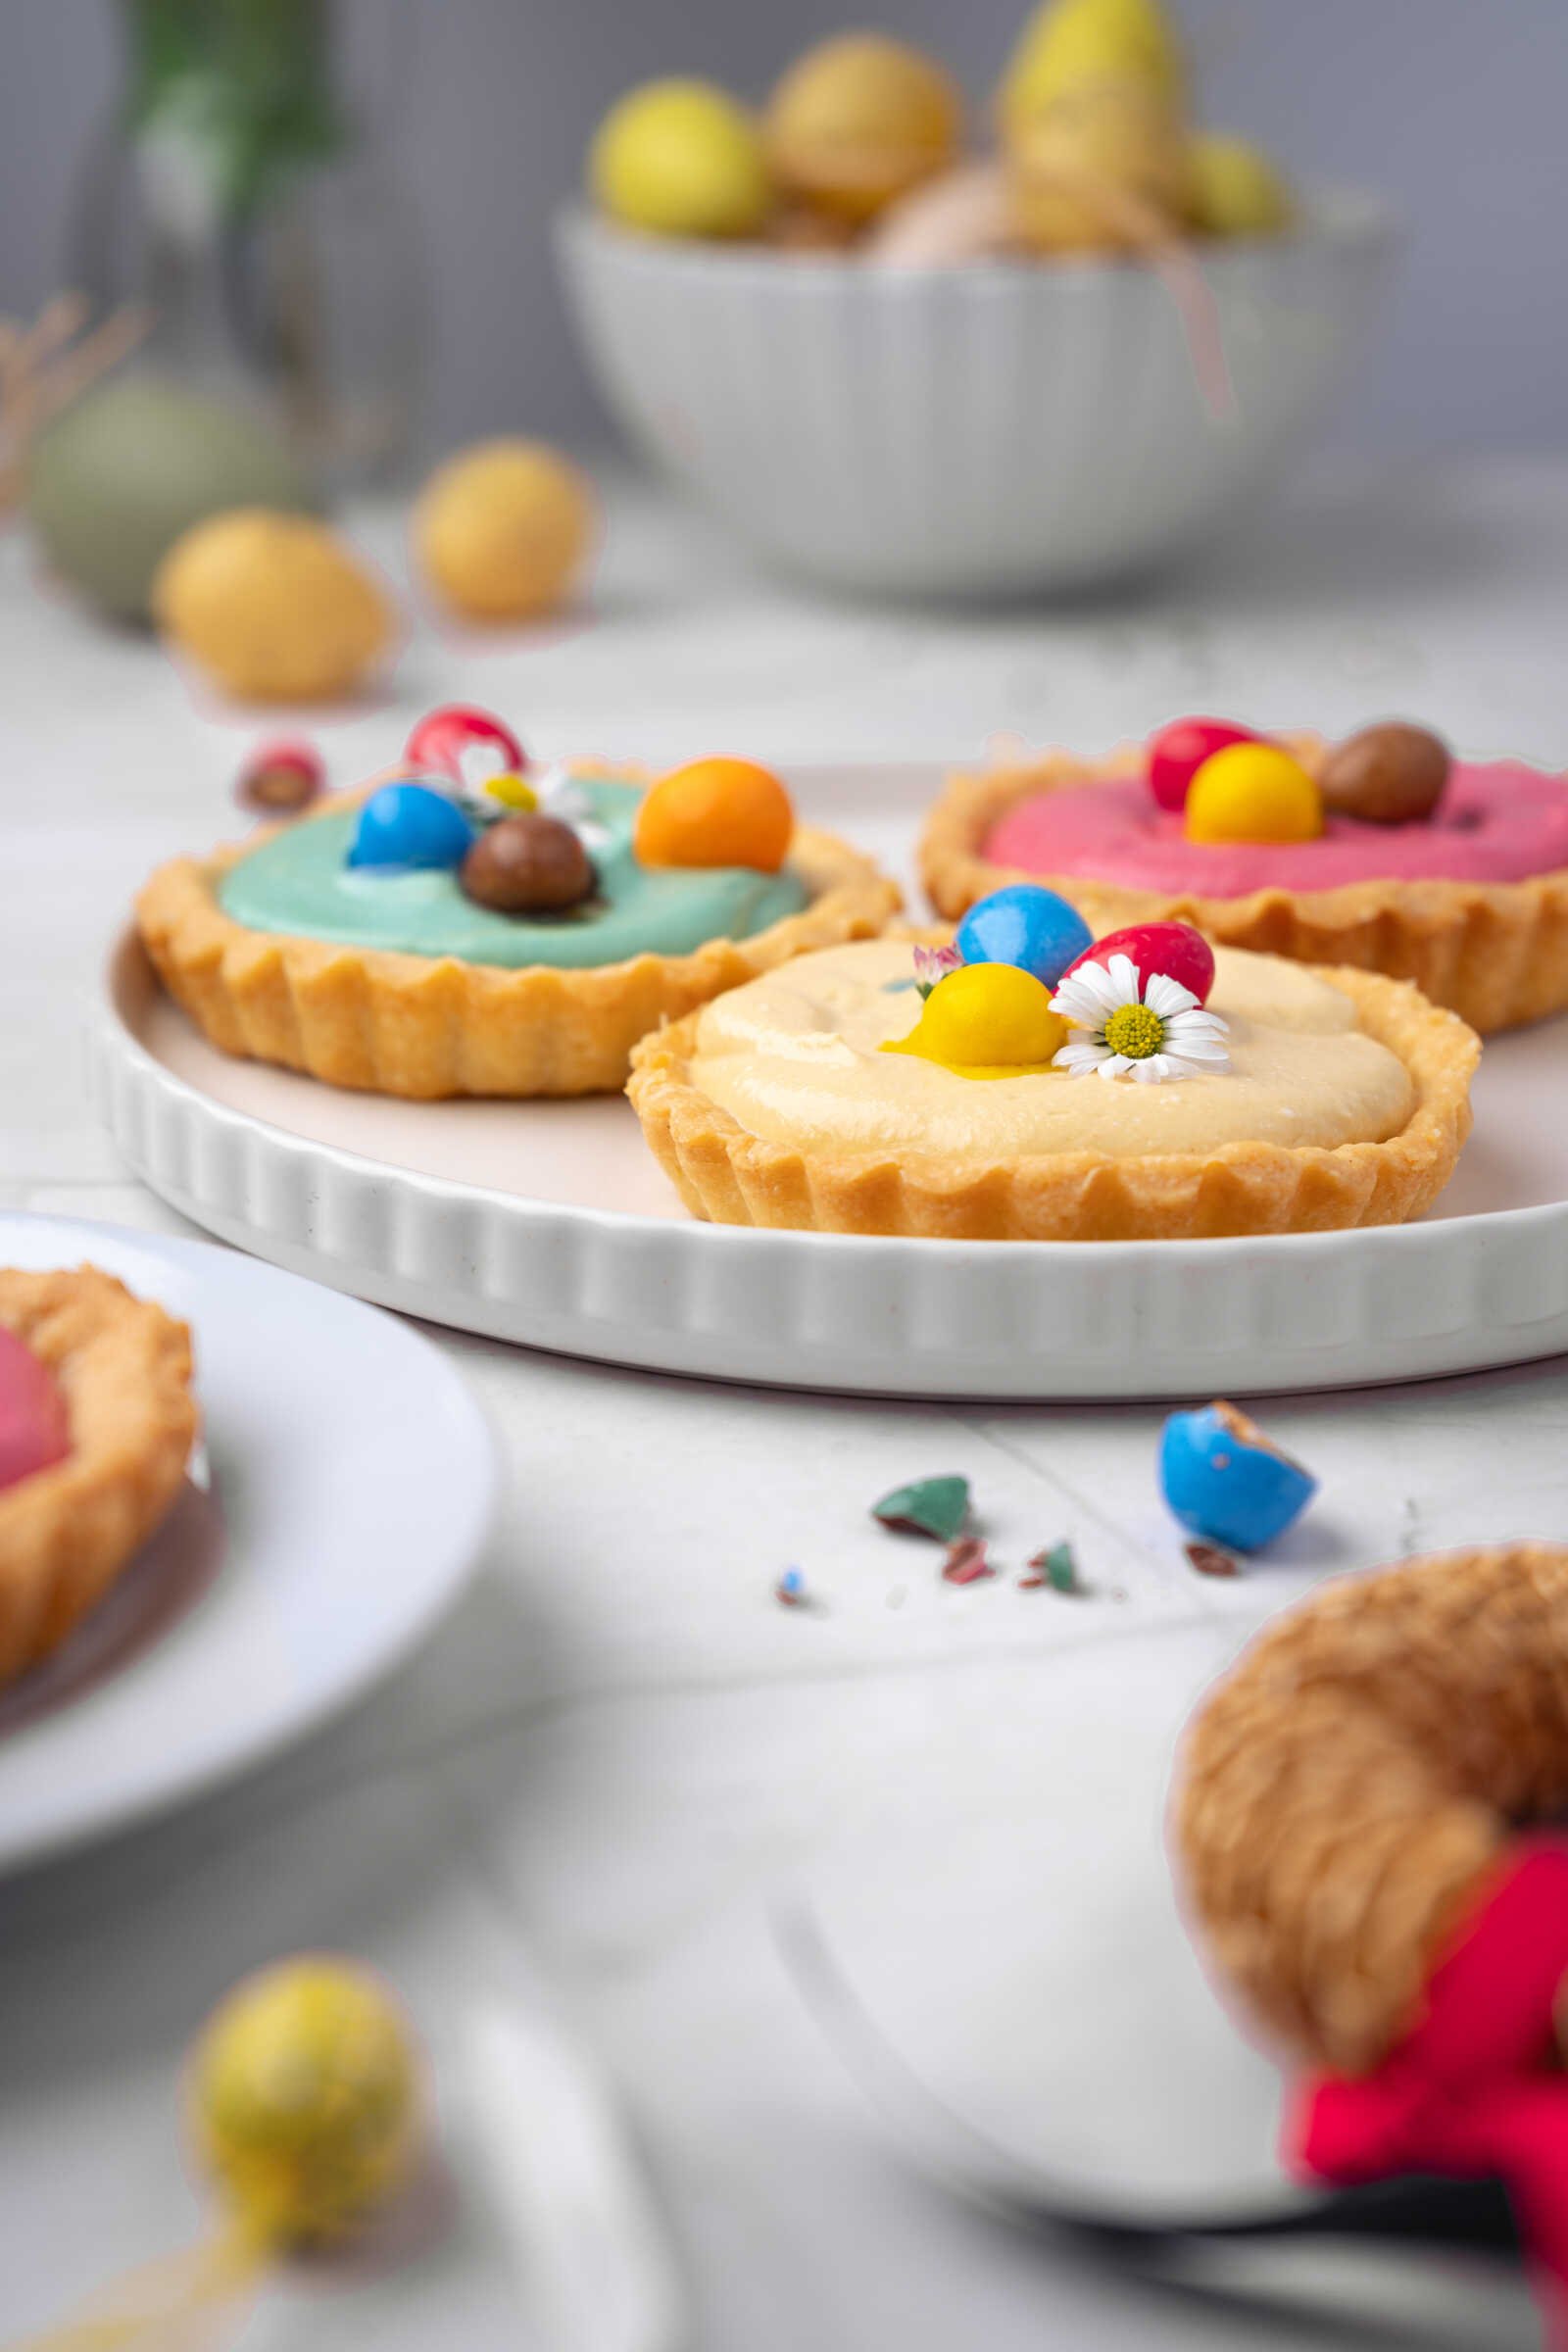
Table of Contents
Why You’ll Love These Mini Springtime Cheesecake Tarts
There are many reasons this recipe quickly becomes a favorite spring dessert.
Perfect for spring celebrations
The pastel colors and decorative toppings make these cheesecake tarts ideal for Easter dessert tables, spring brunches, bridal showers, or birthdays.
Individual portions
Each tartlet is a personal dessert, which makes serving simple and elegant.
Light and creamy filling
The whipped cream folded into the cheesecake mixture gives the filling a light texture that perfectly complements the crisp pastry crust.
Make-ahead friendly
Because the tarts need time to chill, they’re ideal for preparing ahead of your event.
Customizable colors and toppings
You can easily adapt the filling colors and garnishes to match your party theme or seasonal décor.
Ingredients
This recipe creates about eight 4-inch tartlets.
For the Sweet Short Pastry Shell
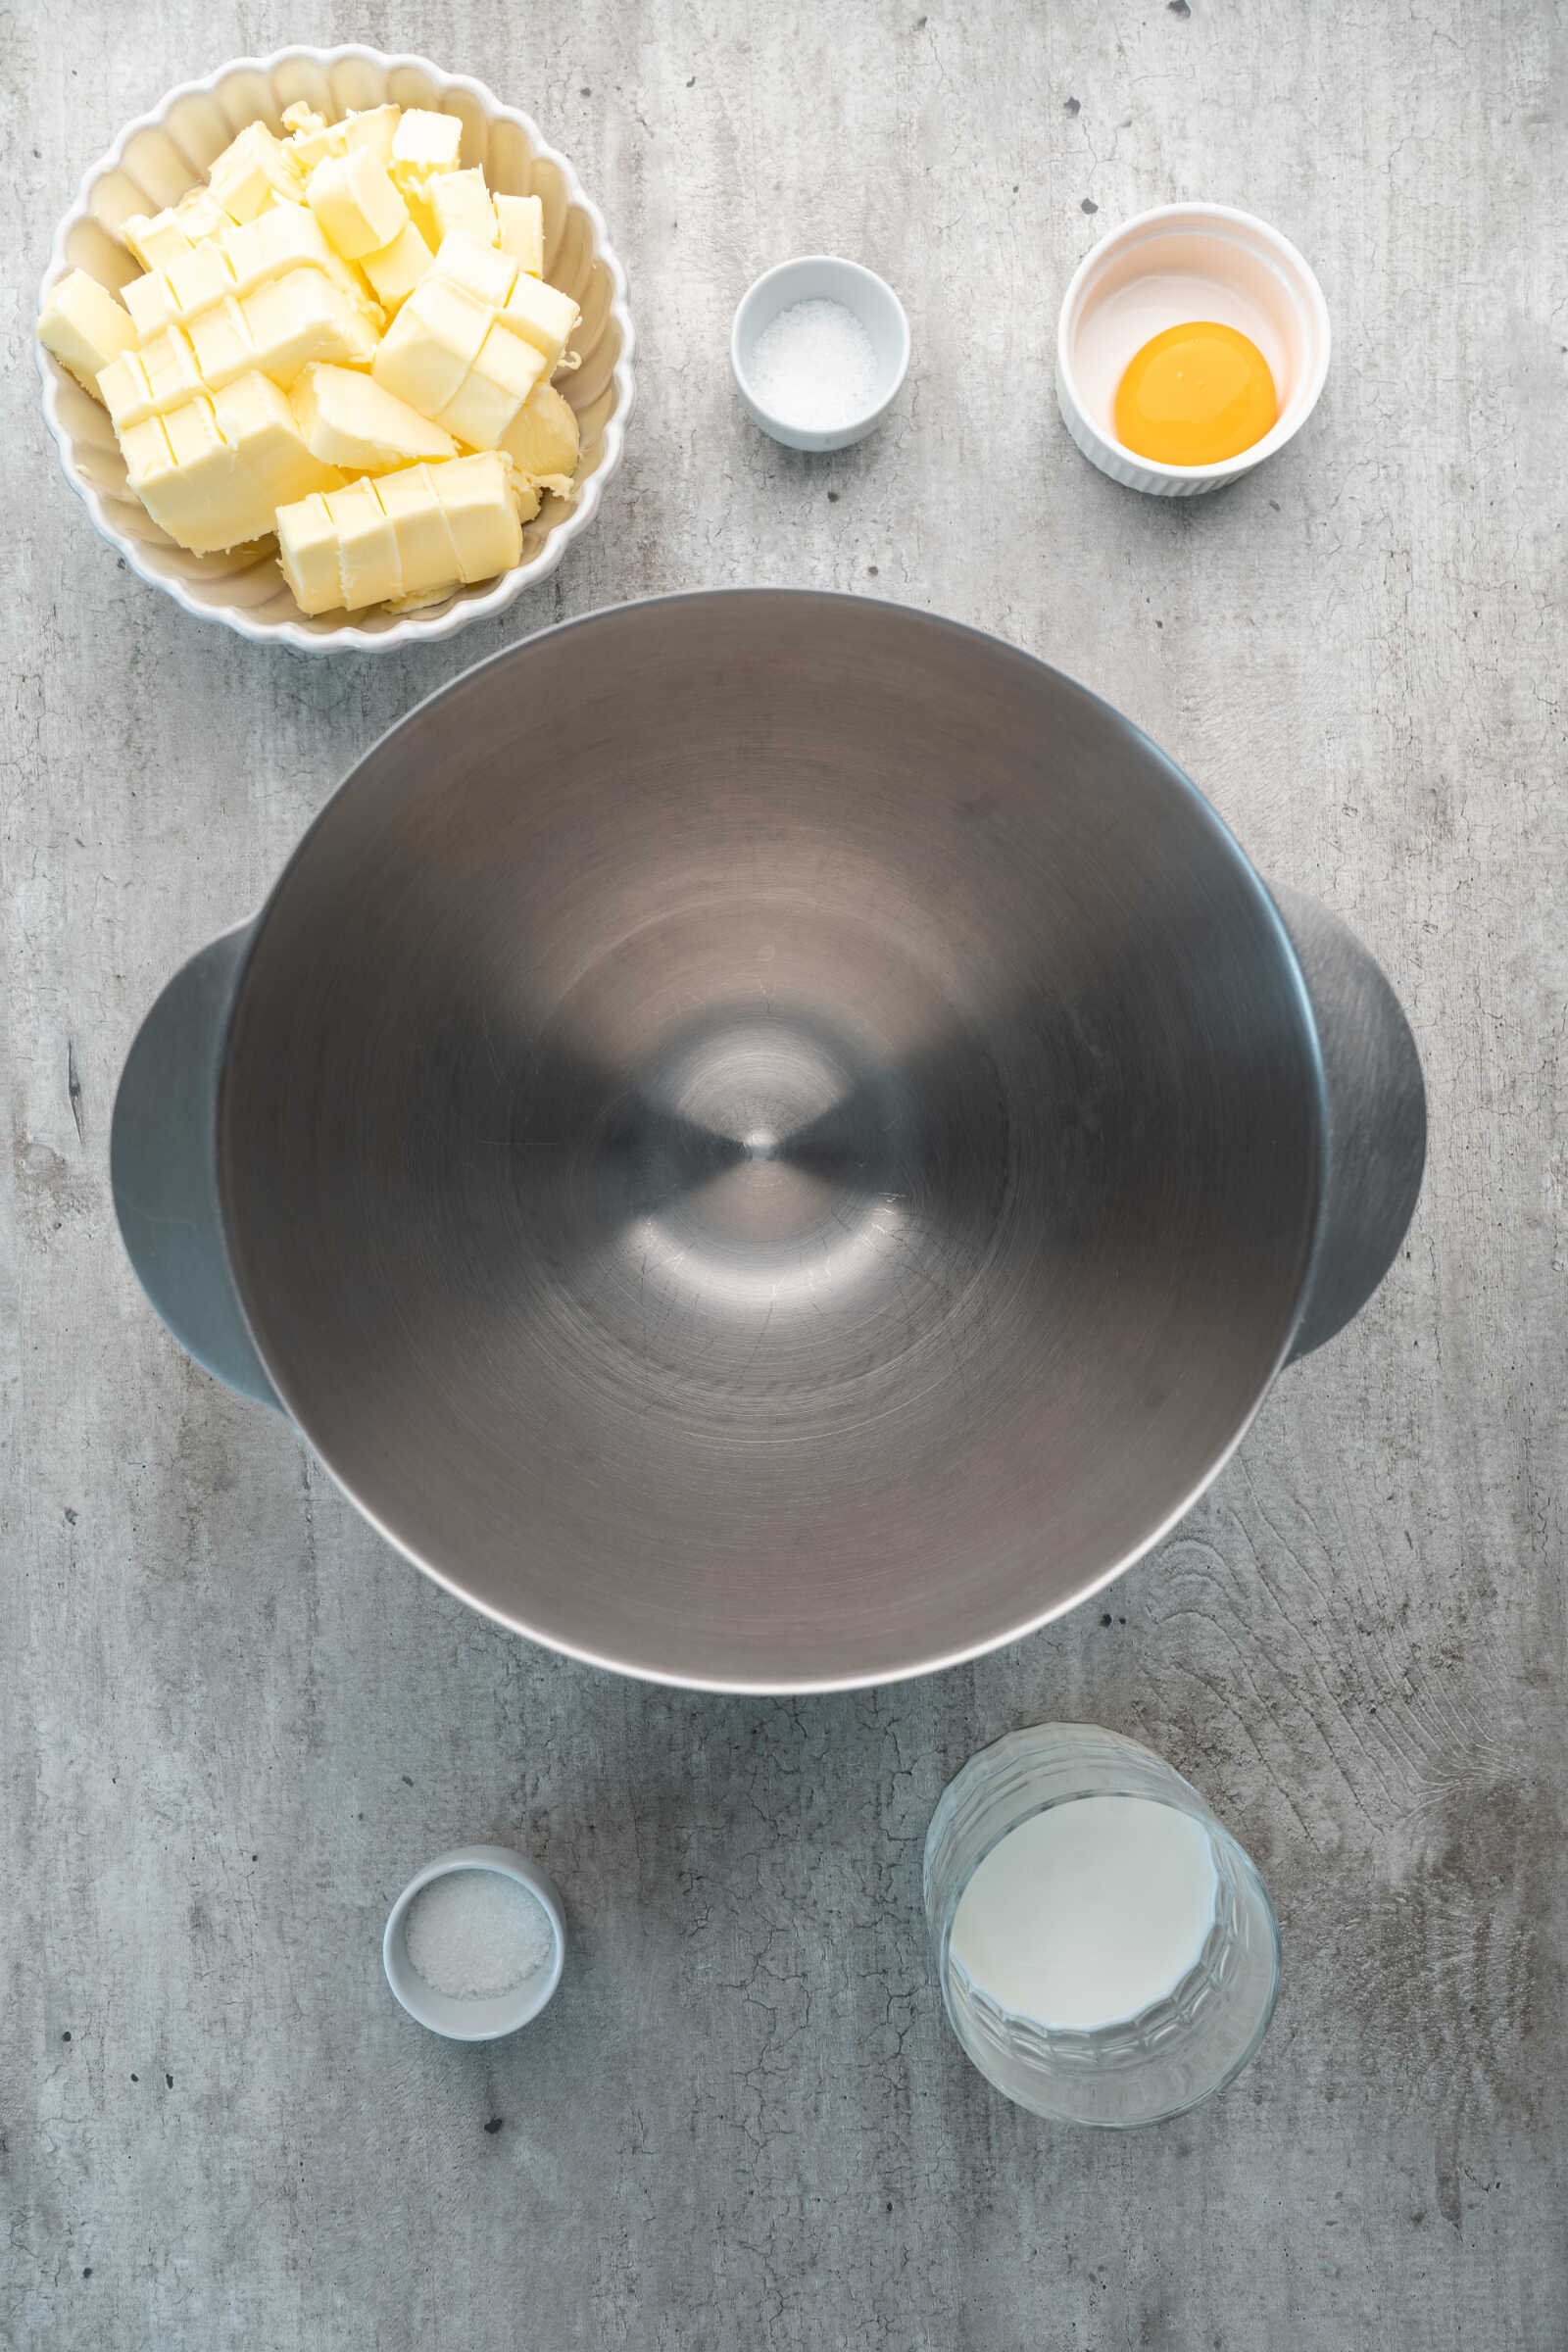
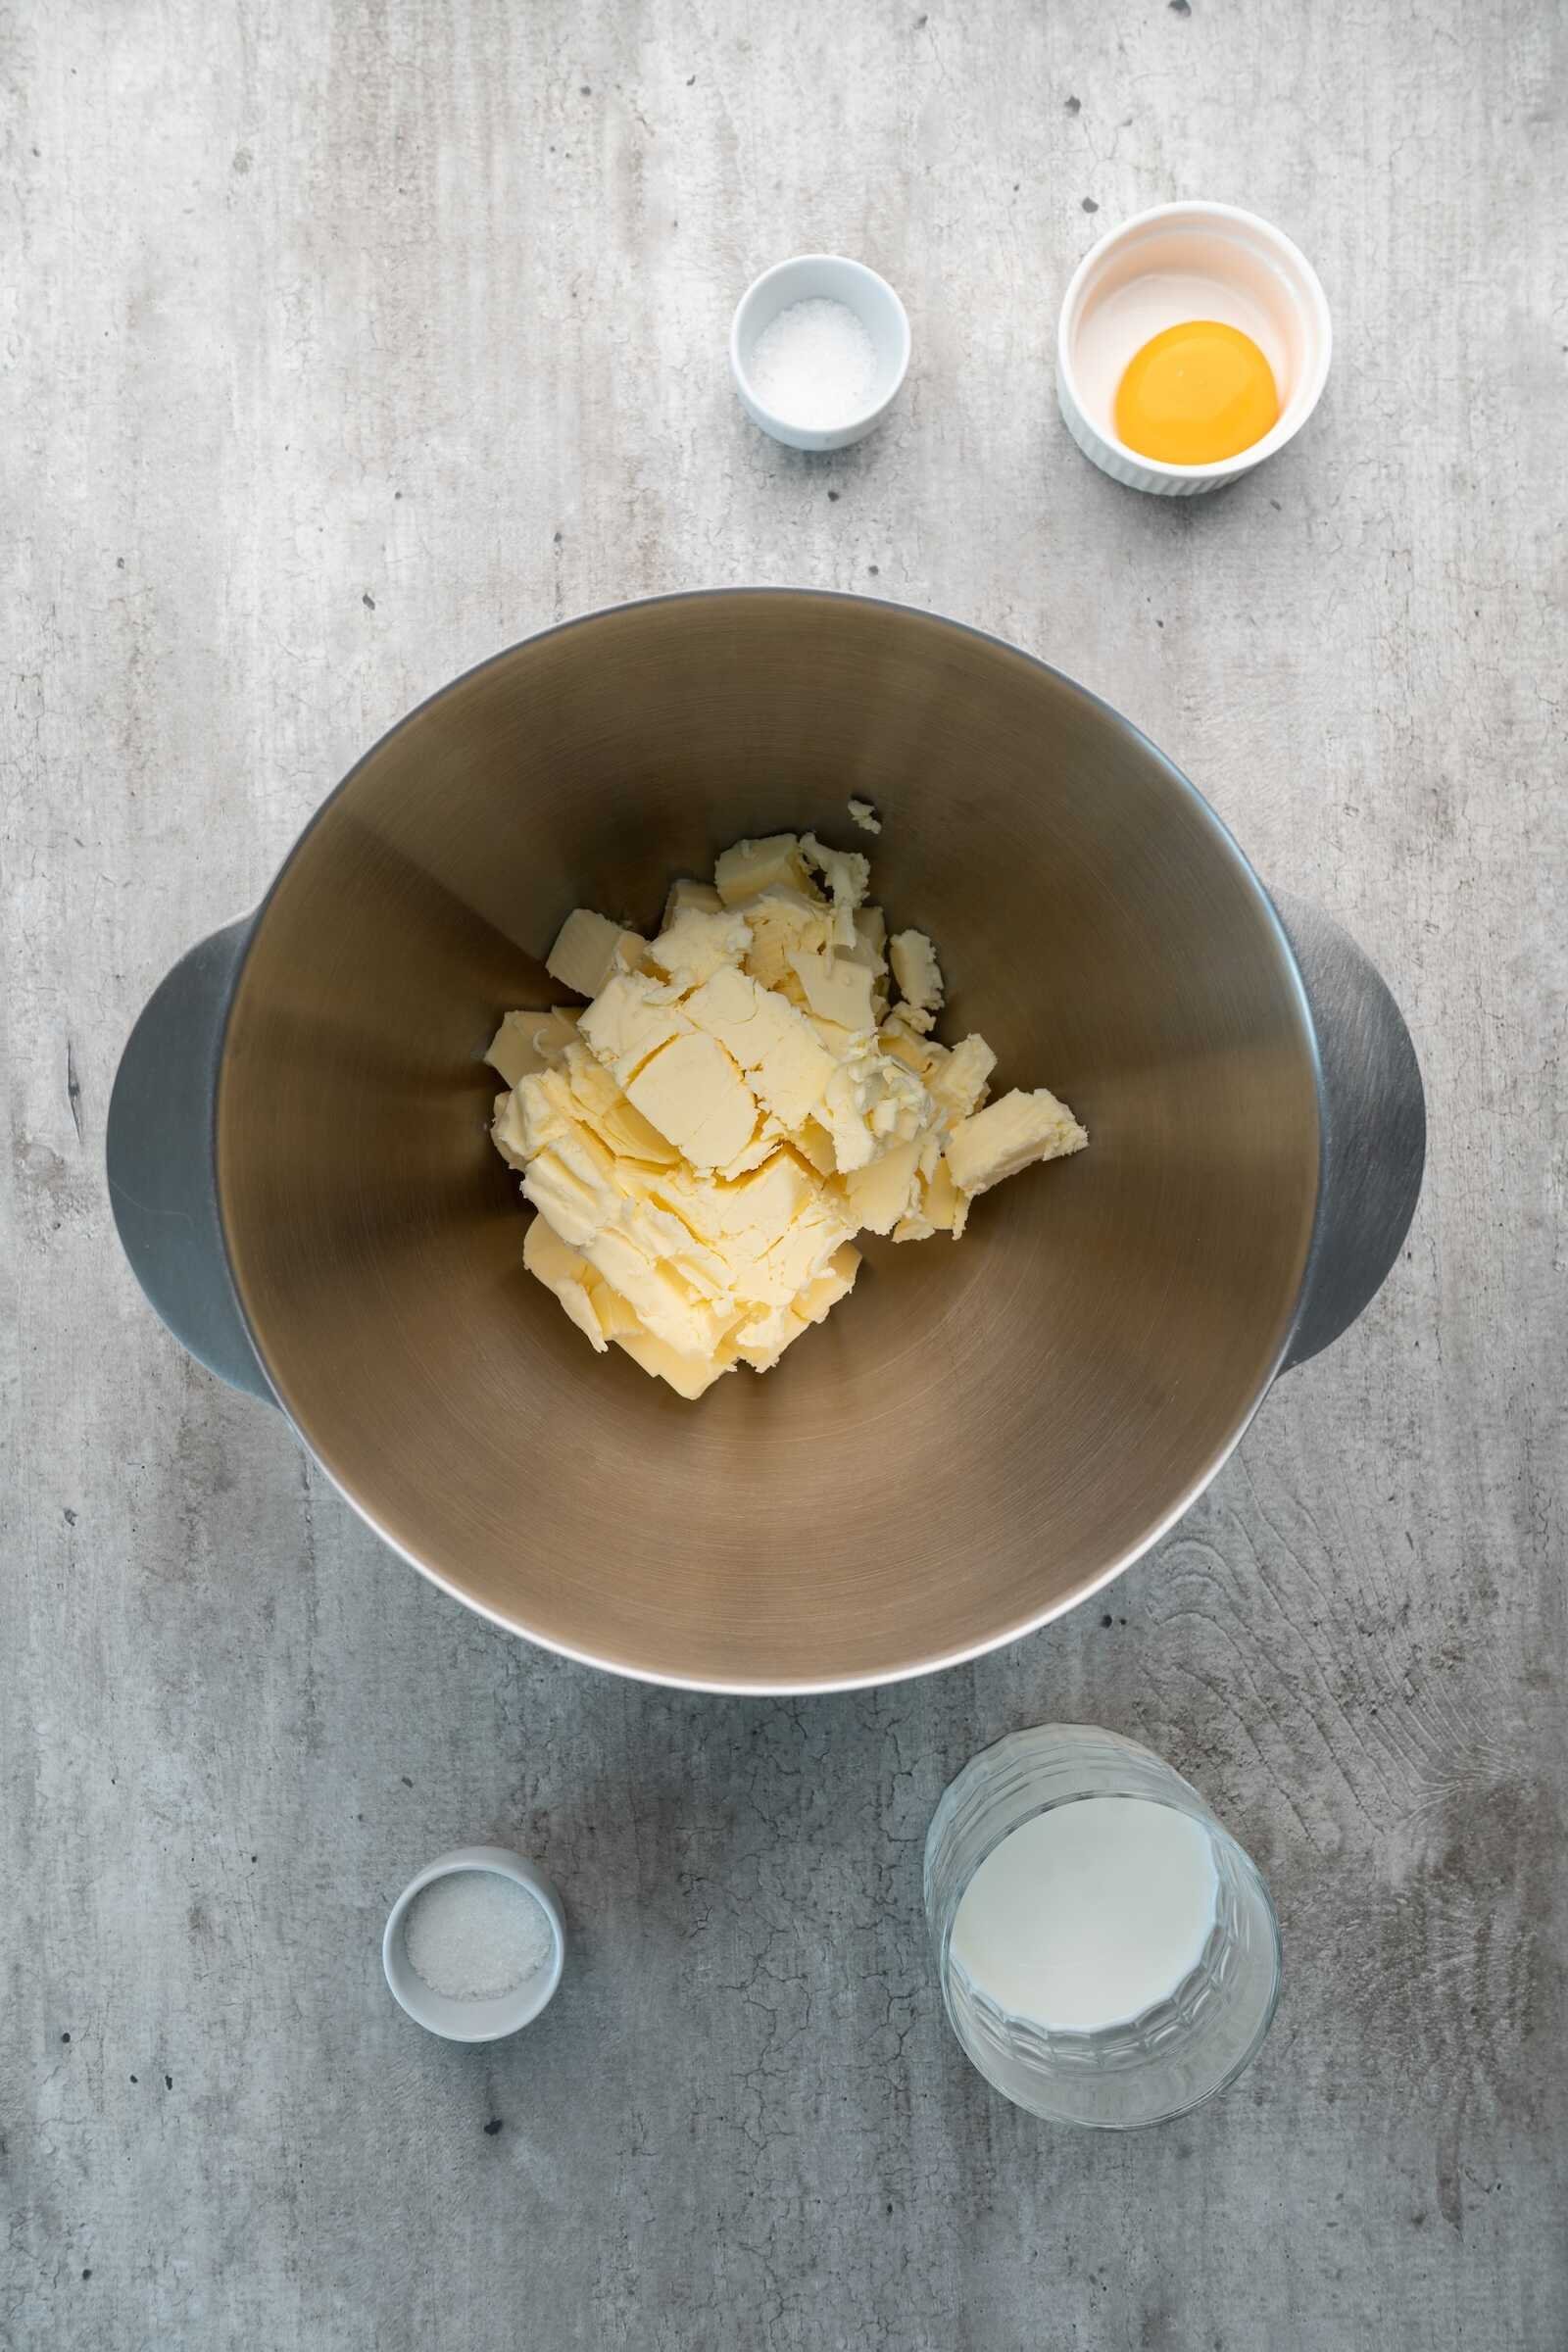
- 4 cups pastry flour, plus extra for dusting
- 1 ⅔ cups unsalted butter, at room temperature
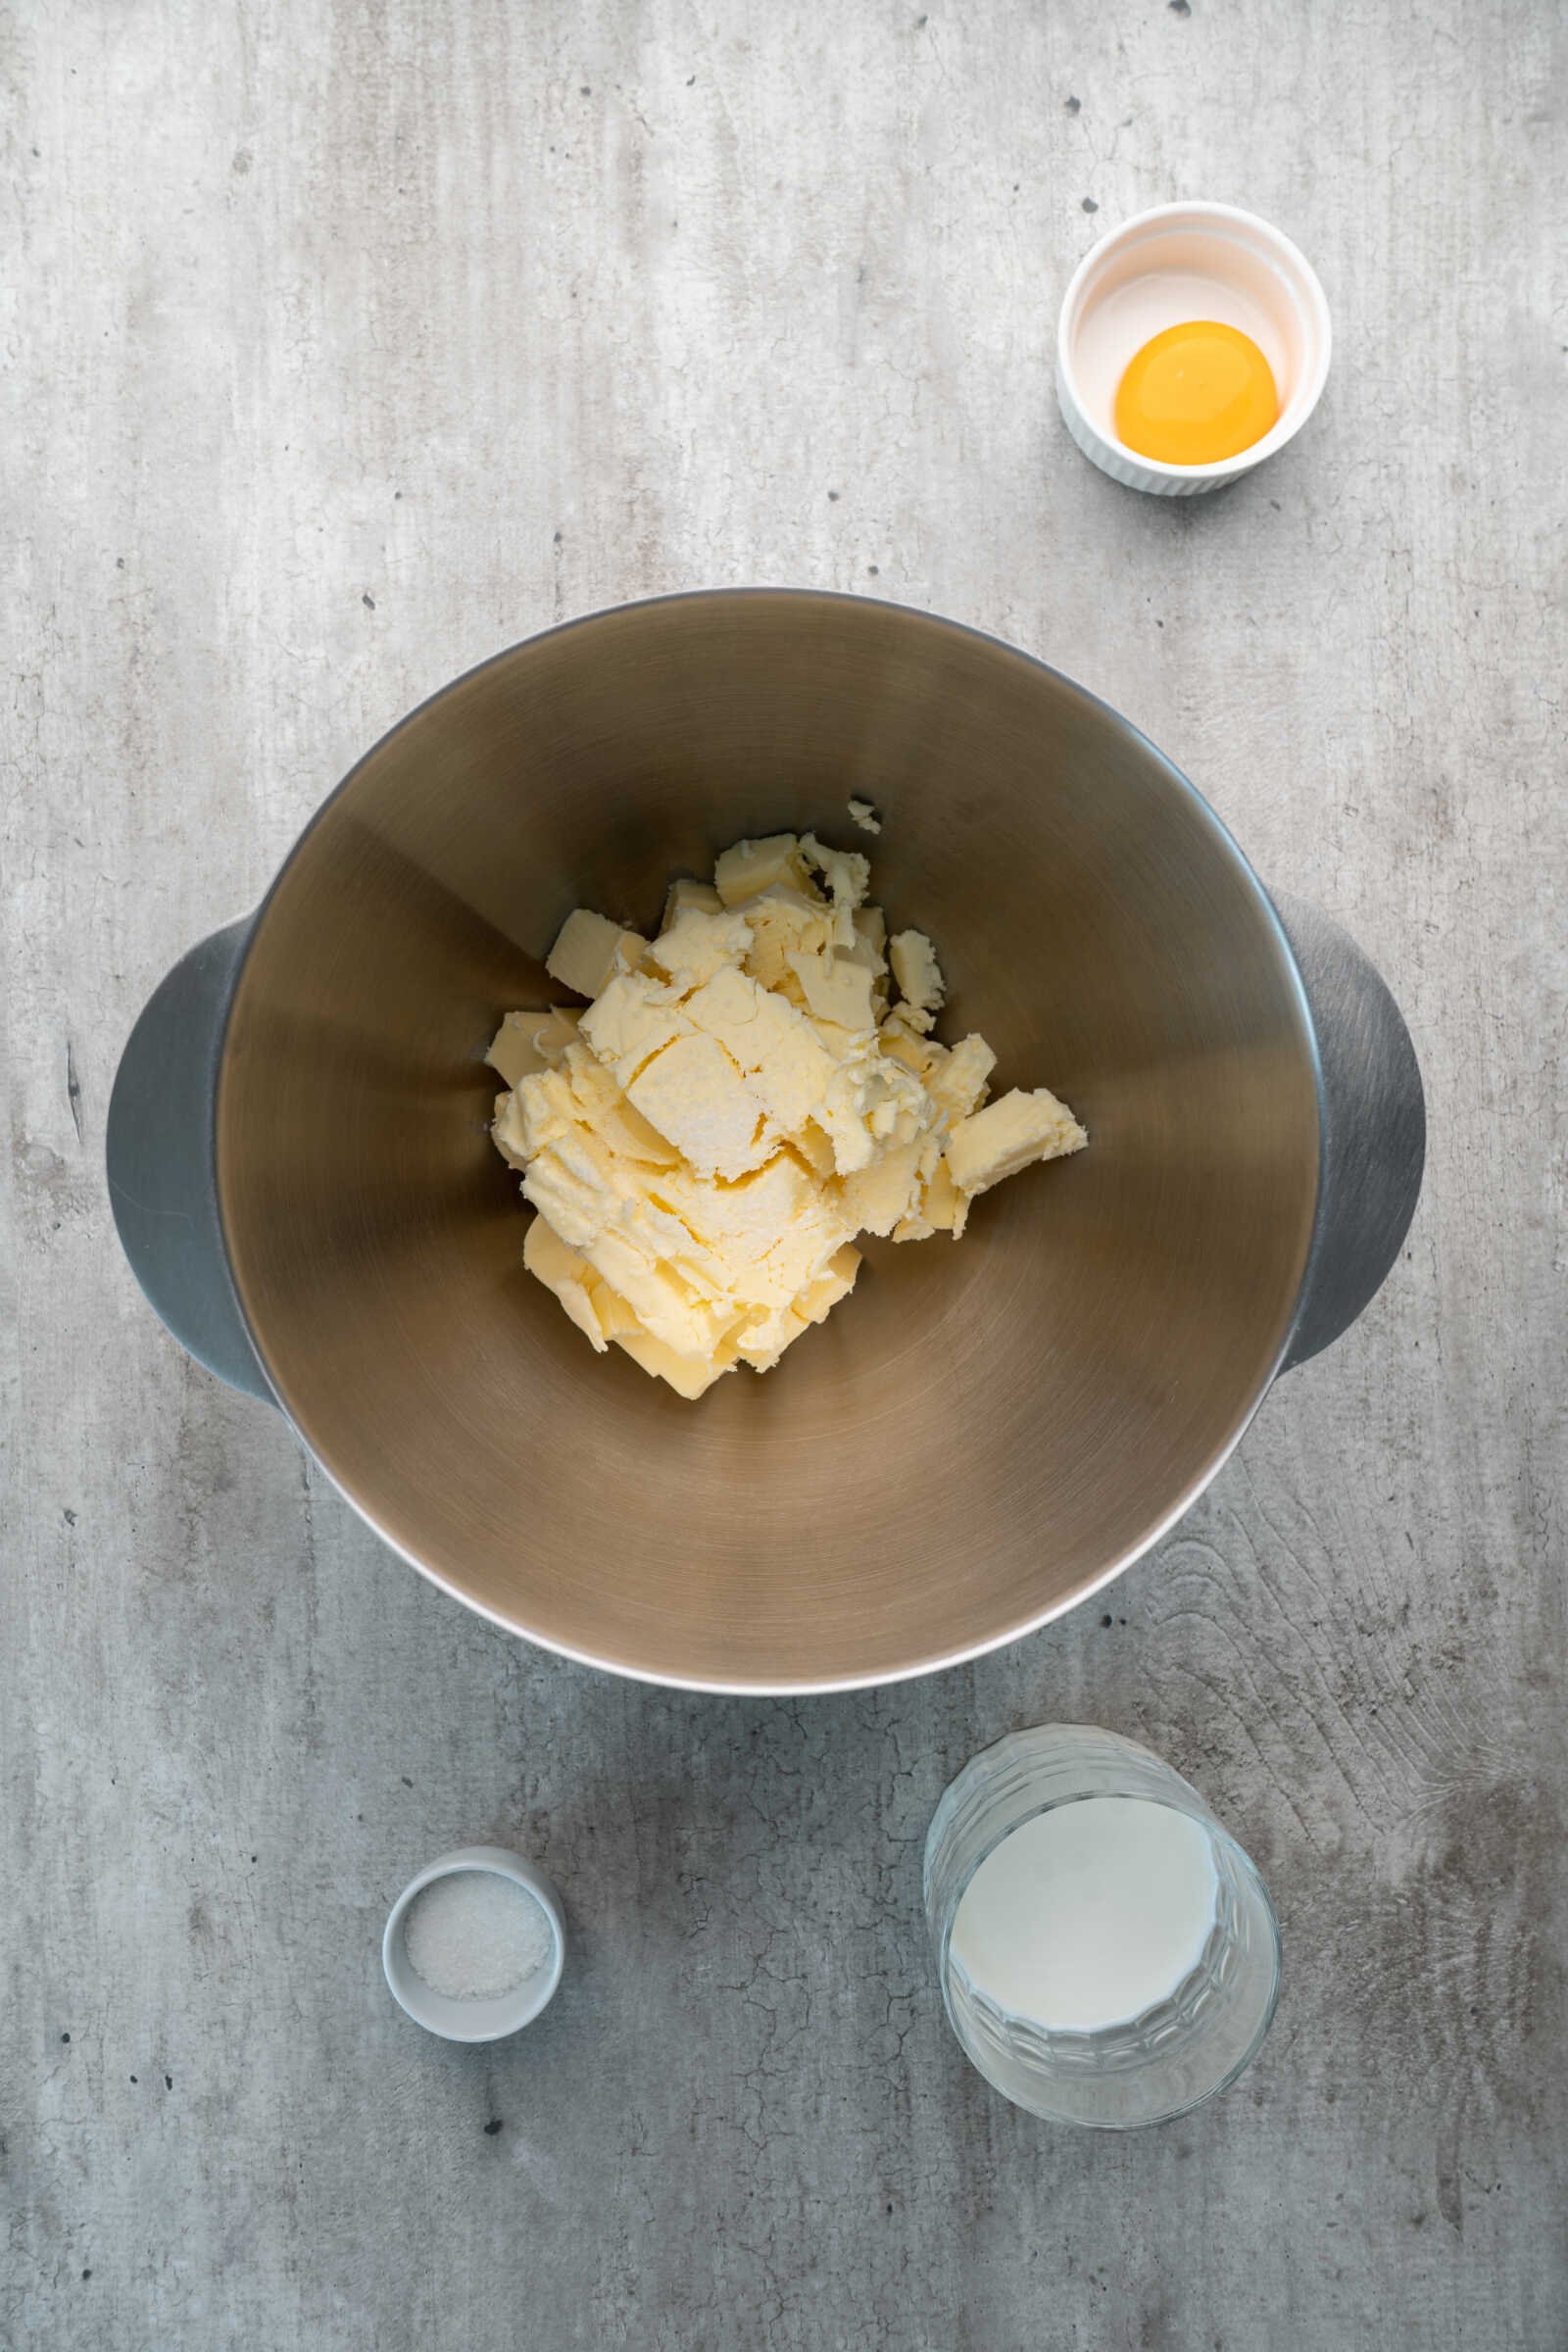
- 1 teaspoon salt
- 1 large egg yolk
- 2 teaspoons sugar
- 7 tablespoons whole milk, room temperature
For the Cheesecake-Style Filling
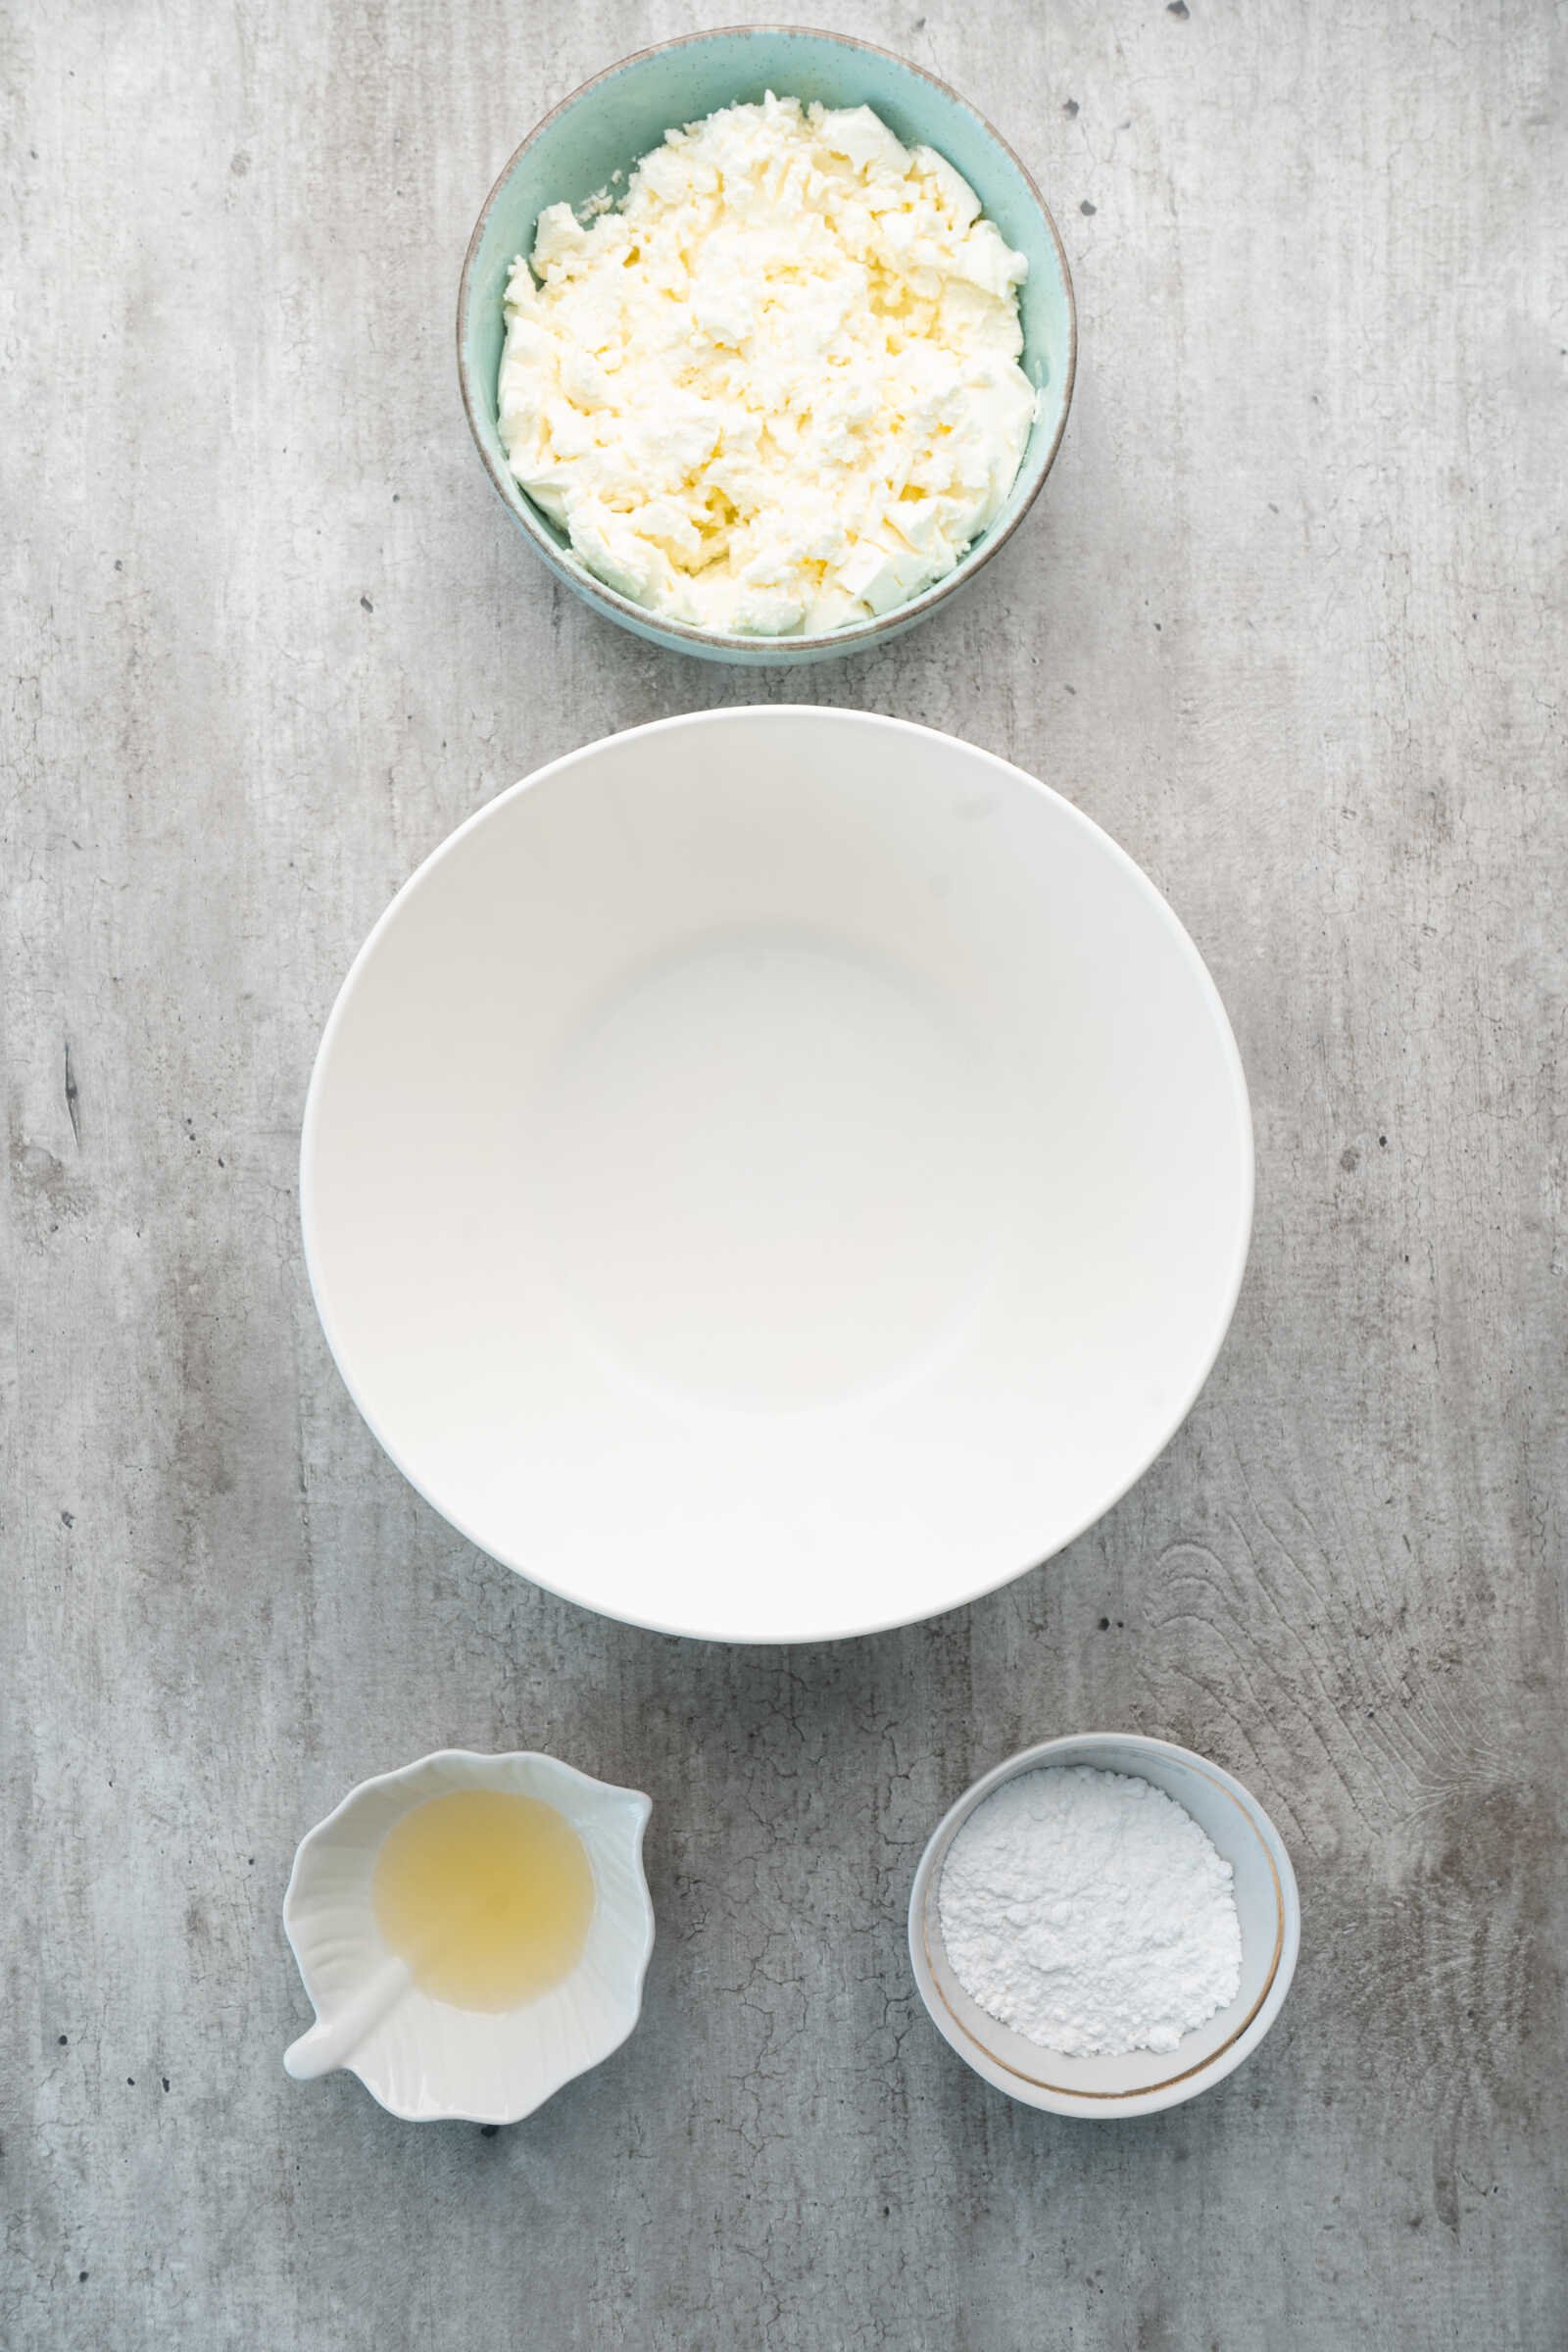
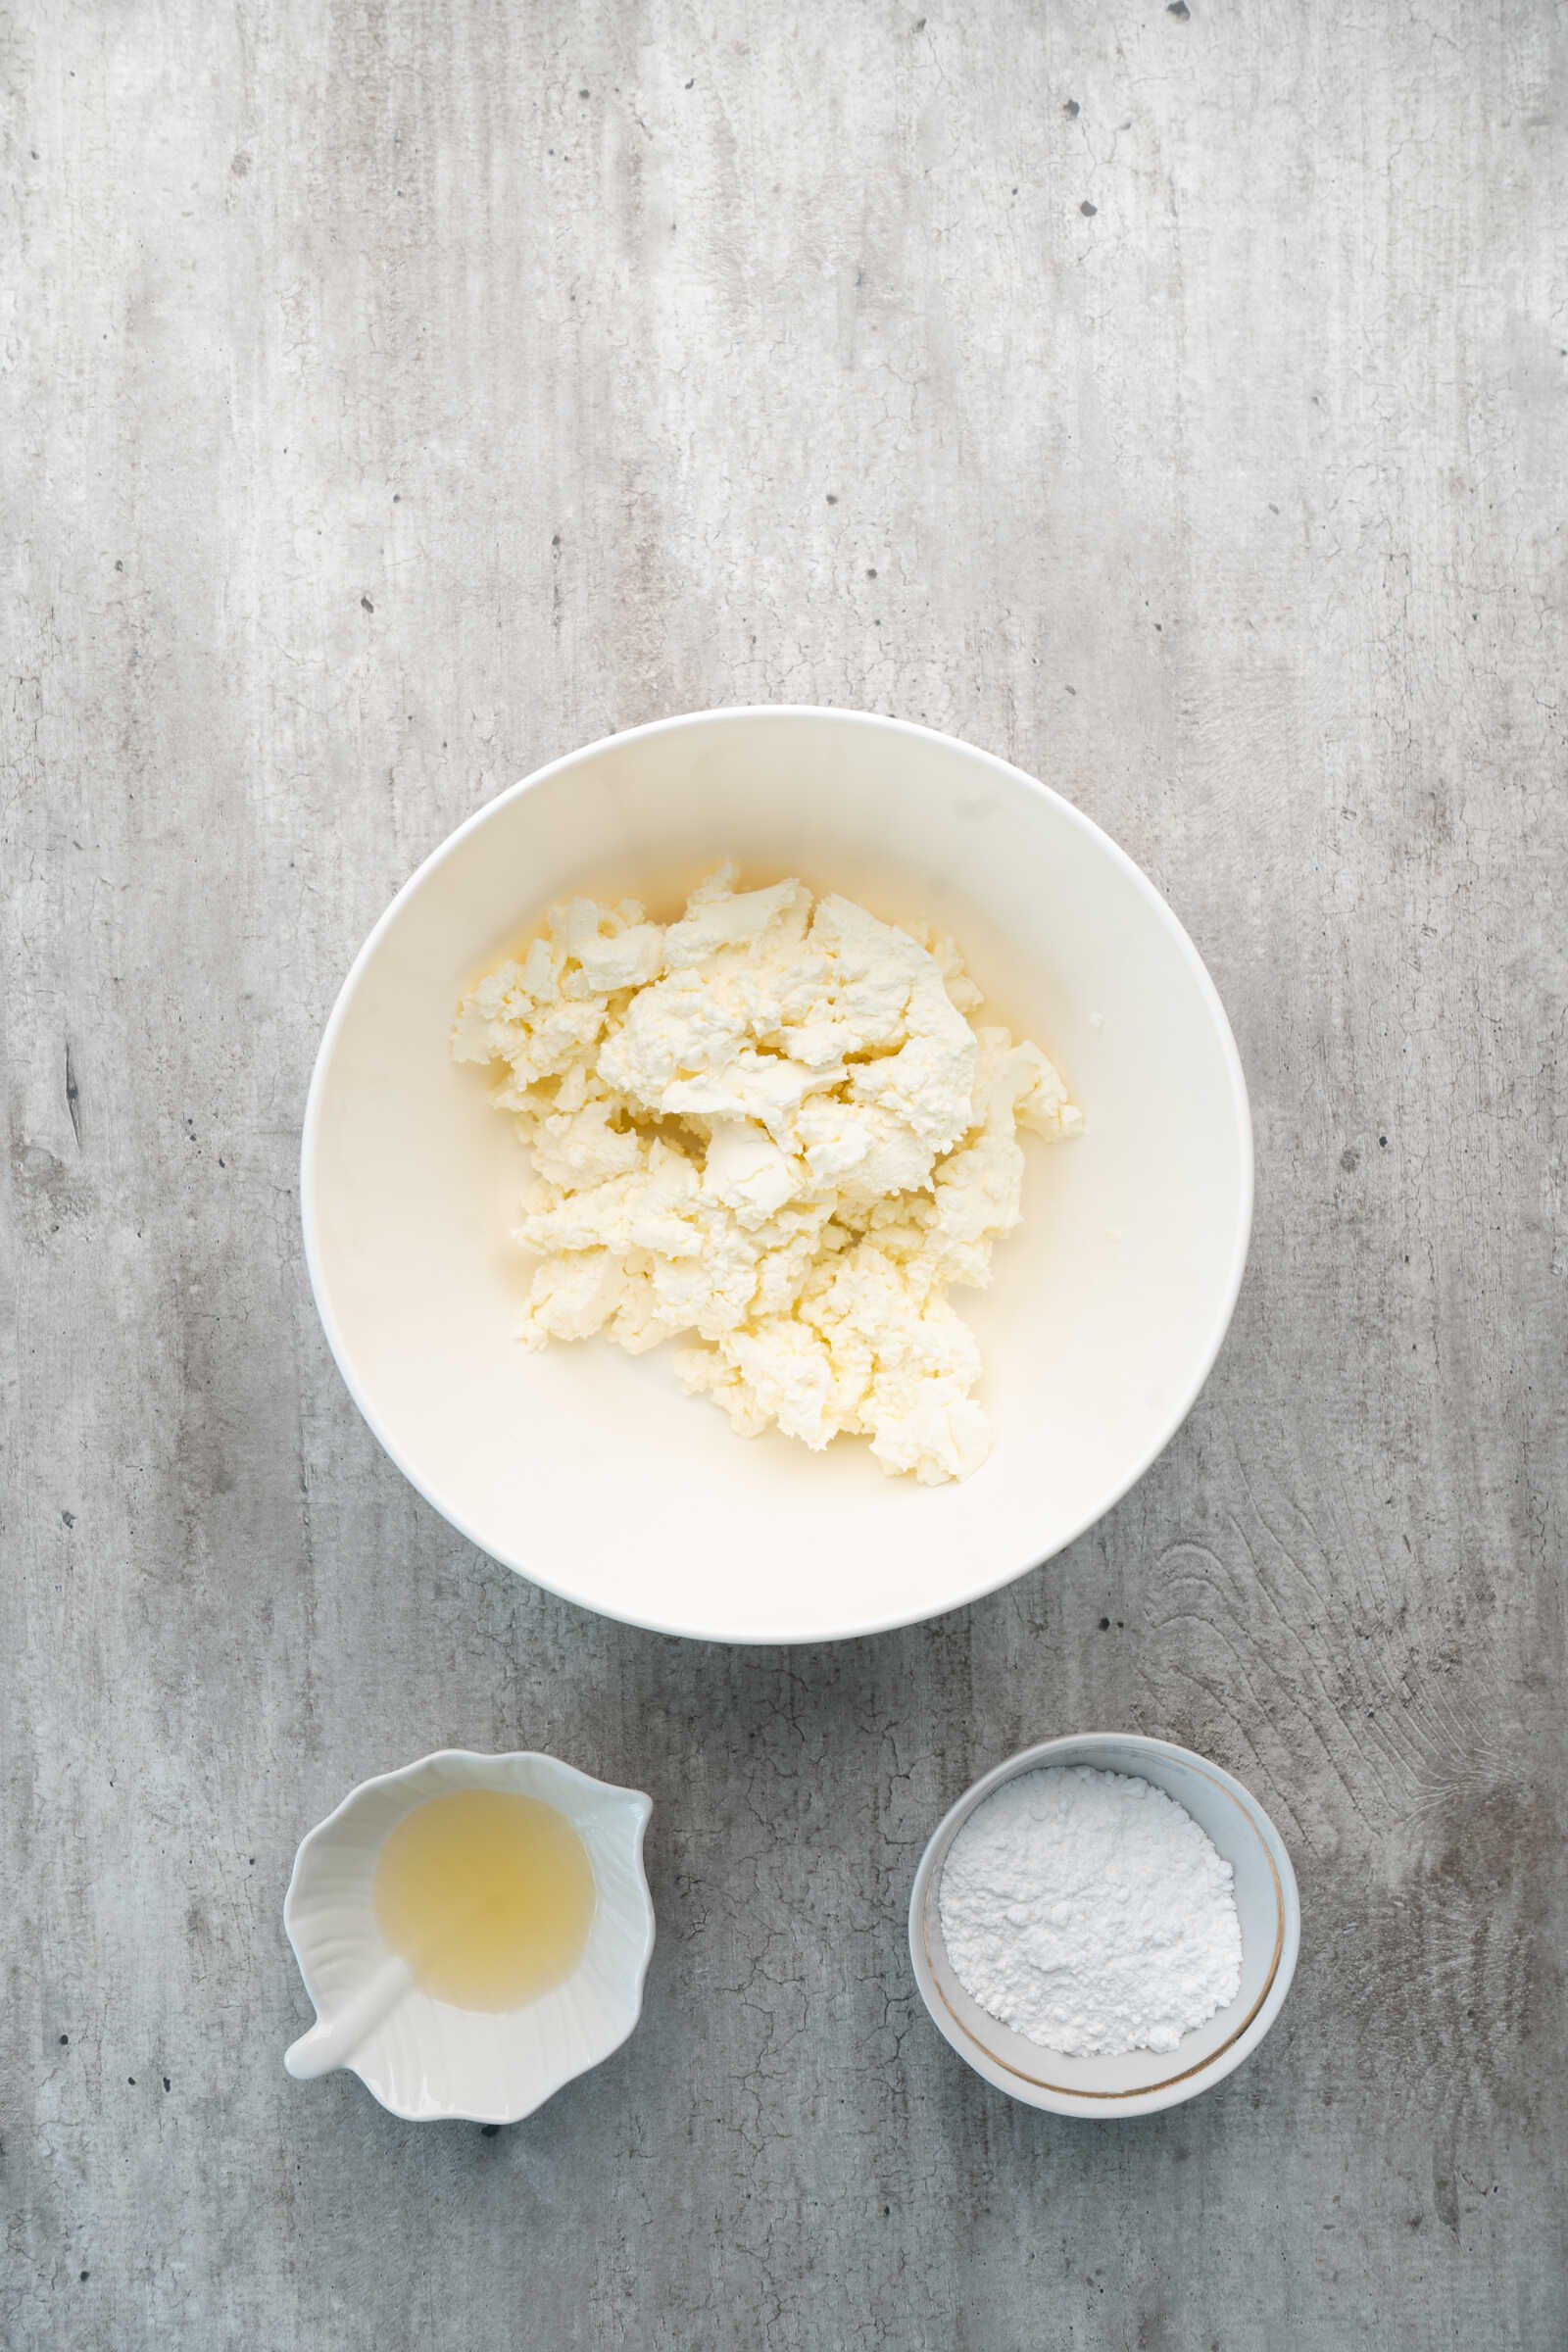
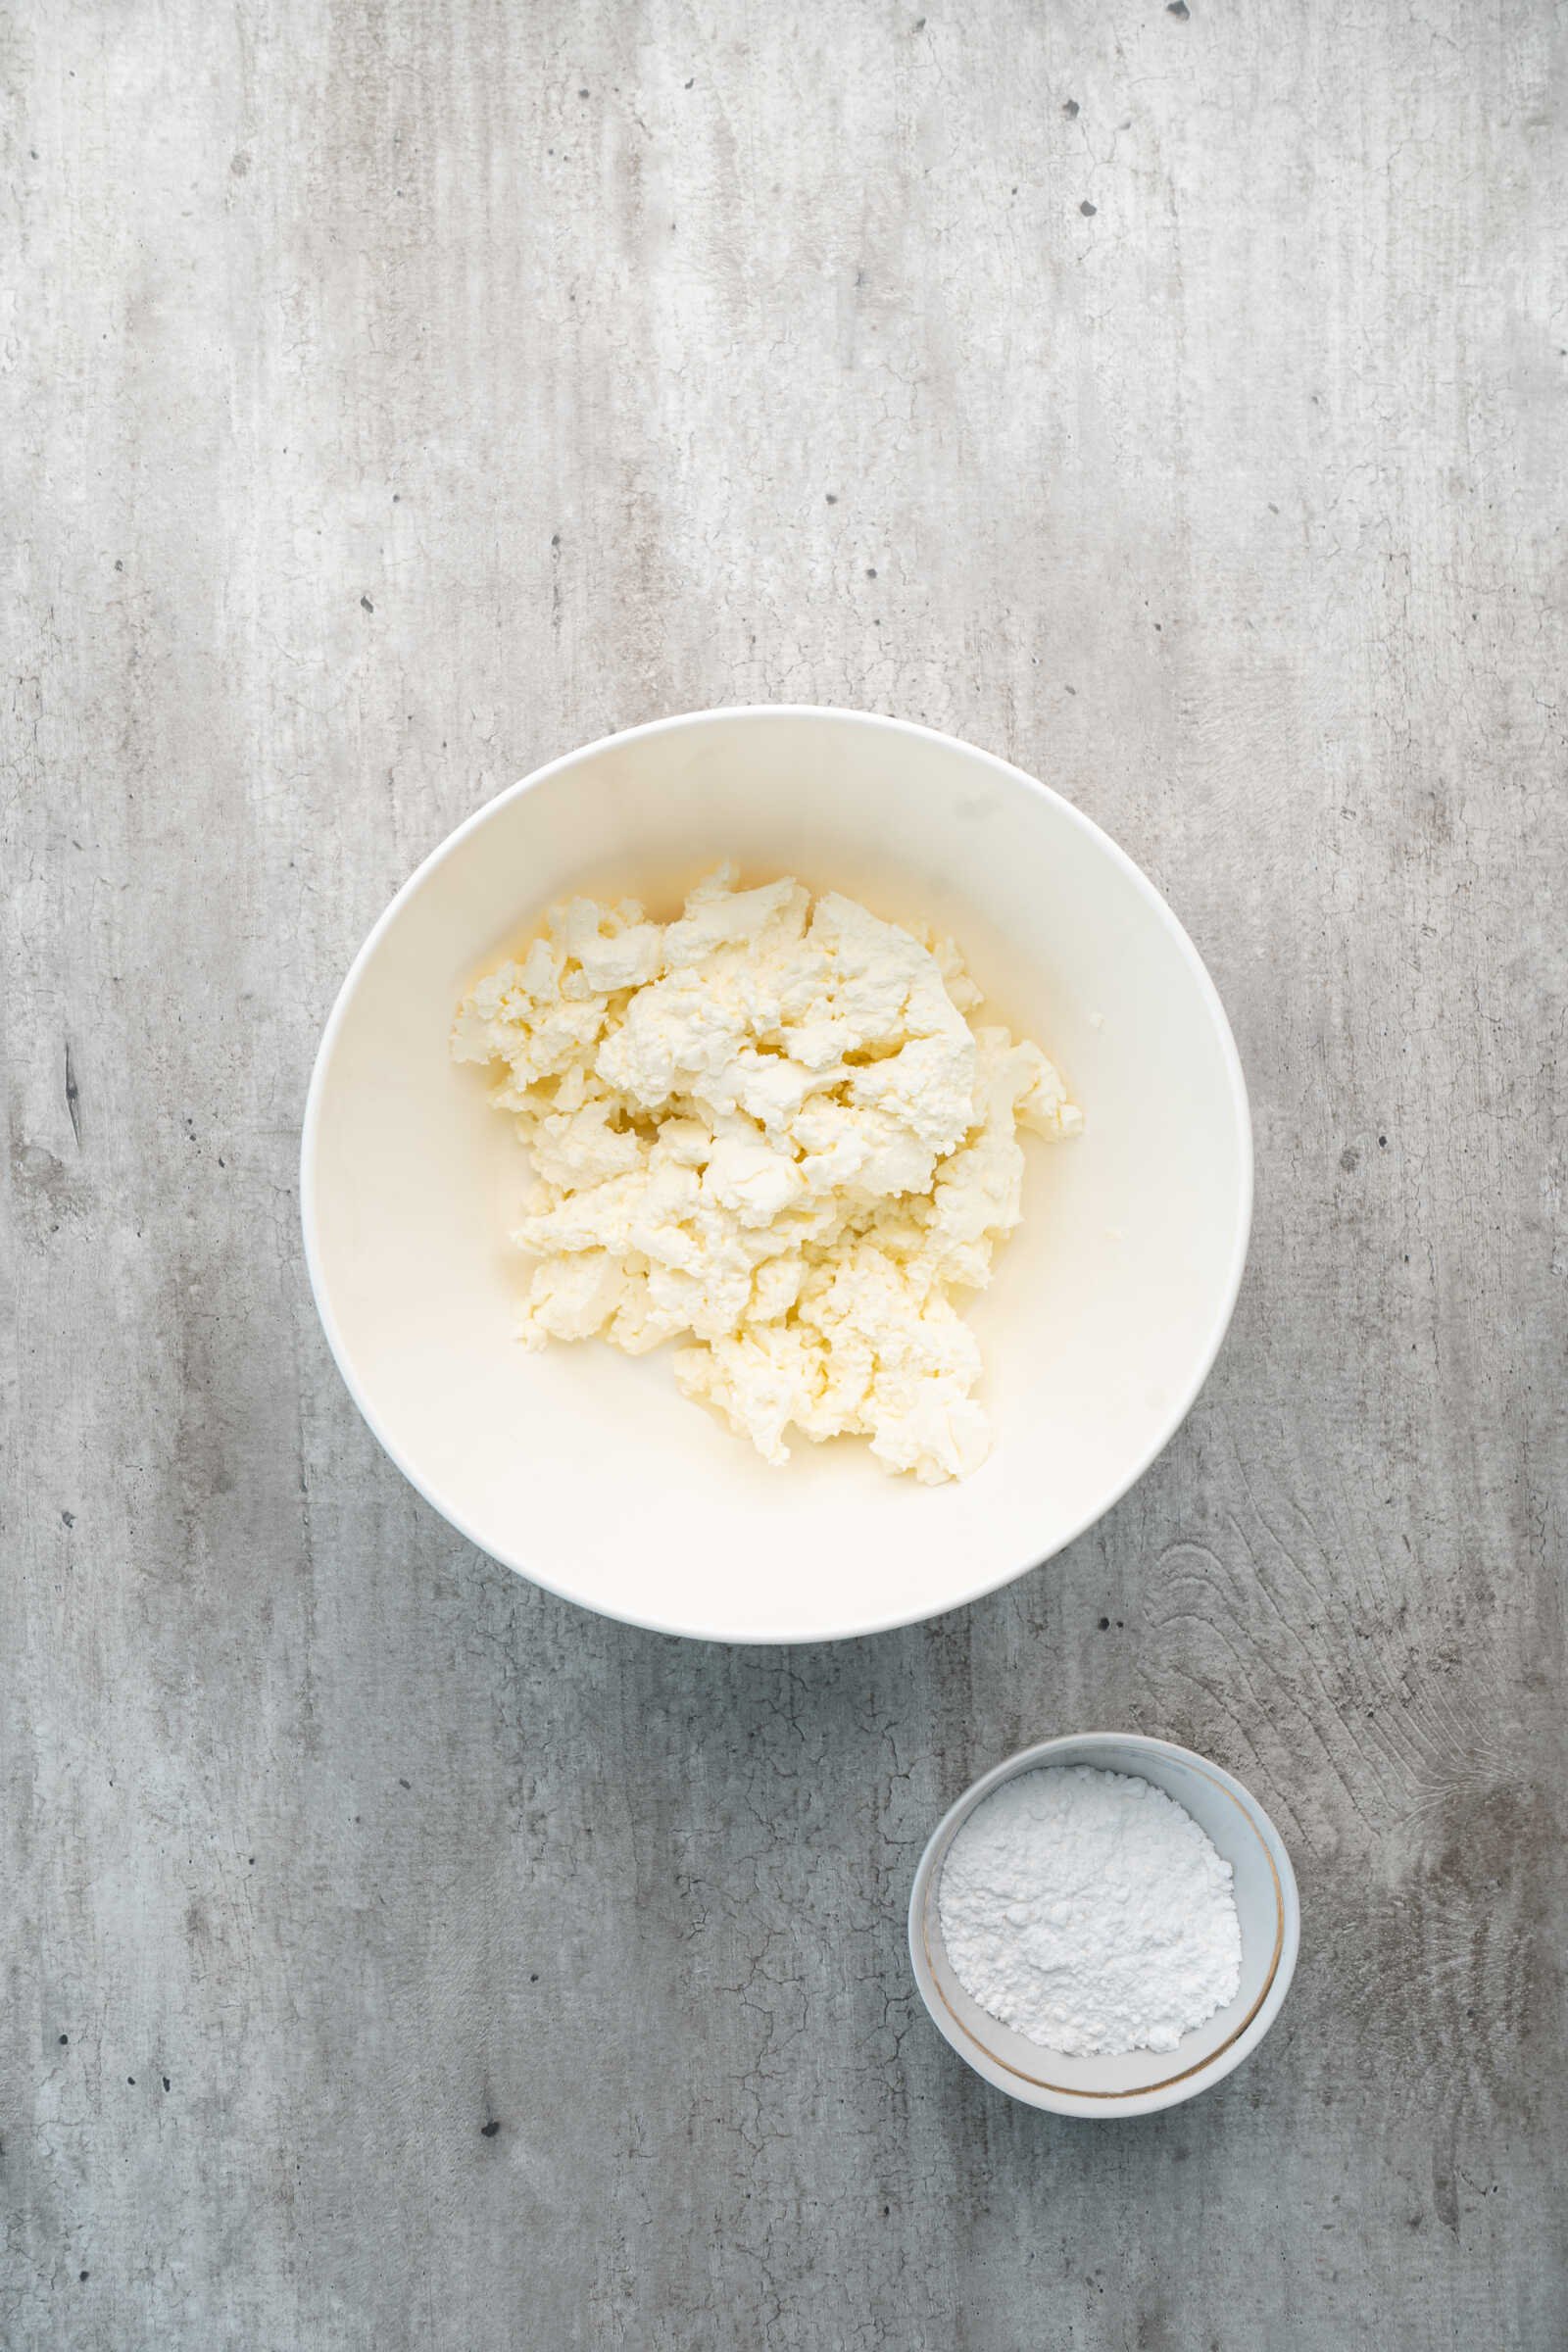
- 12 oz cream cheese, softened at room temperature
- 4 teaspoons fresh lemon juice
- ½ cup powdered sugar
- ½ cup heavy cream
- 1 teaspoon vanilla extract
- 1 drop gel food coloring of your choice
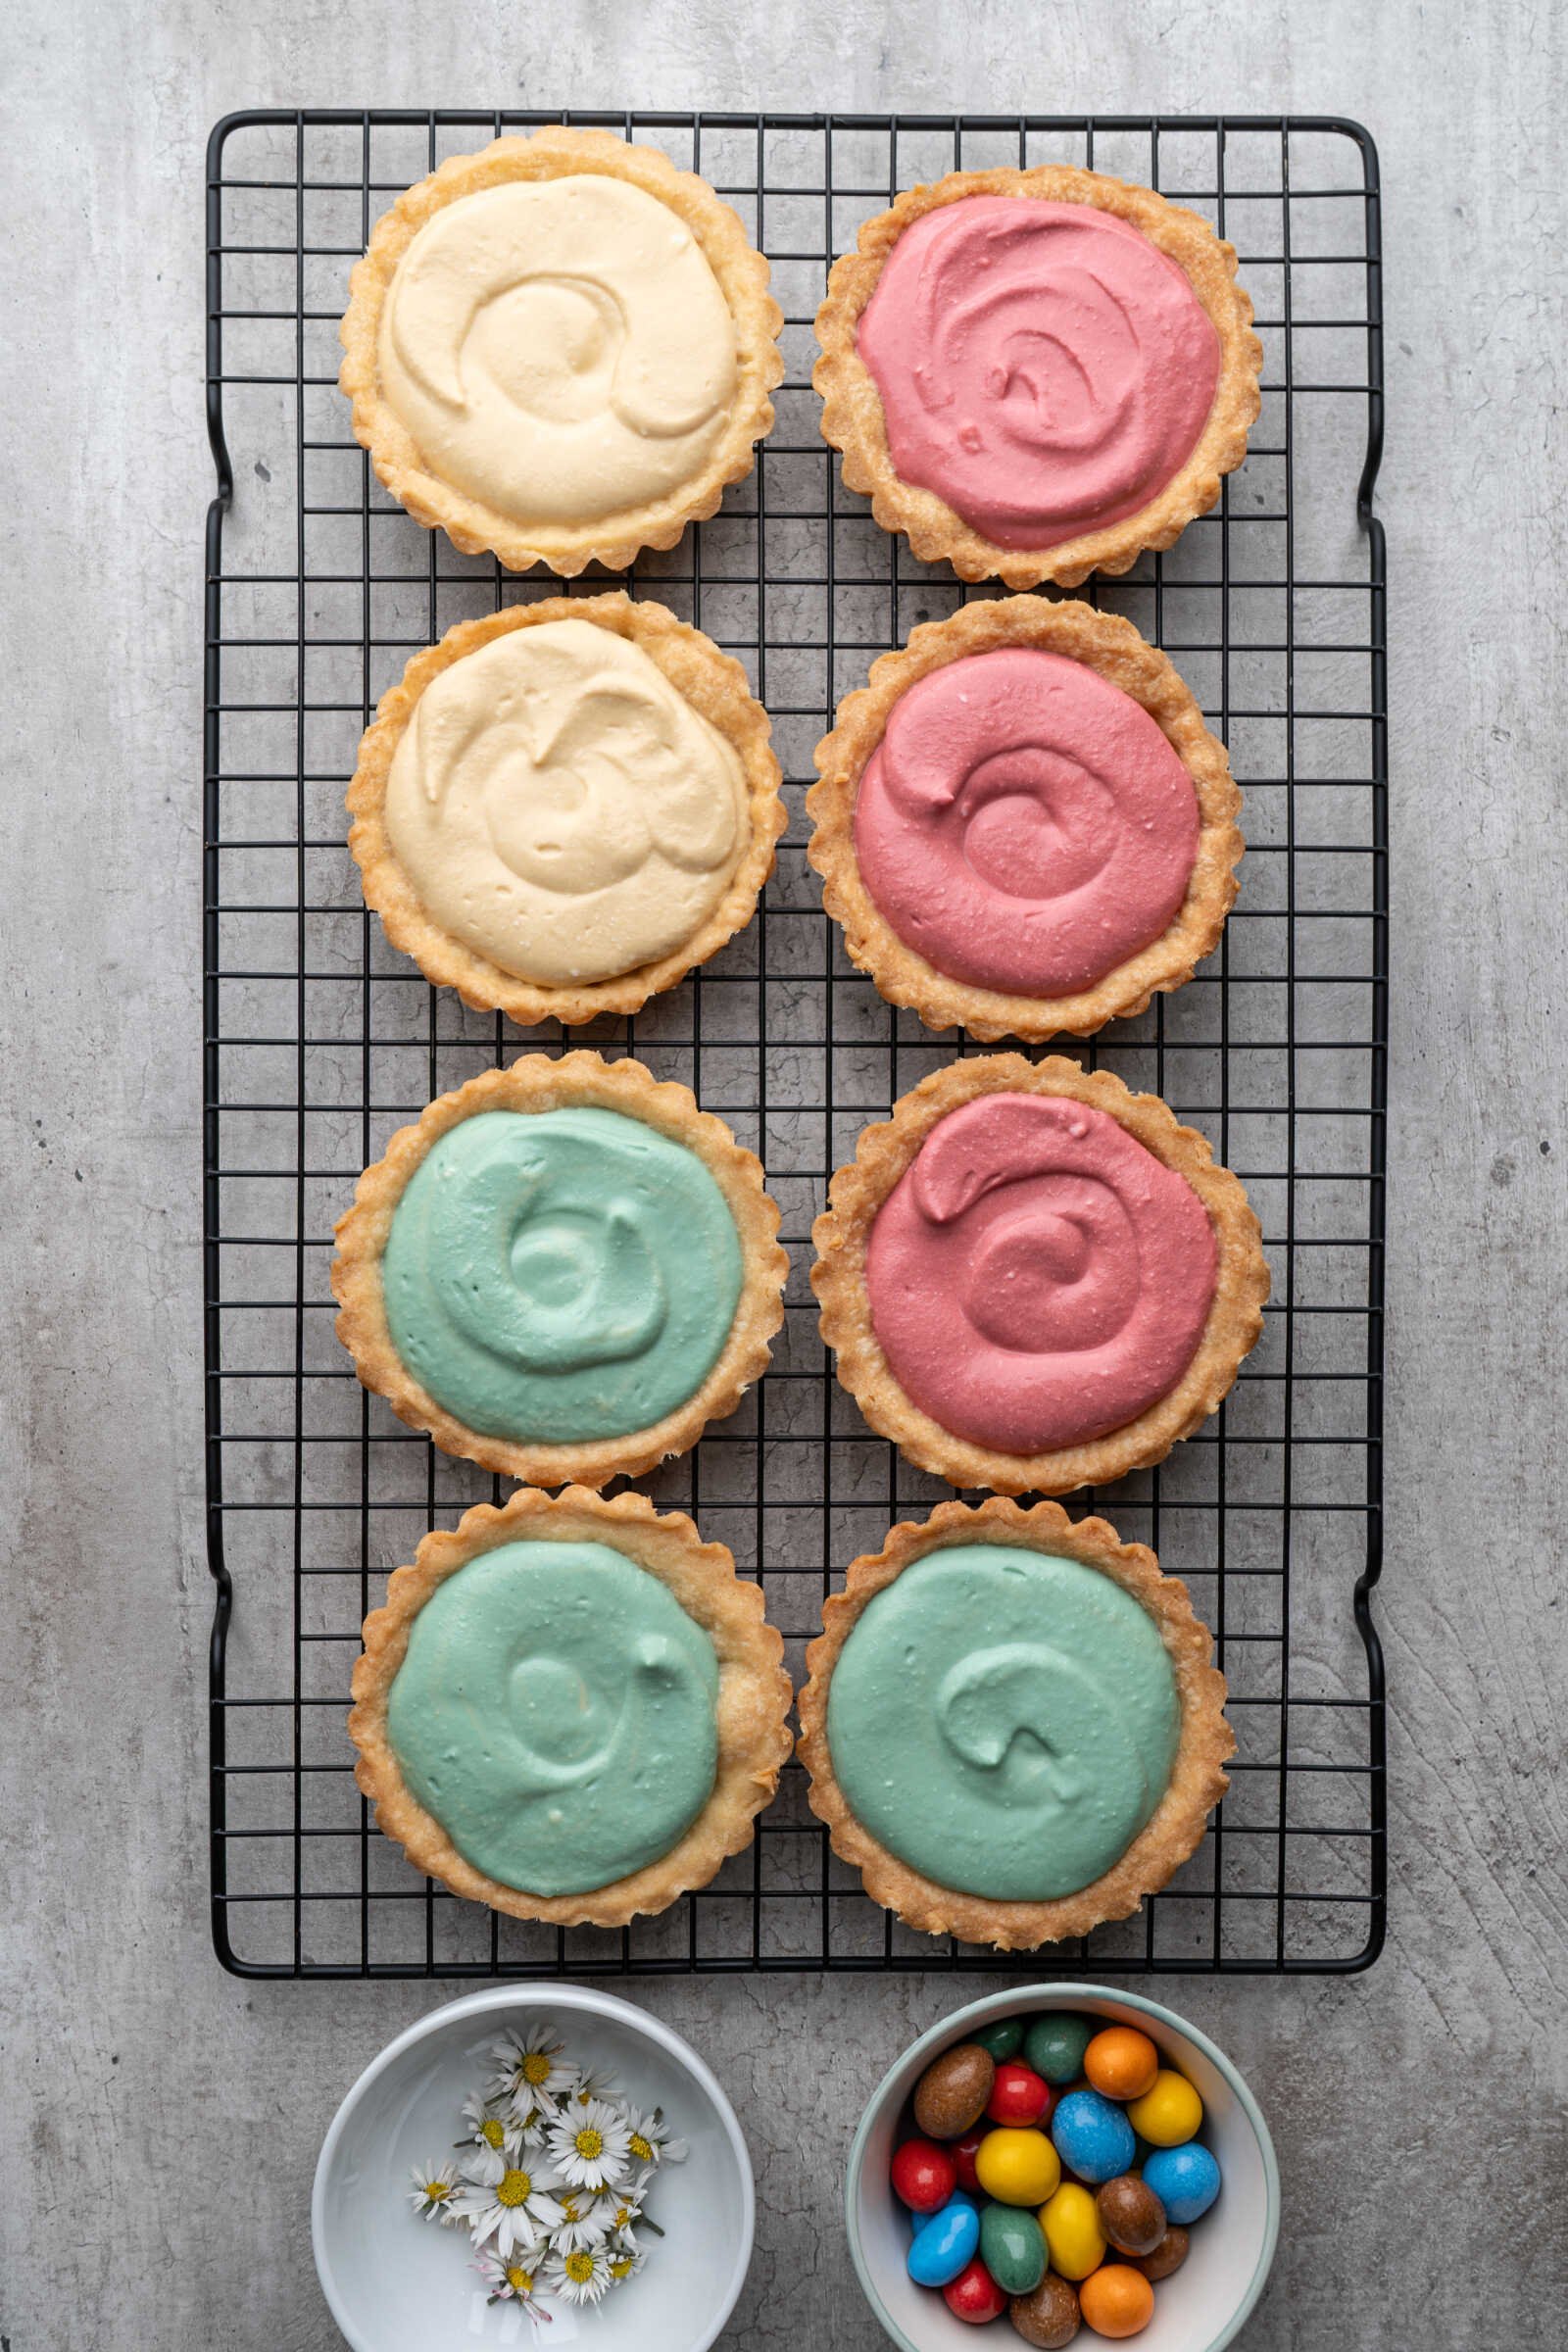
Optional Garnishes
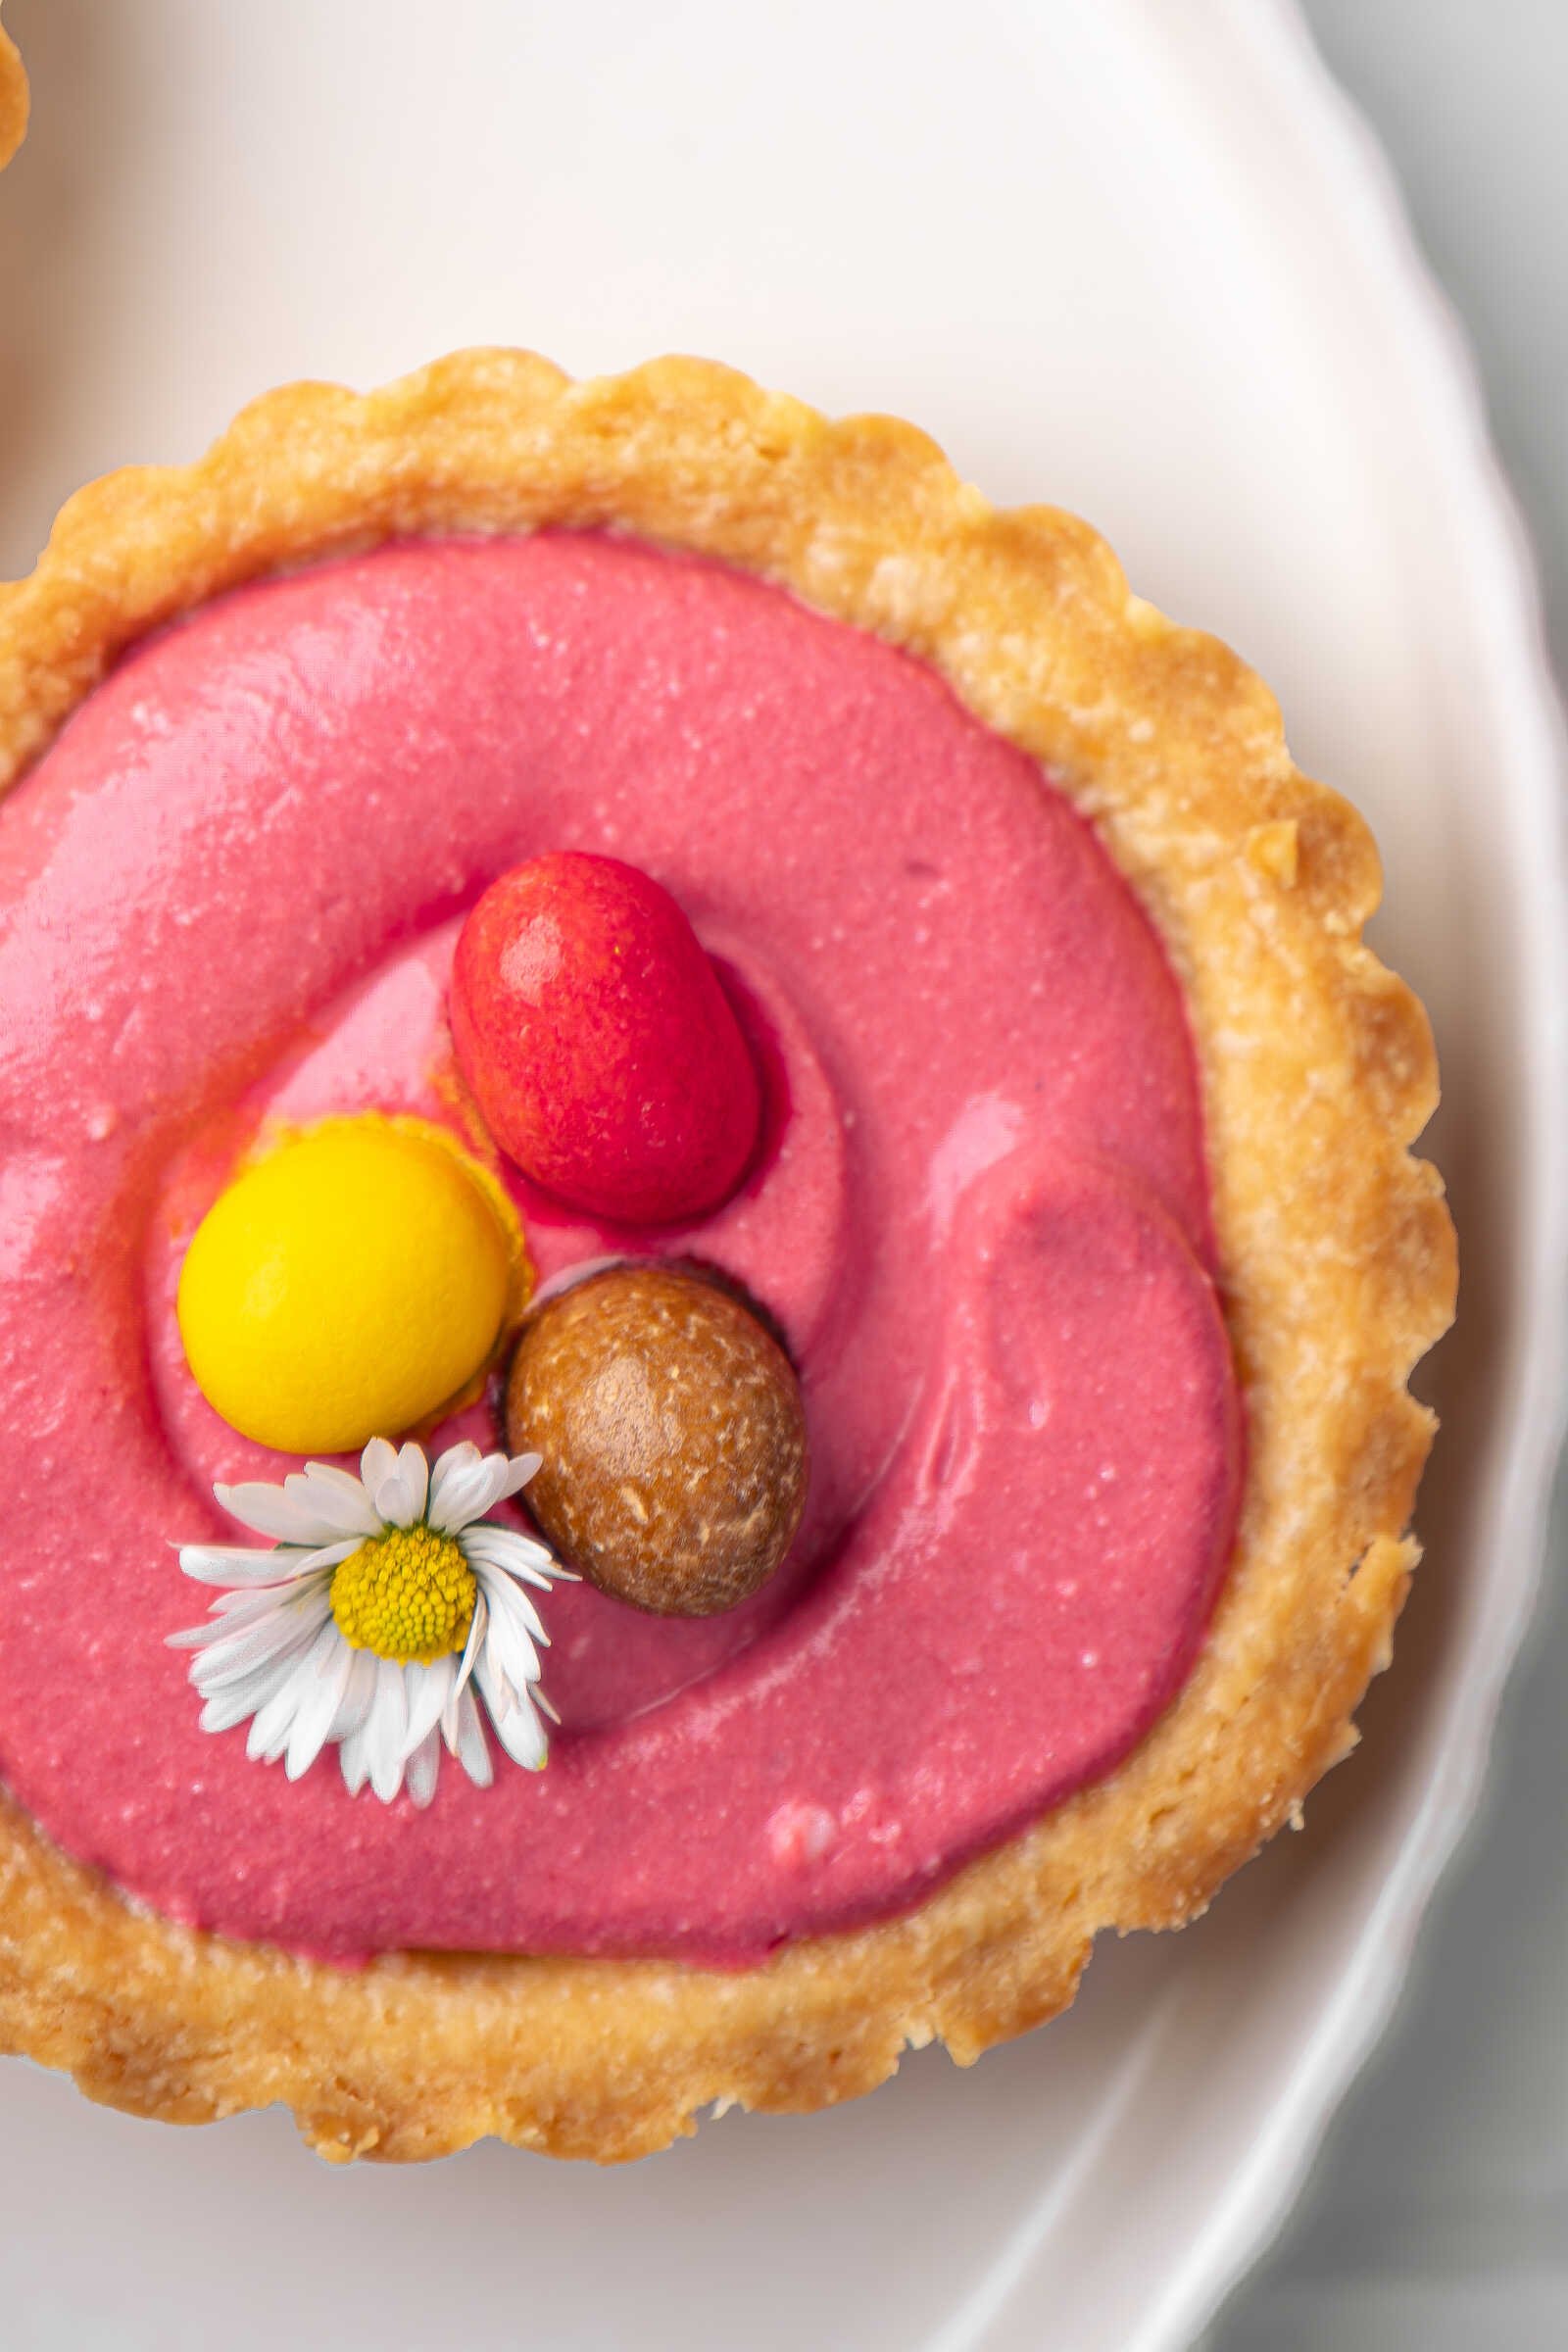
- Mini Easter chocolate eggs
- Edible flowers
- Pastel sprinkles
- Fresh berries
Step-by-Step Instructions
1. Prepare the Sweet Short Pastry Dough
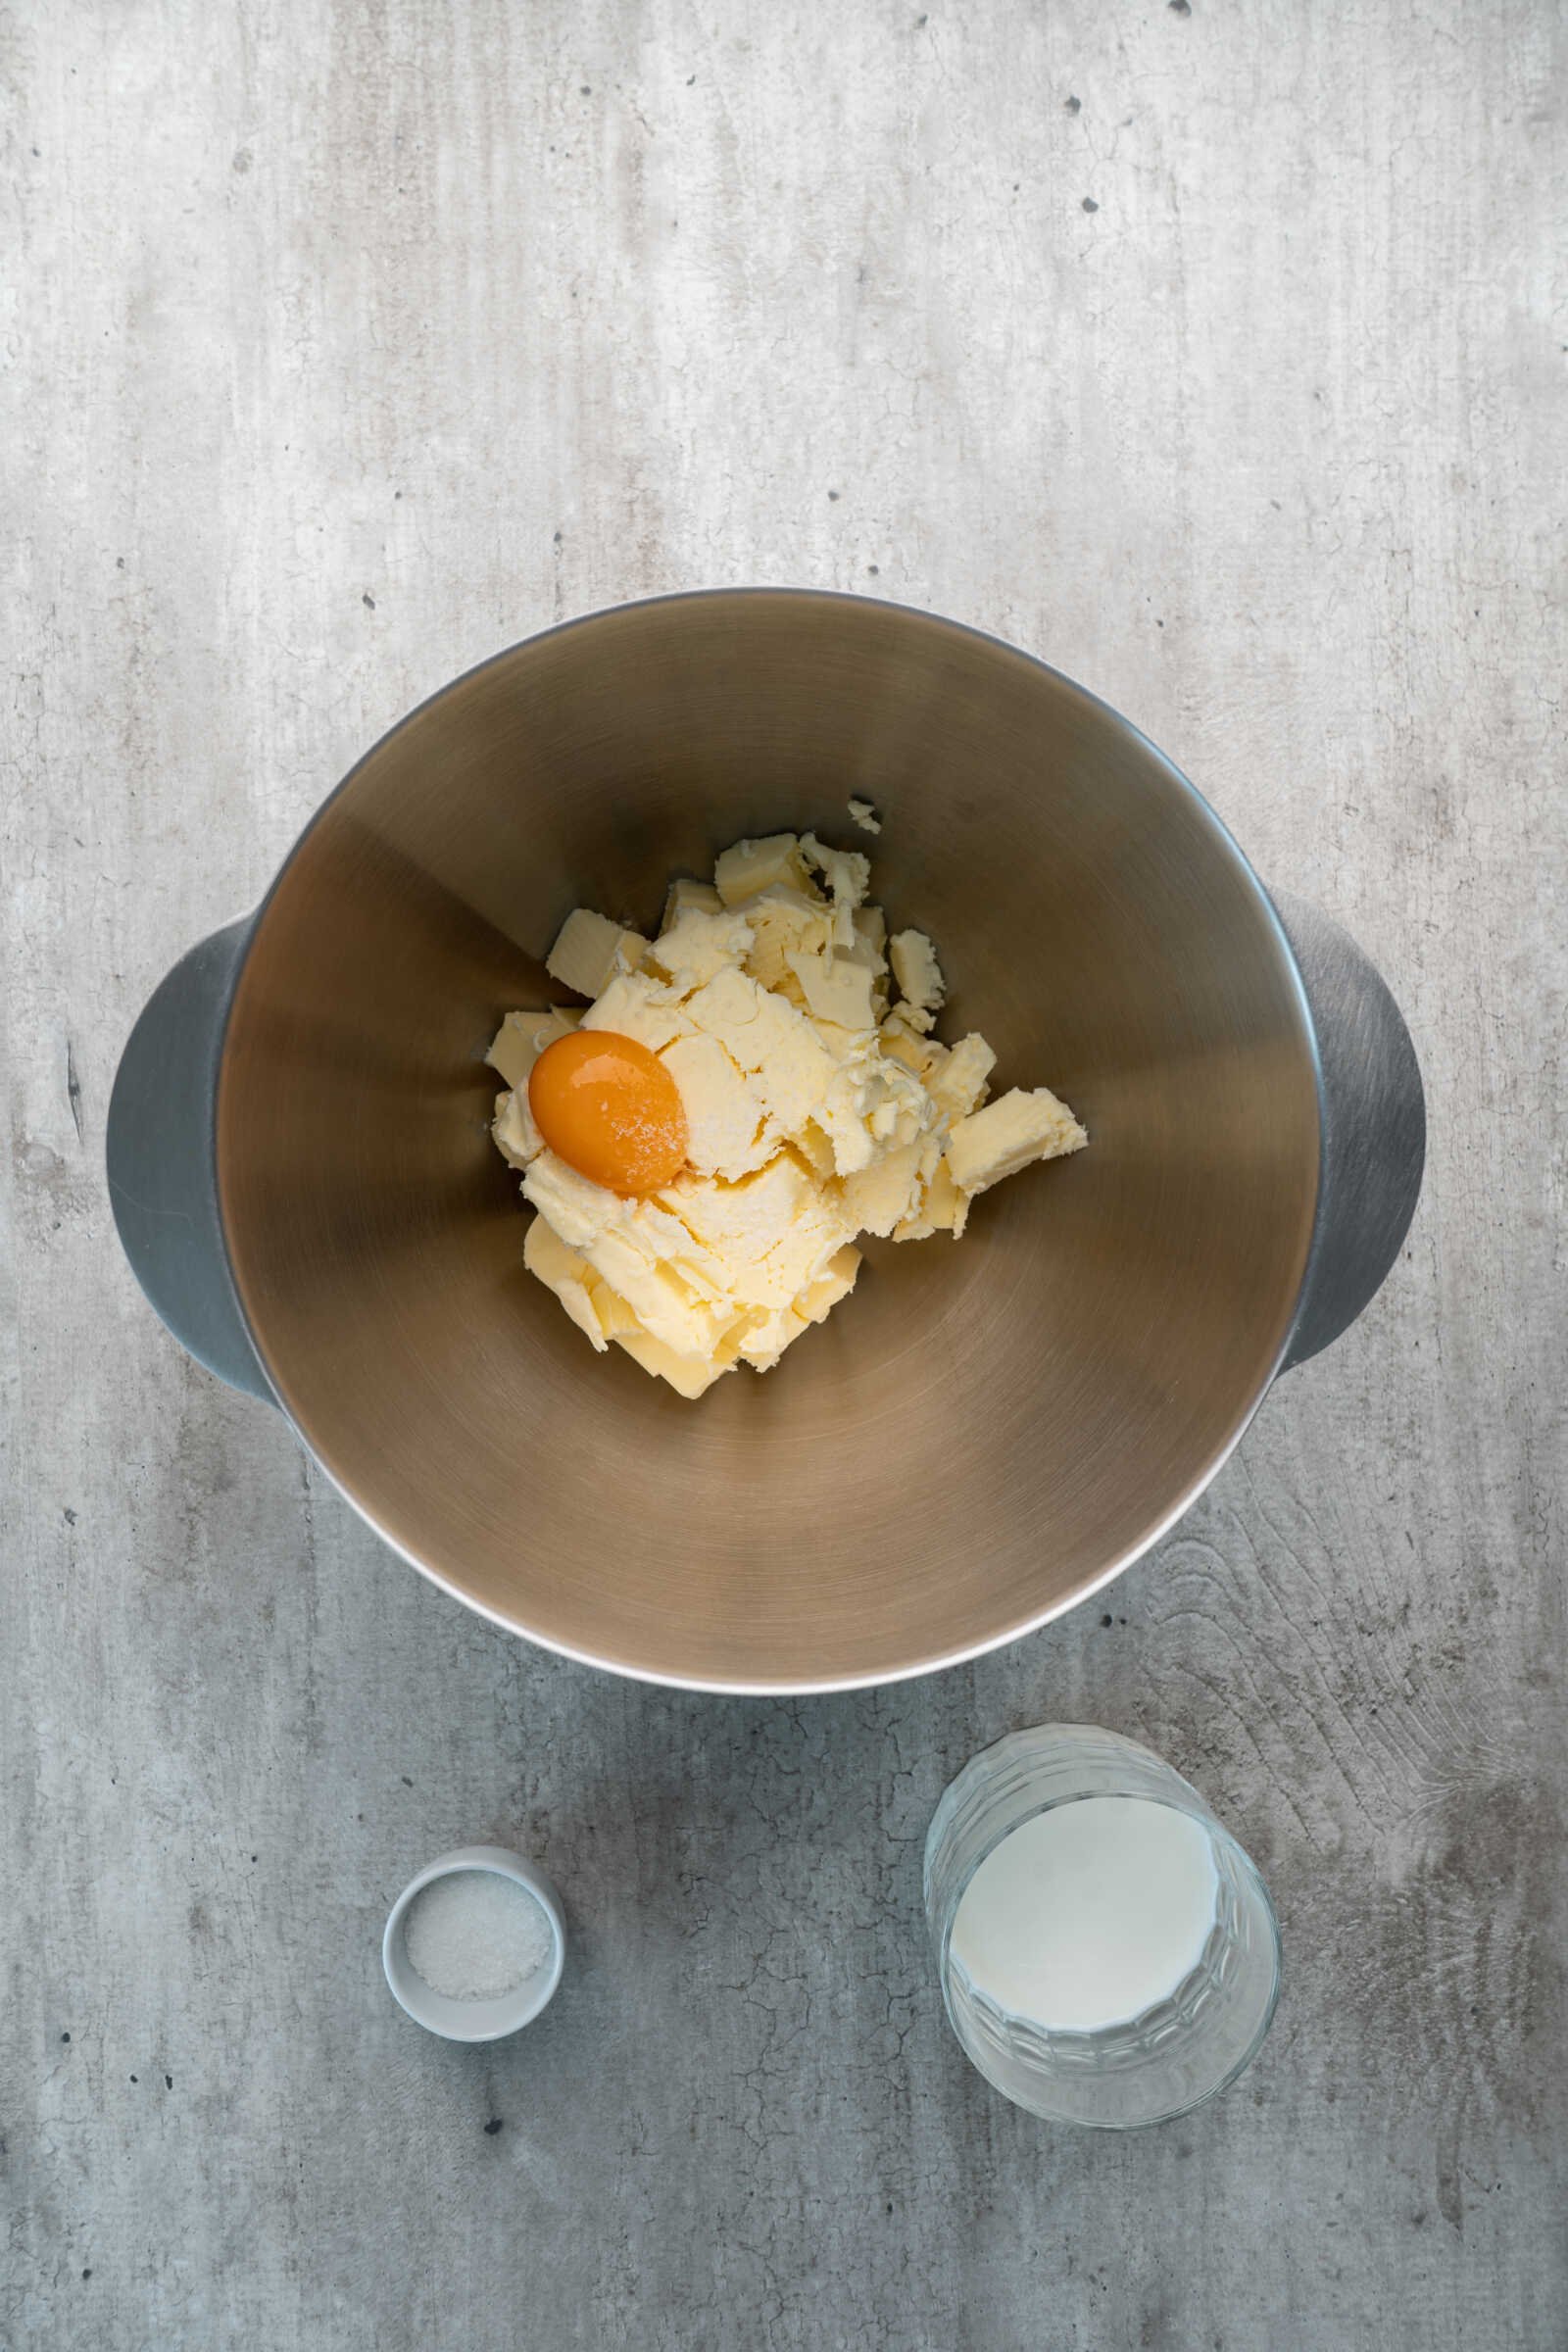
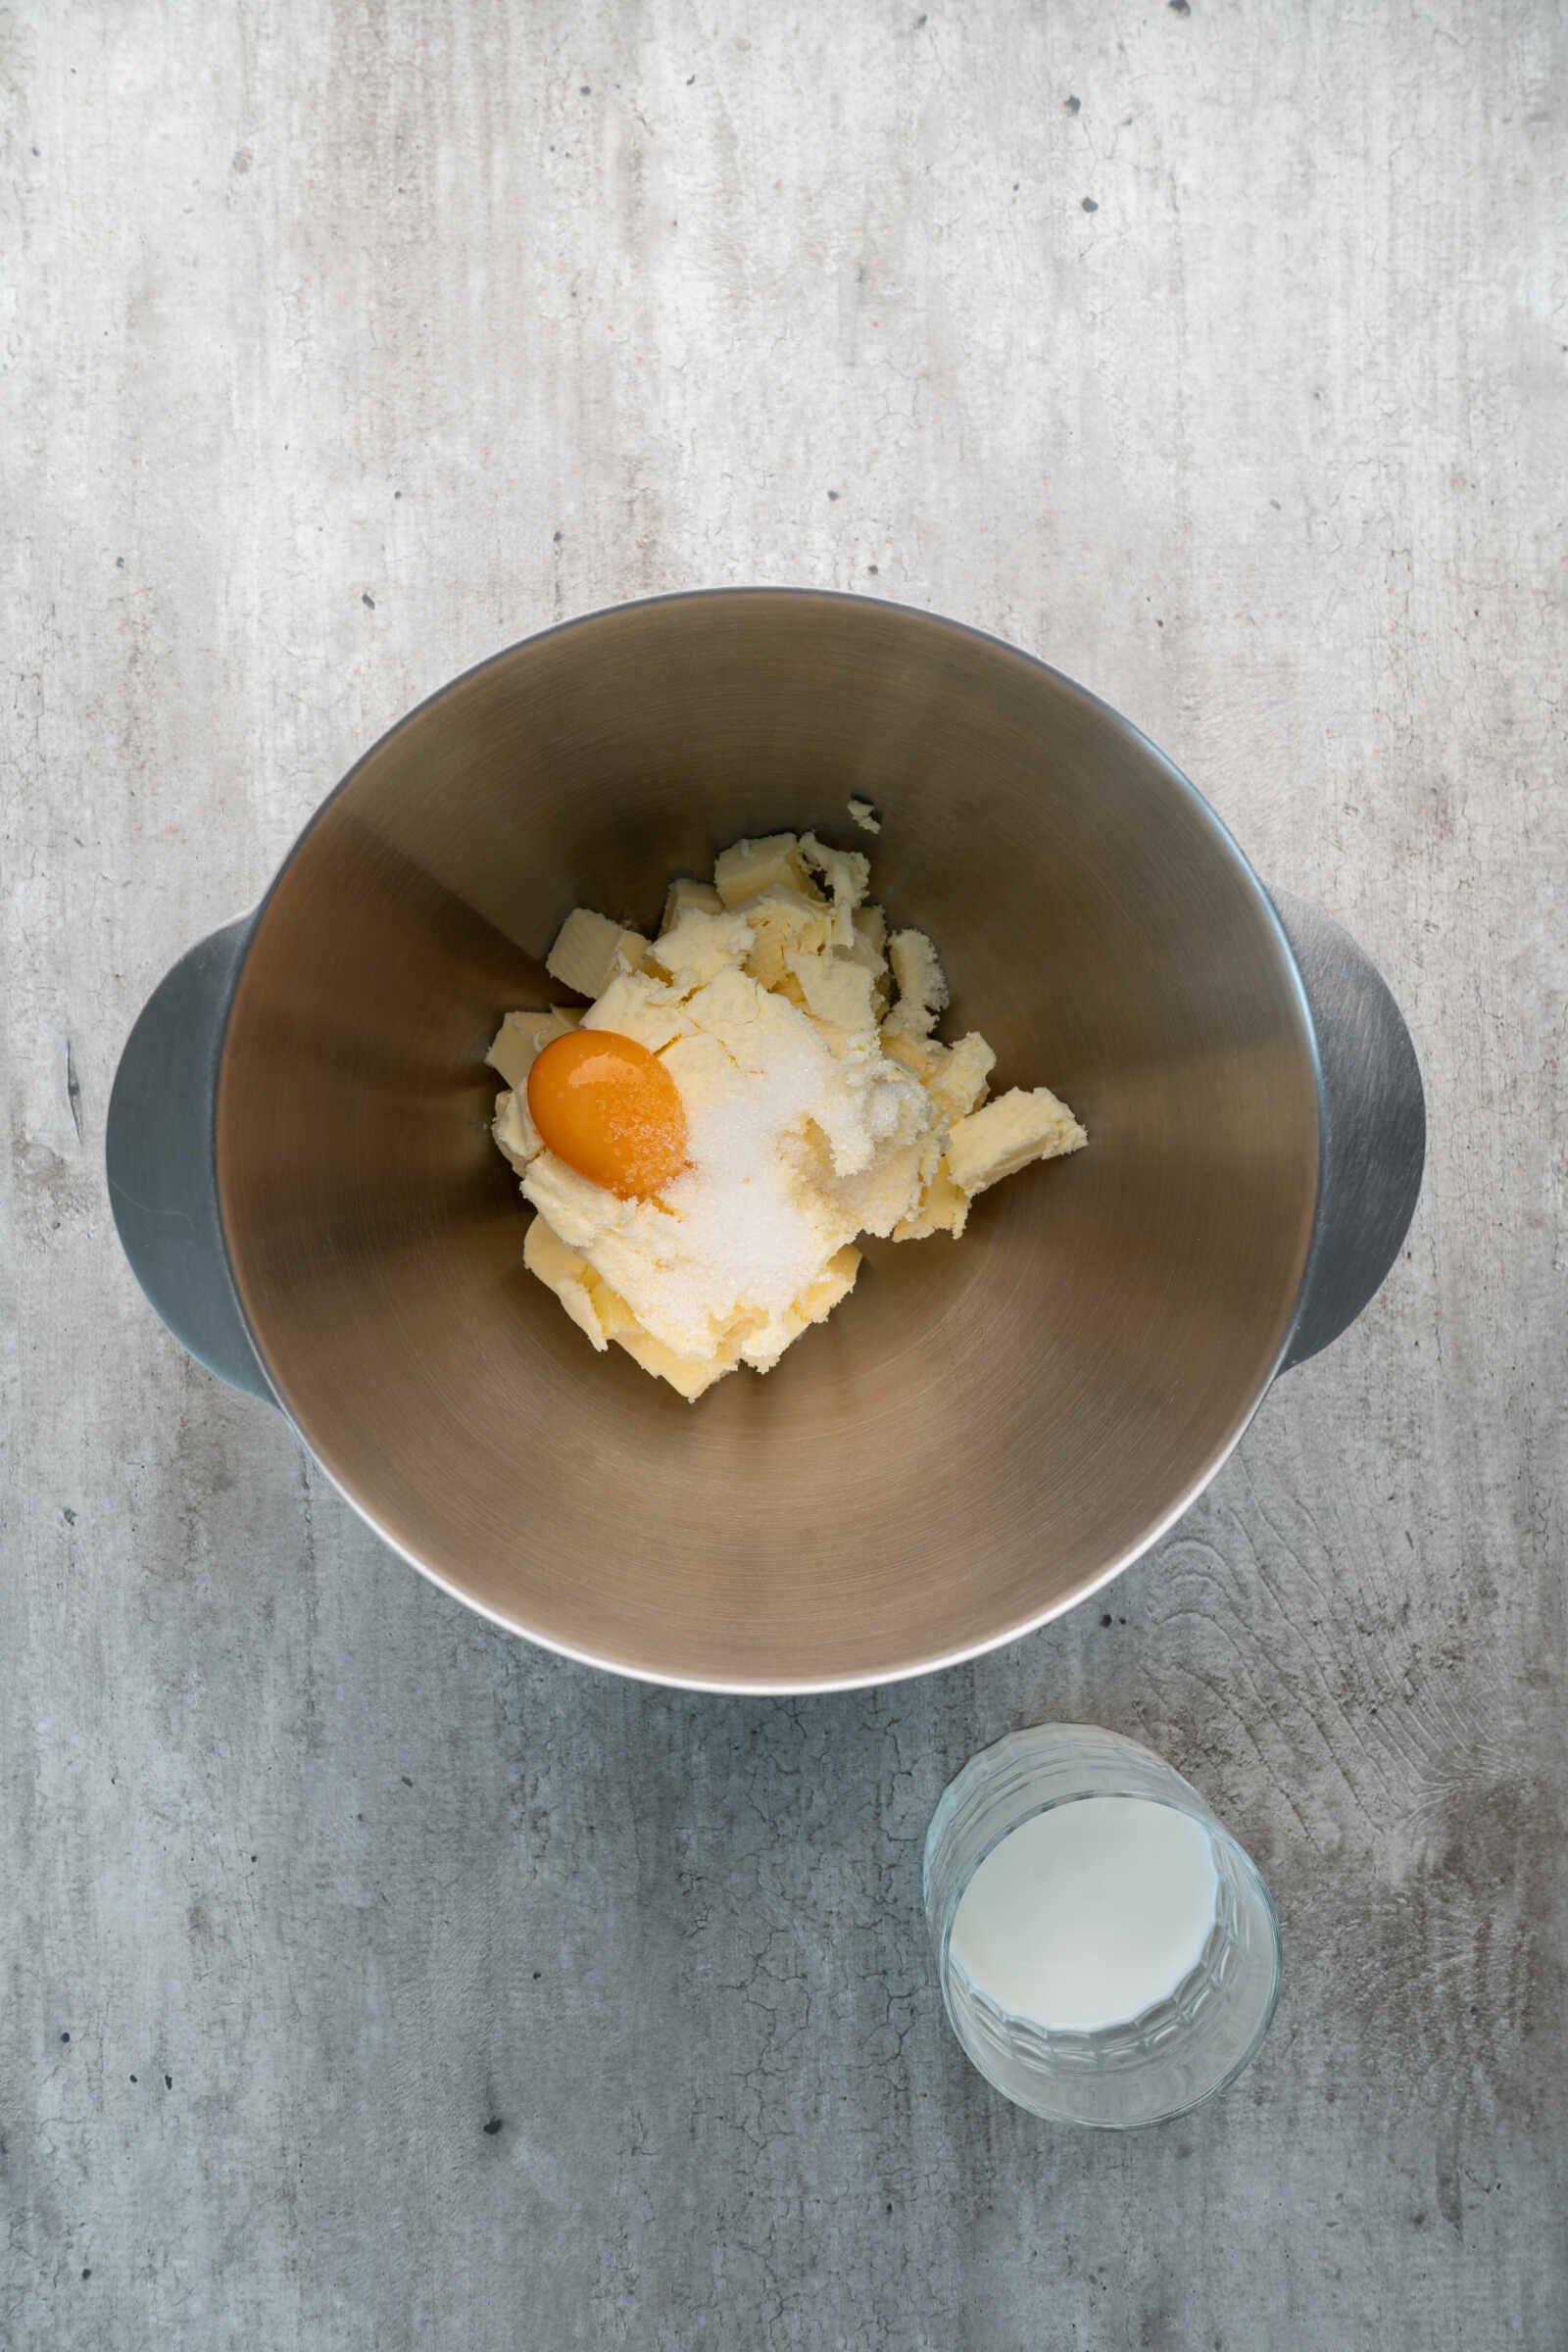
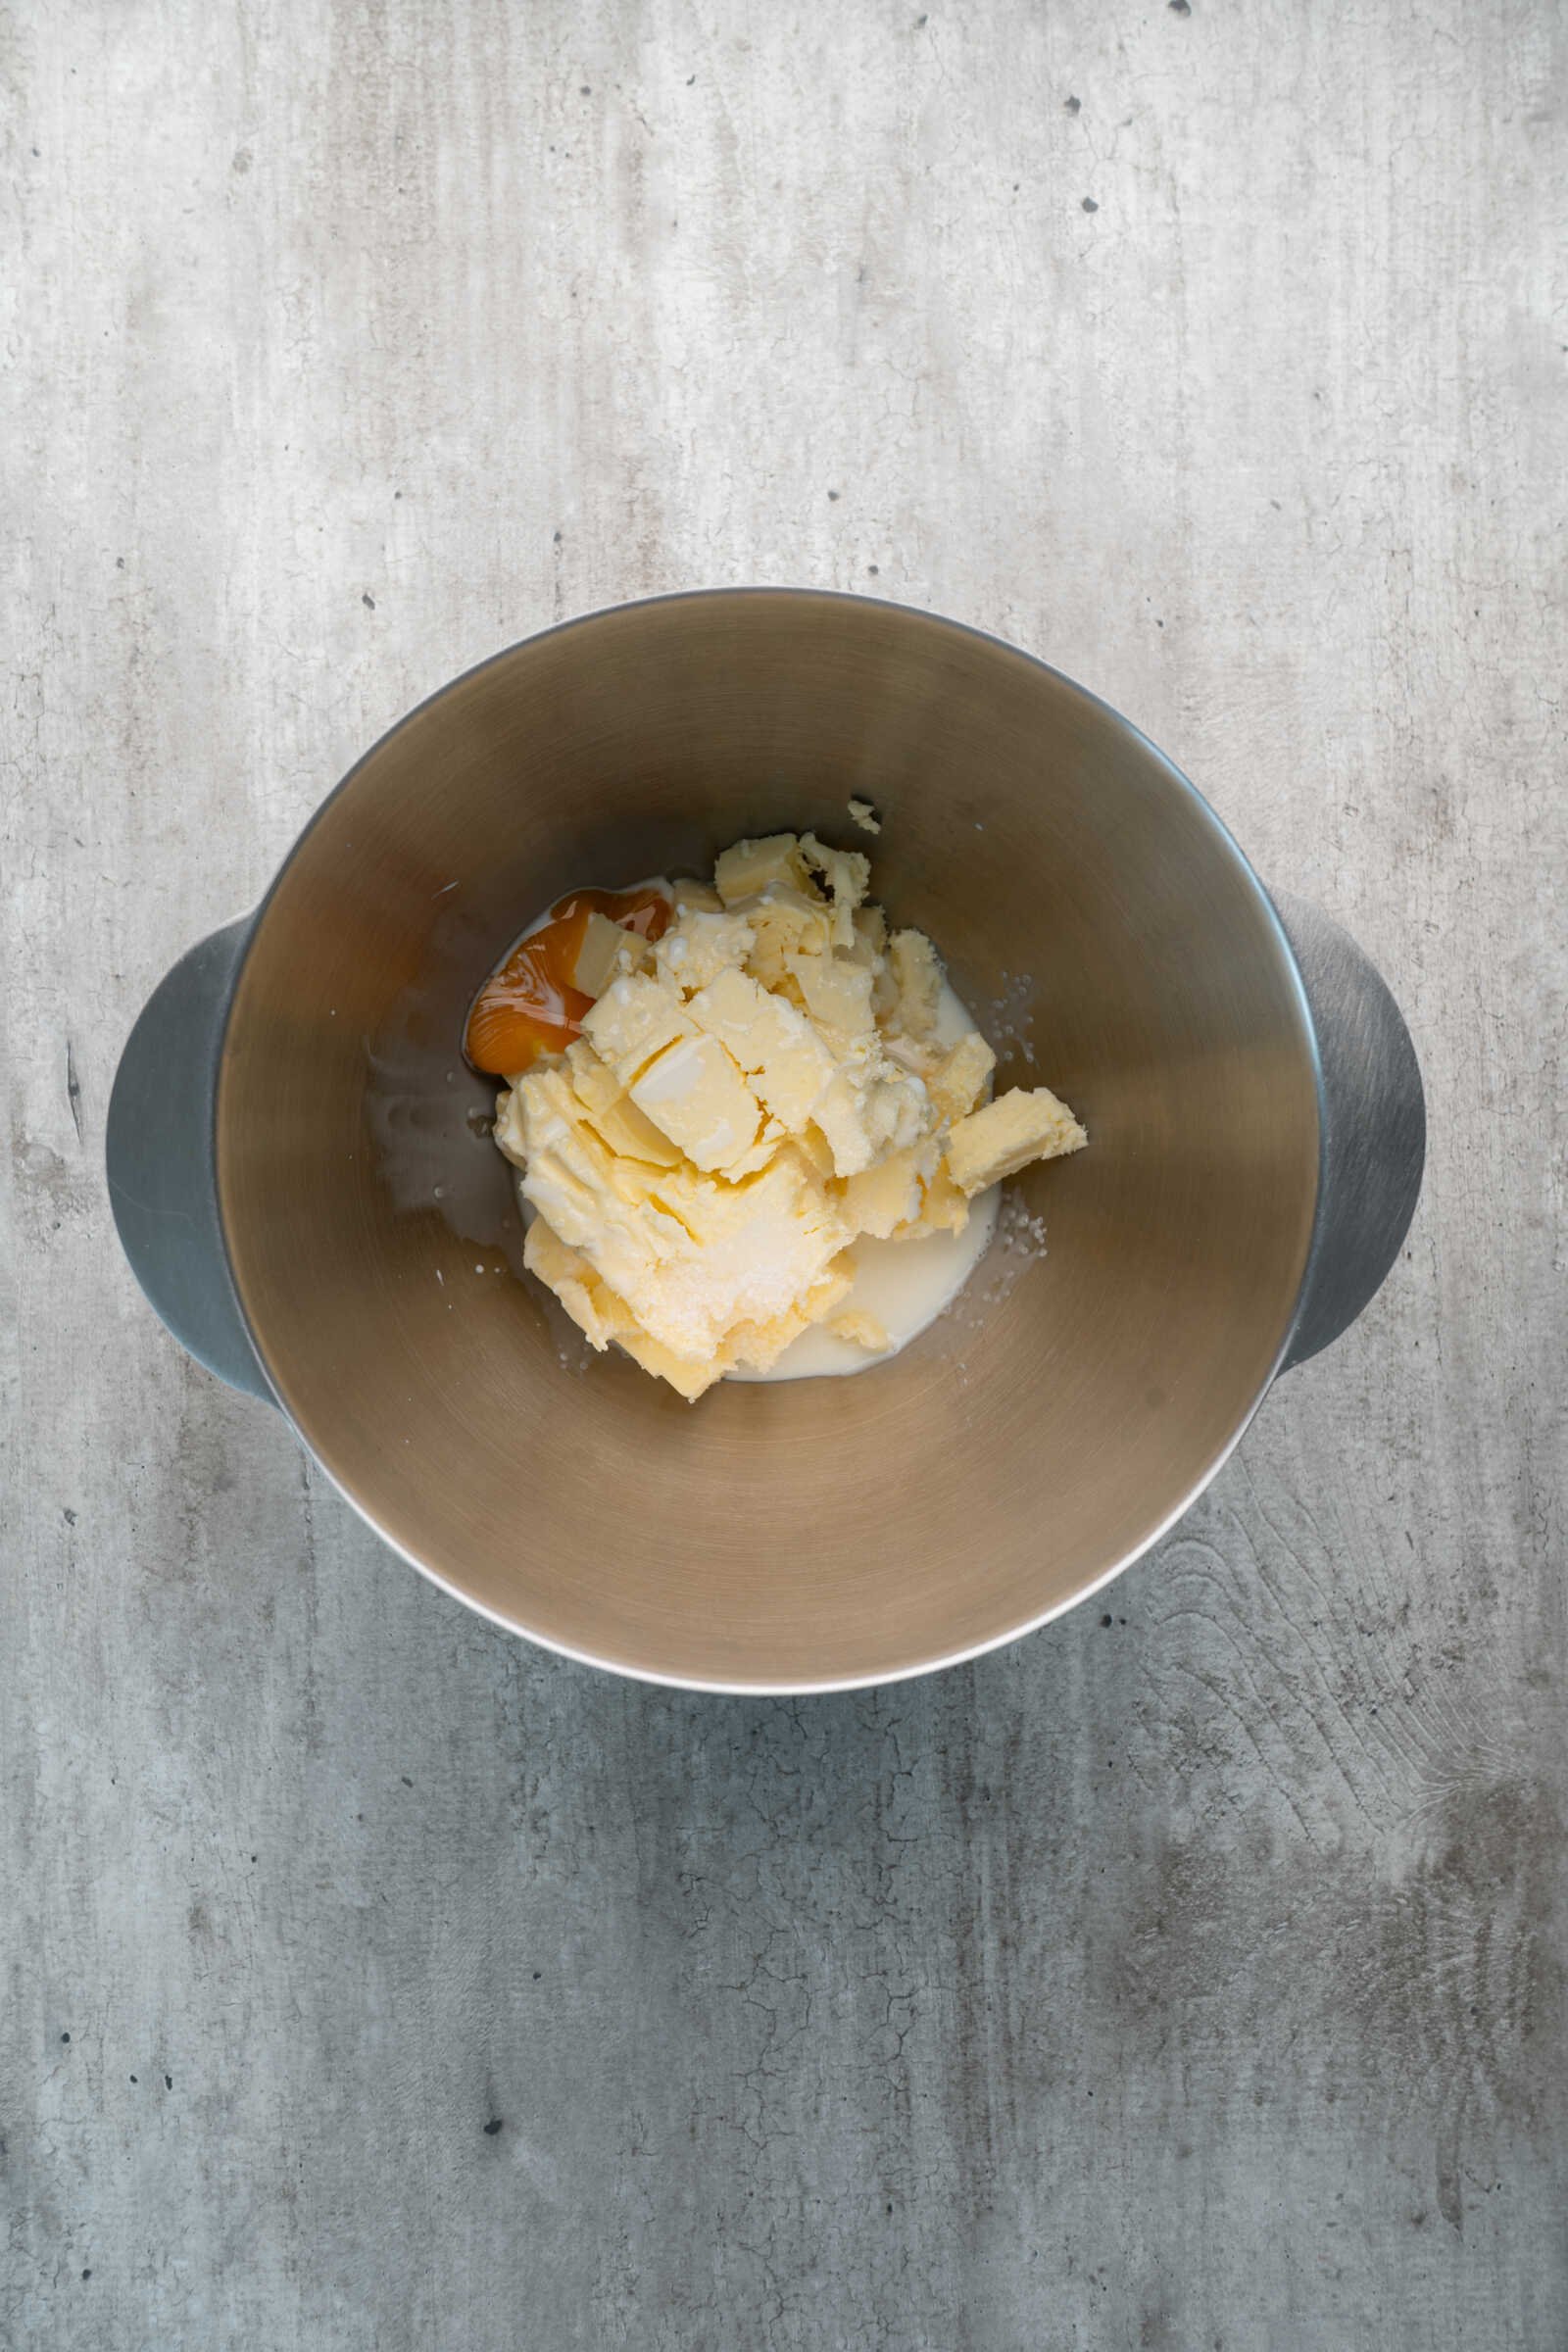
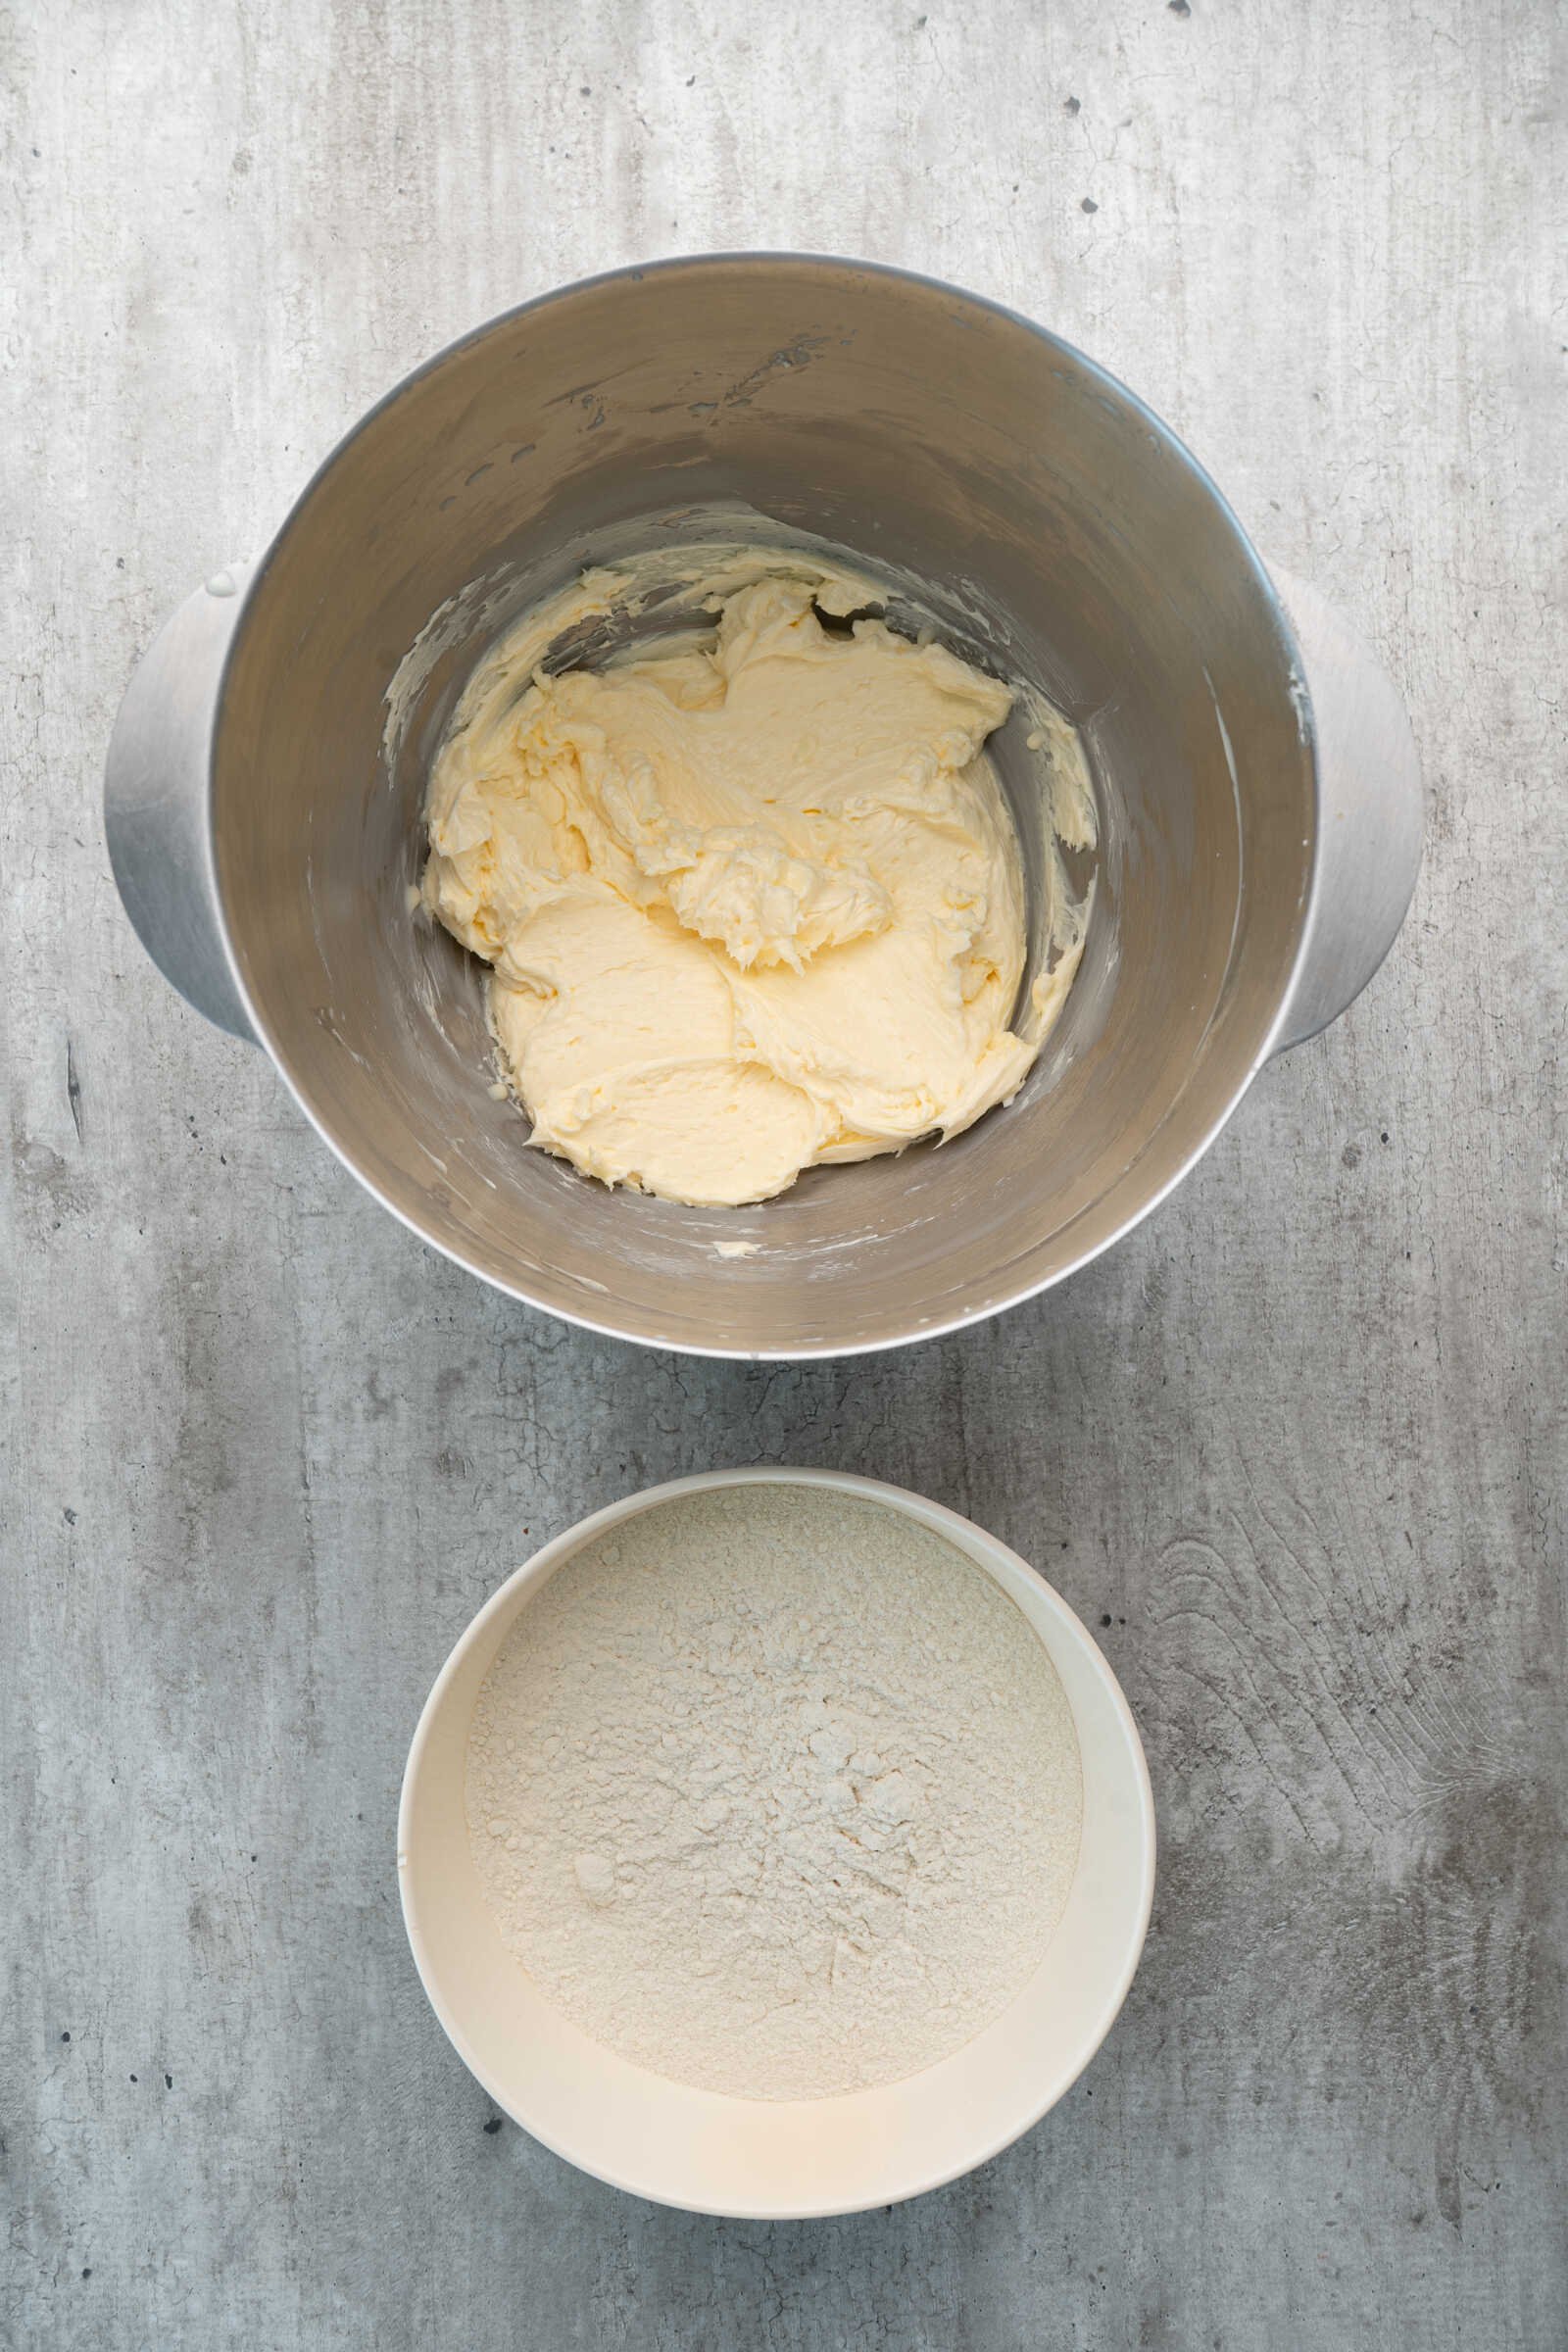
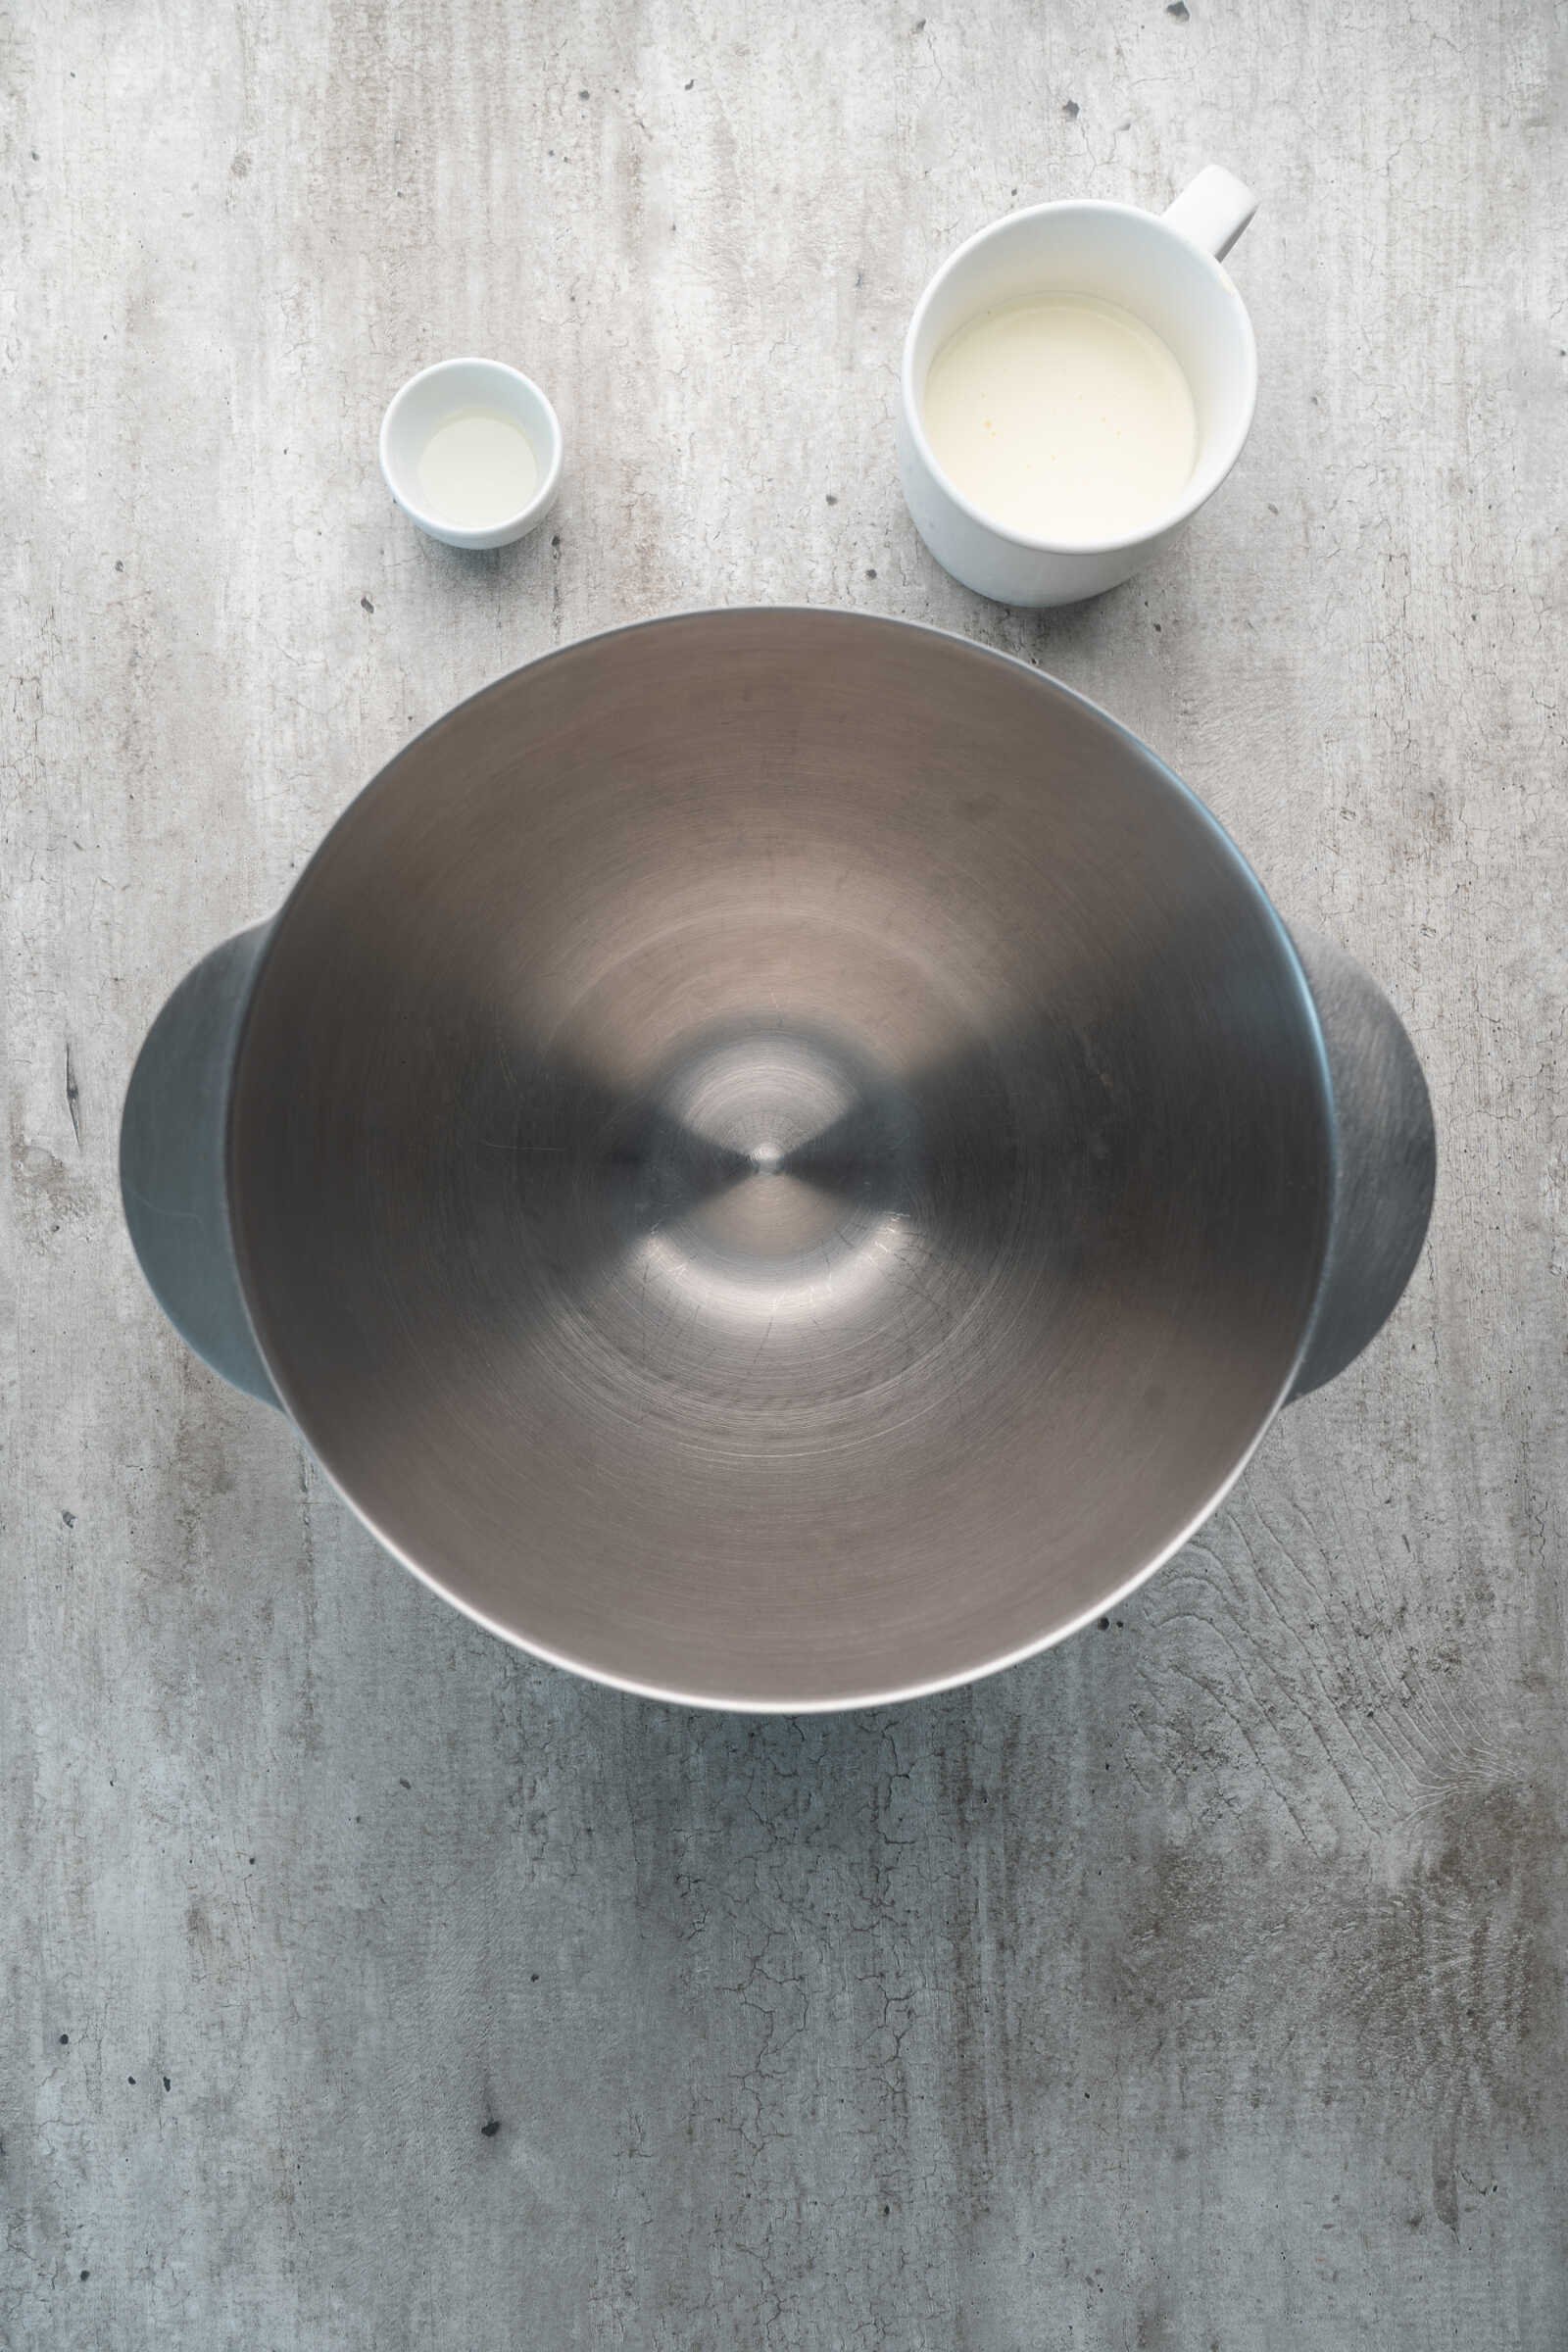
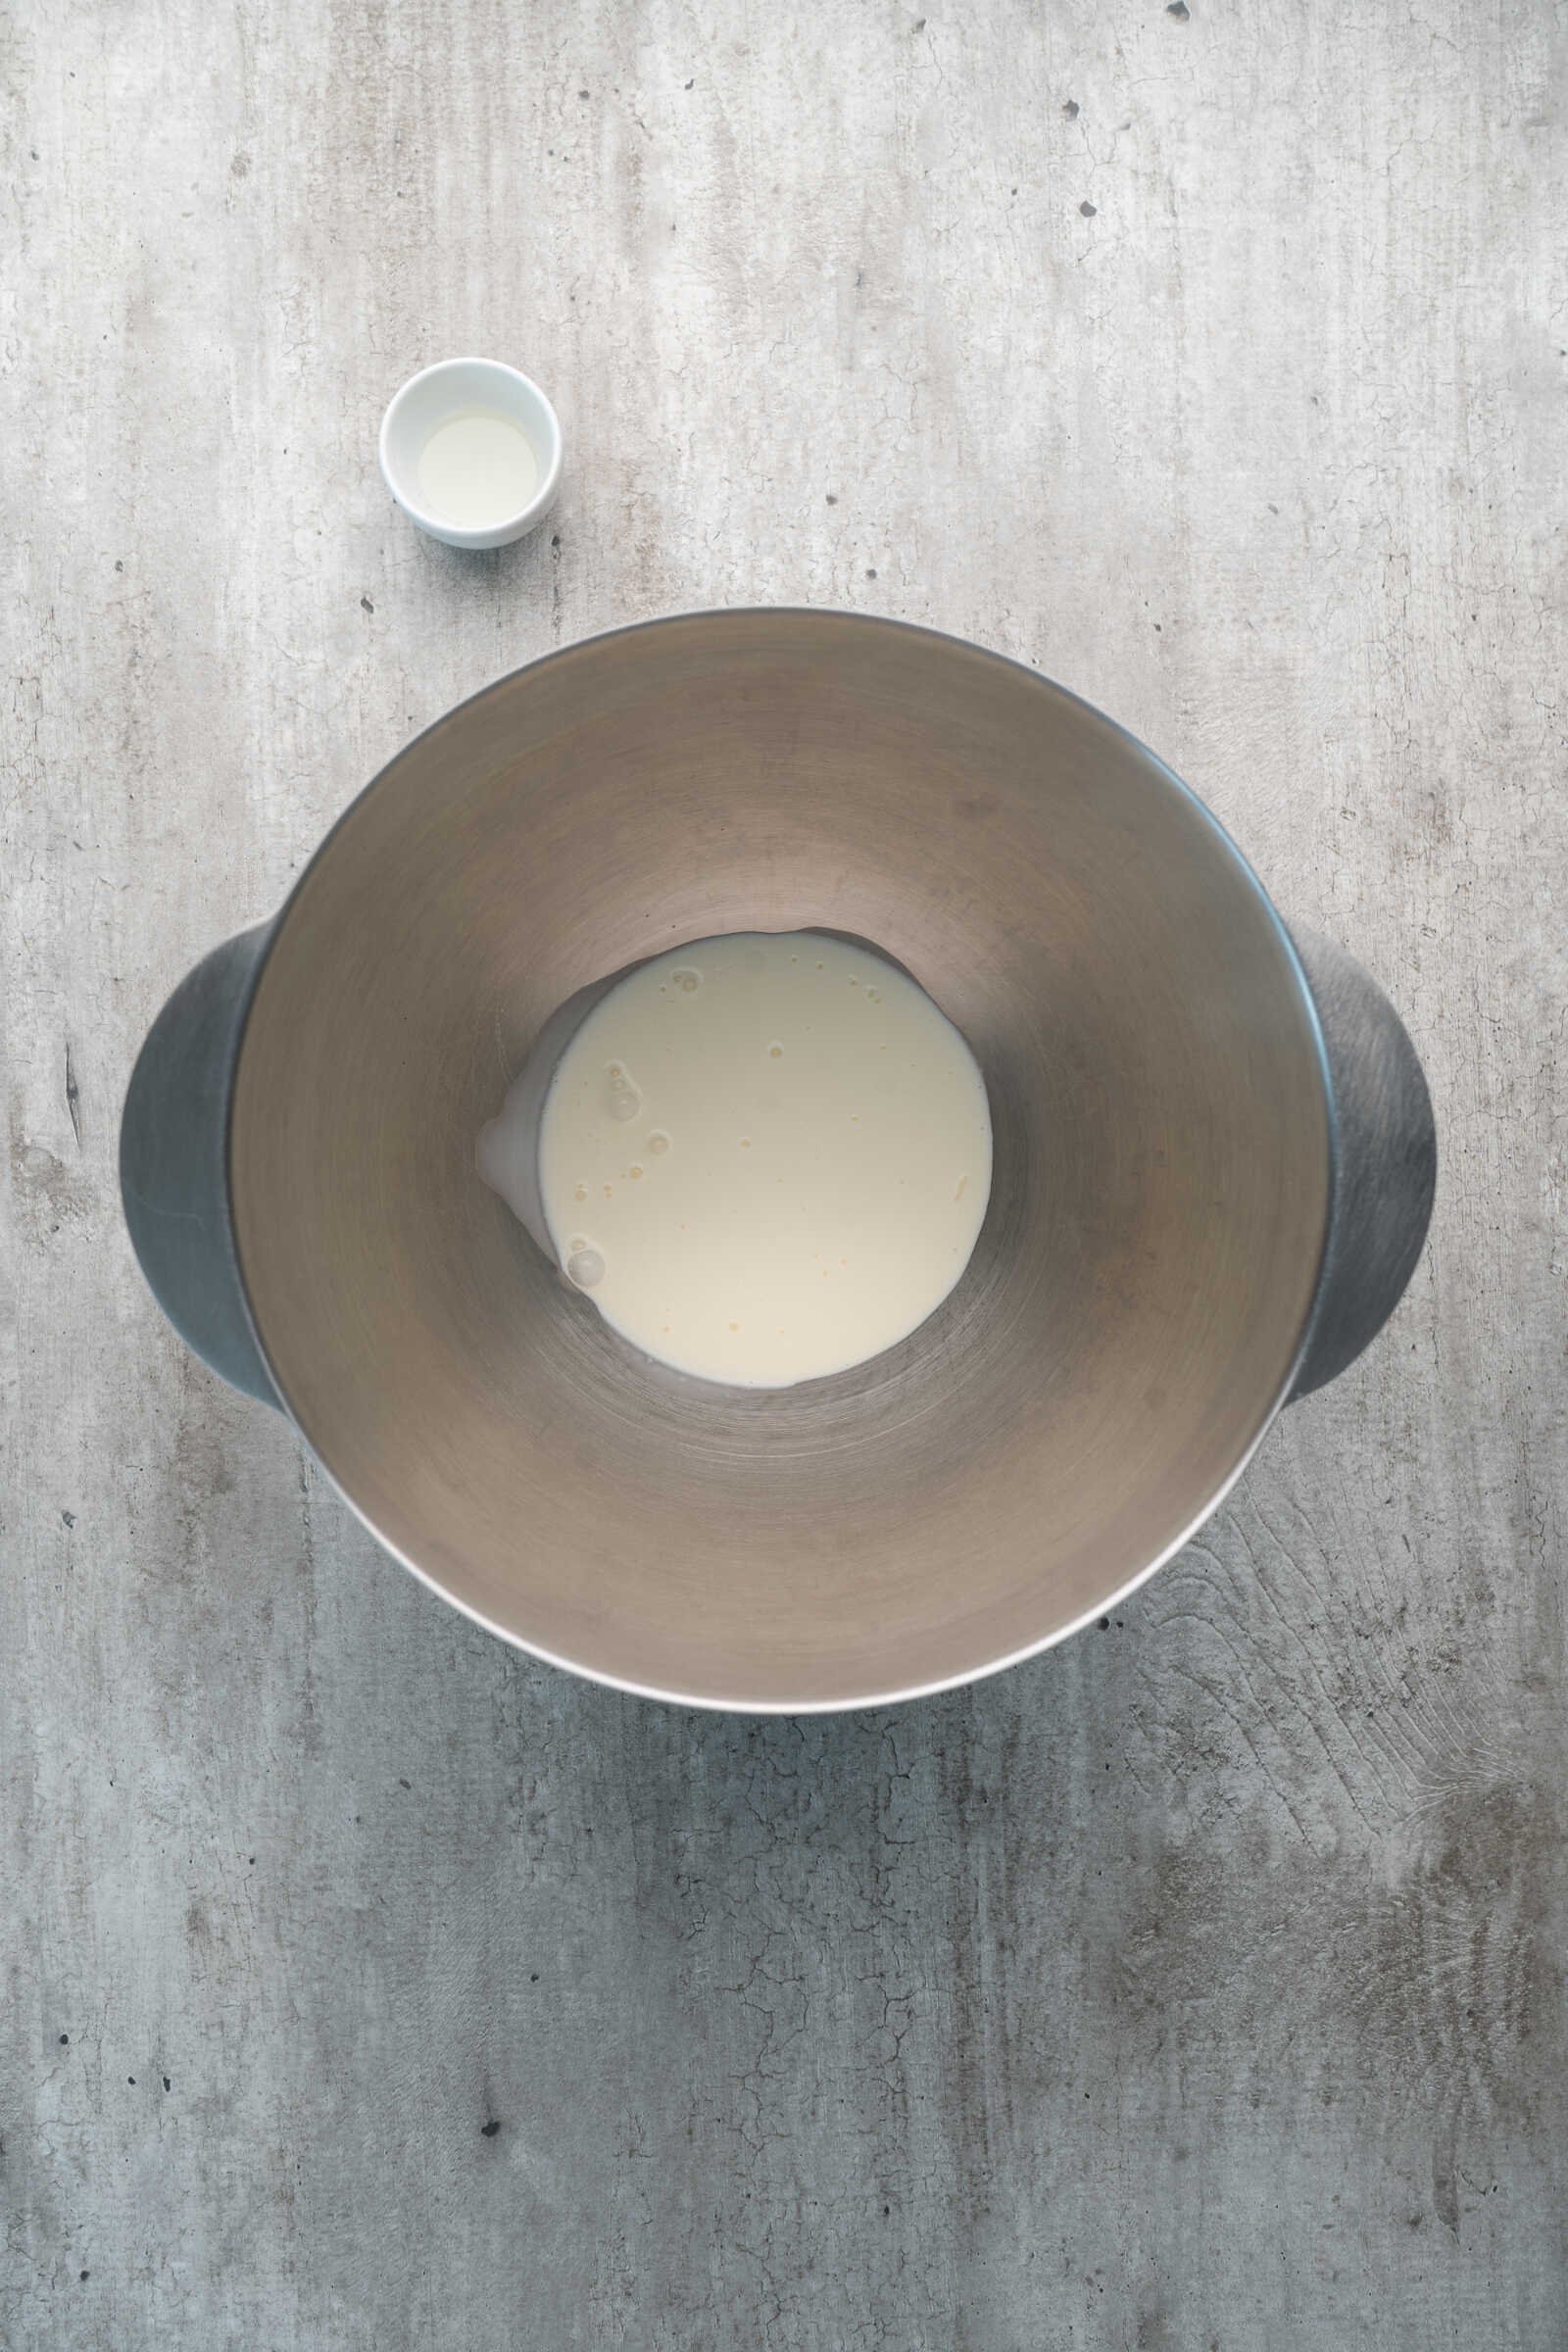
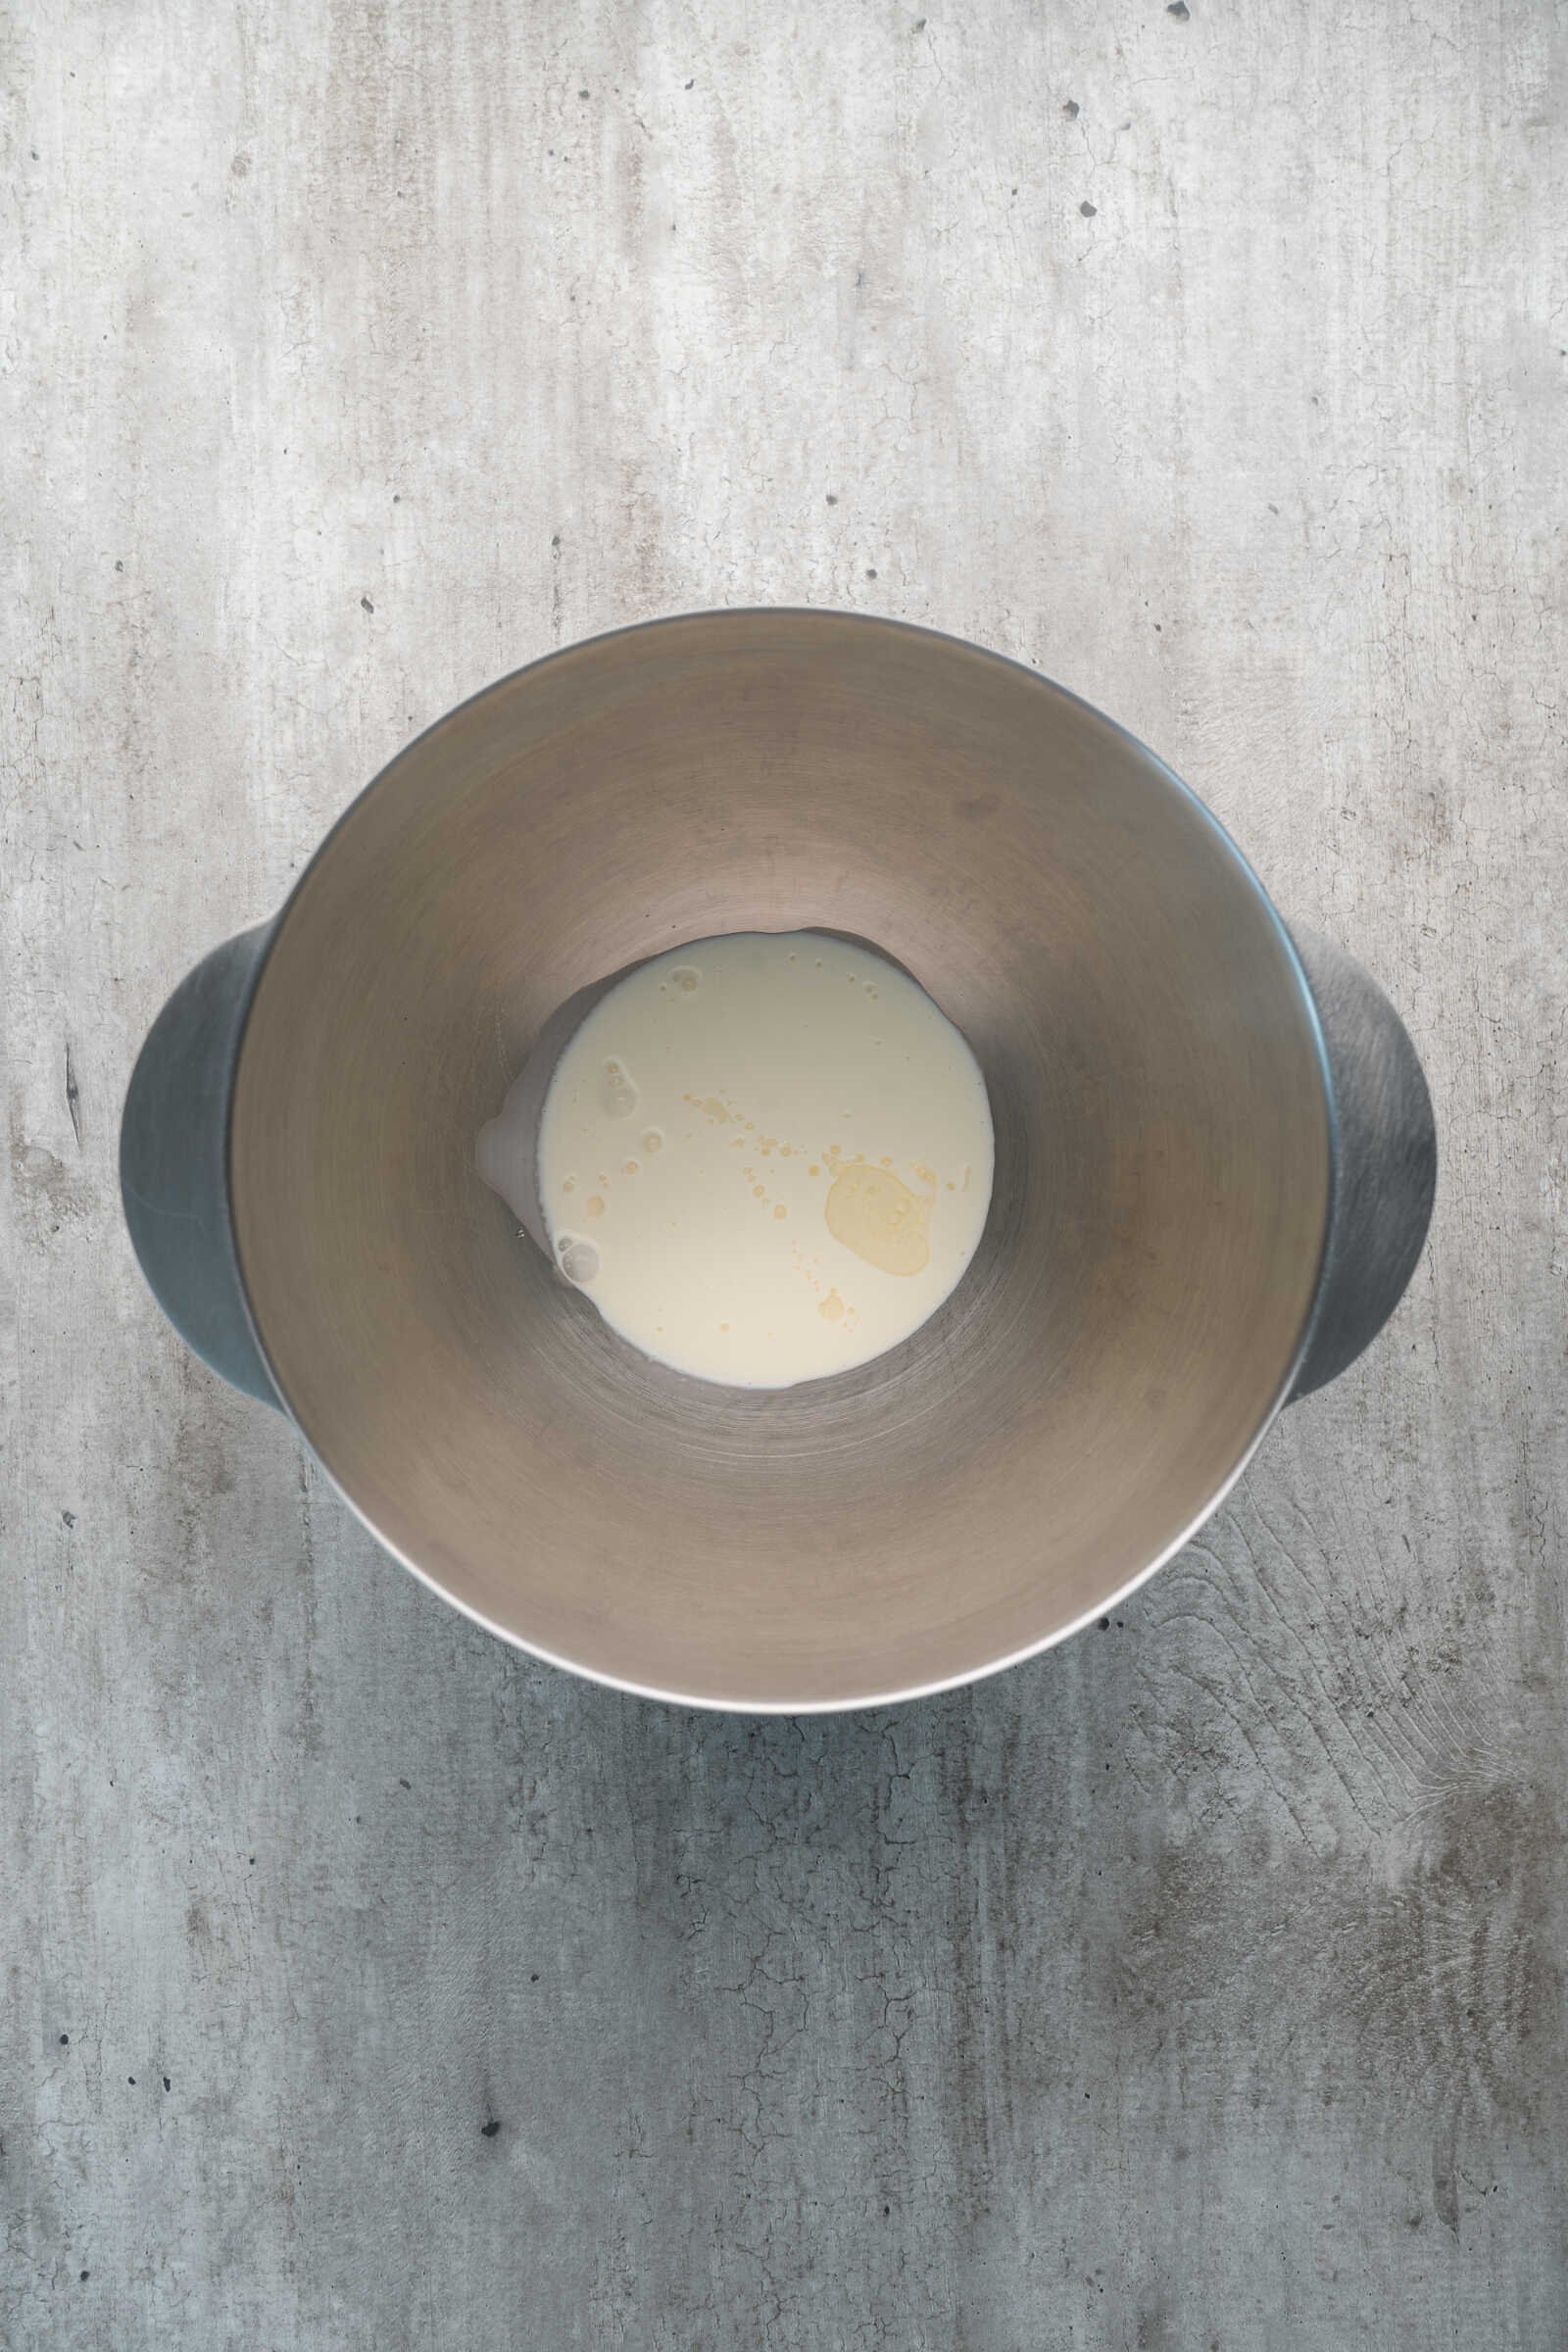
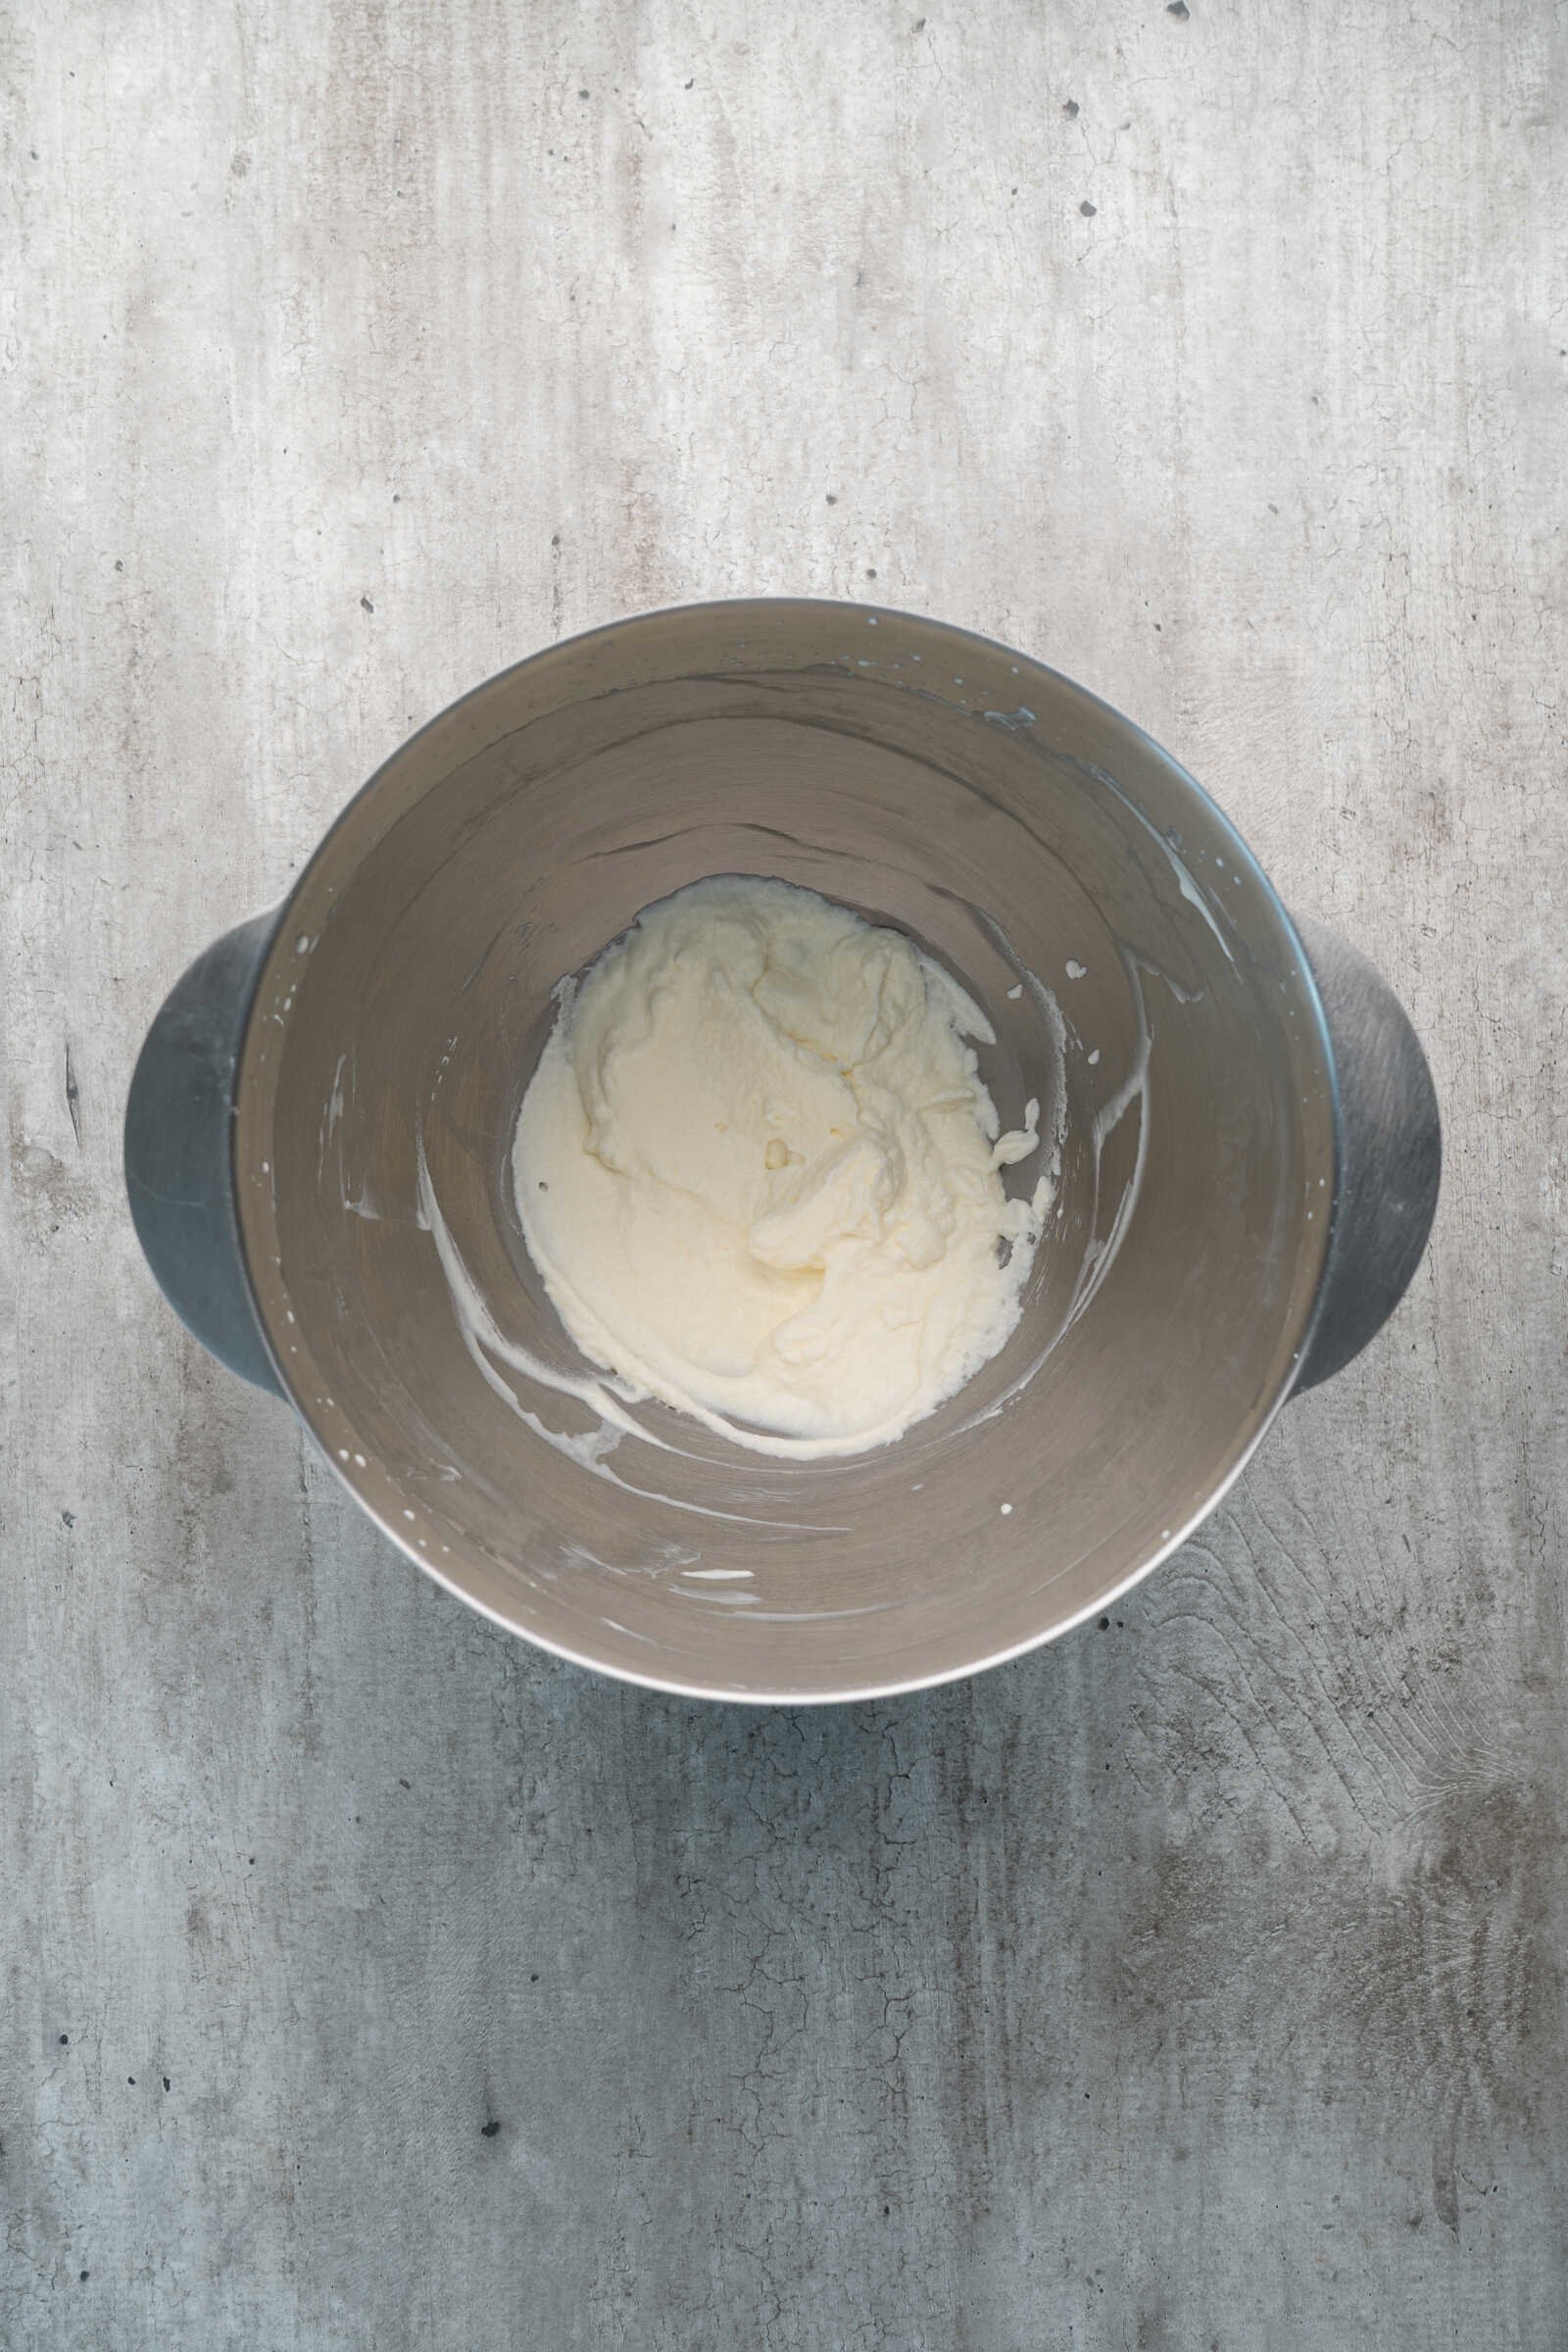
Start by making the buttery tart shells. In a large mixing bowl (or food processor), combine the softened butter, salt, egg yolk, sugar, and milk. Mix until the mixture becomes smooth and creamy.
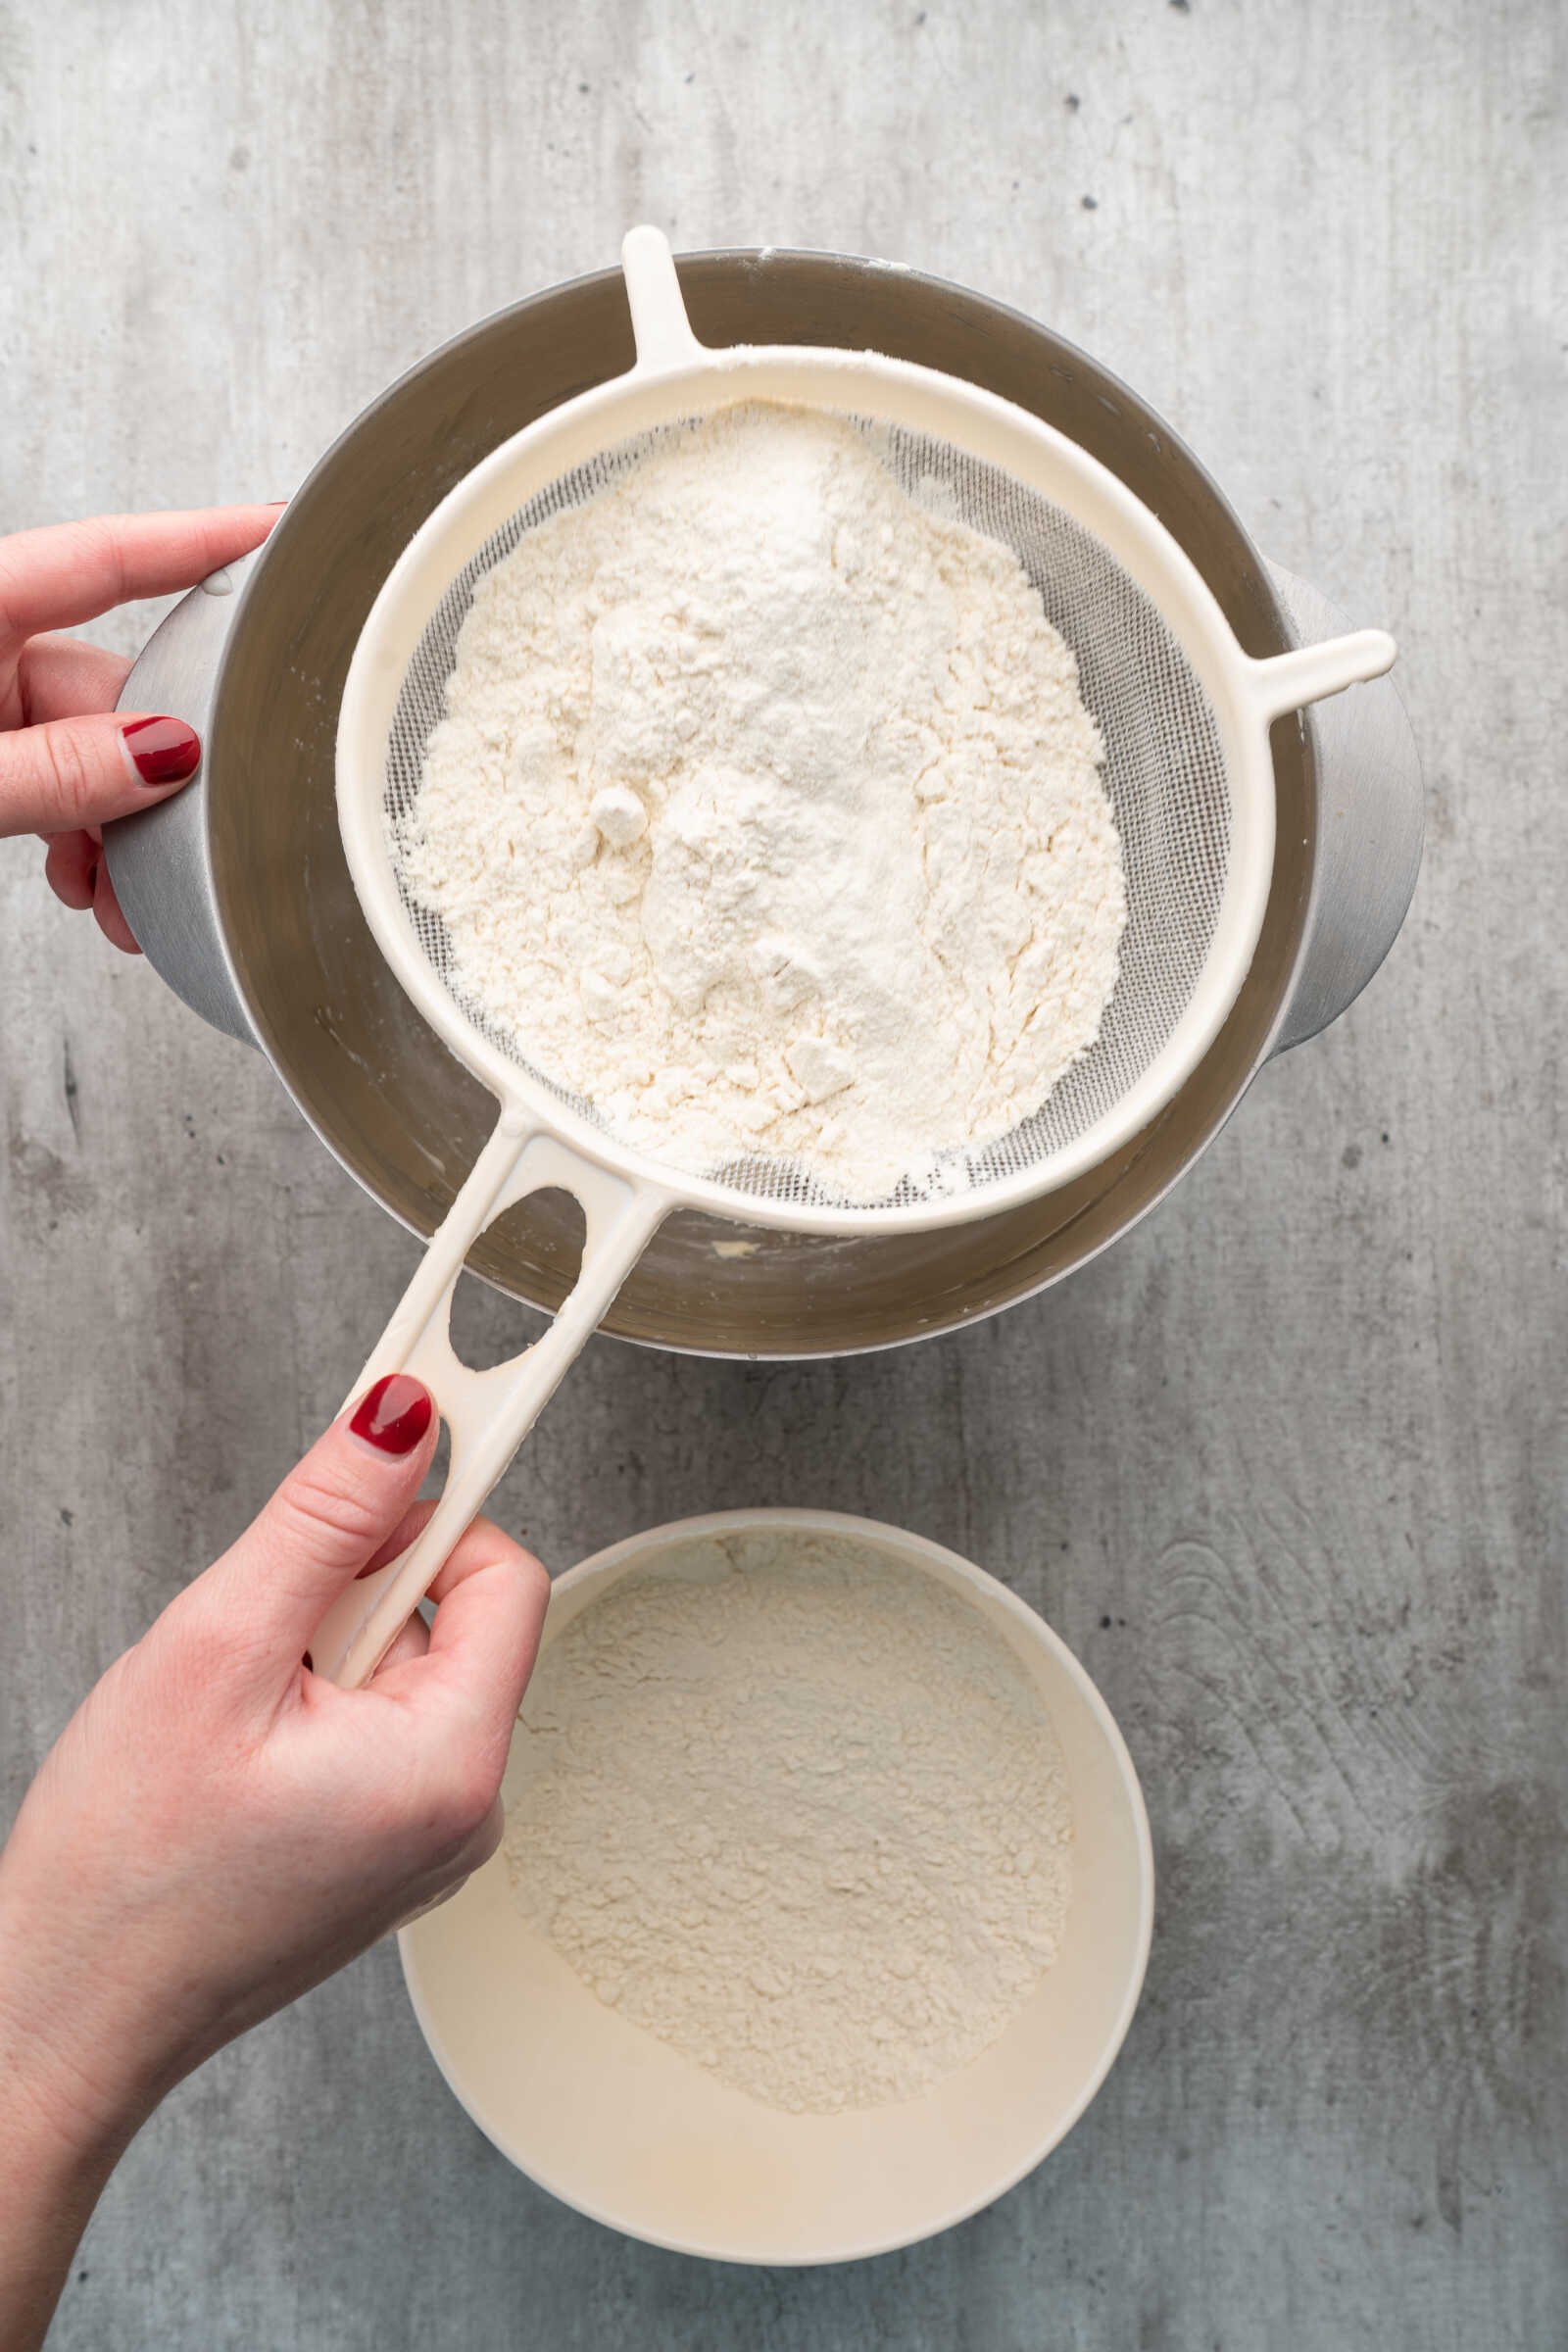
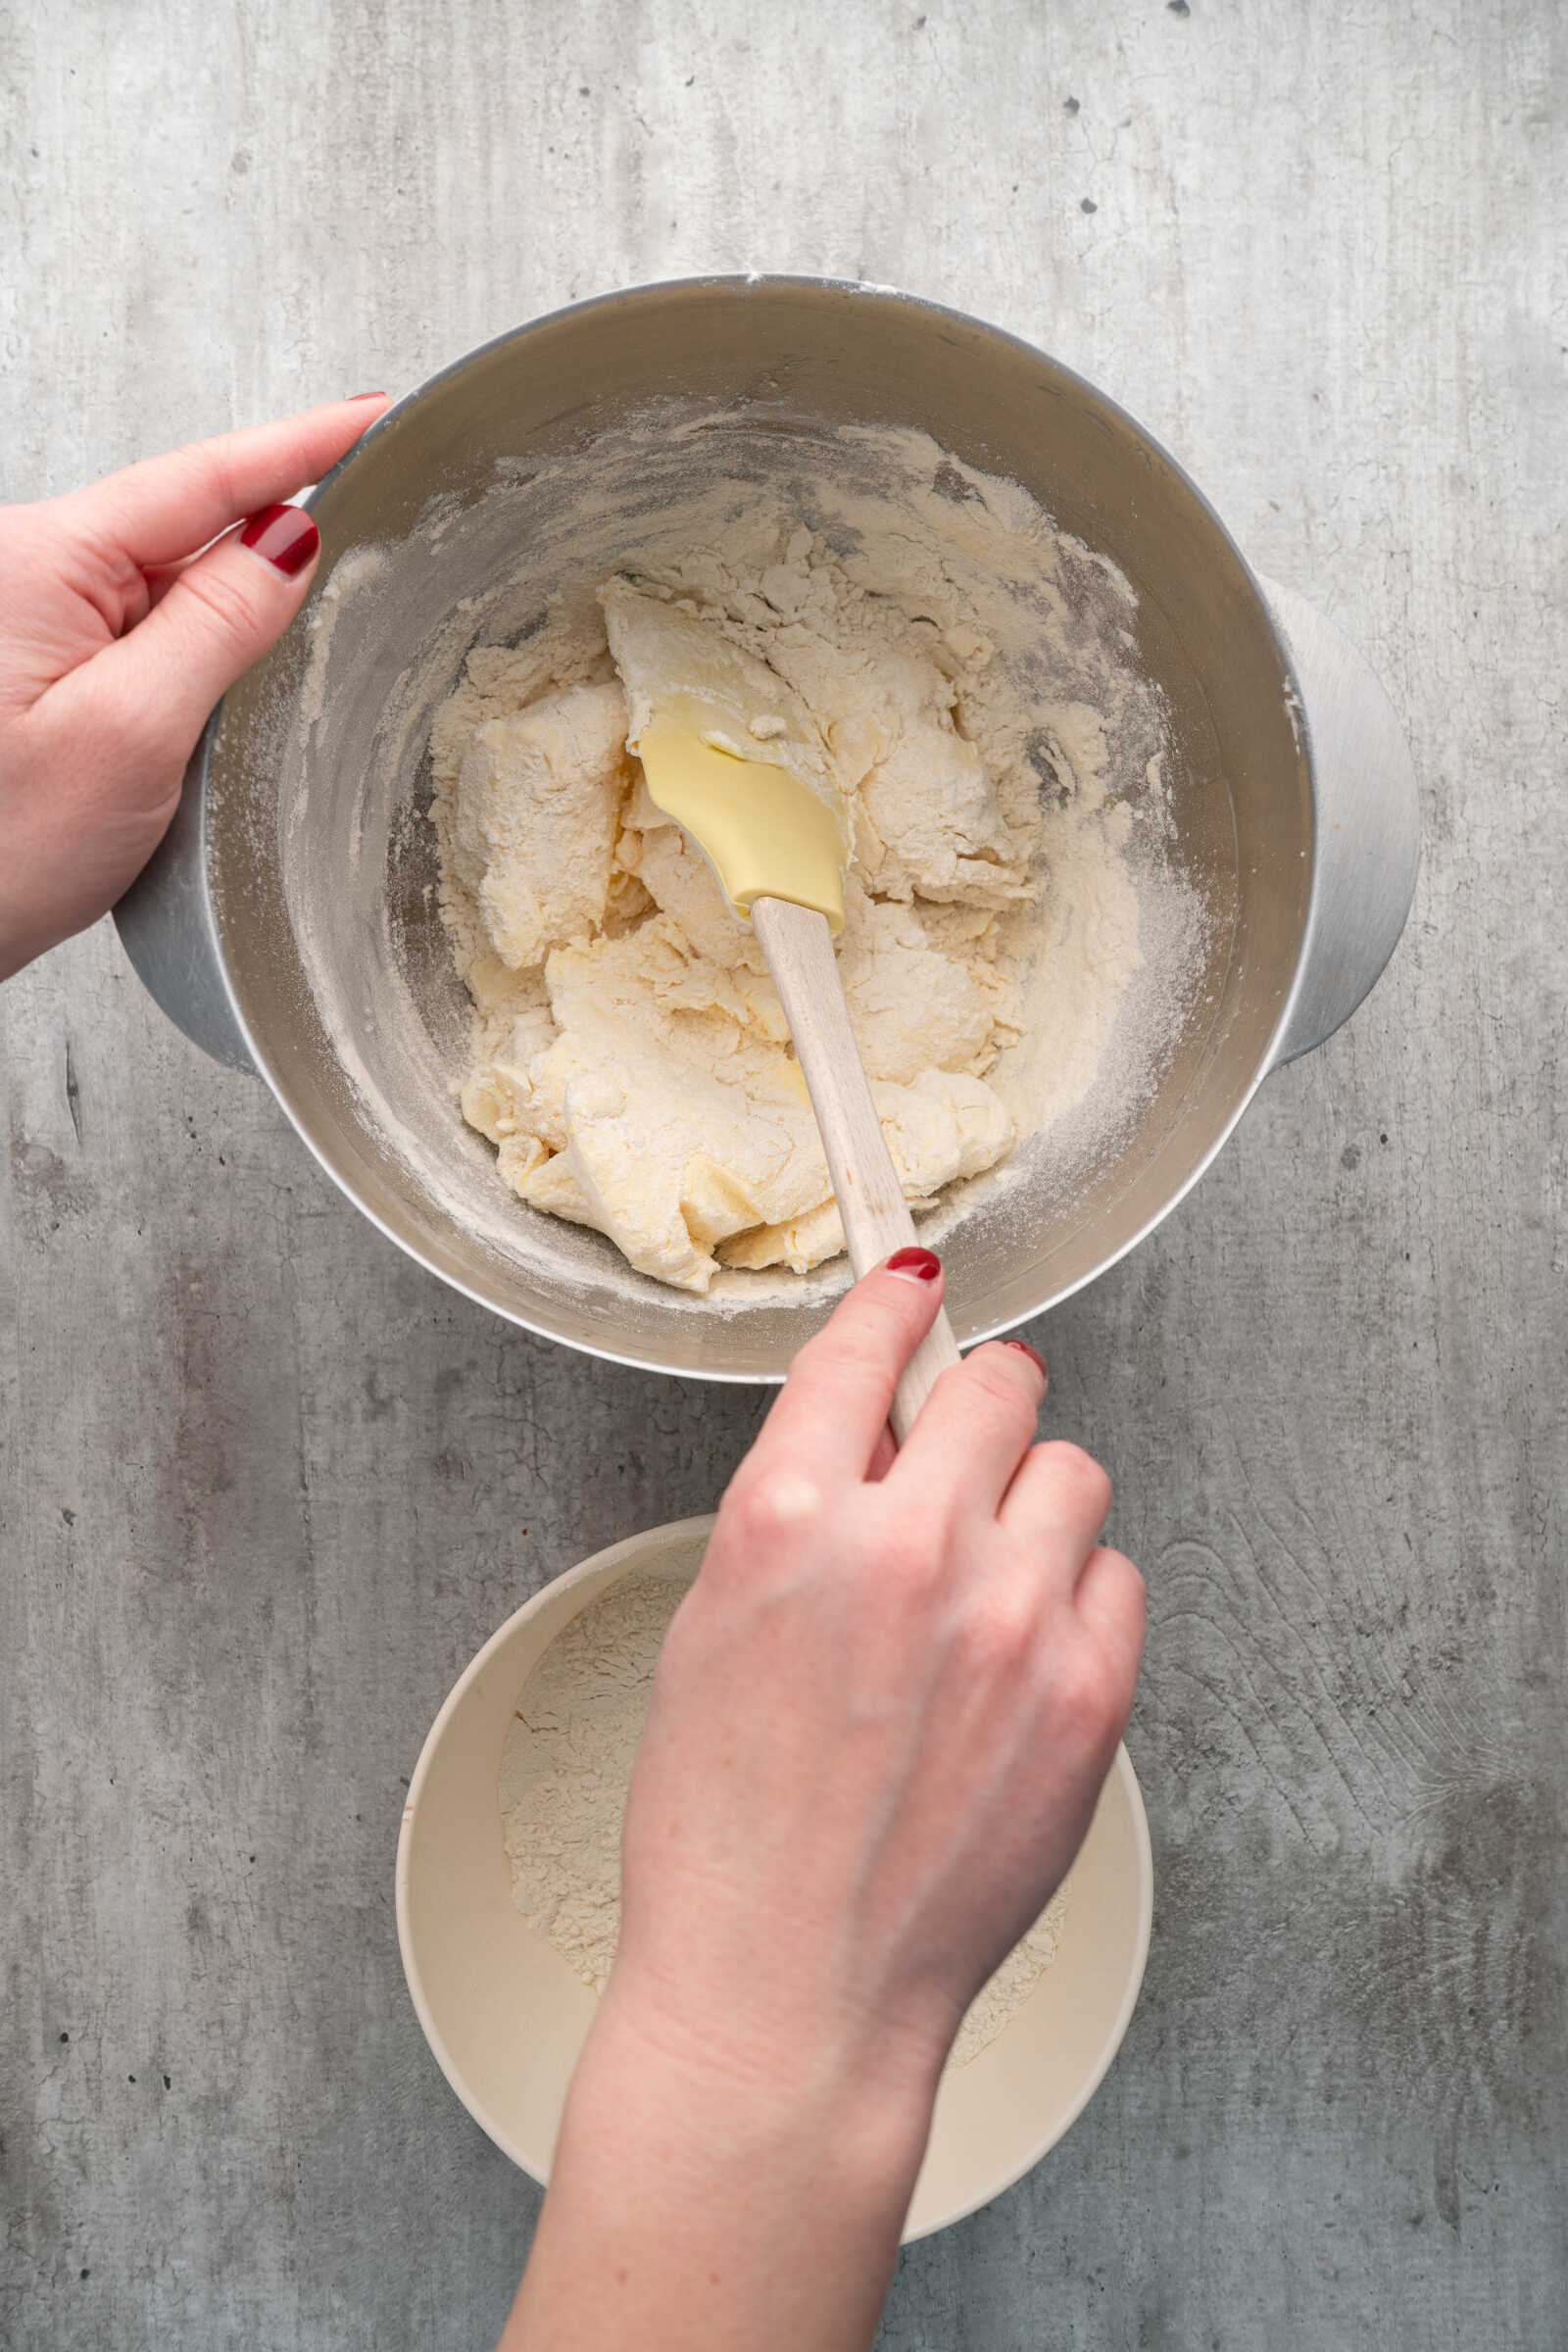
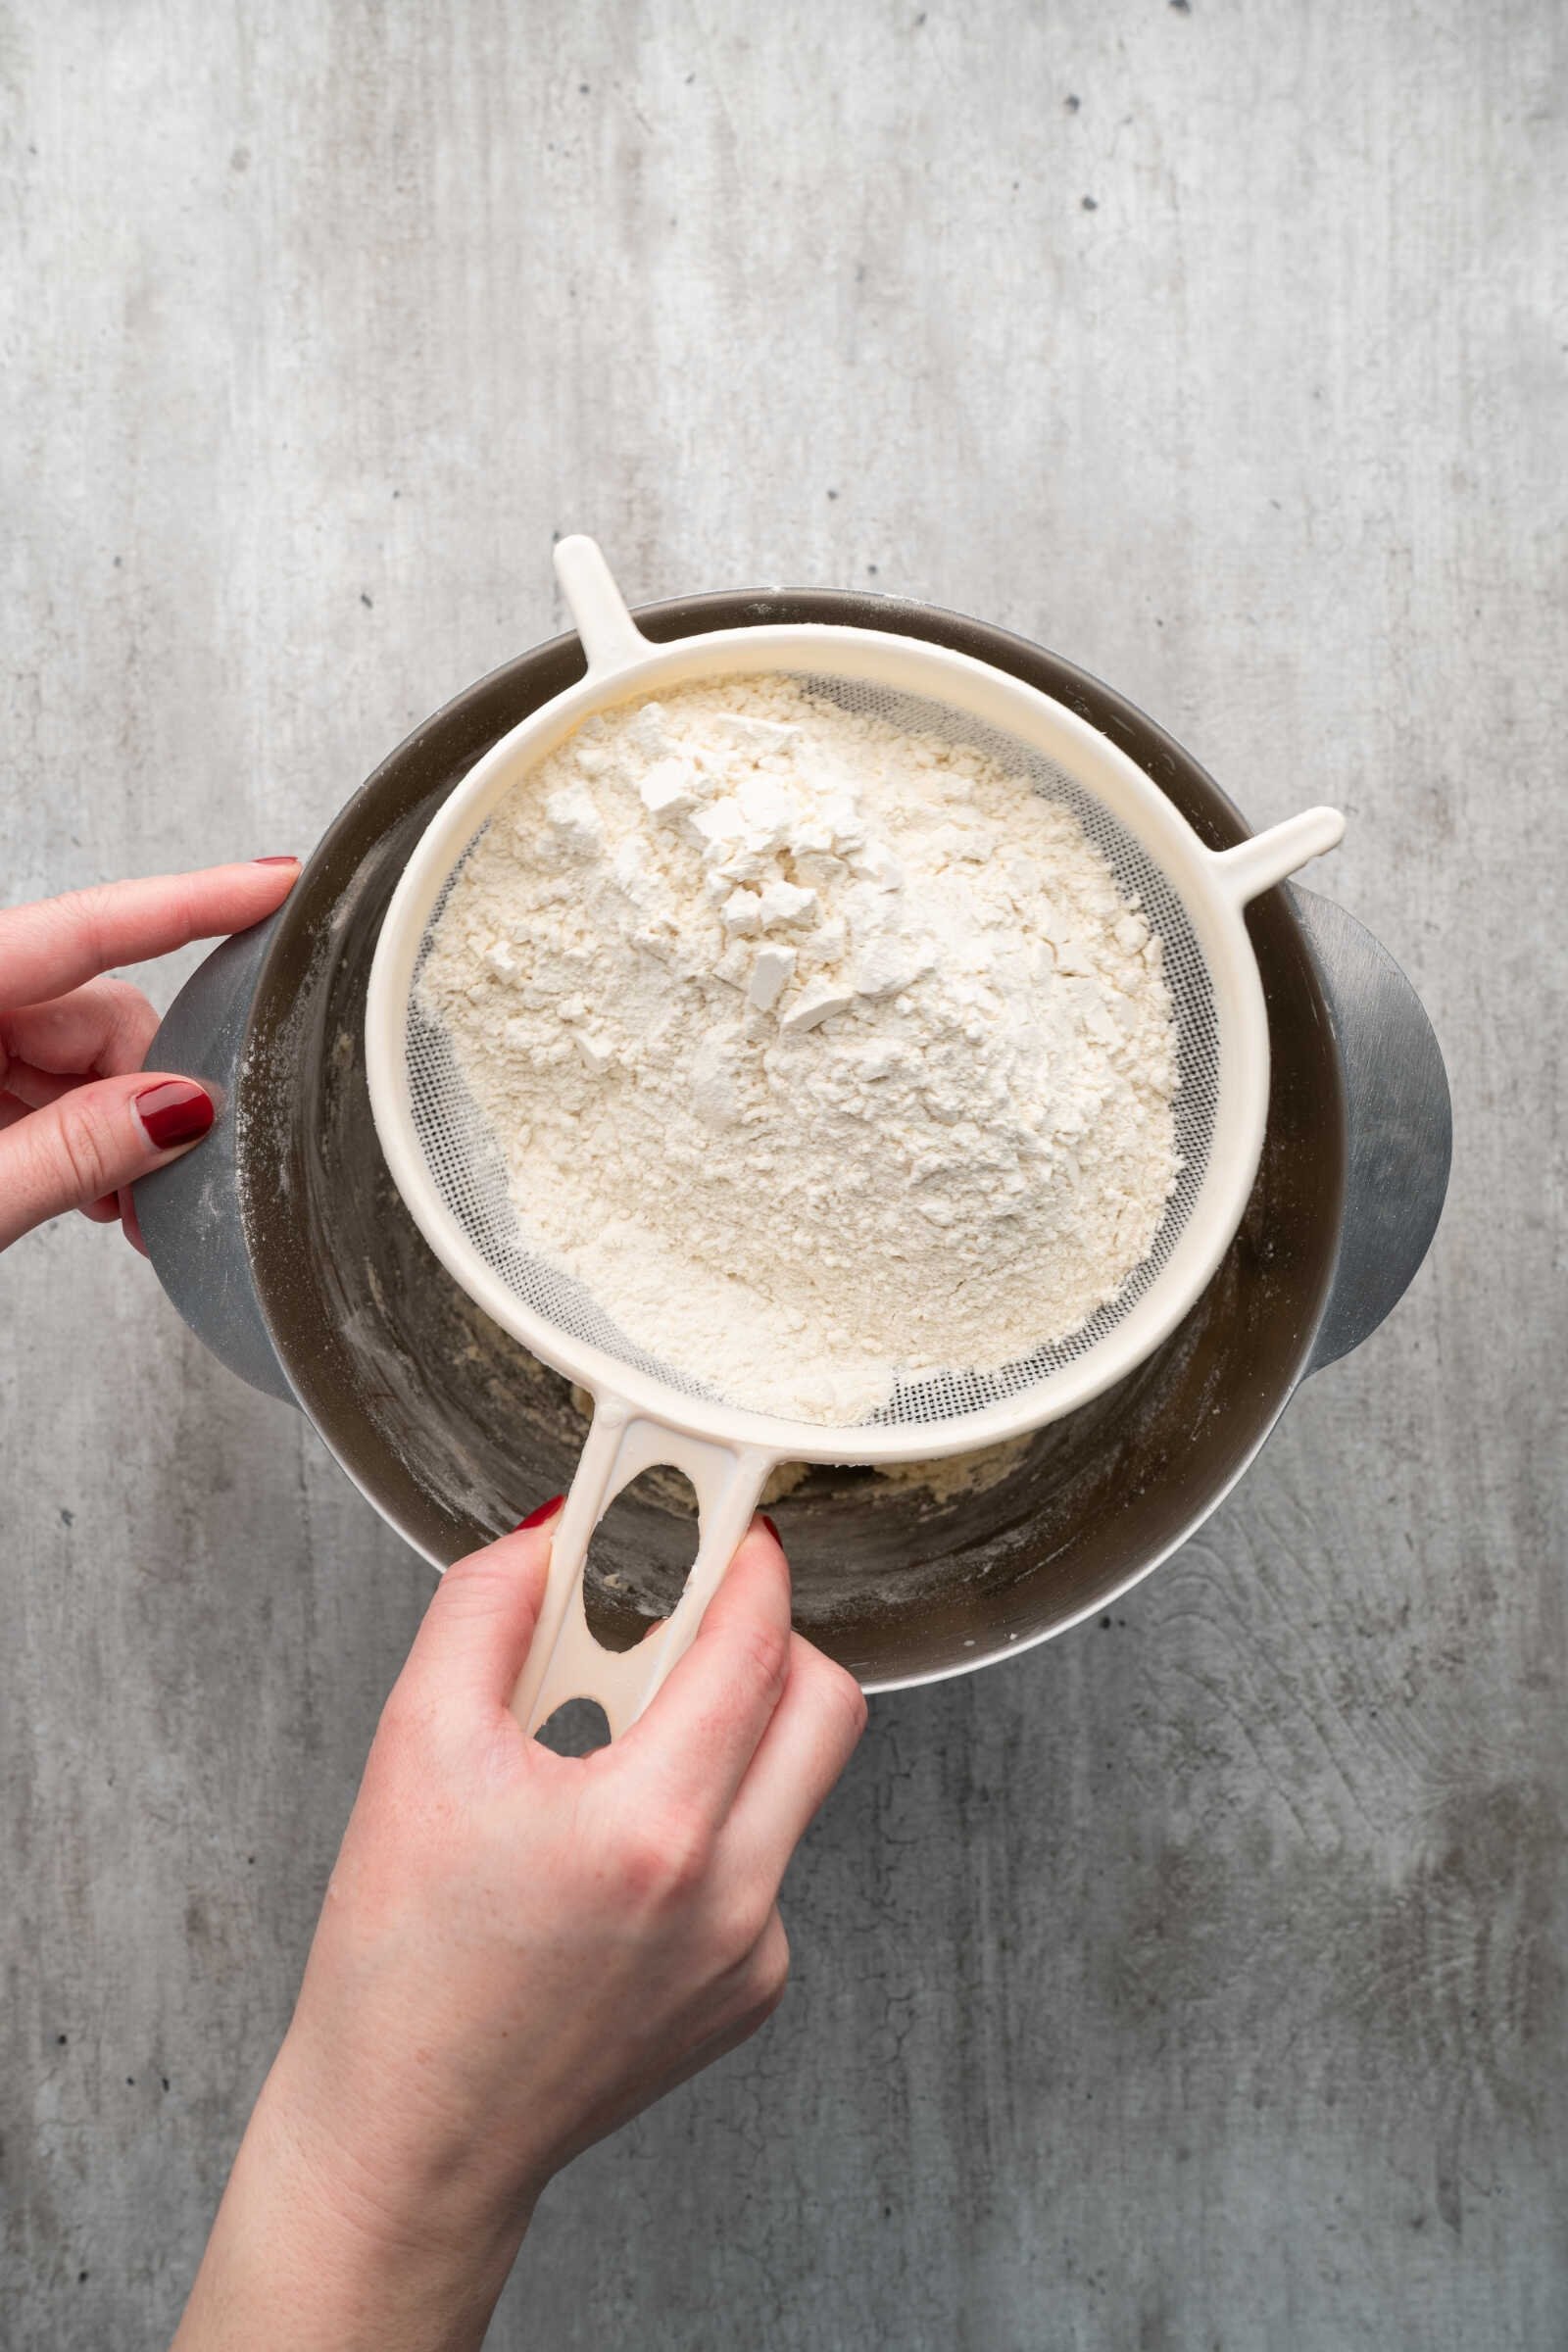
Next, sift the pastry flour and gradually add it to the butter mixture. Mix gently until the dough begins forming into a soft ball. Be careful not to overmix the dough, as this can make the crust tough.
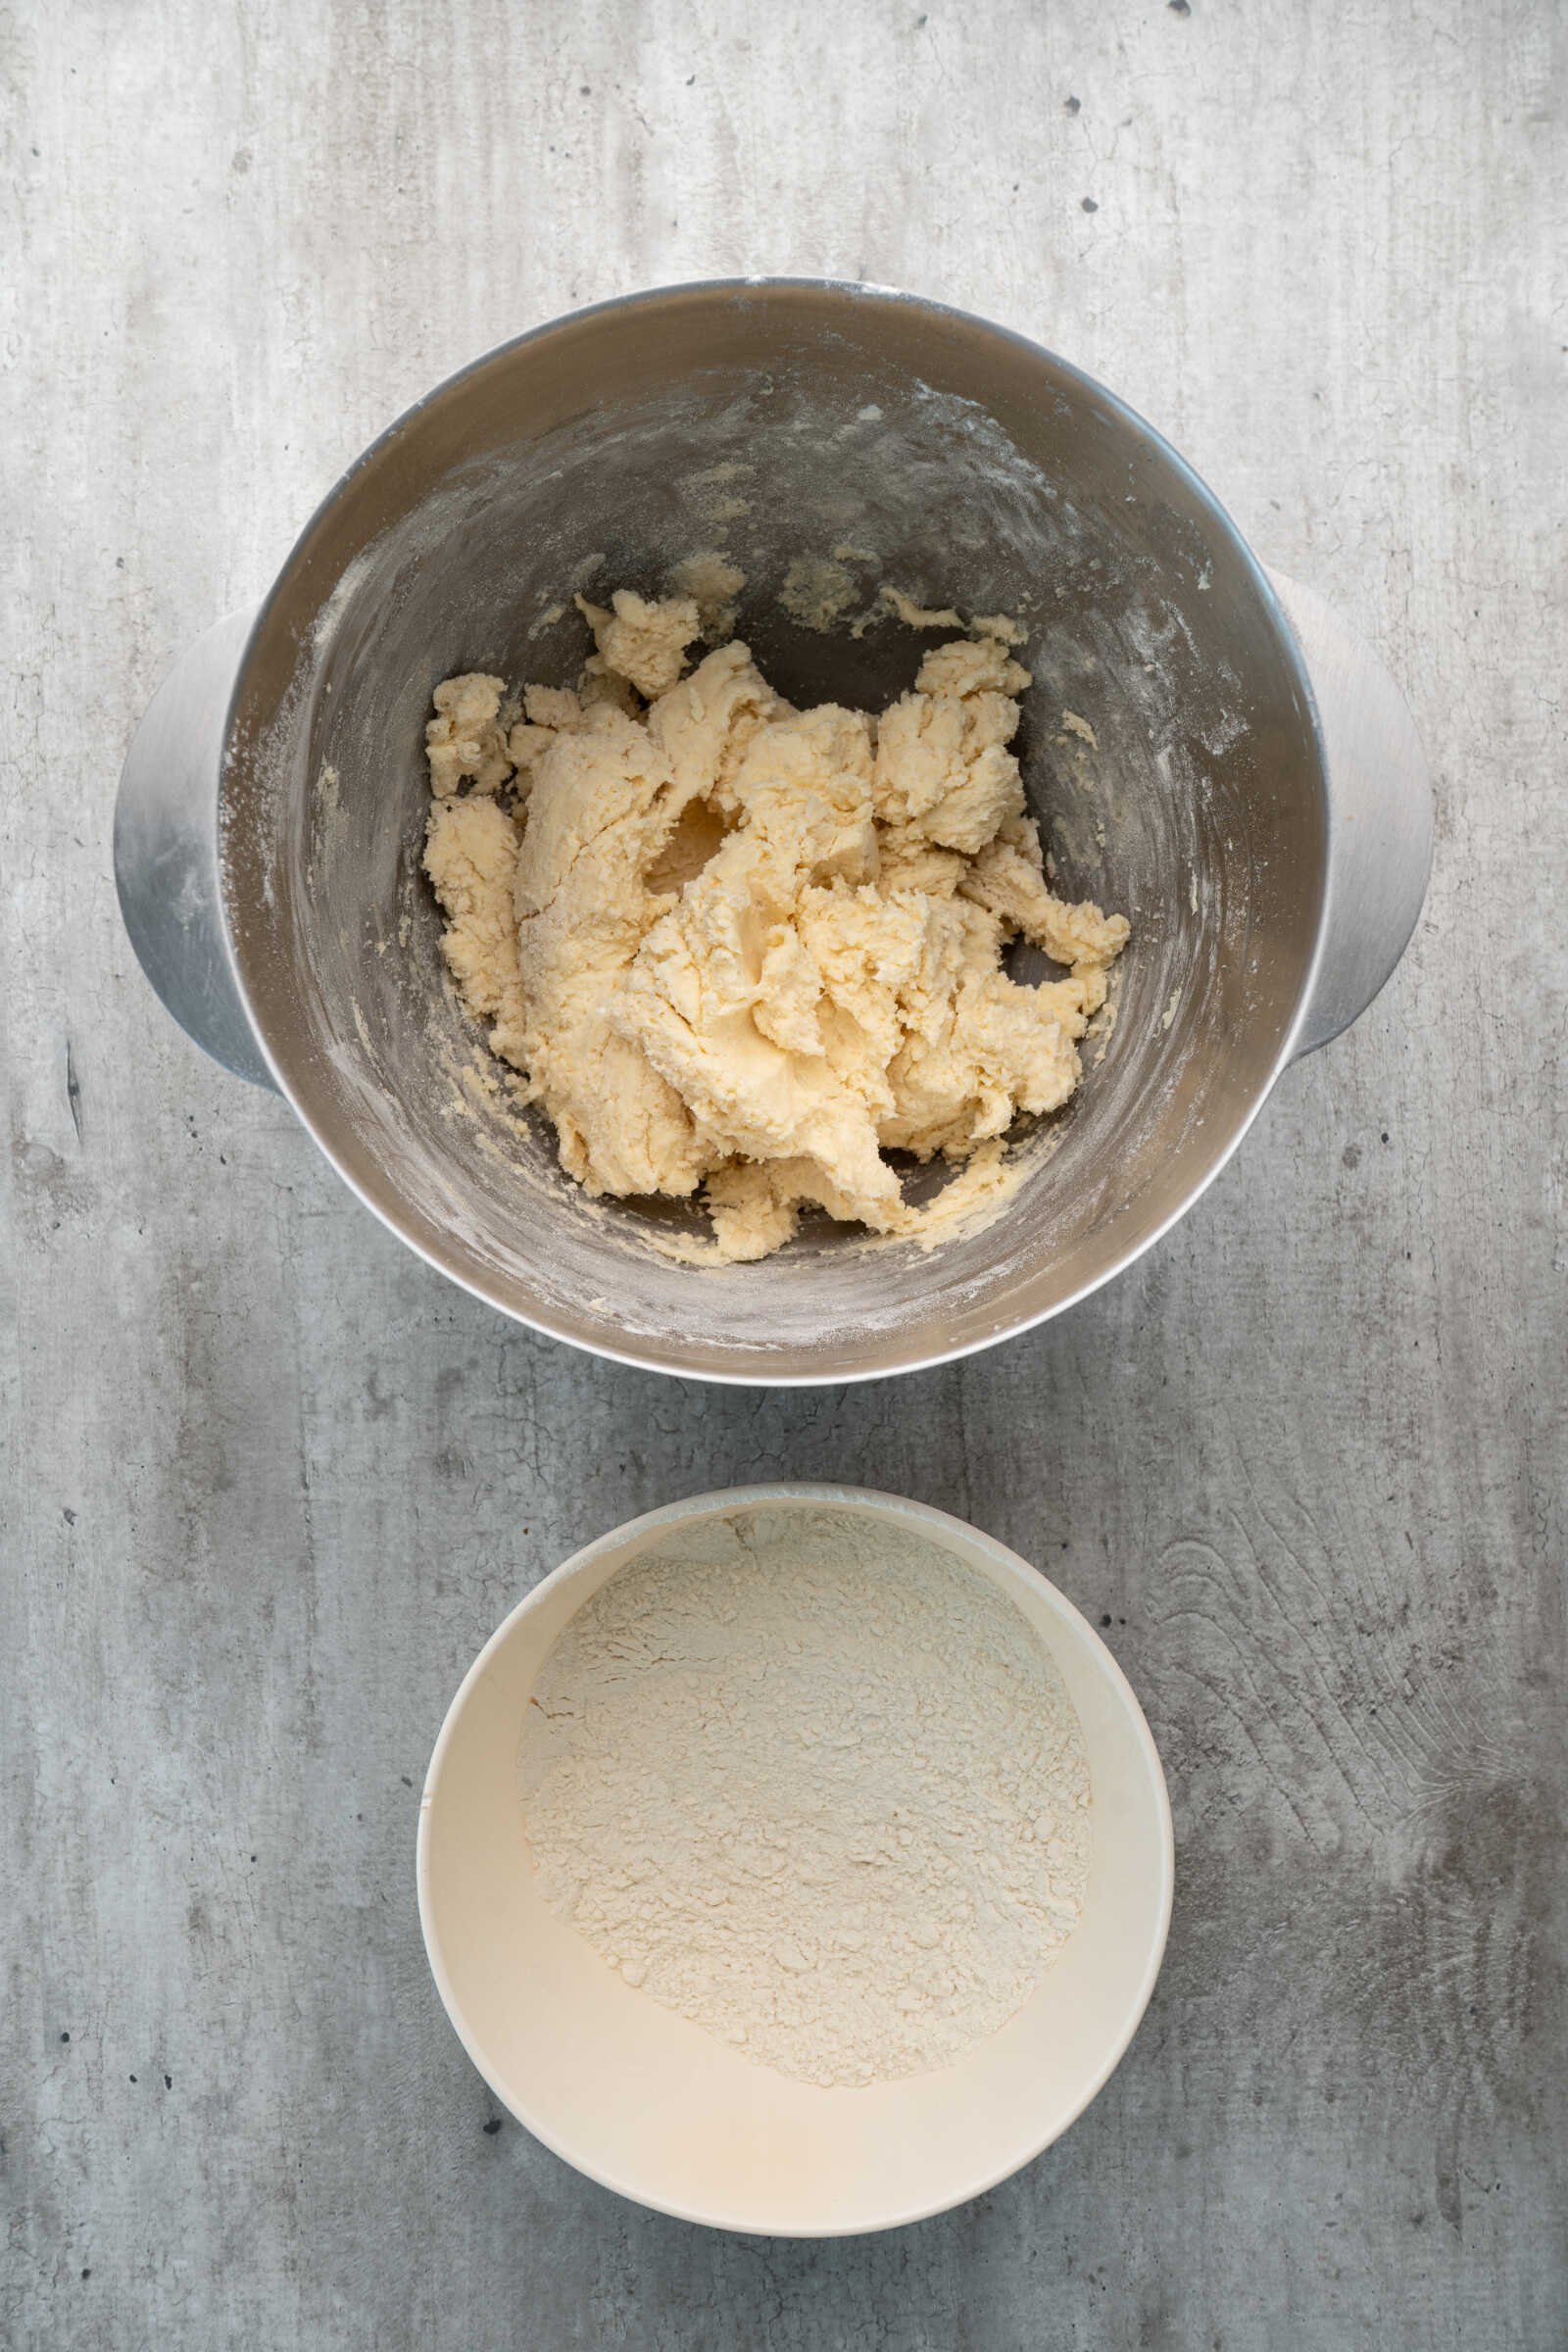
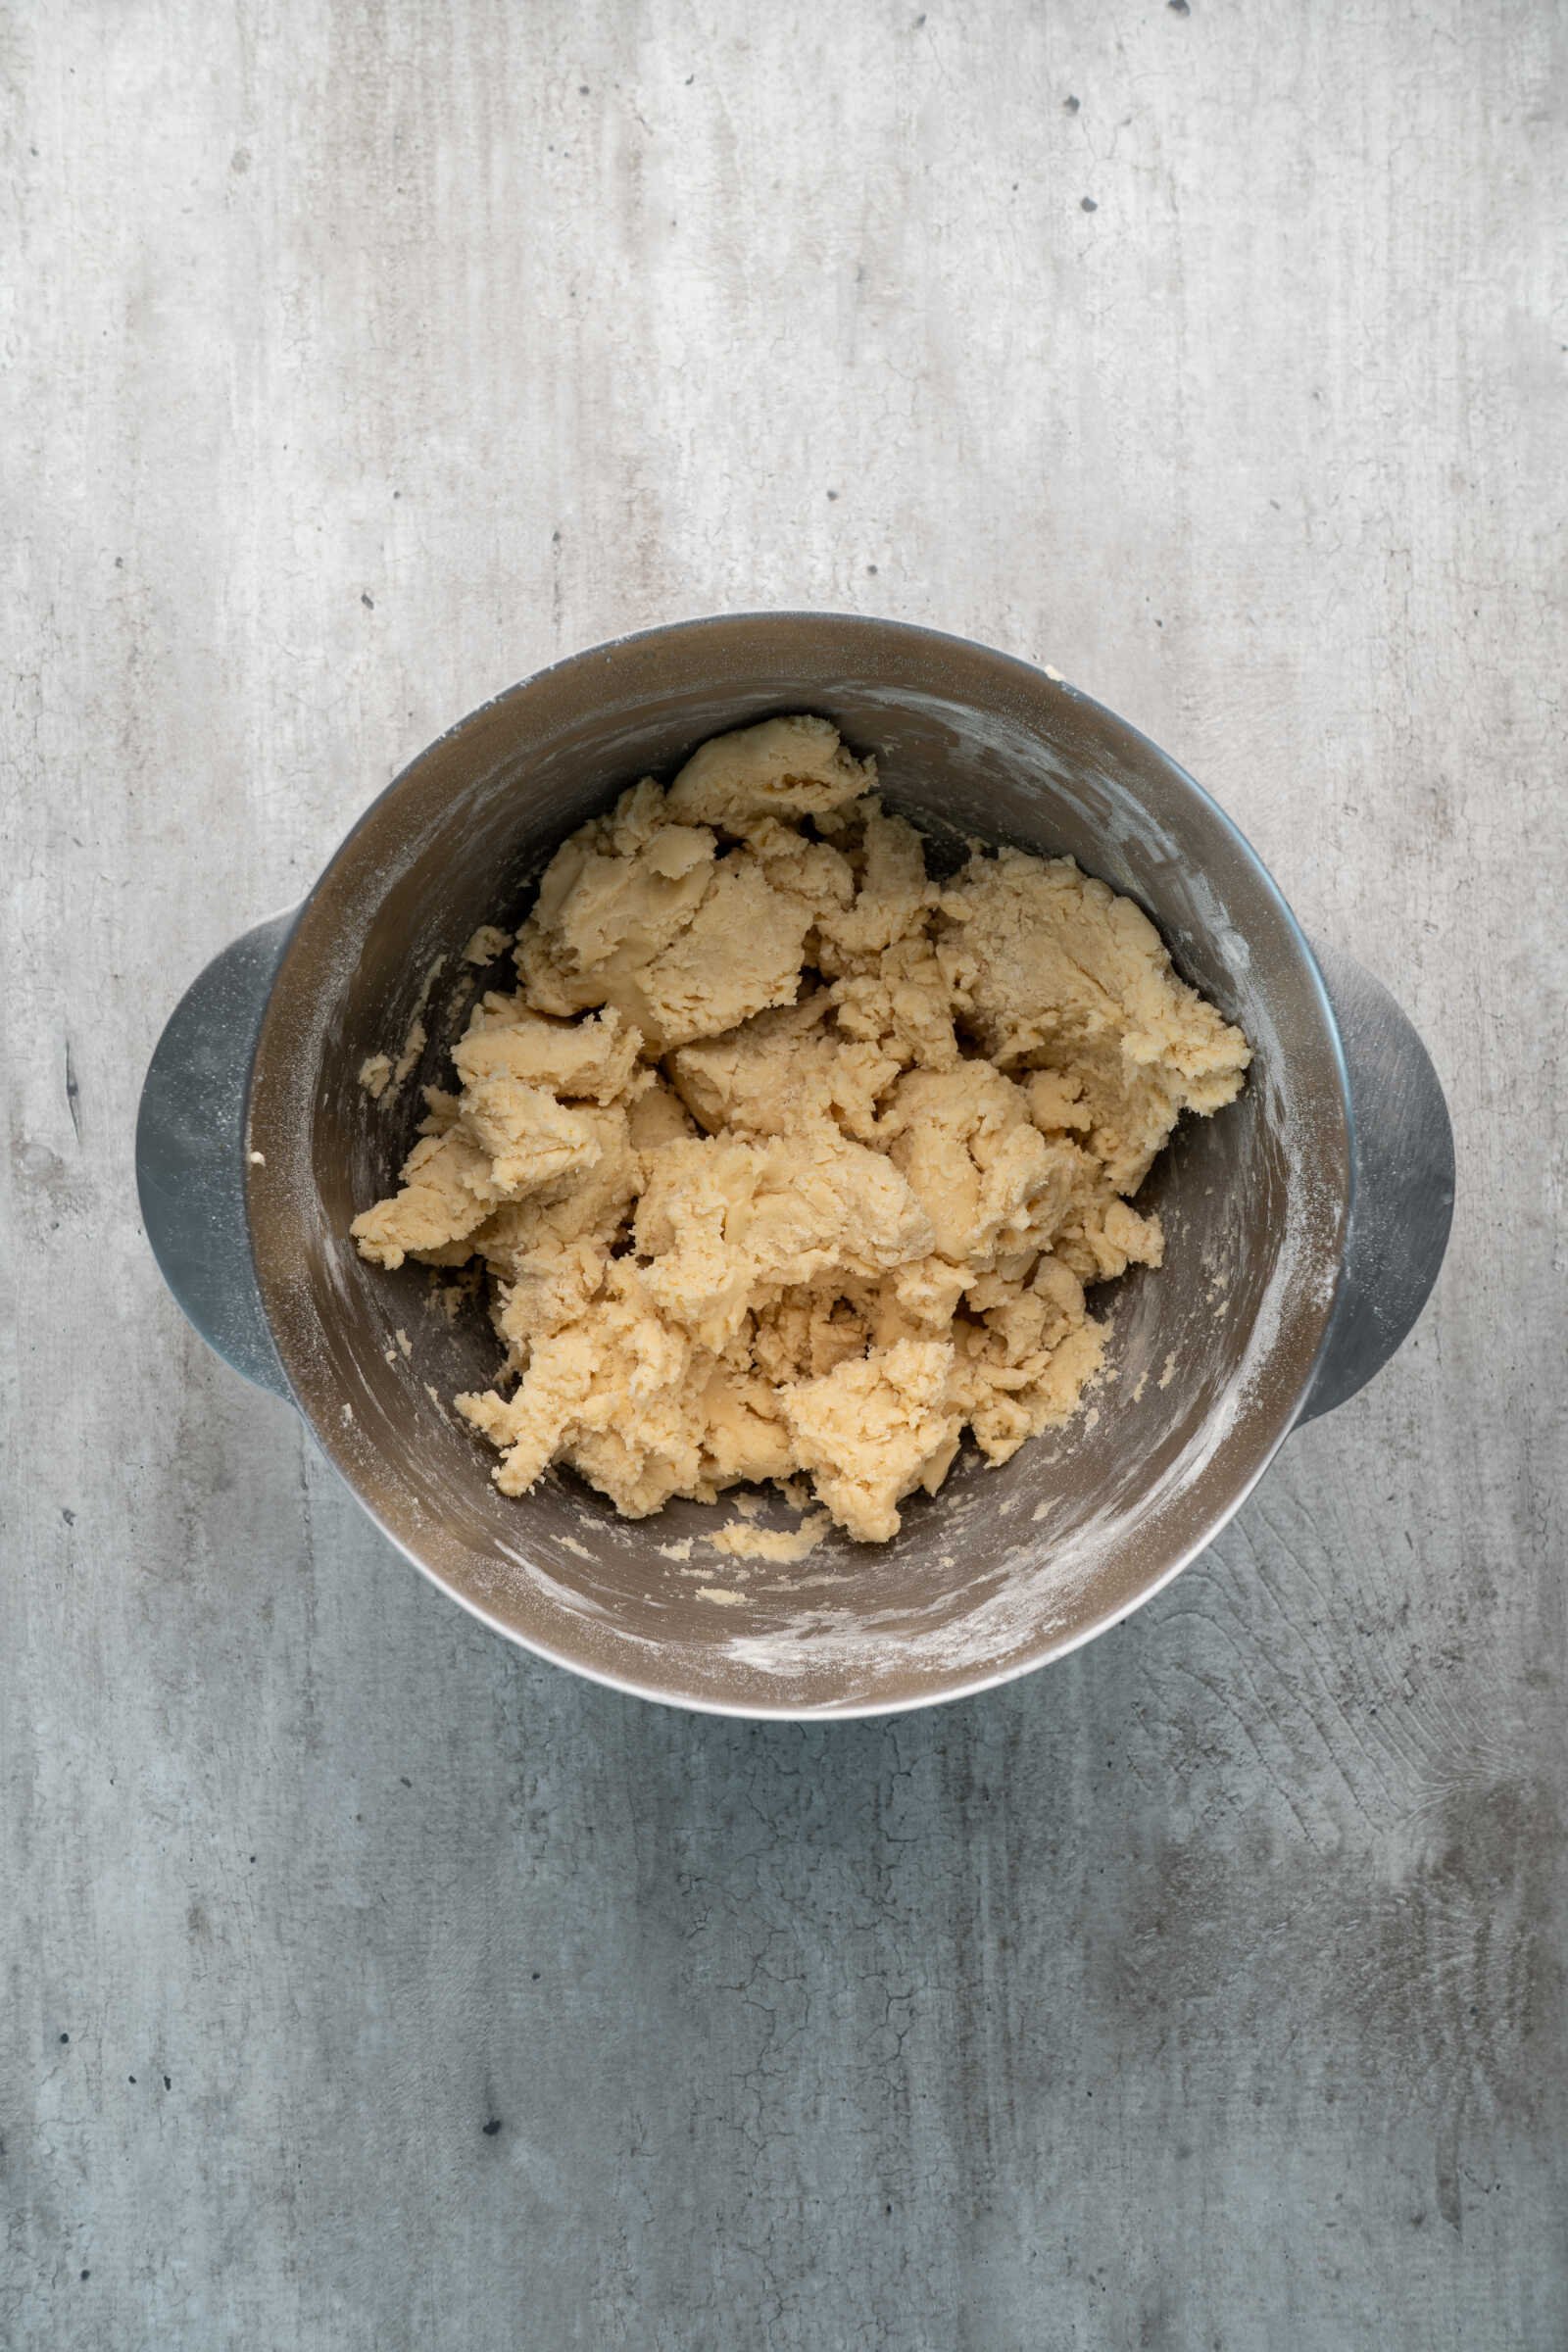
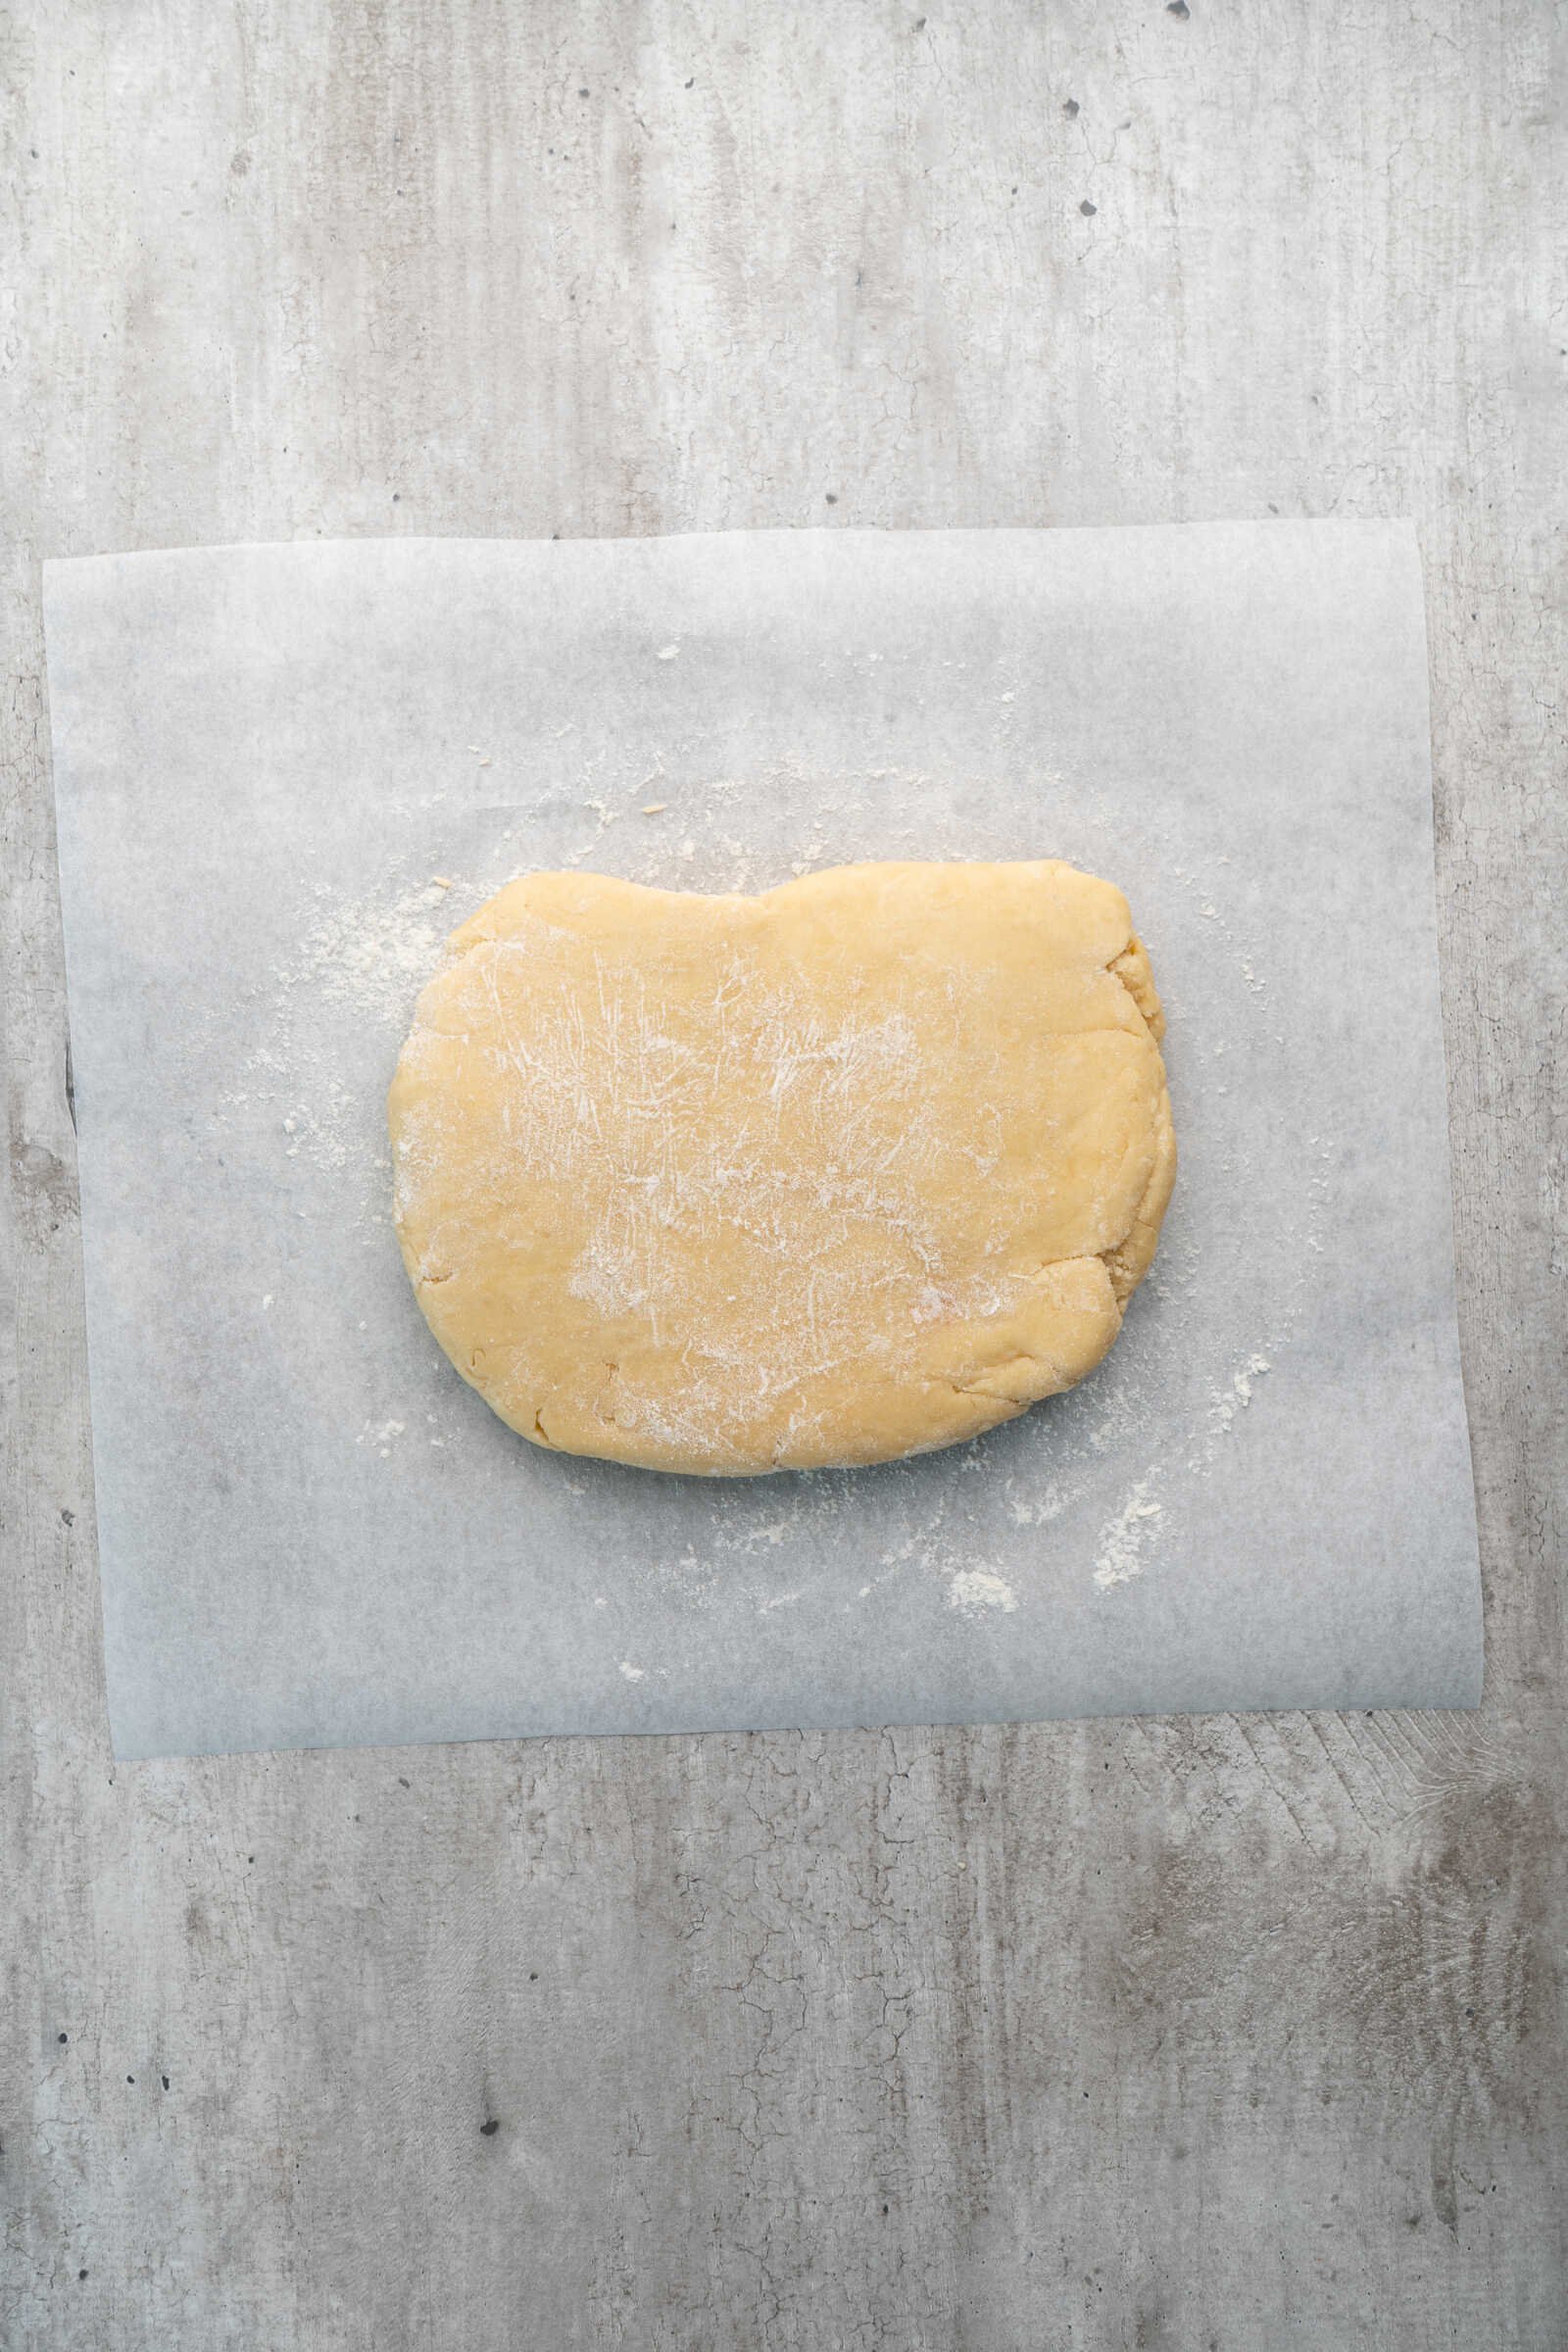
If you’re using a food processor, simply pulse the mixture until the dough forms. Turn the dough out onto a lightly floured surface and knead gently for one to two minutes until smooth and uniform.
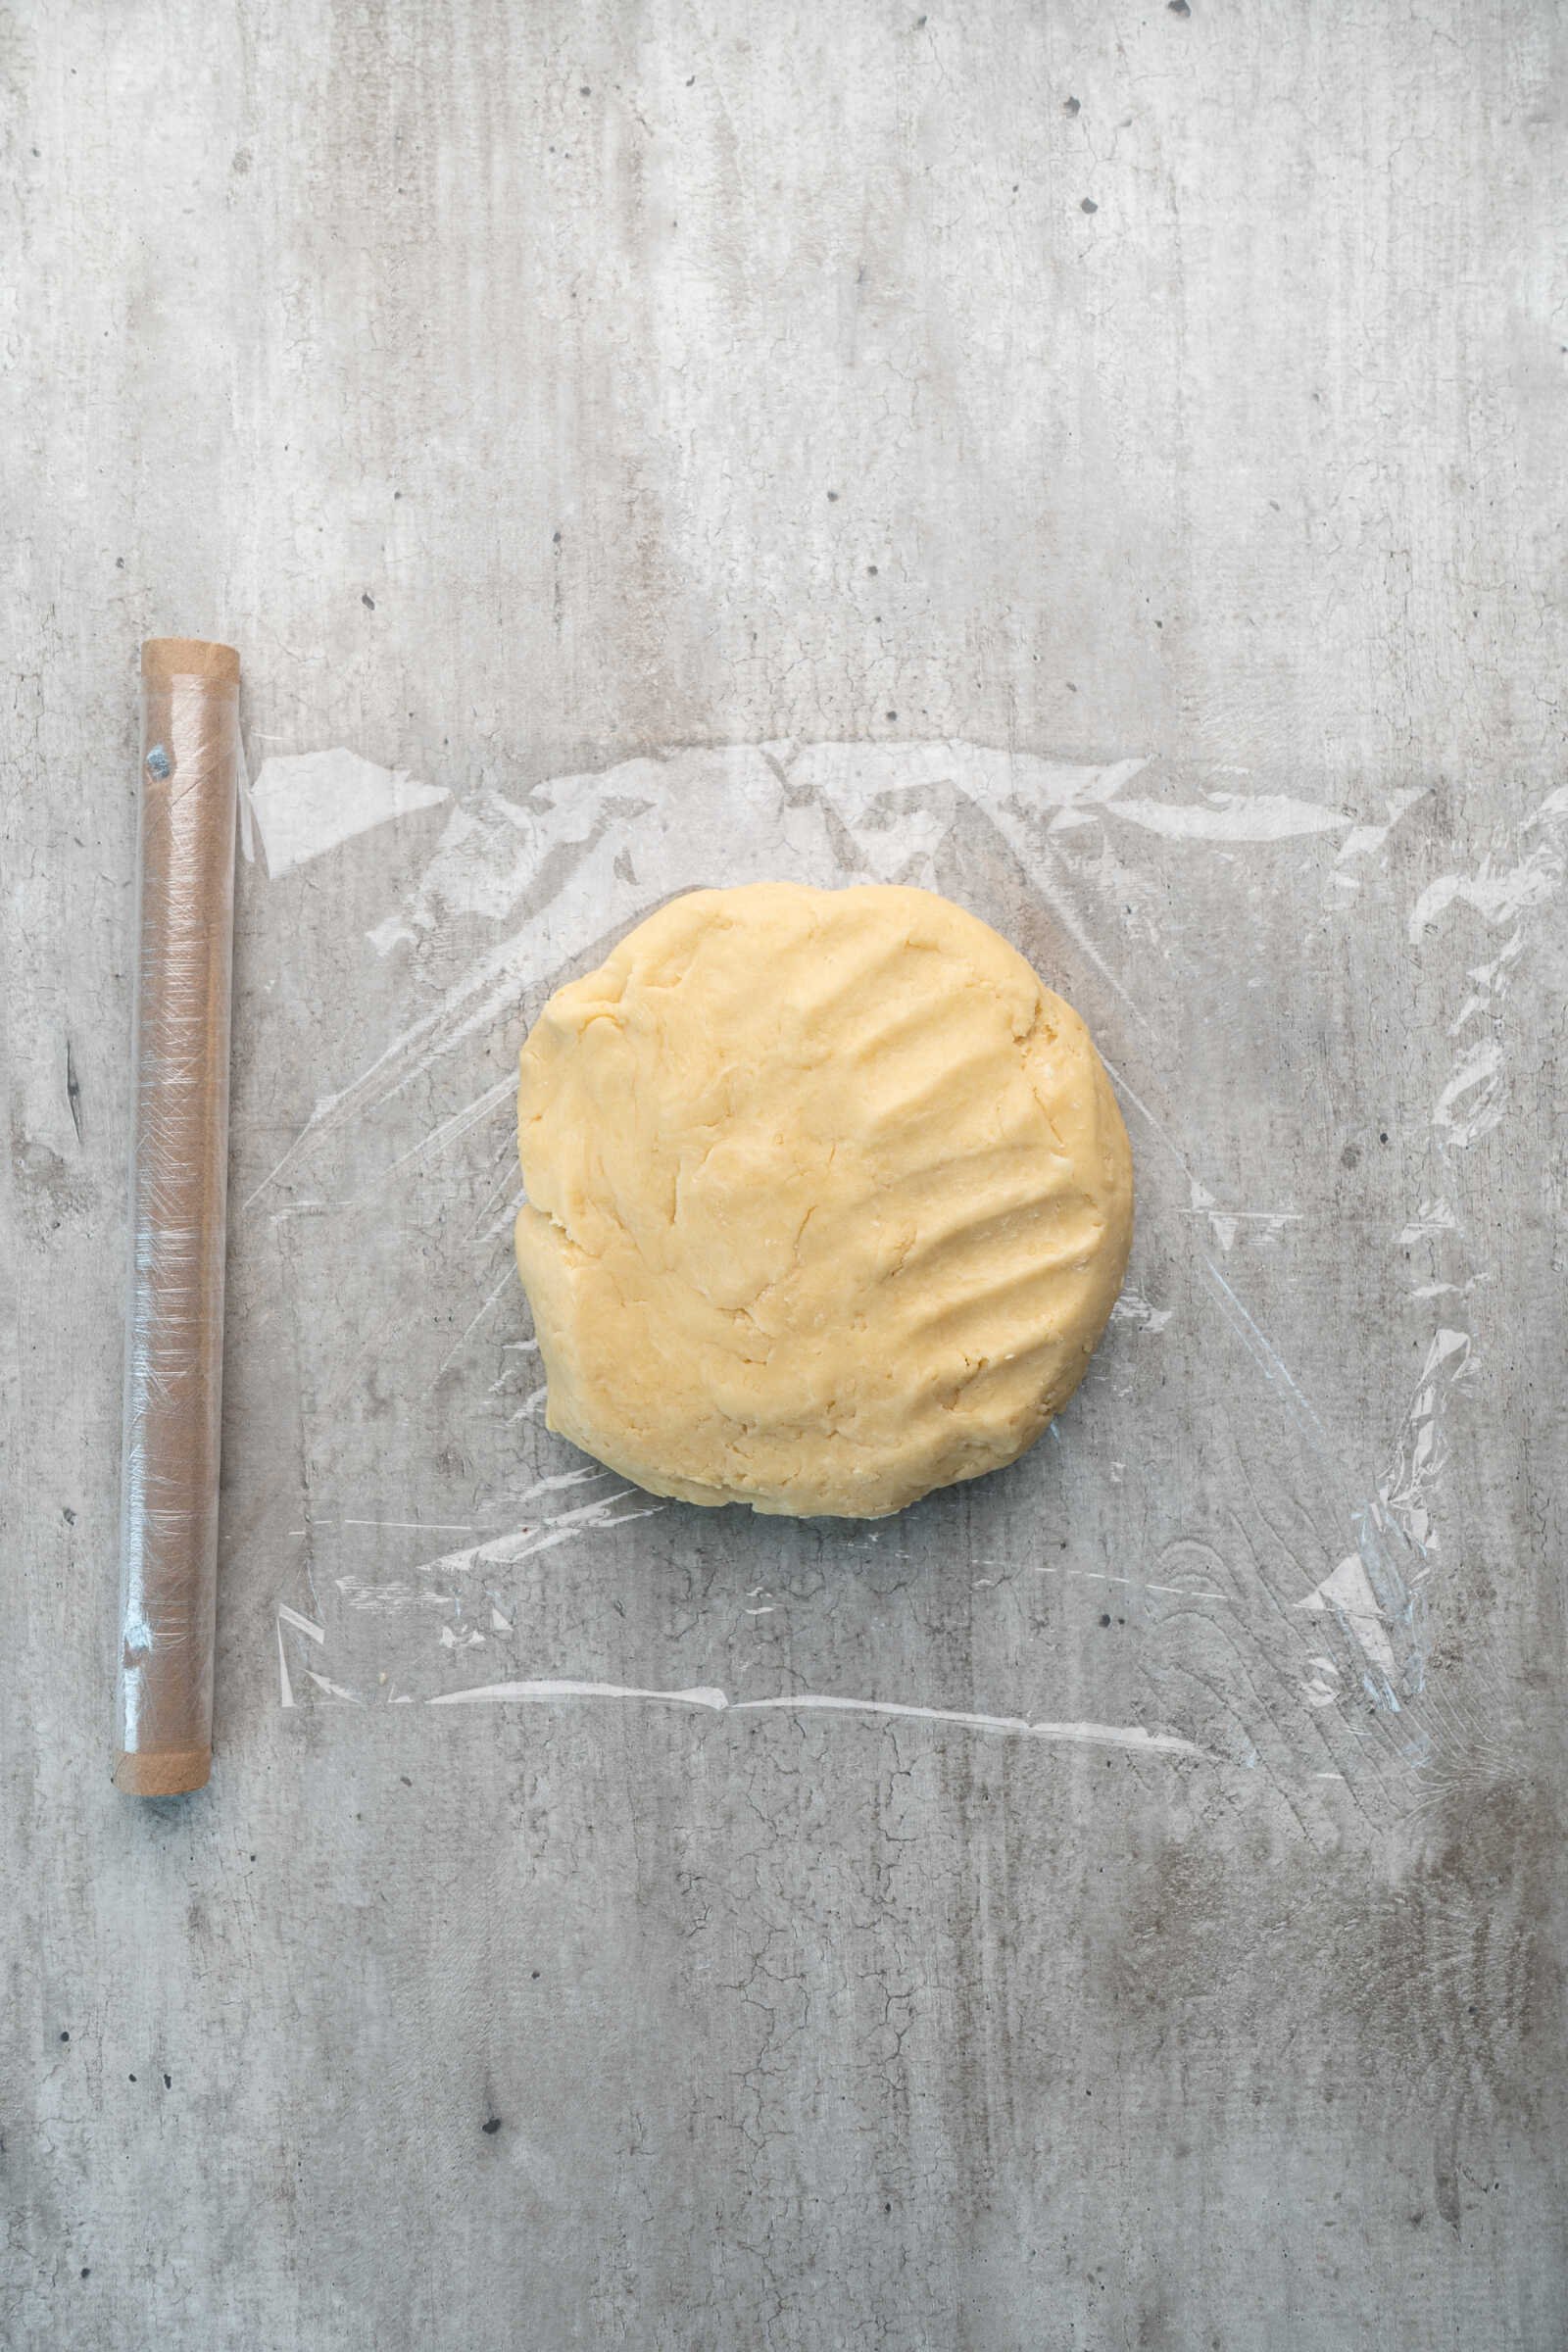
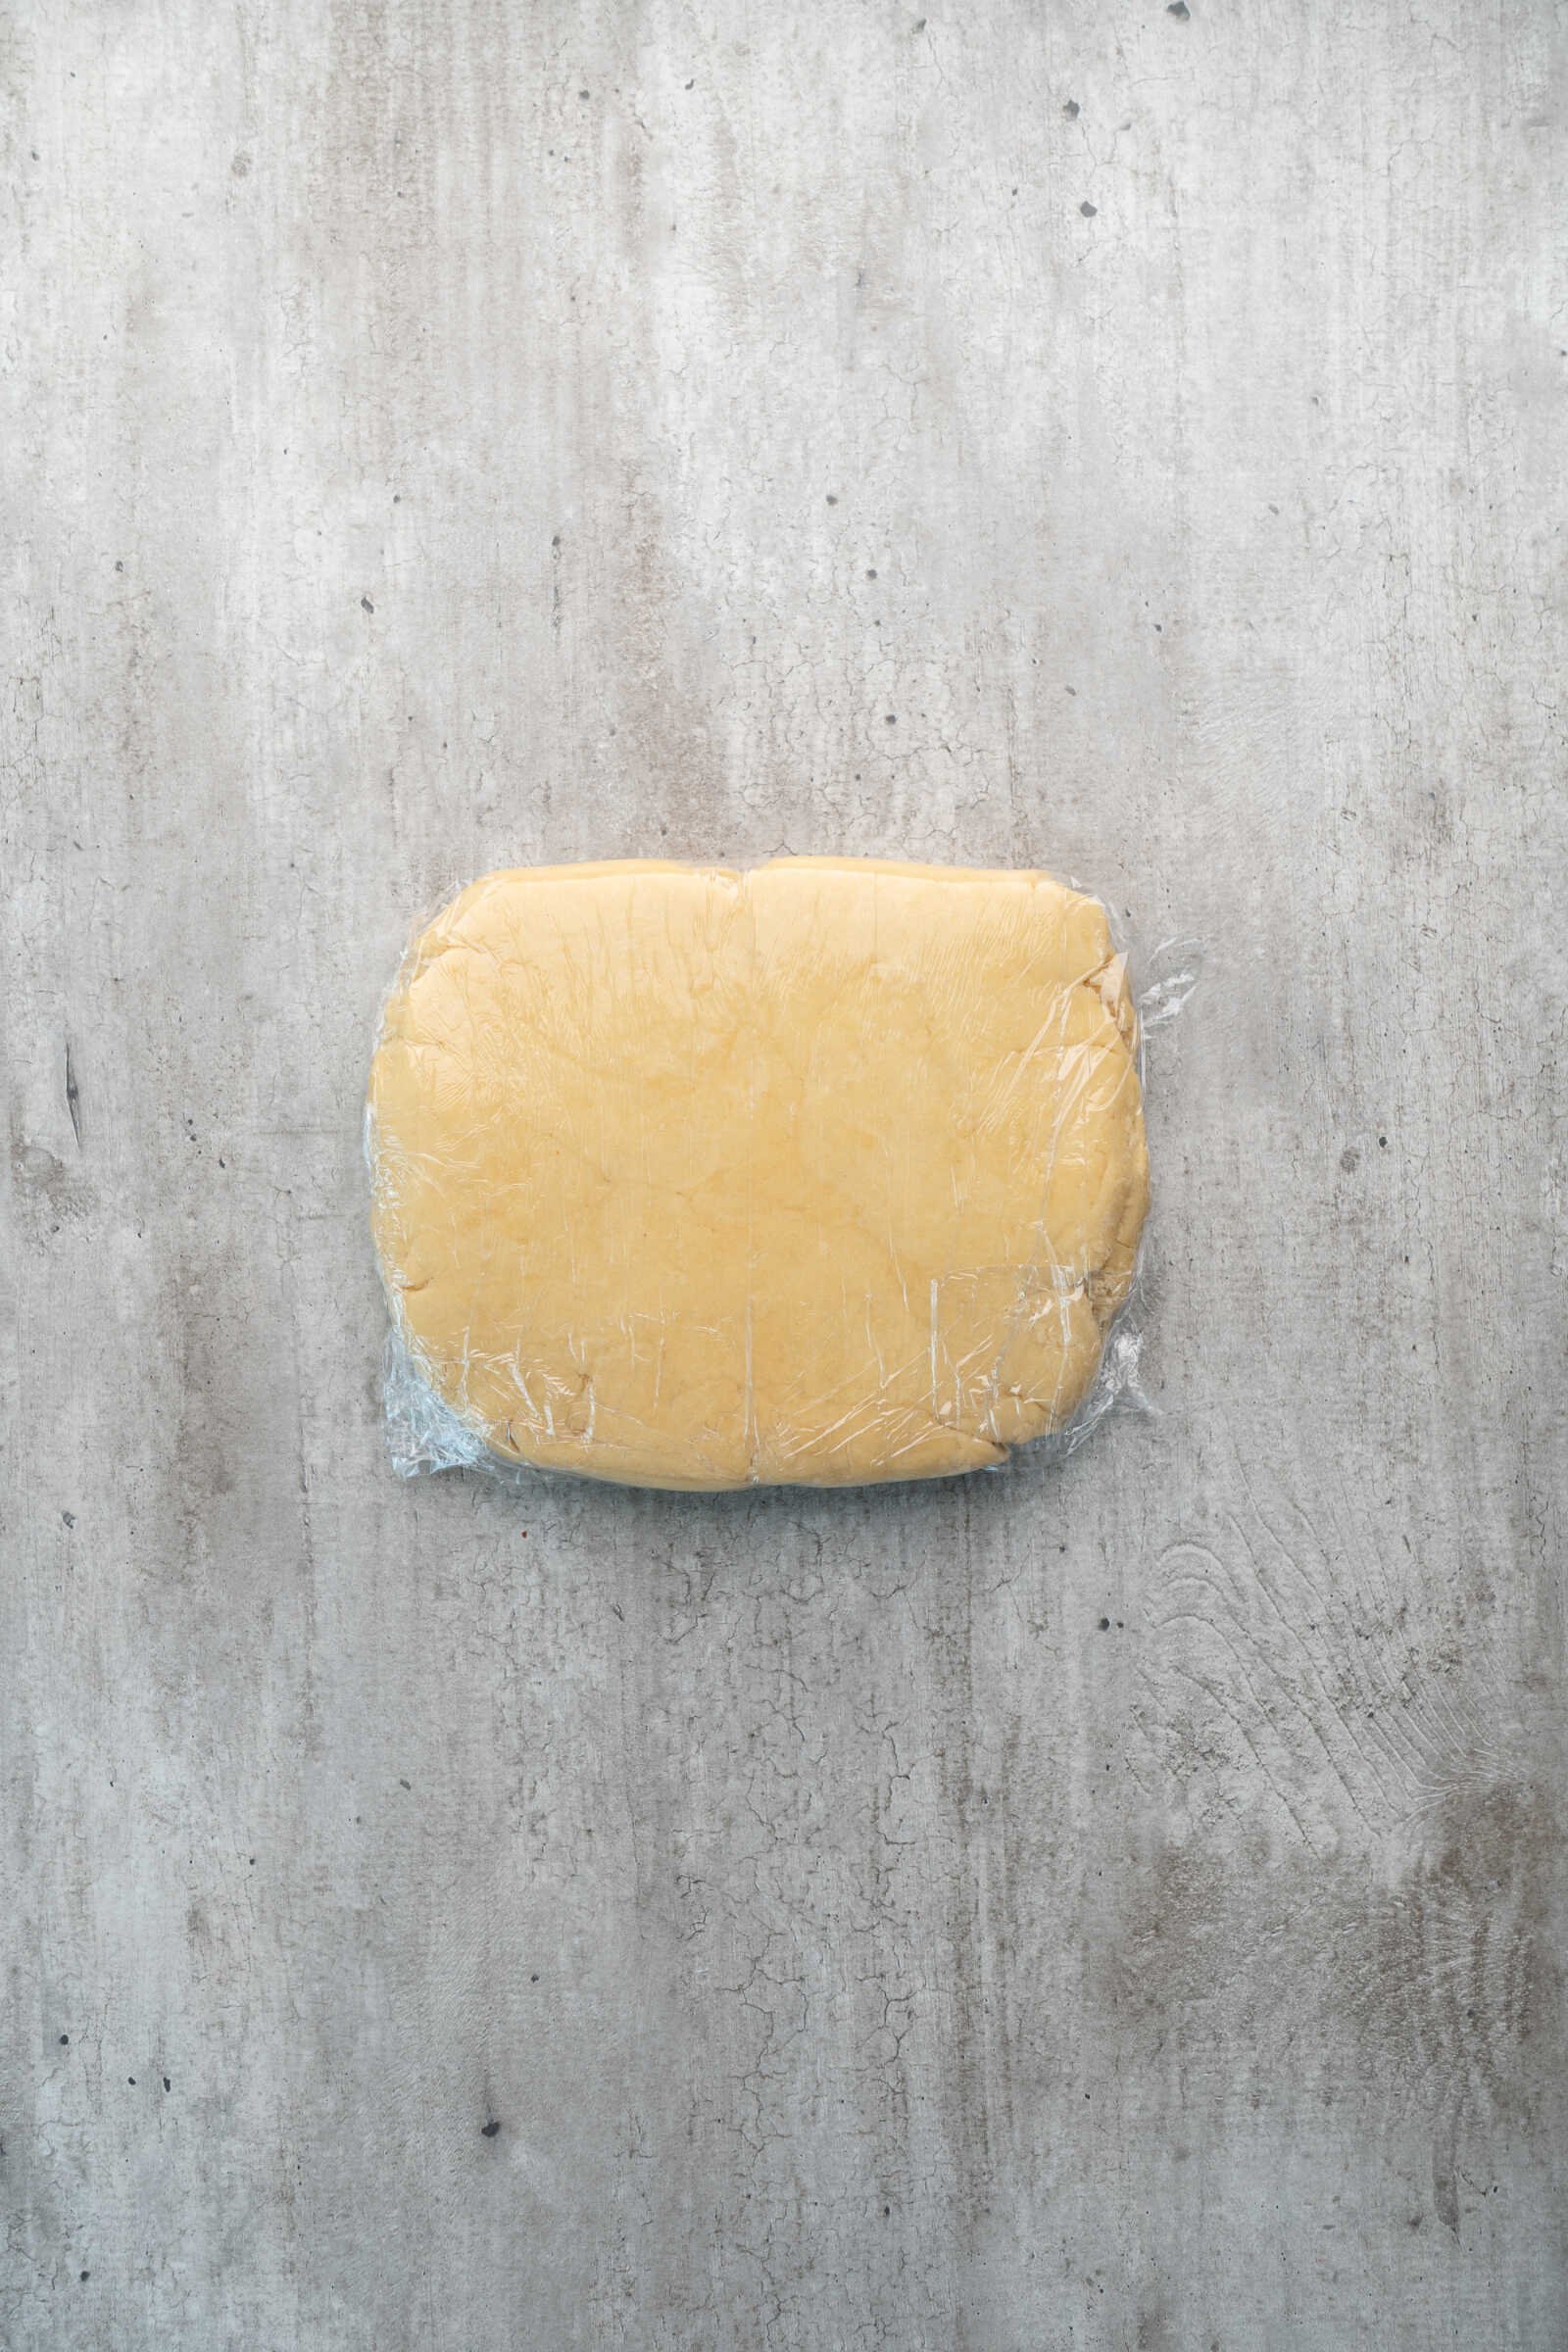
Flatten the dough into a disk, wrap it tightly in plastic wrap, and place it in the refrigerator for at least two hours to chill. Chilling the dough helps relax the gluten and ensures the tart shells bake up tender and crisp.


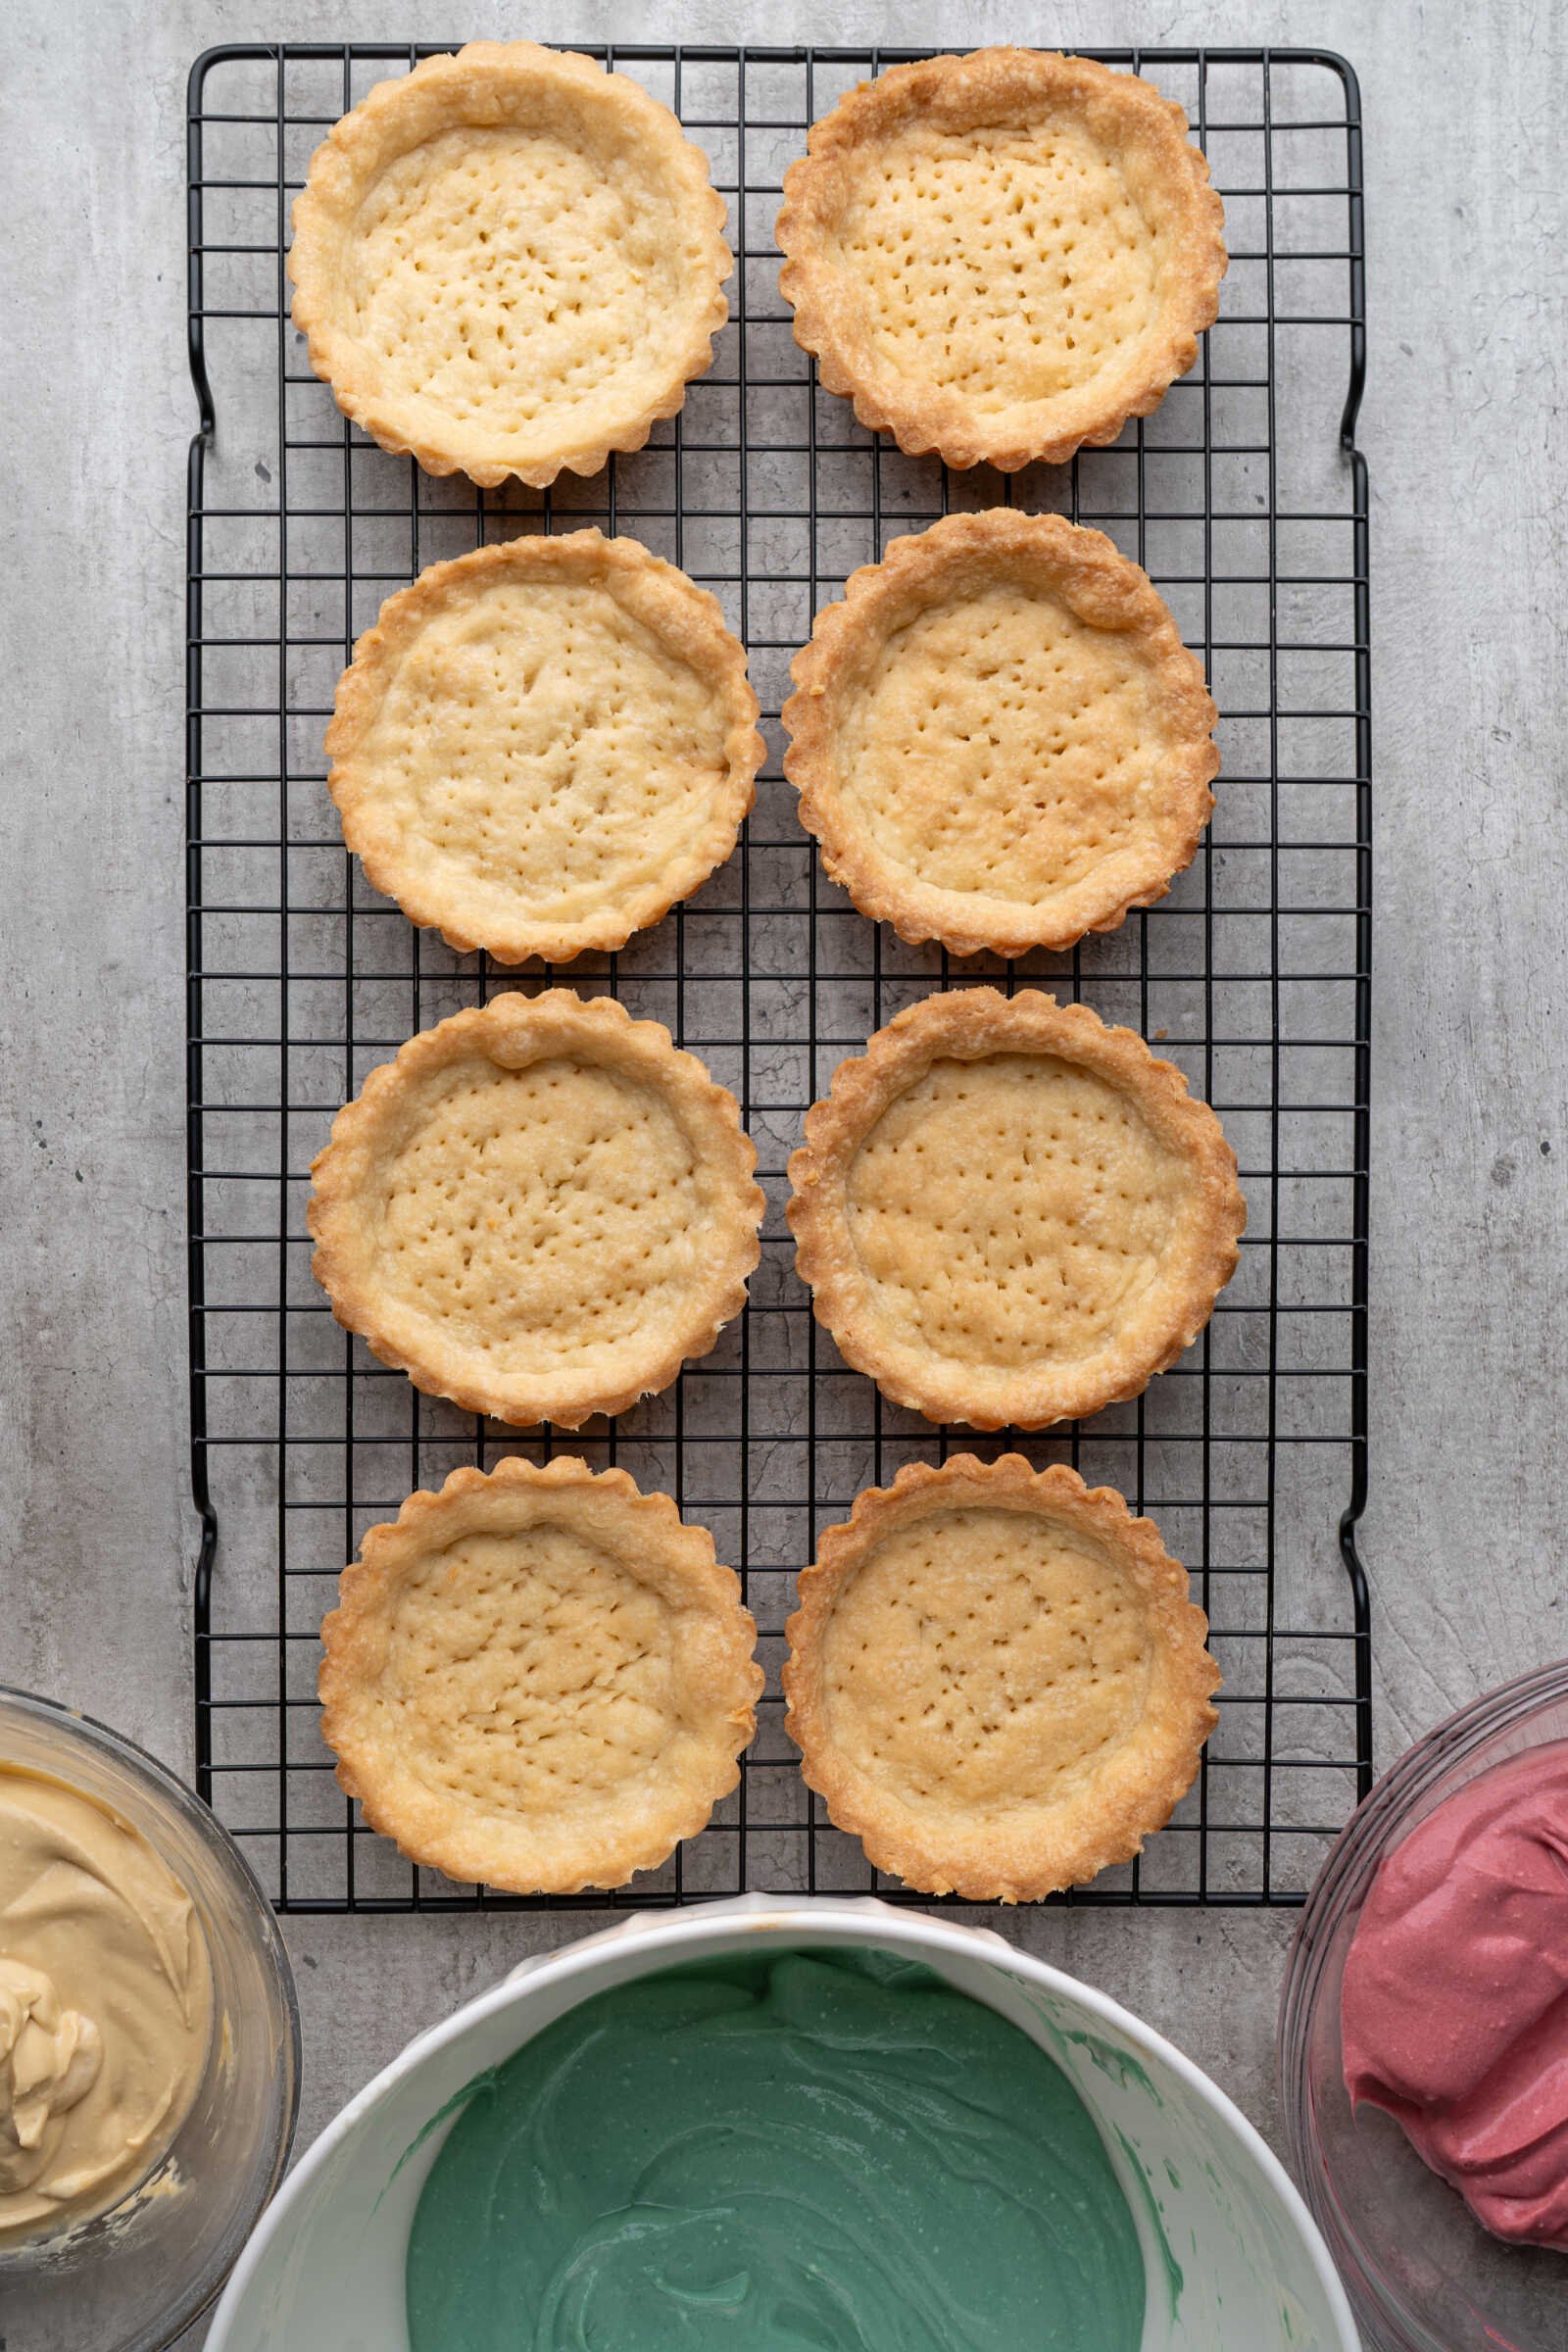
2. Shape and Bake the Tart Shells
Once the dough has chilled, it’s time to shape the tart shells. Preheat your oven to 350°F and generously butter eight 4-inch tart pans.
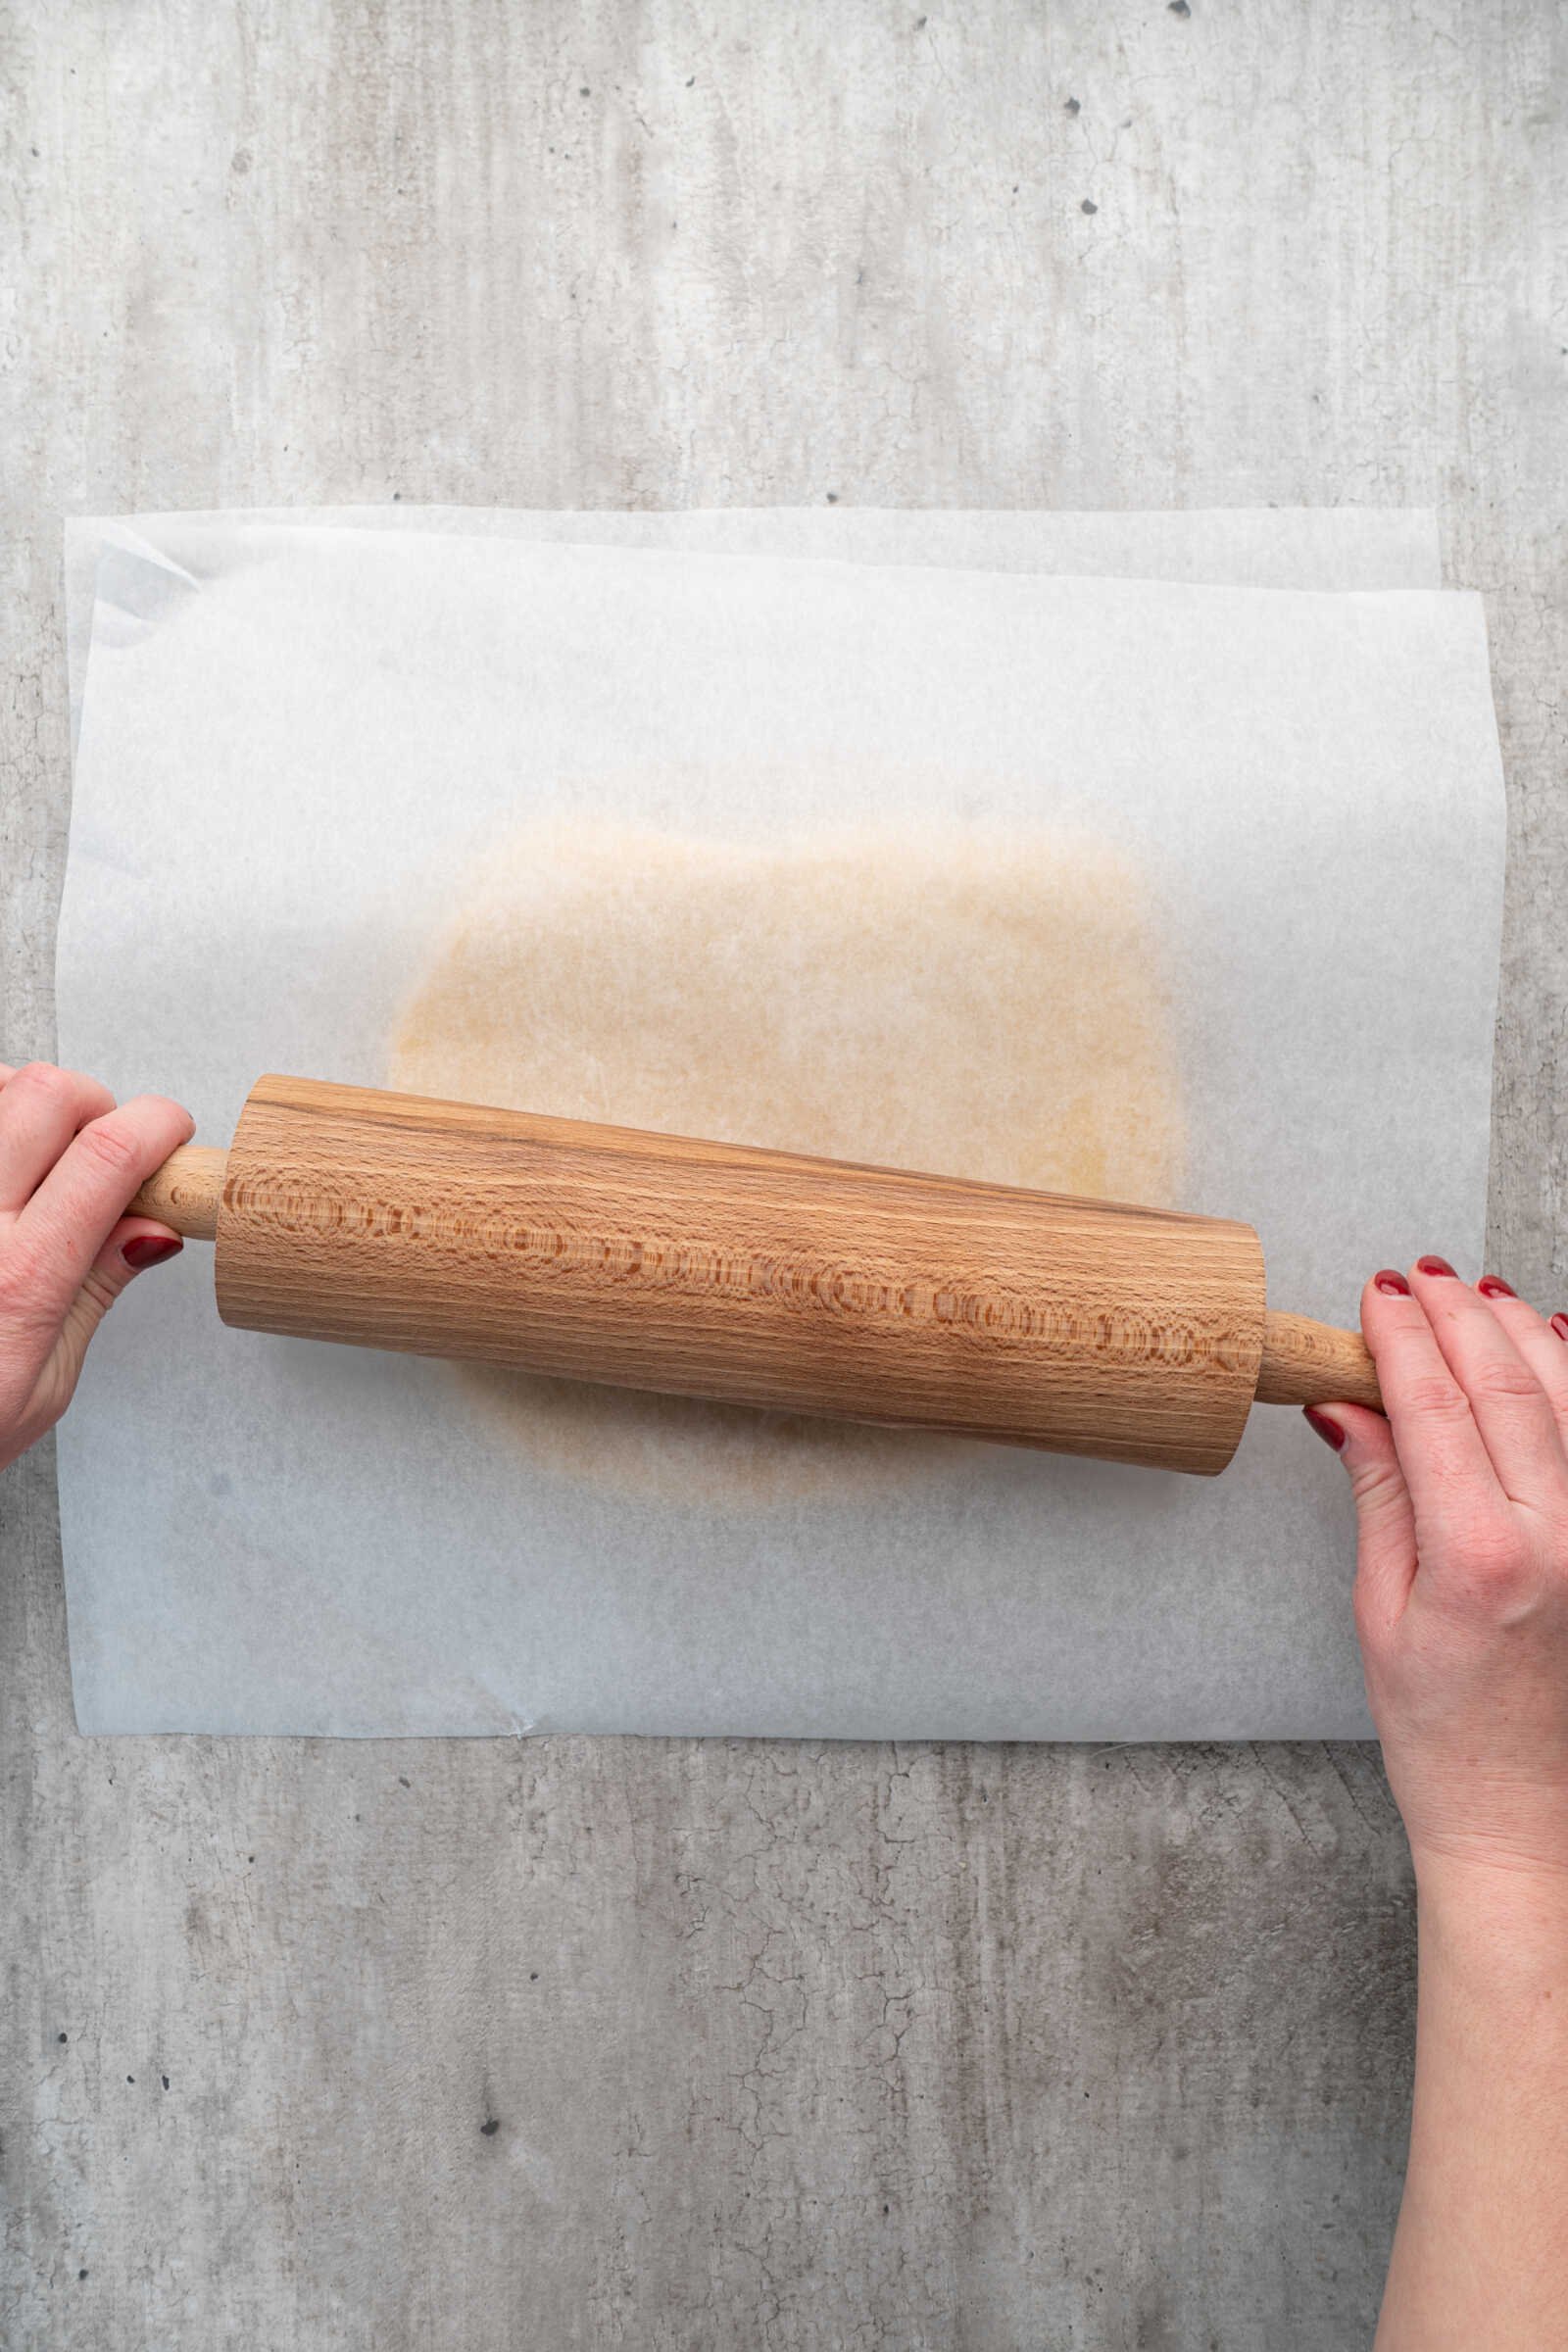
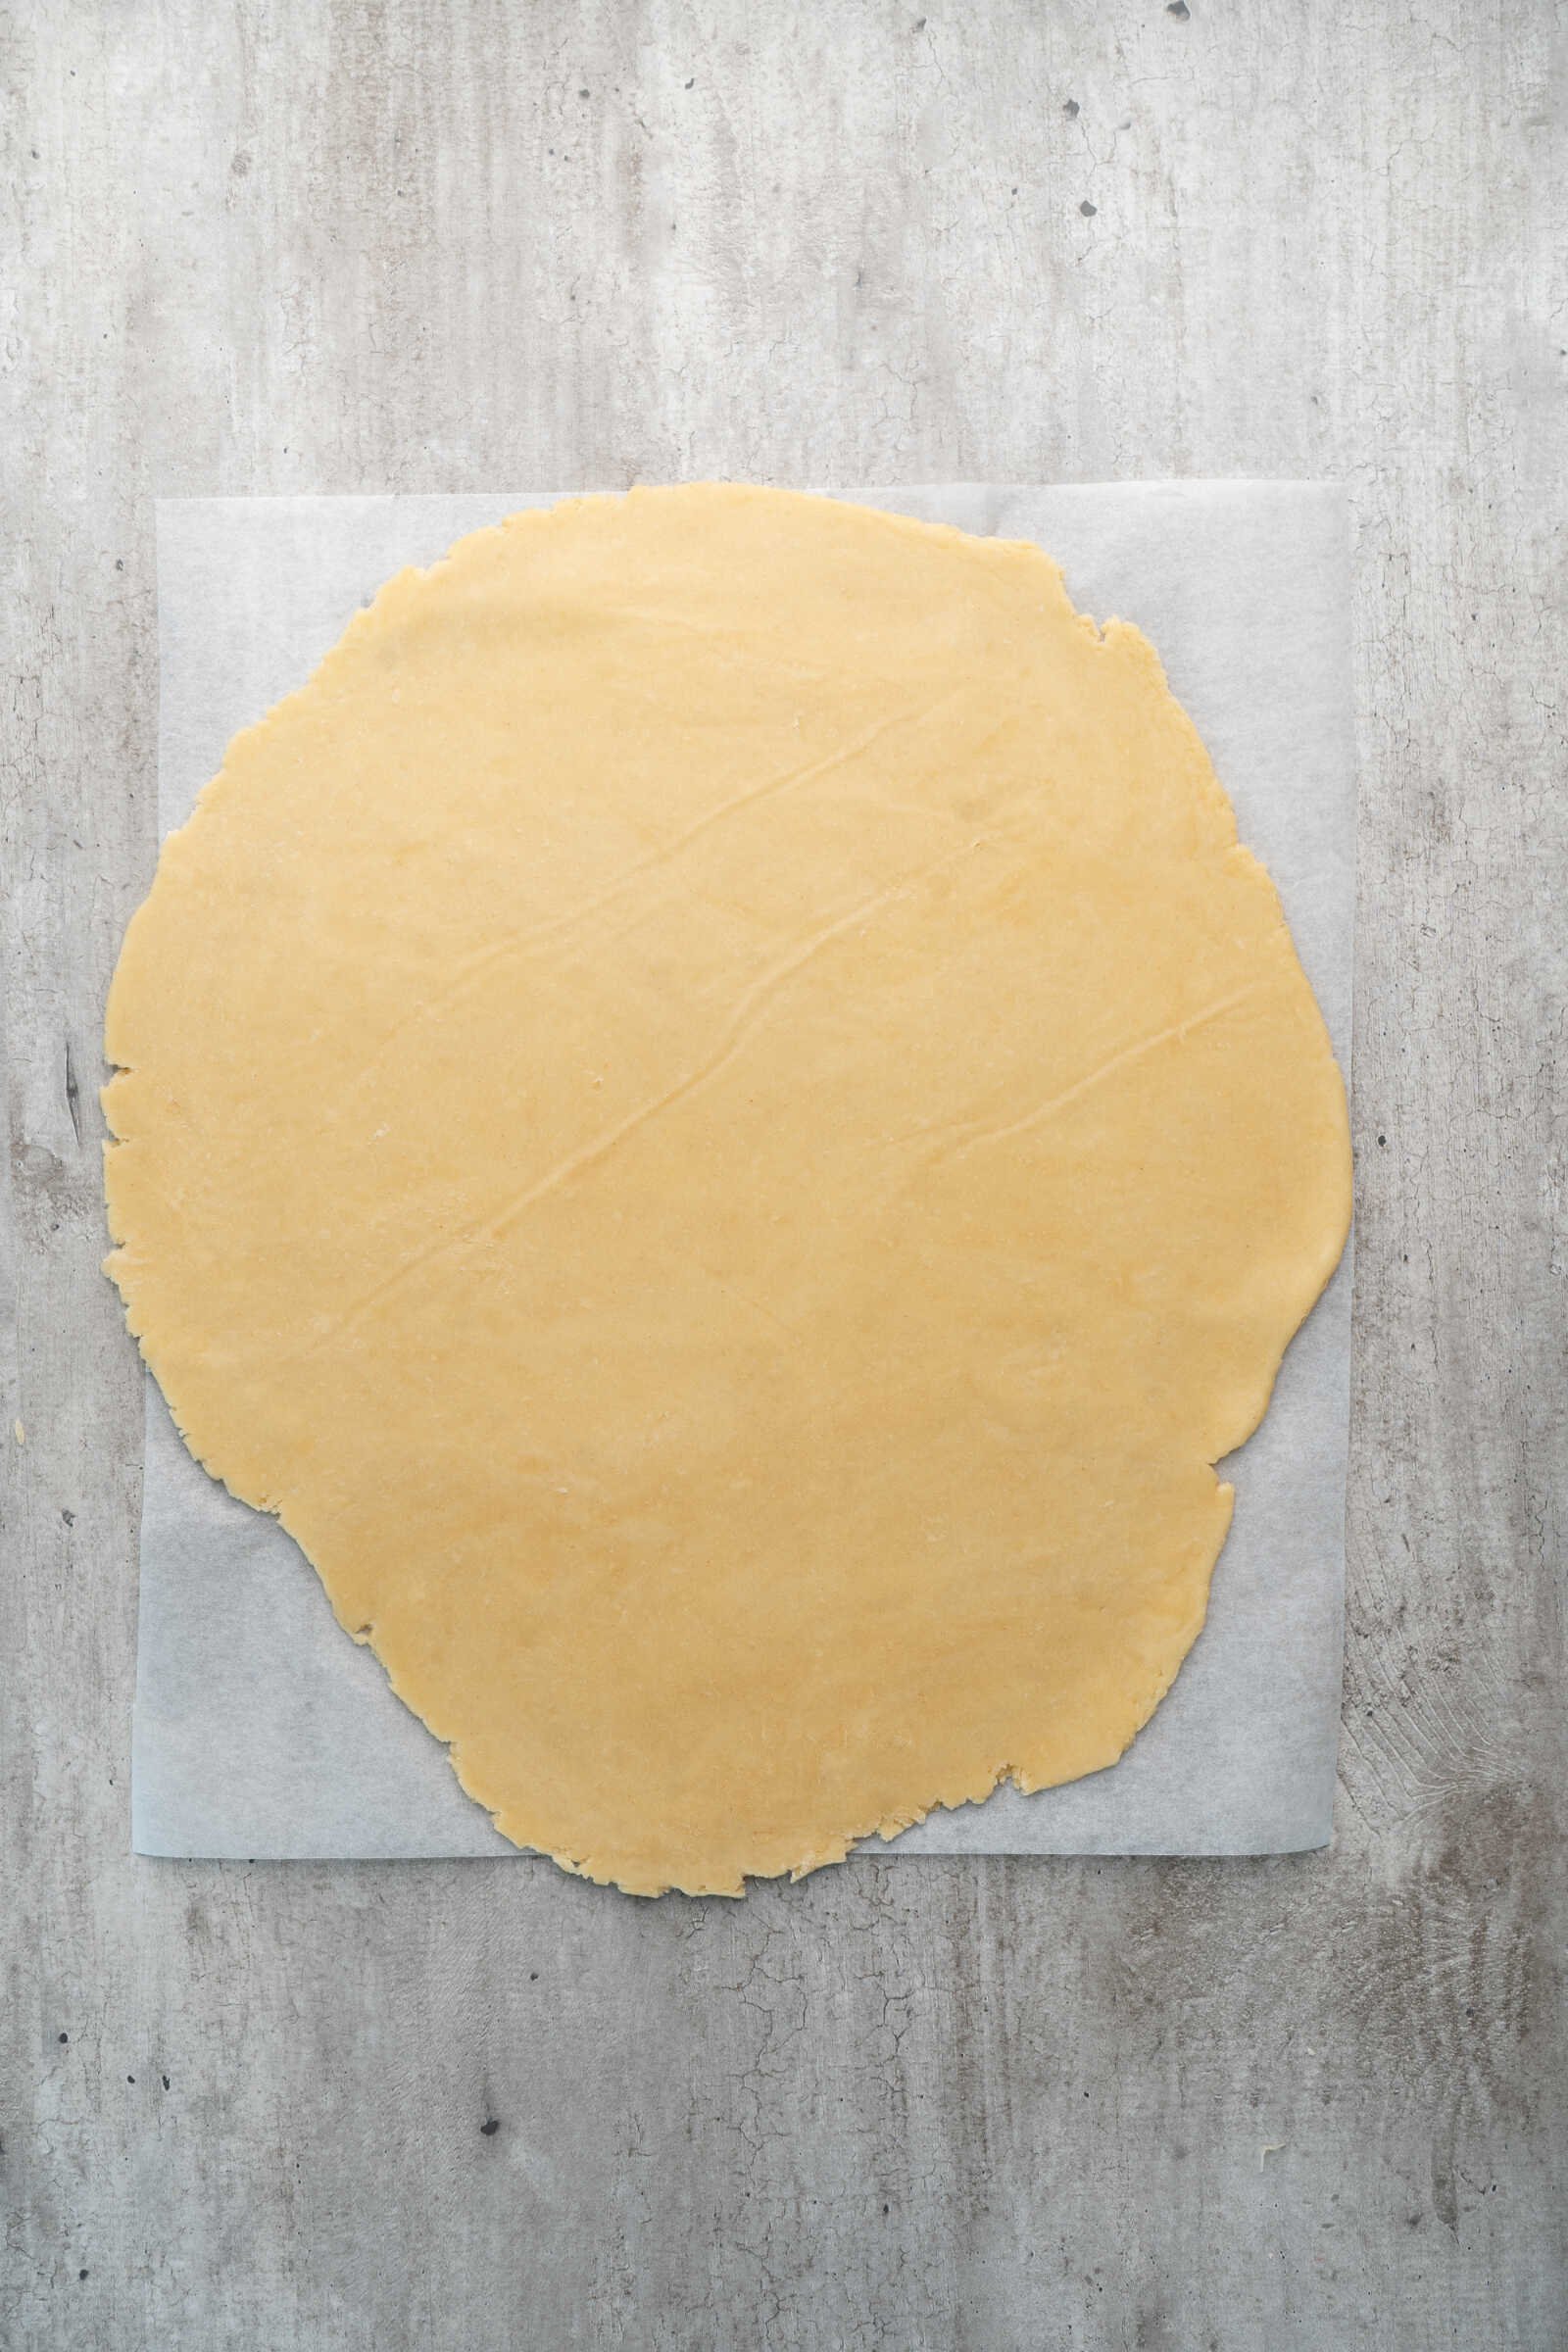
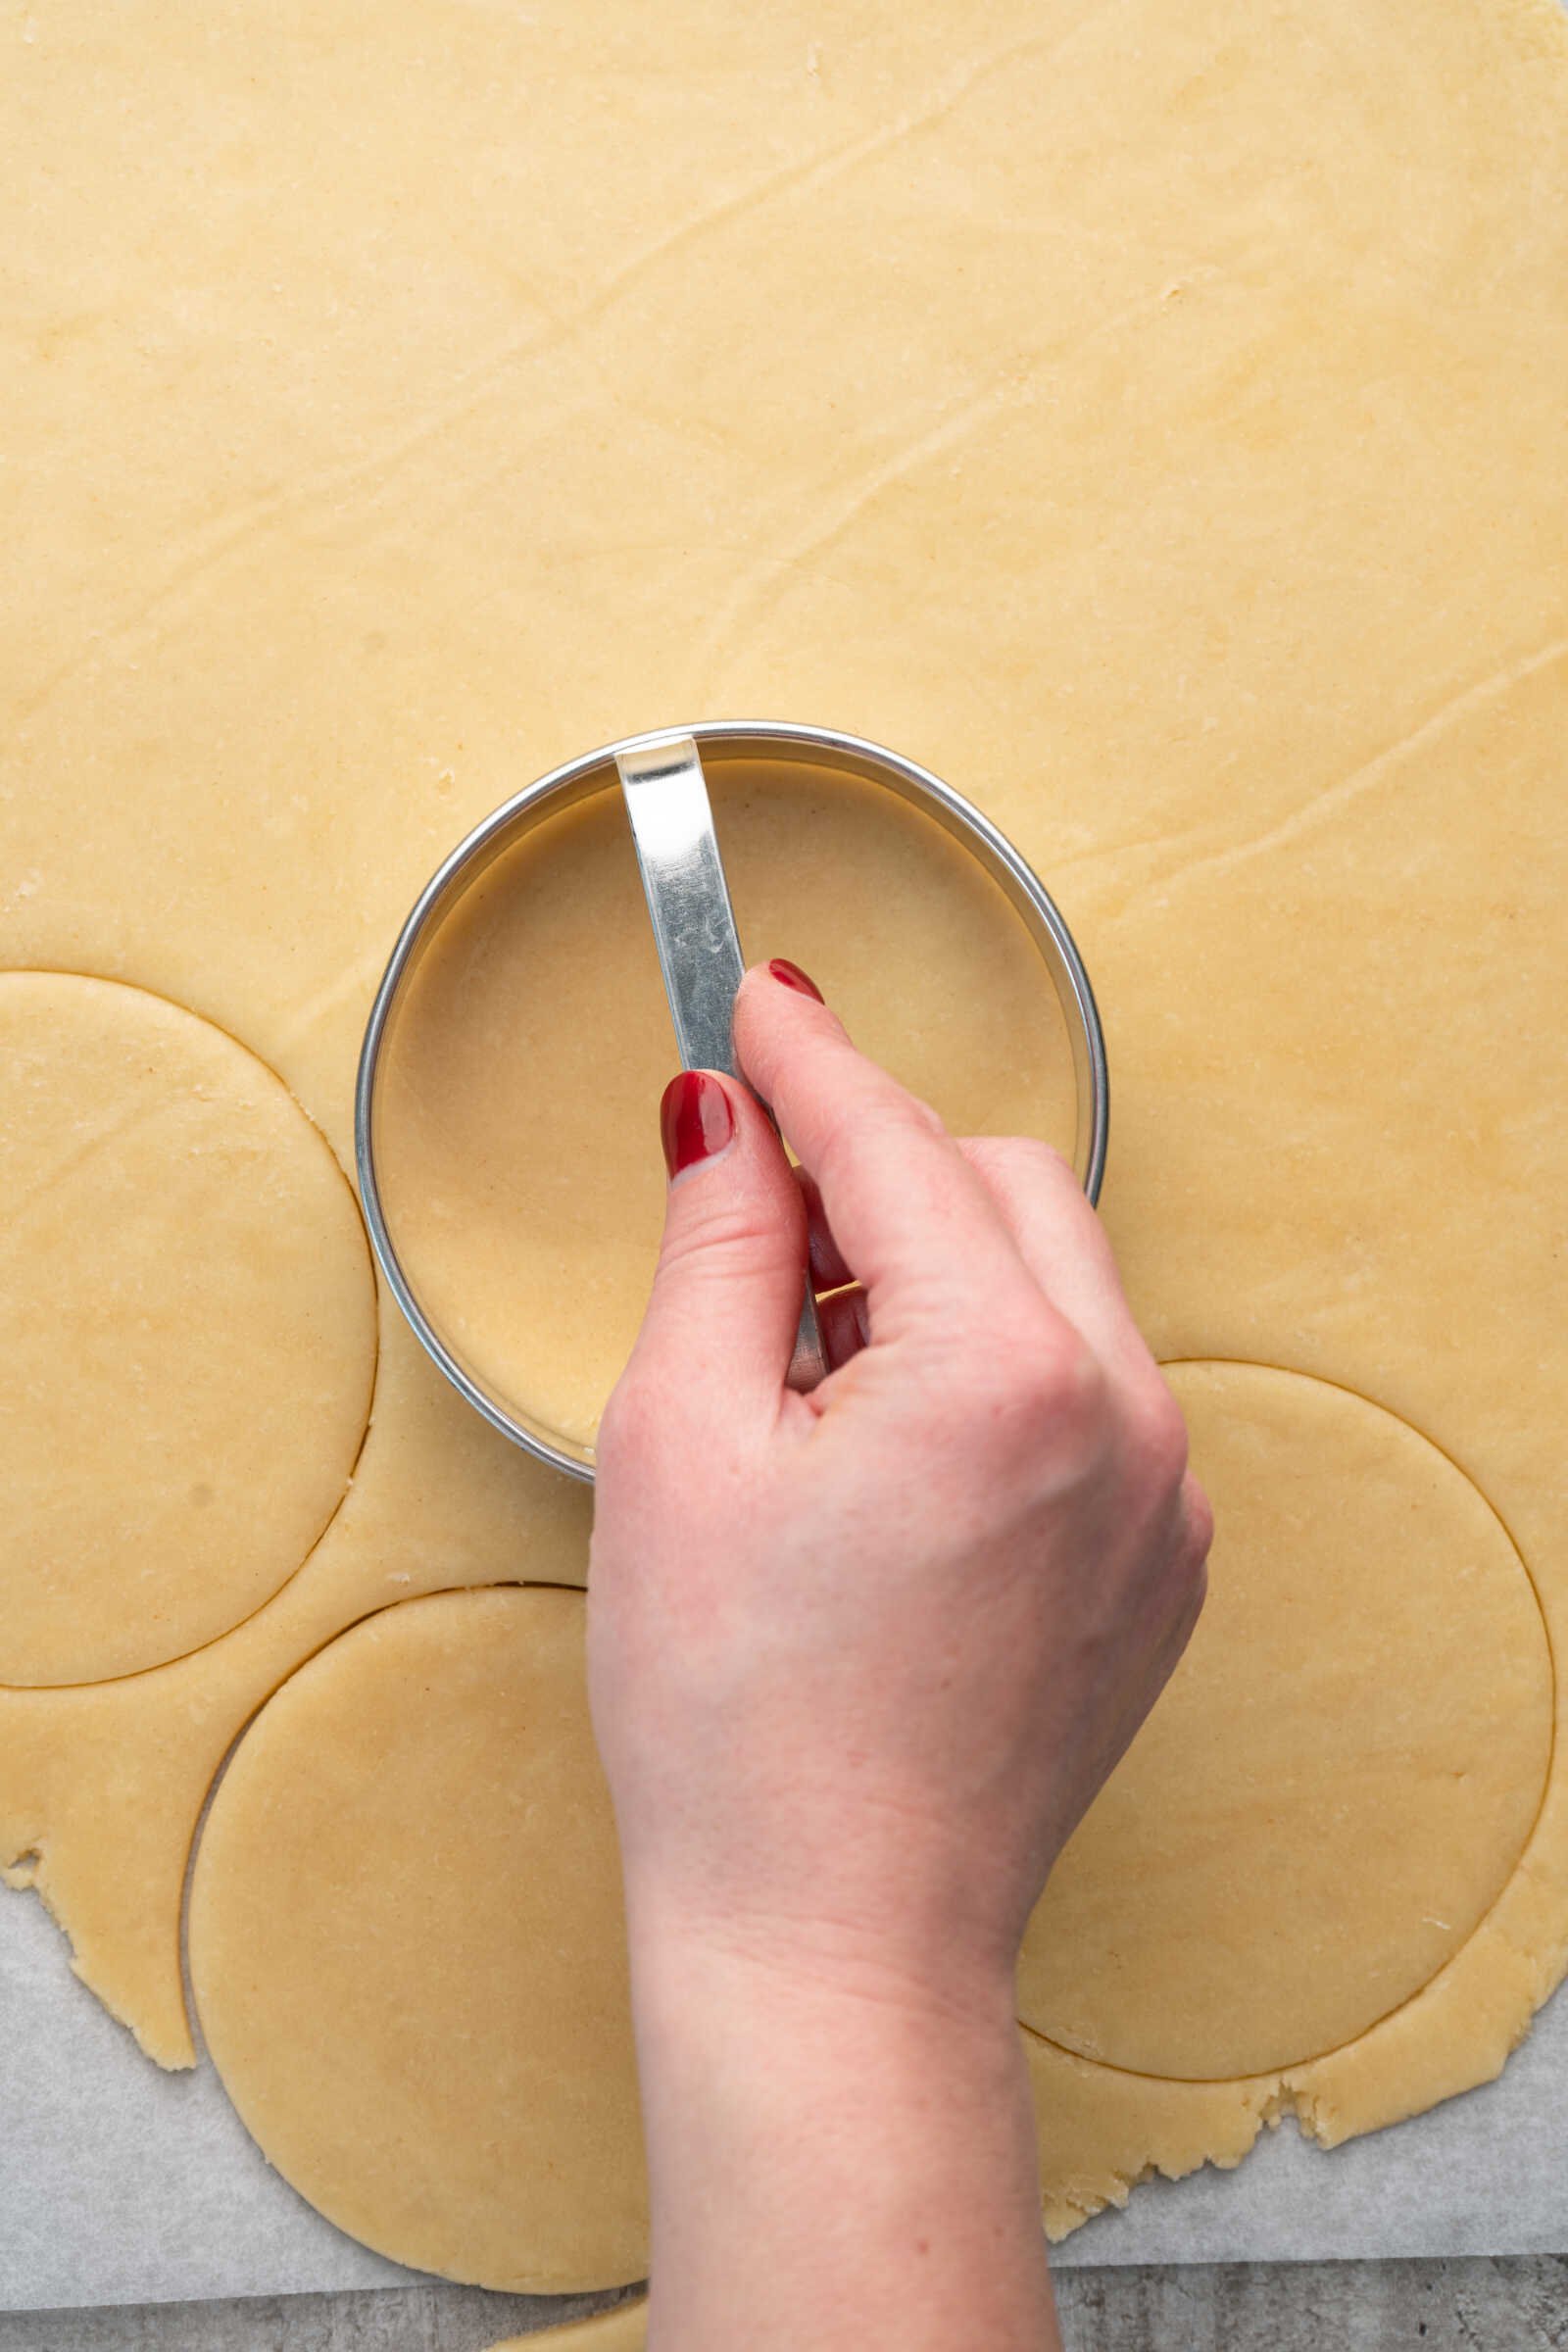
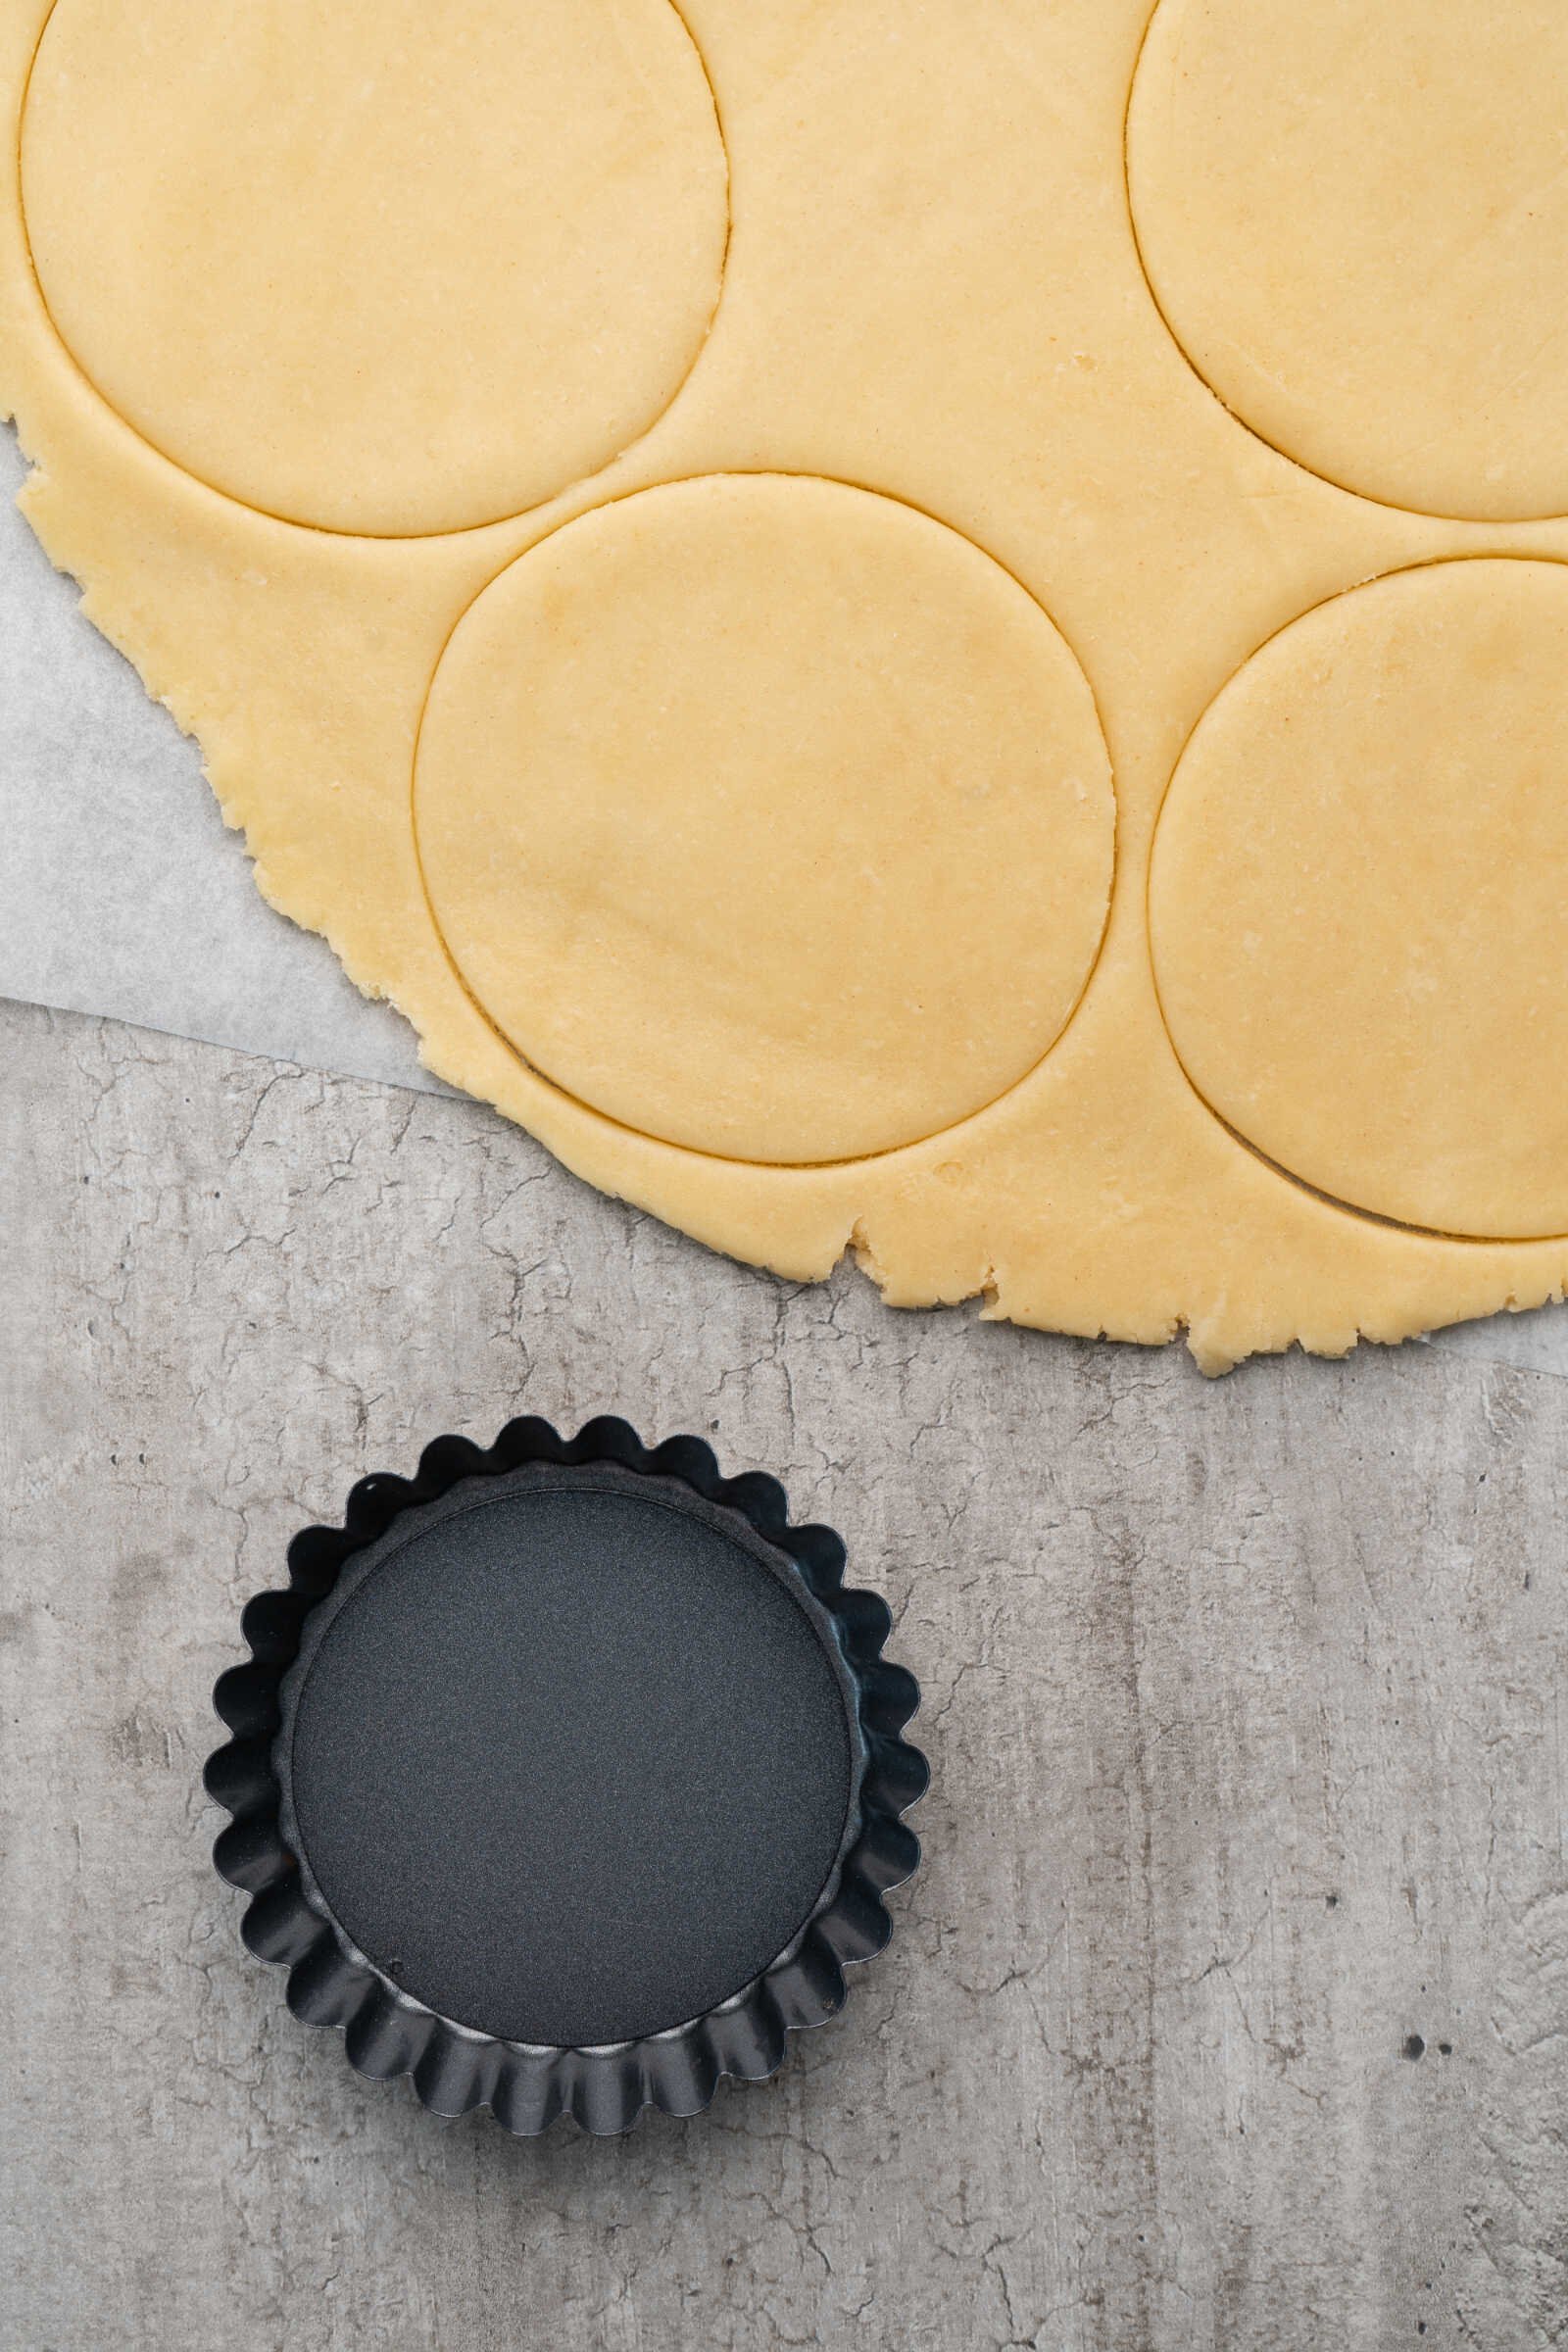
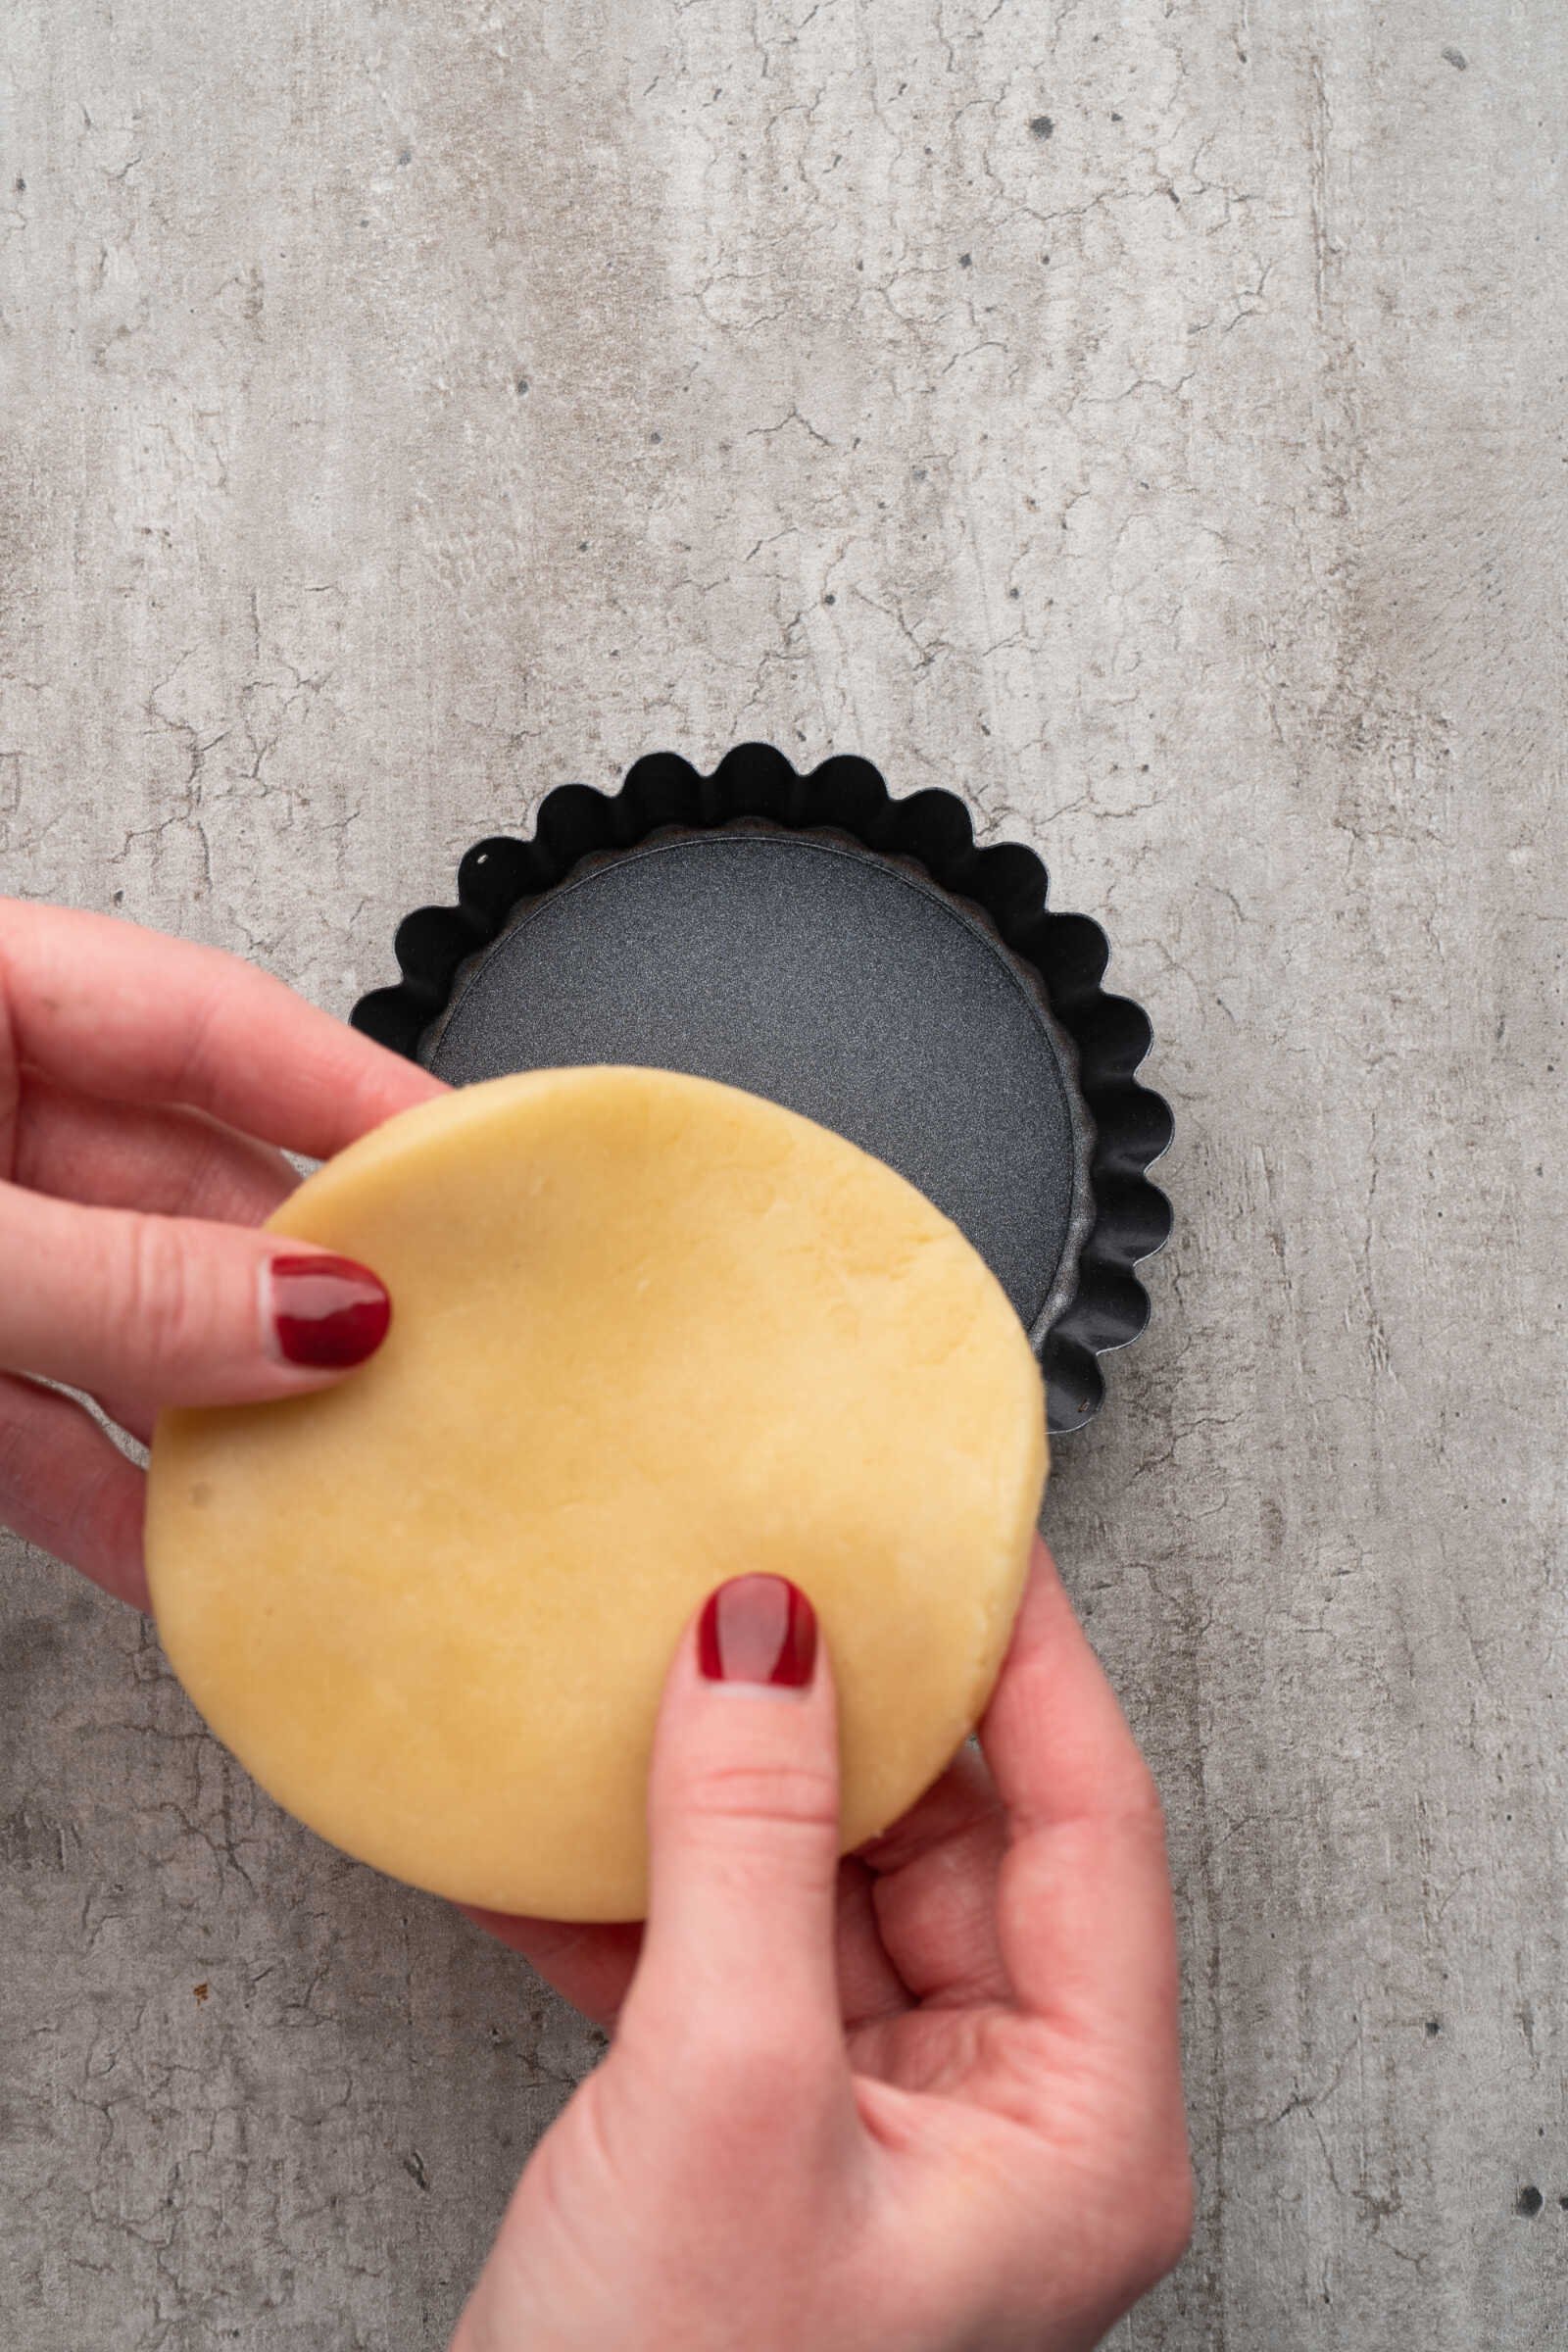
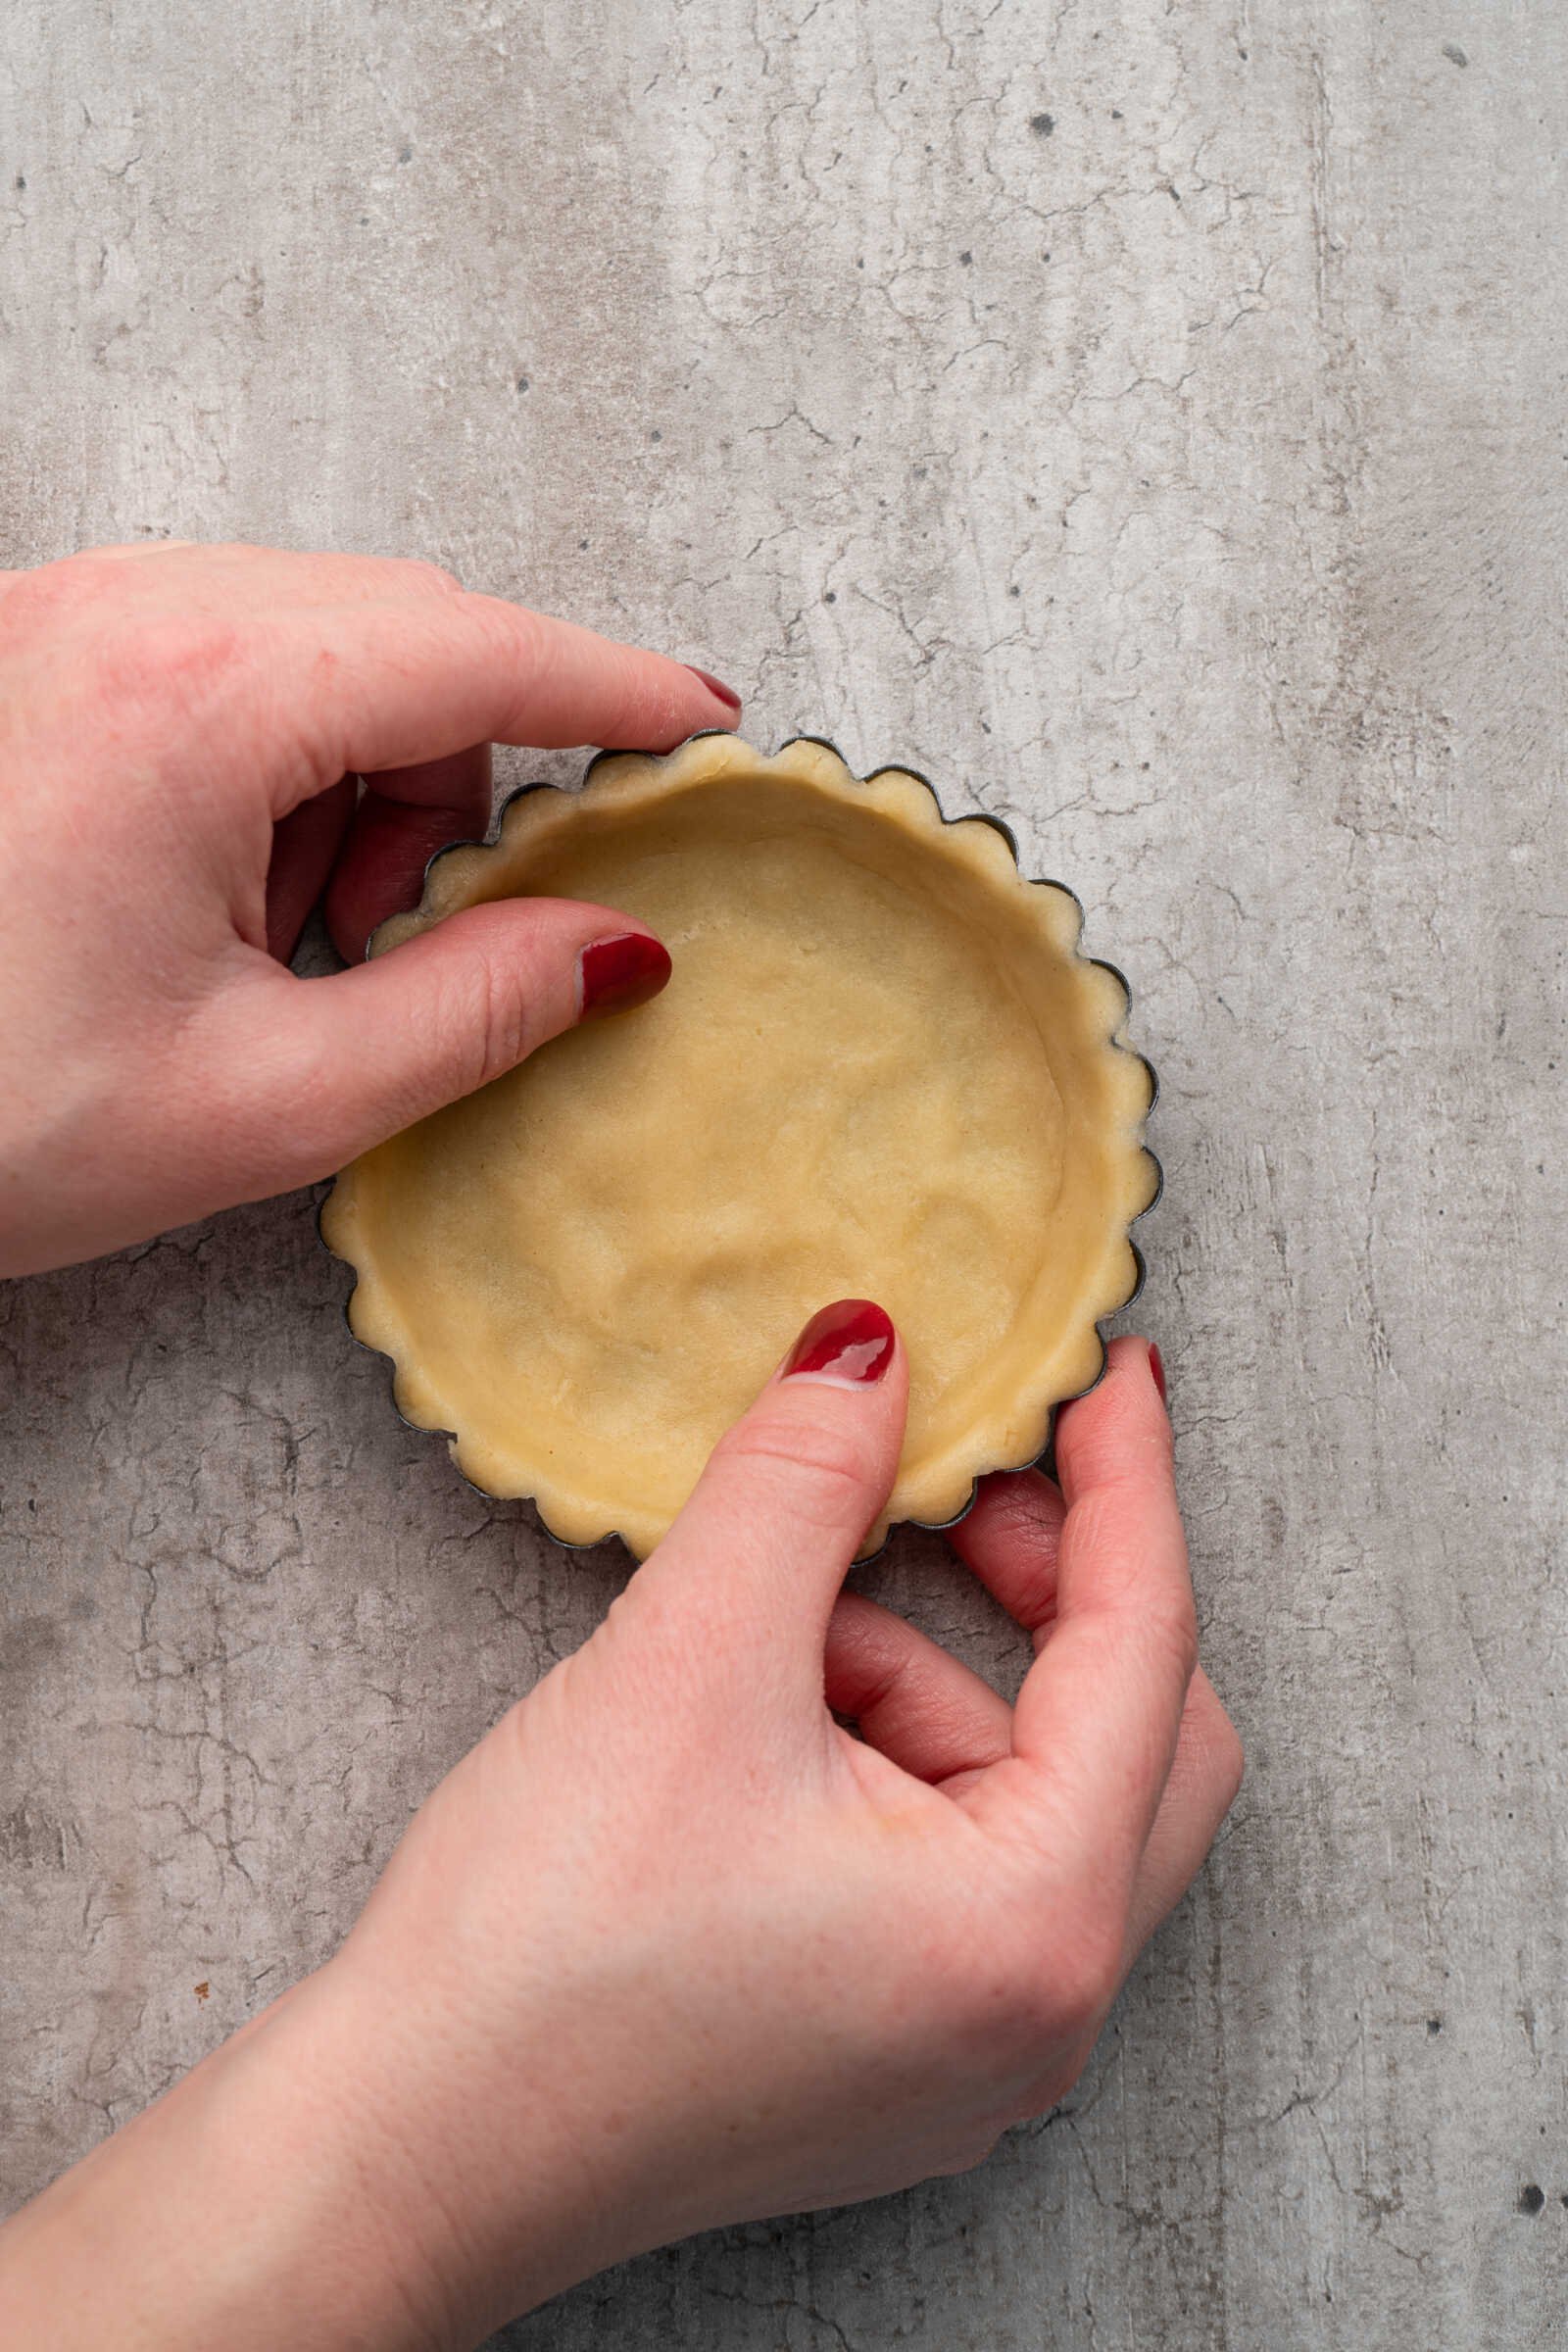
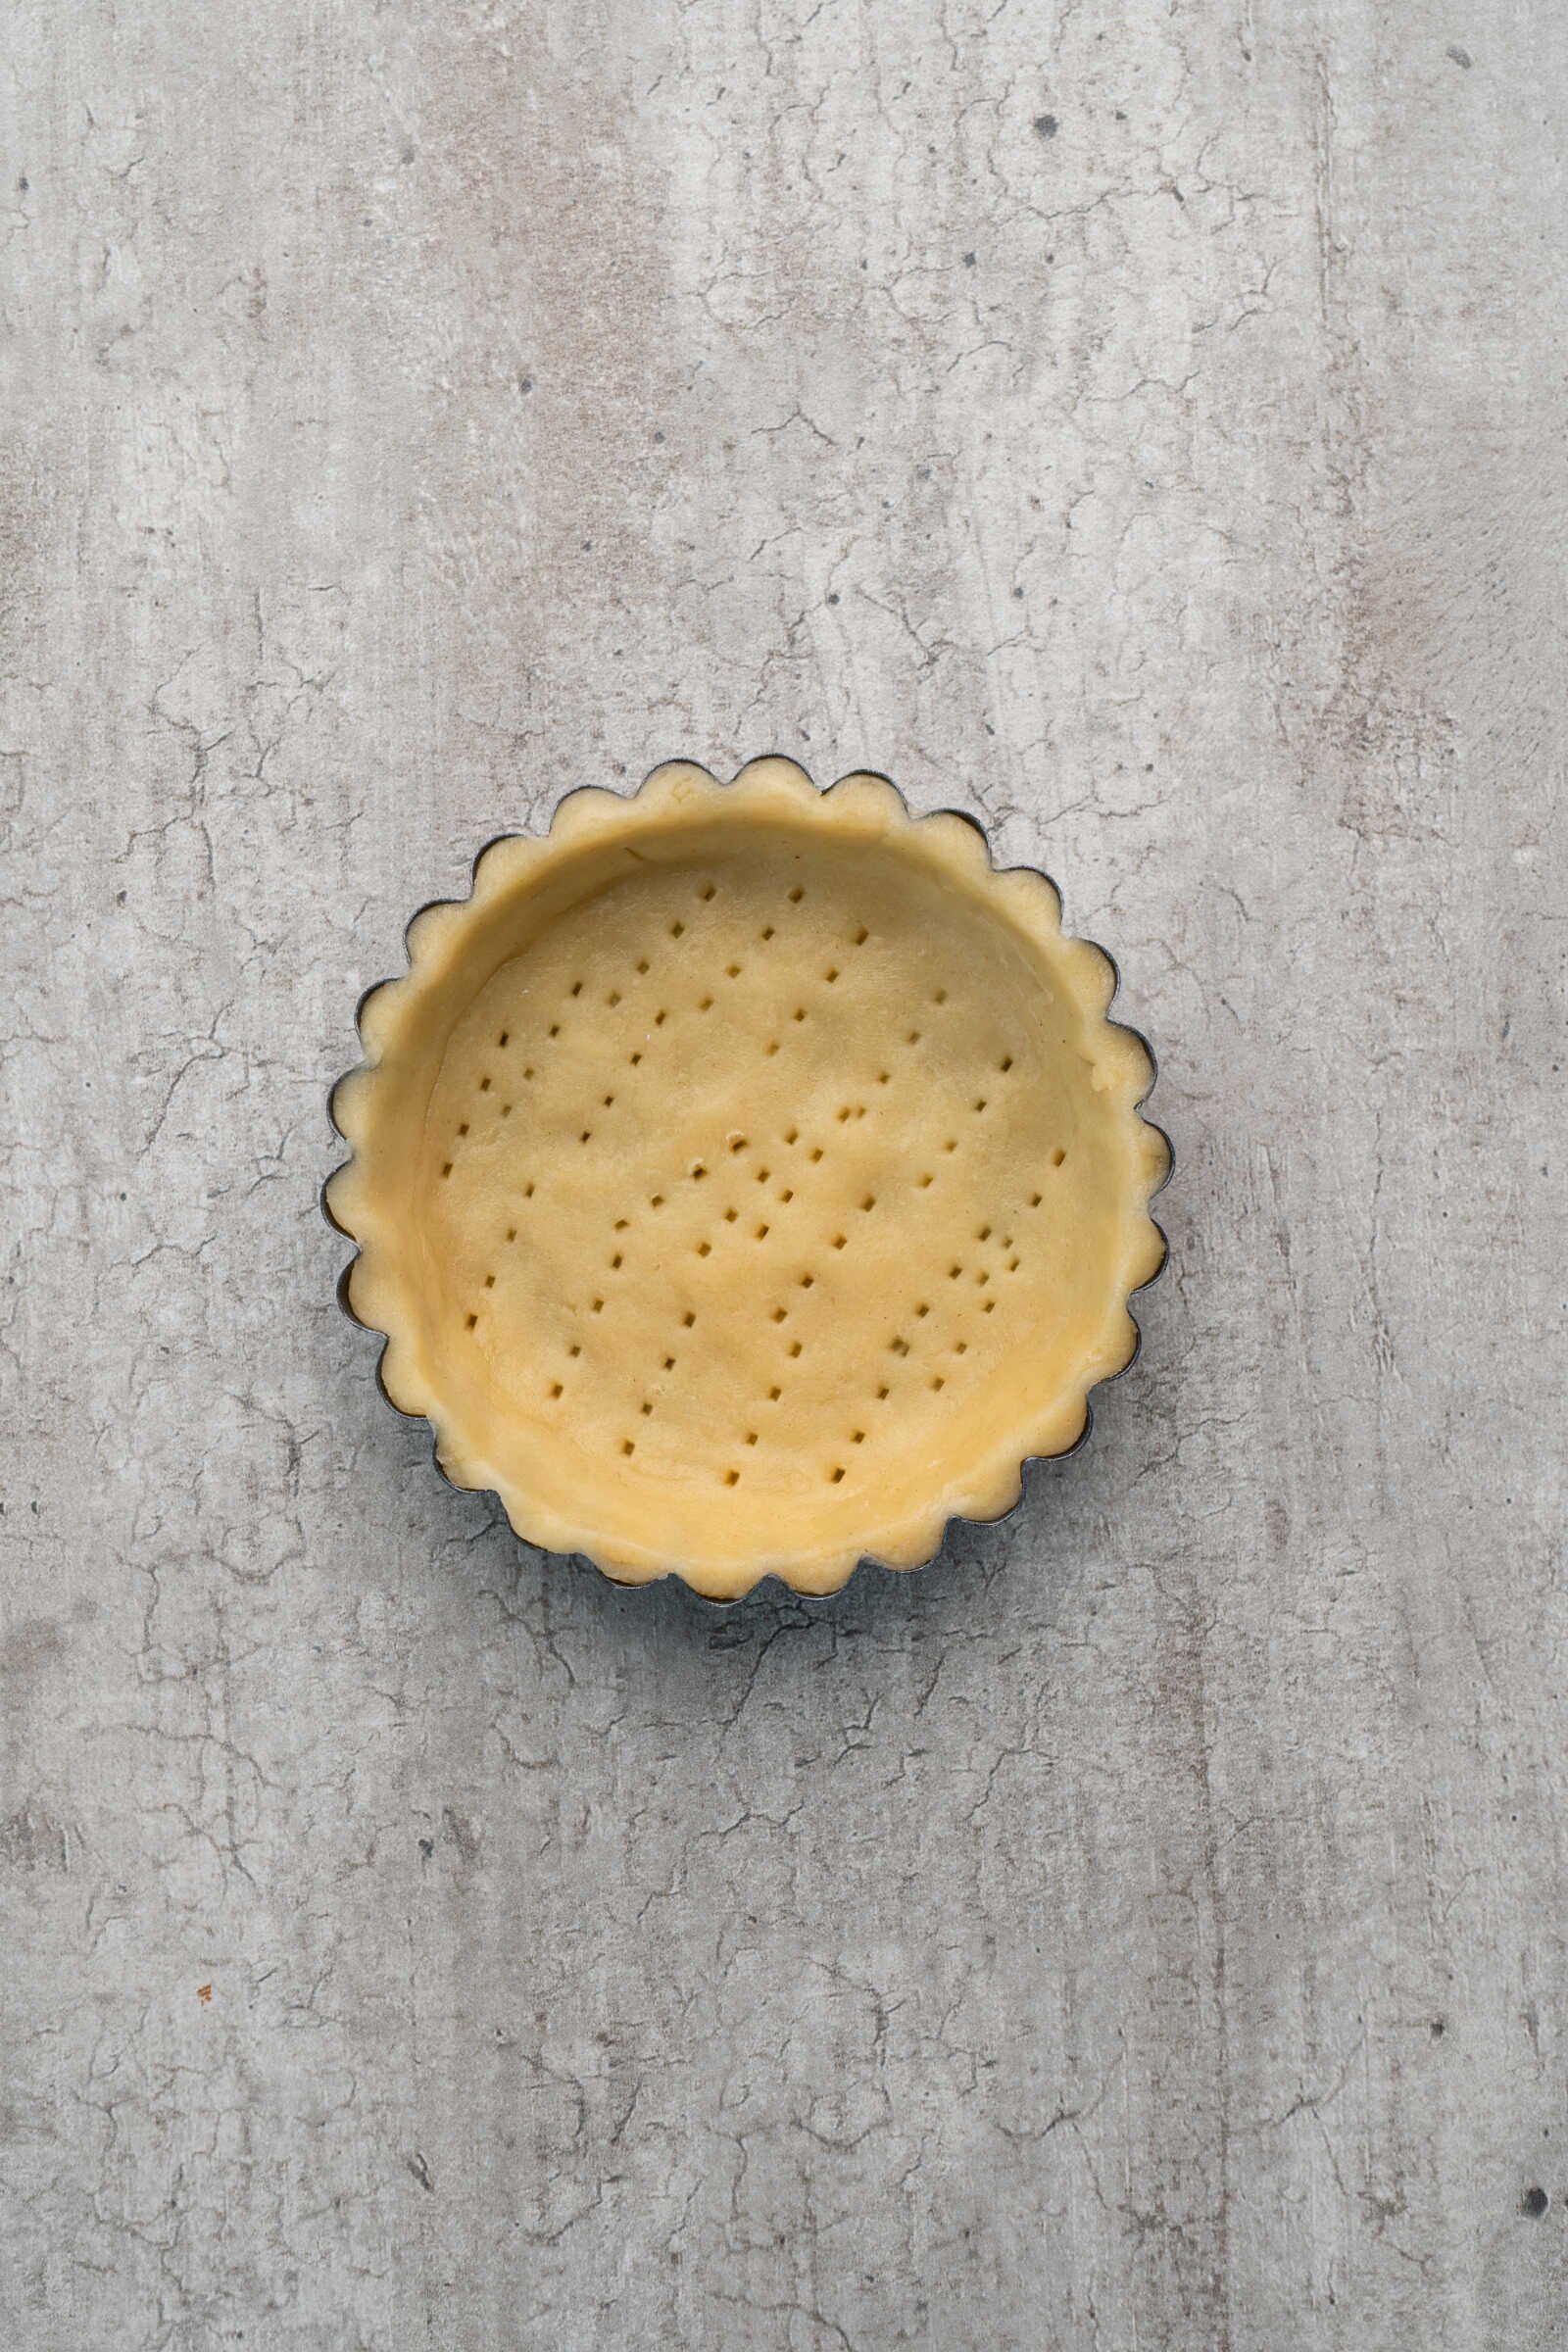
Roll the chilled dough on a lightly floured surface, ideally between two sheets of parchment paper, until it reaches about ¼-inch thickness. Cut circles slightly larger than your tart pans and gently press the dough into each pan. Carefully press the dough into the edges and trim any excess.
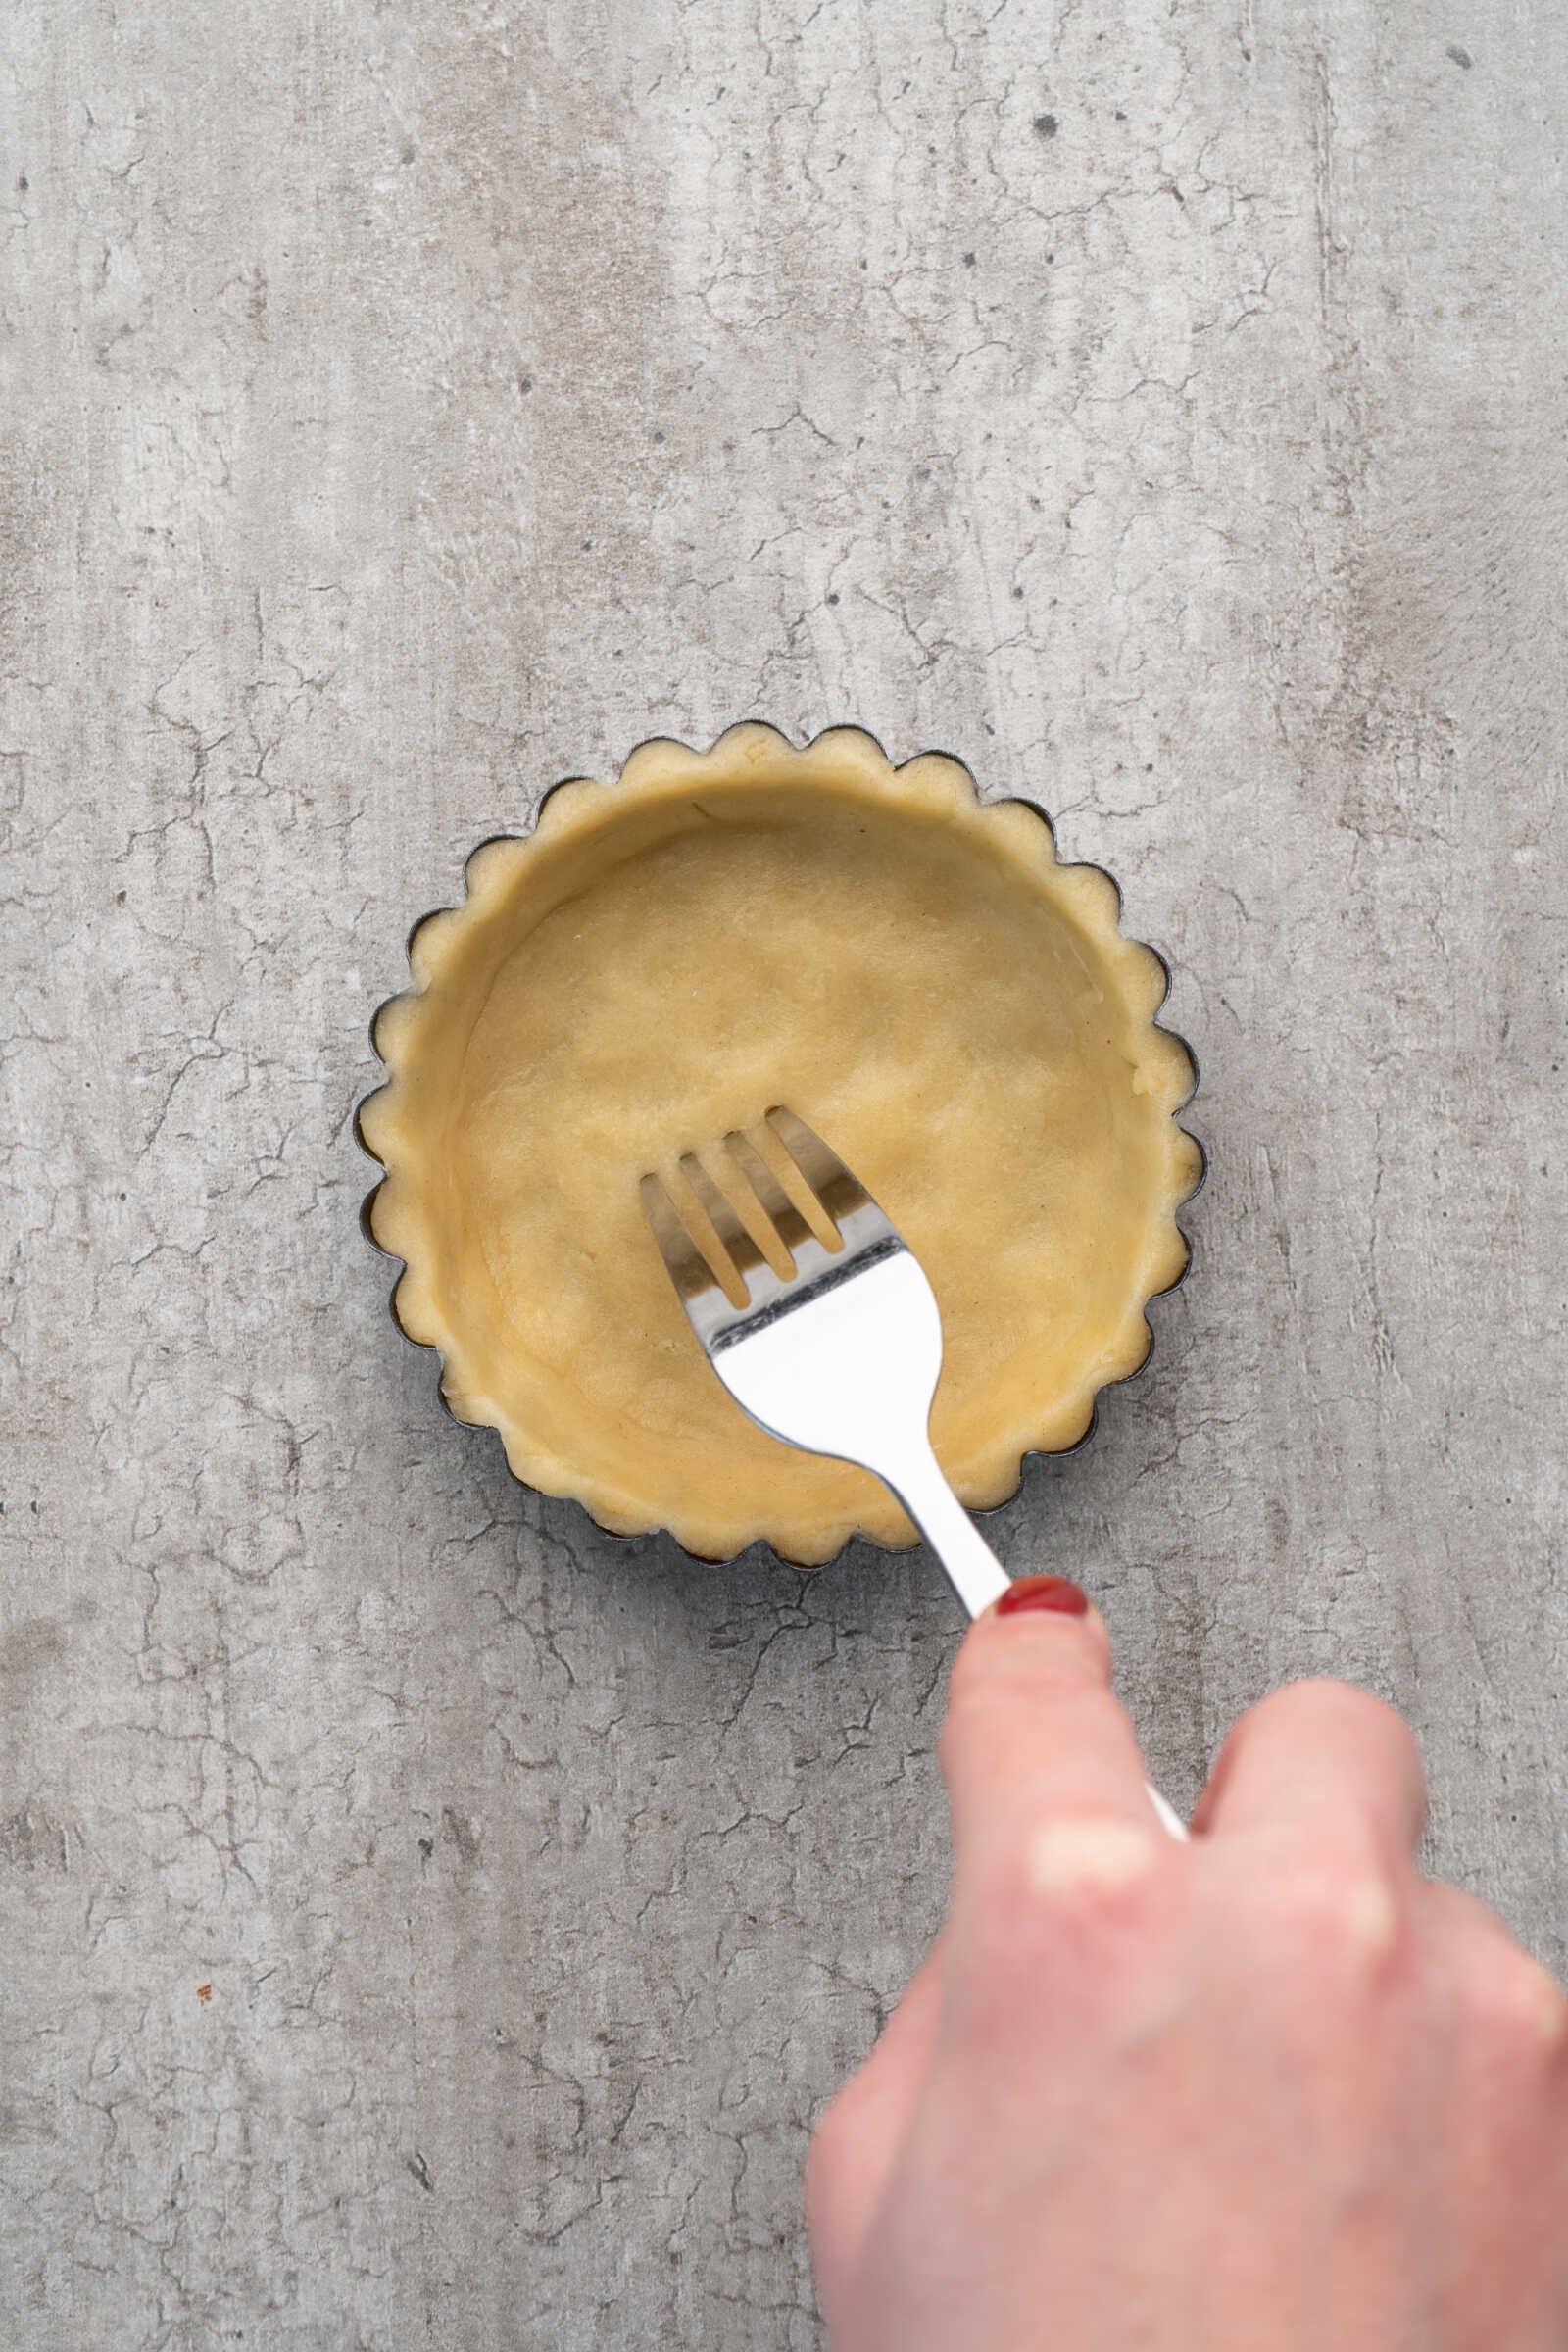
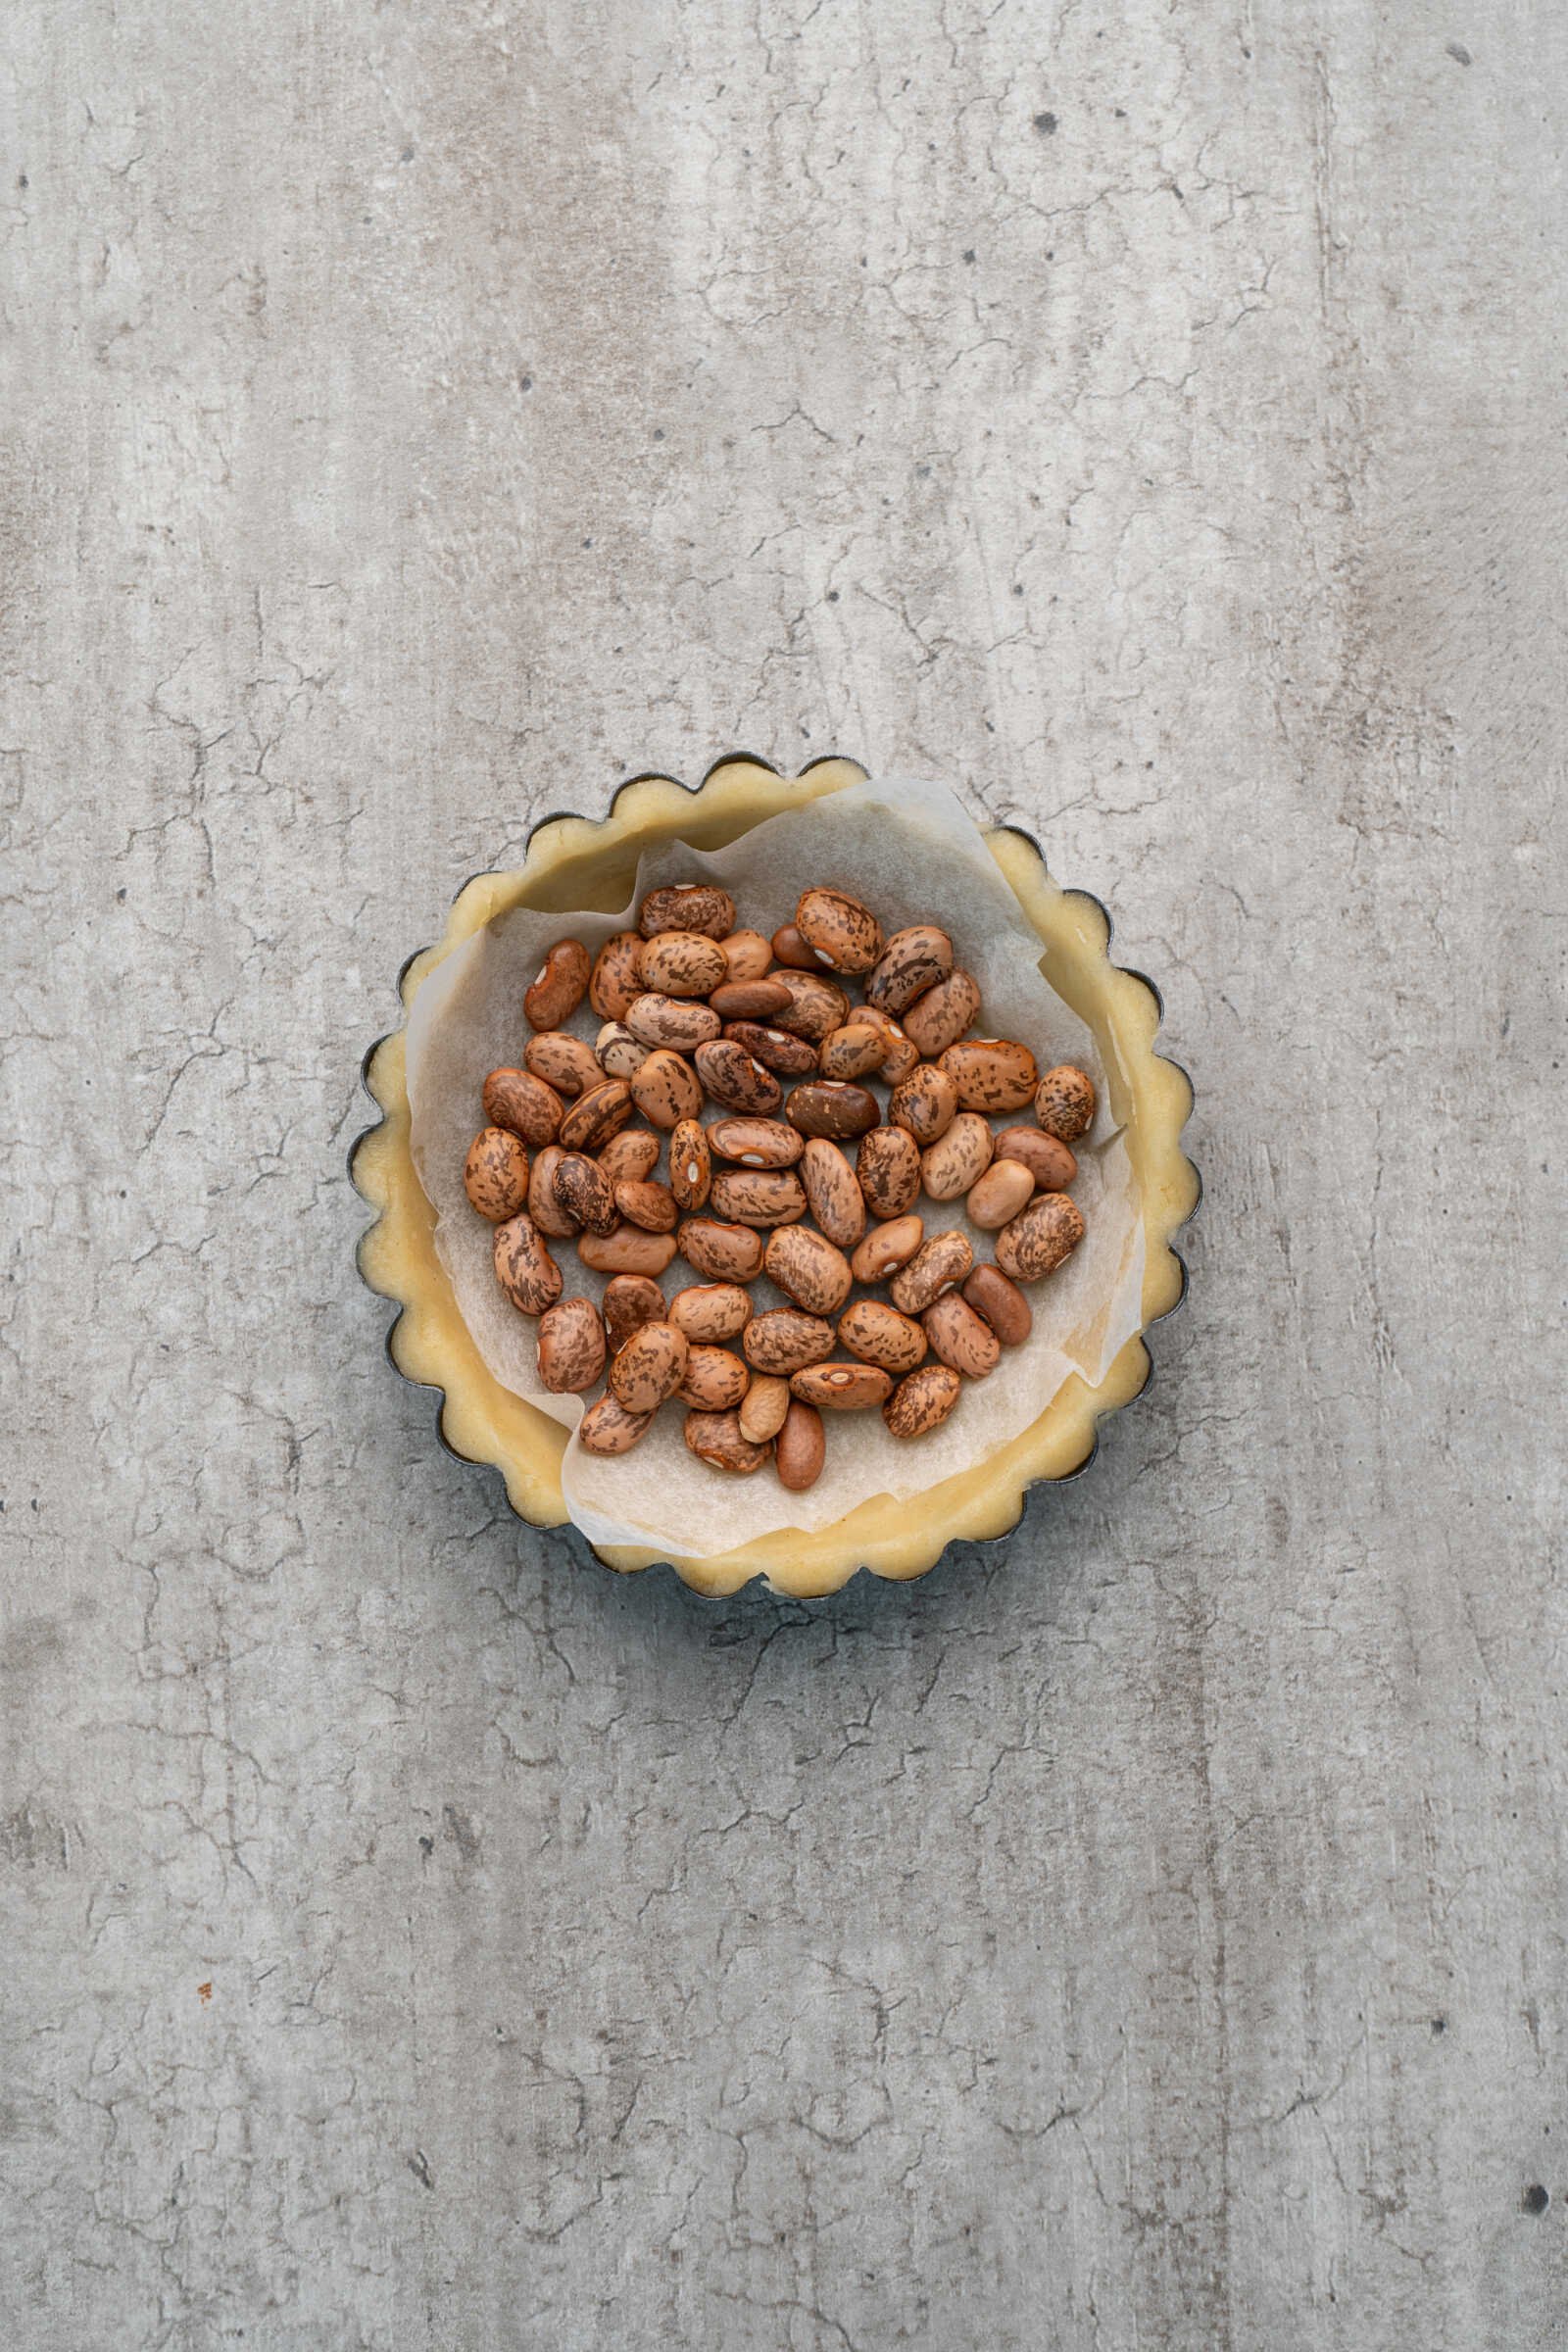
To prevent the shells from puffing up while baking, prick the bottoms with a fork. Next, line each tart shell with parchment paper and fill them with baking beans or uncooked rice for blind baking.
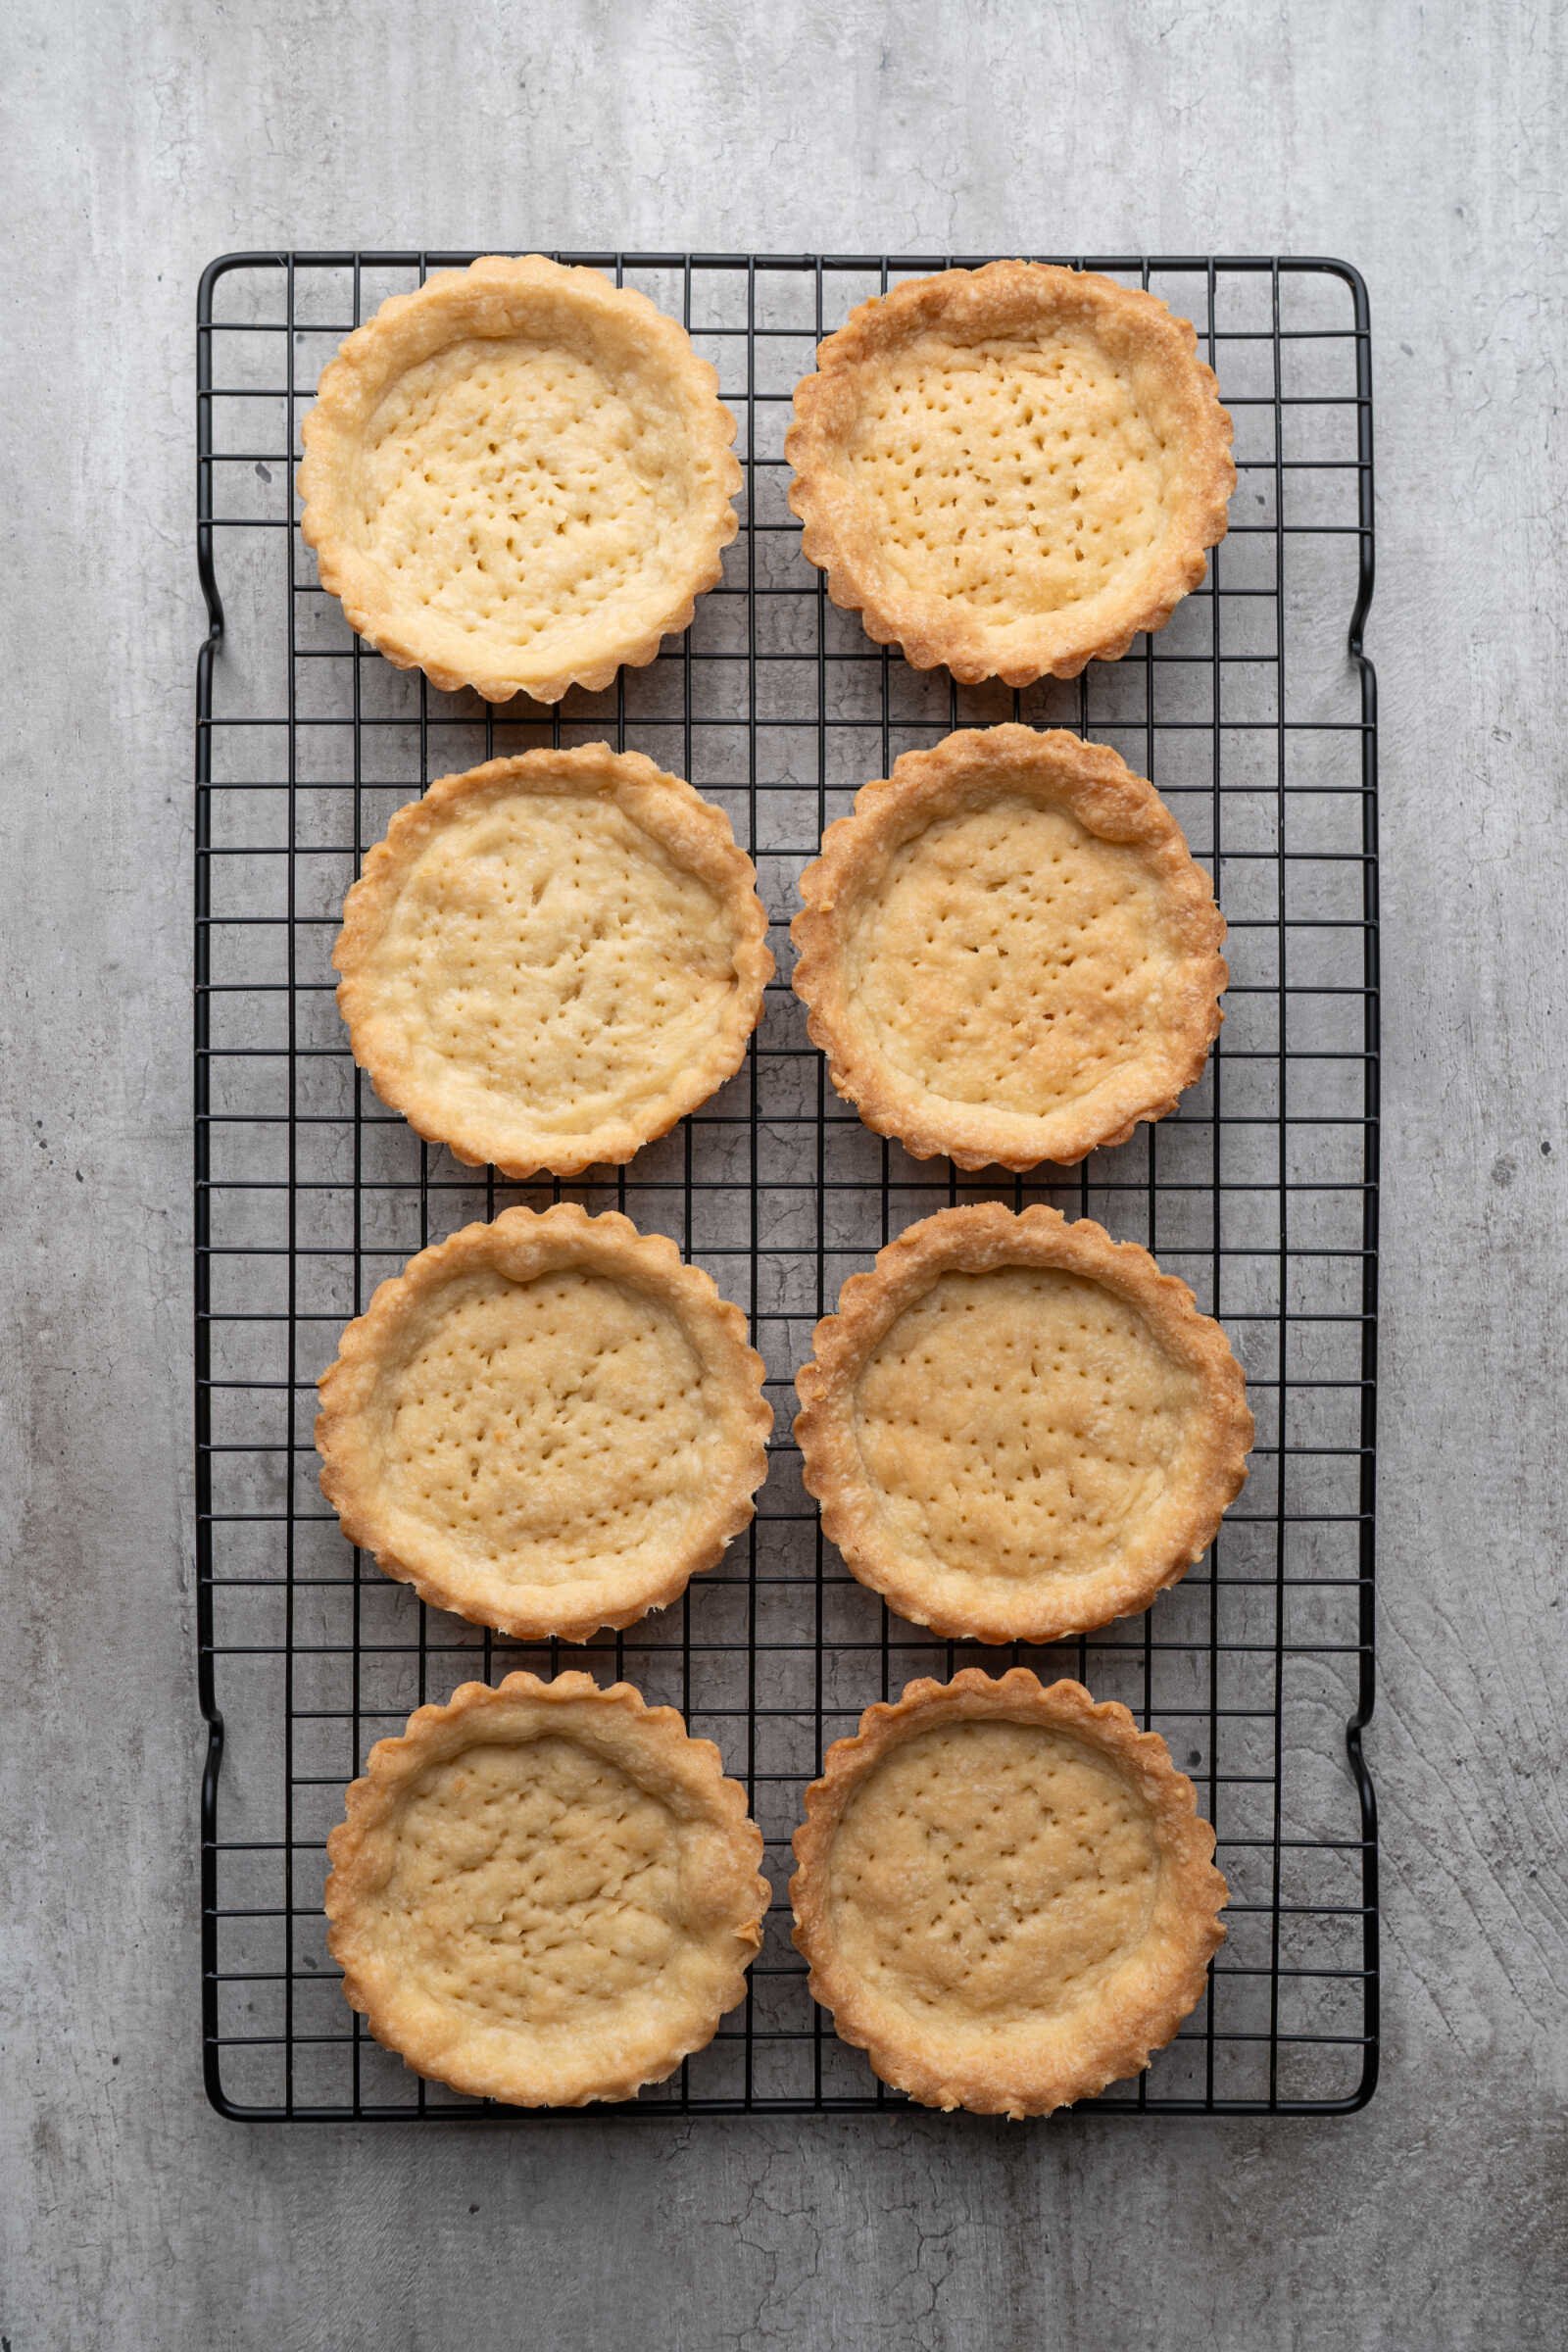
Place the tart pans on a baking sheet and bake for about 30 minutes, or until the crusts turn lightly golden. Once baked, remove them from the oven and allow the shells to cool completely on a wire rack before filling.
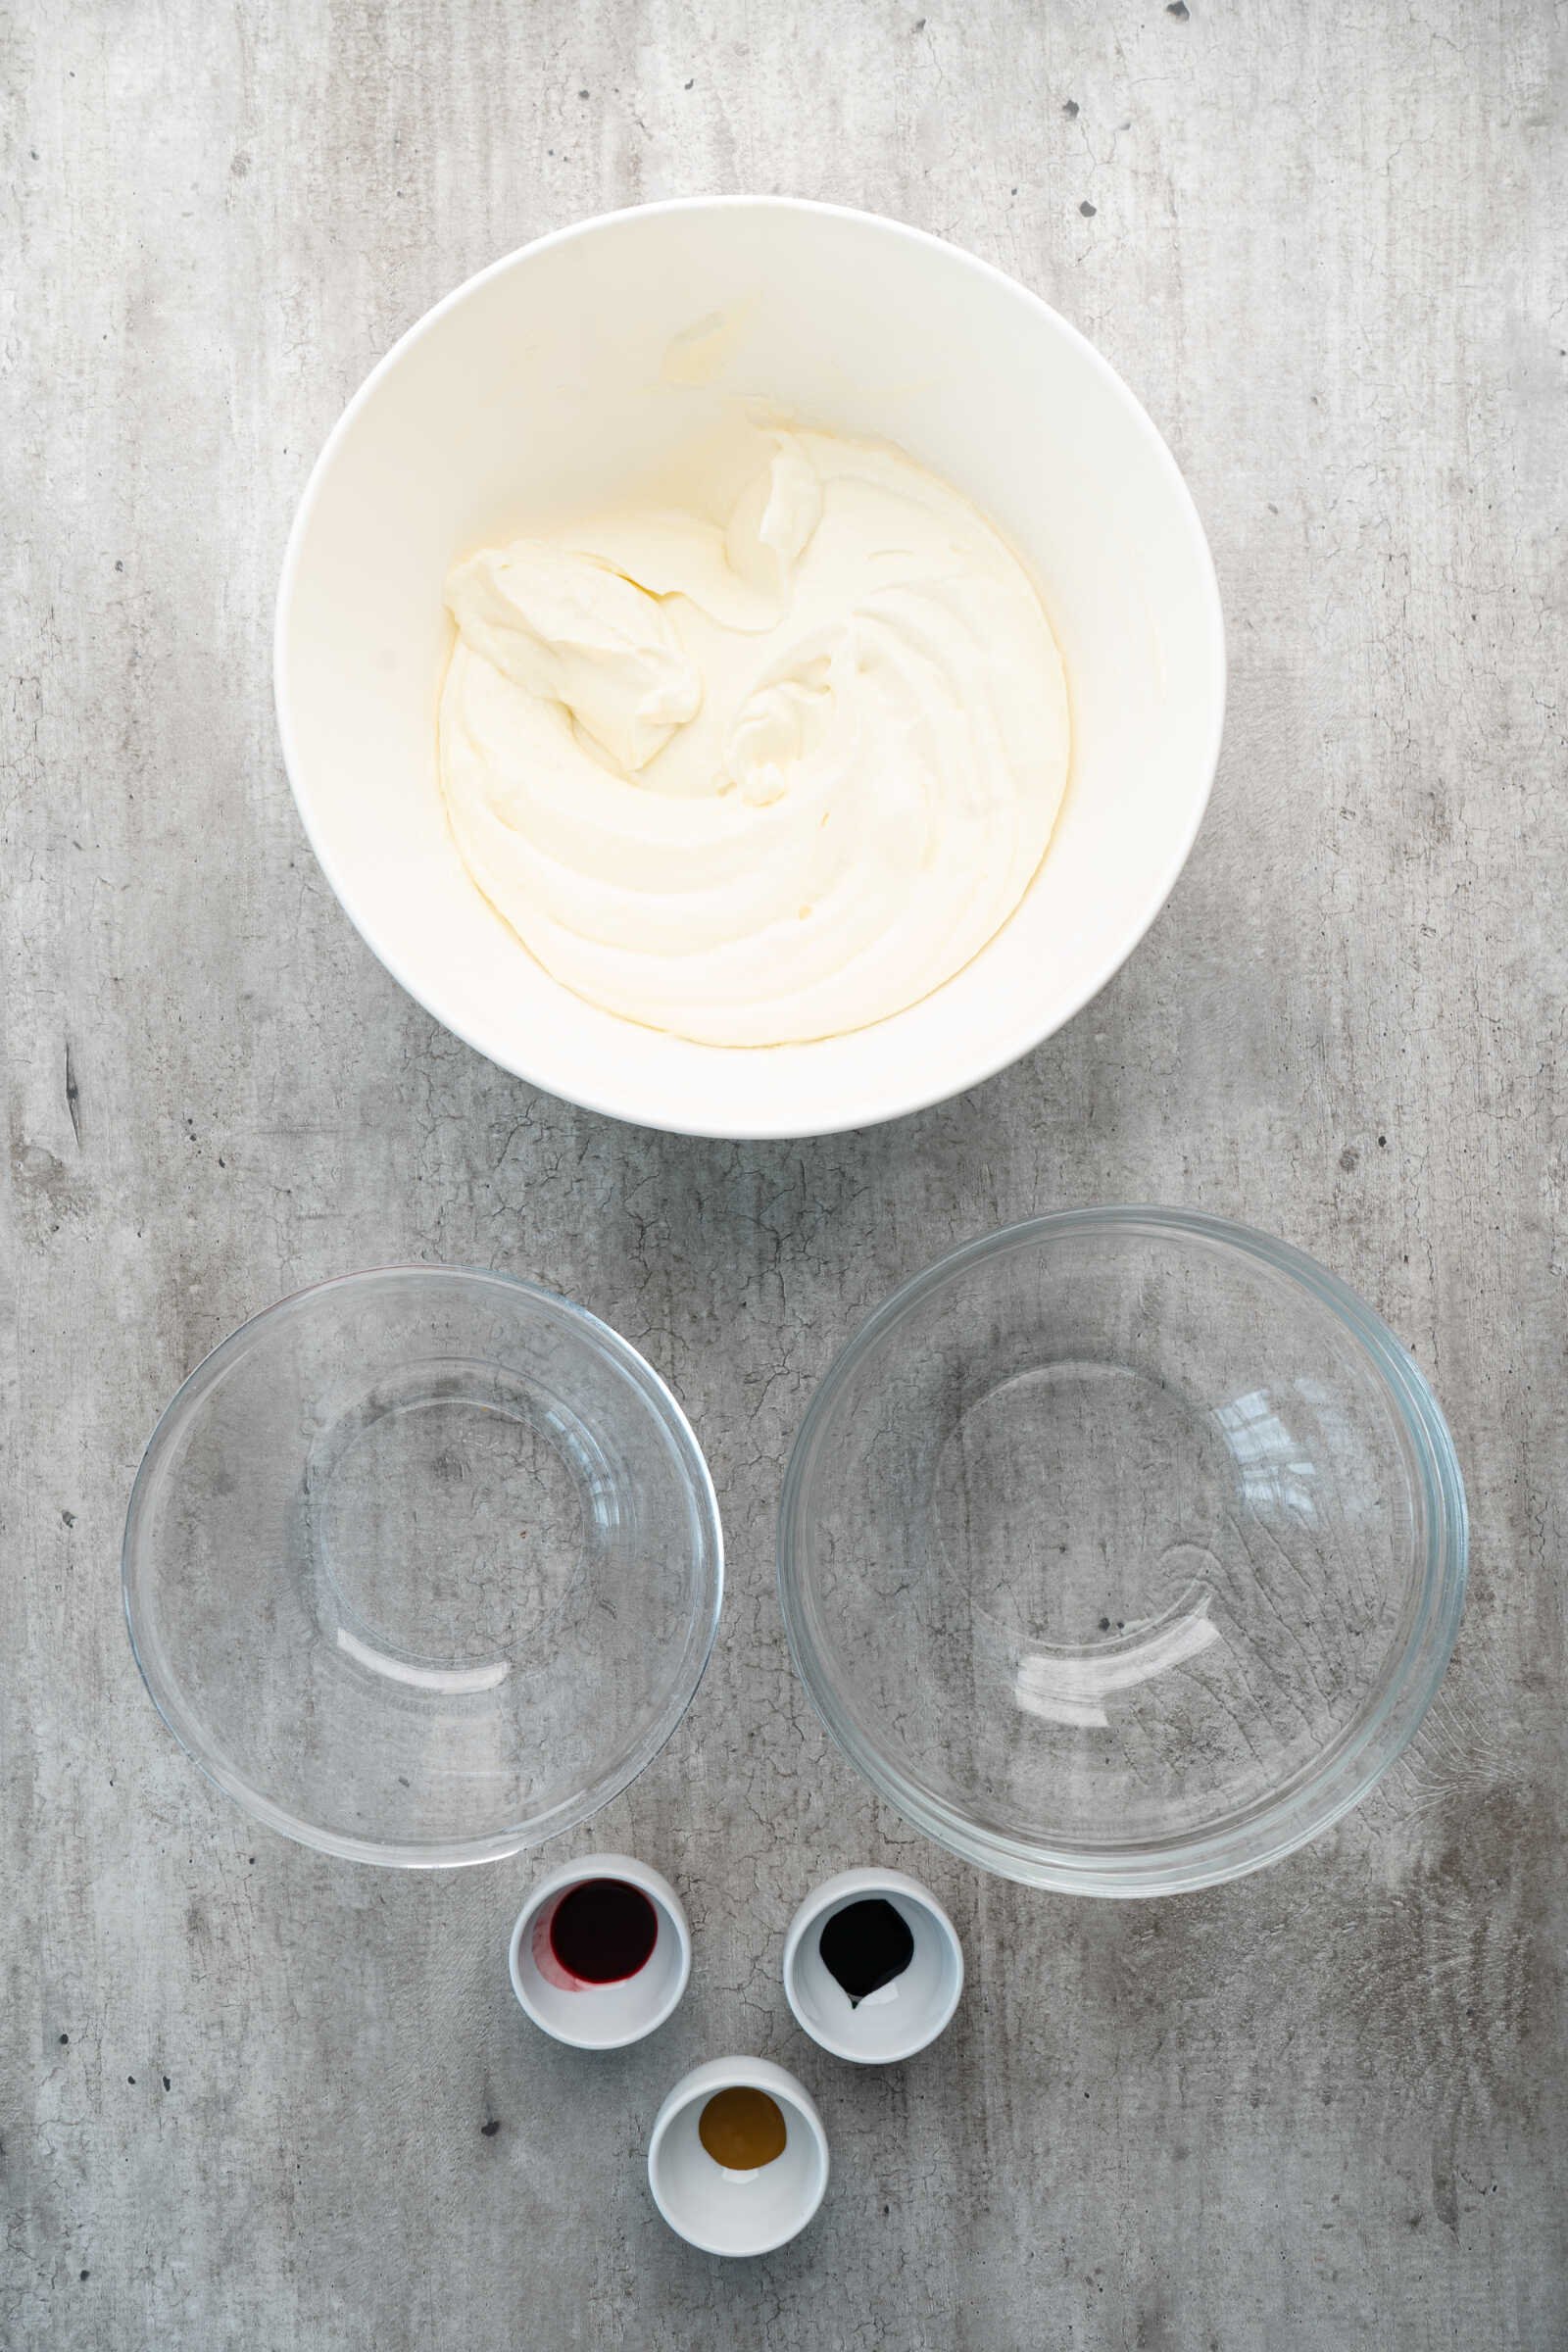
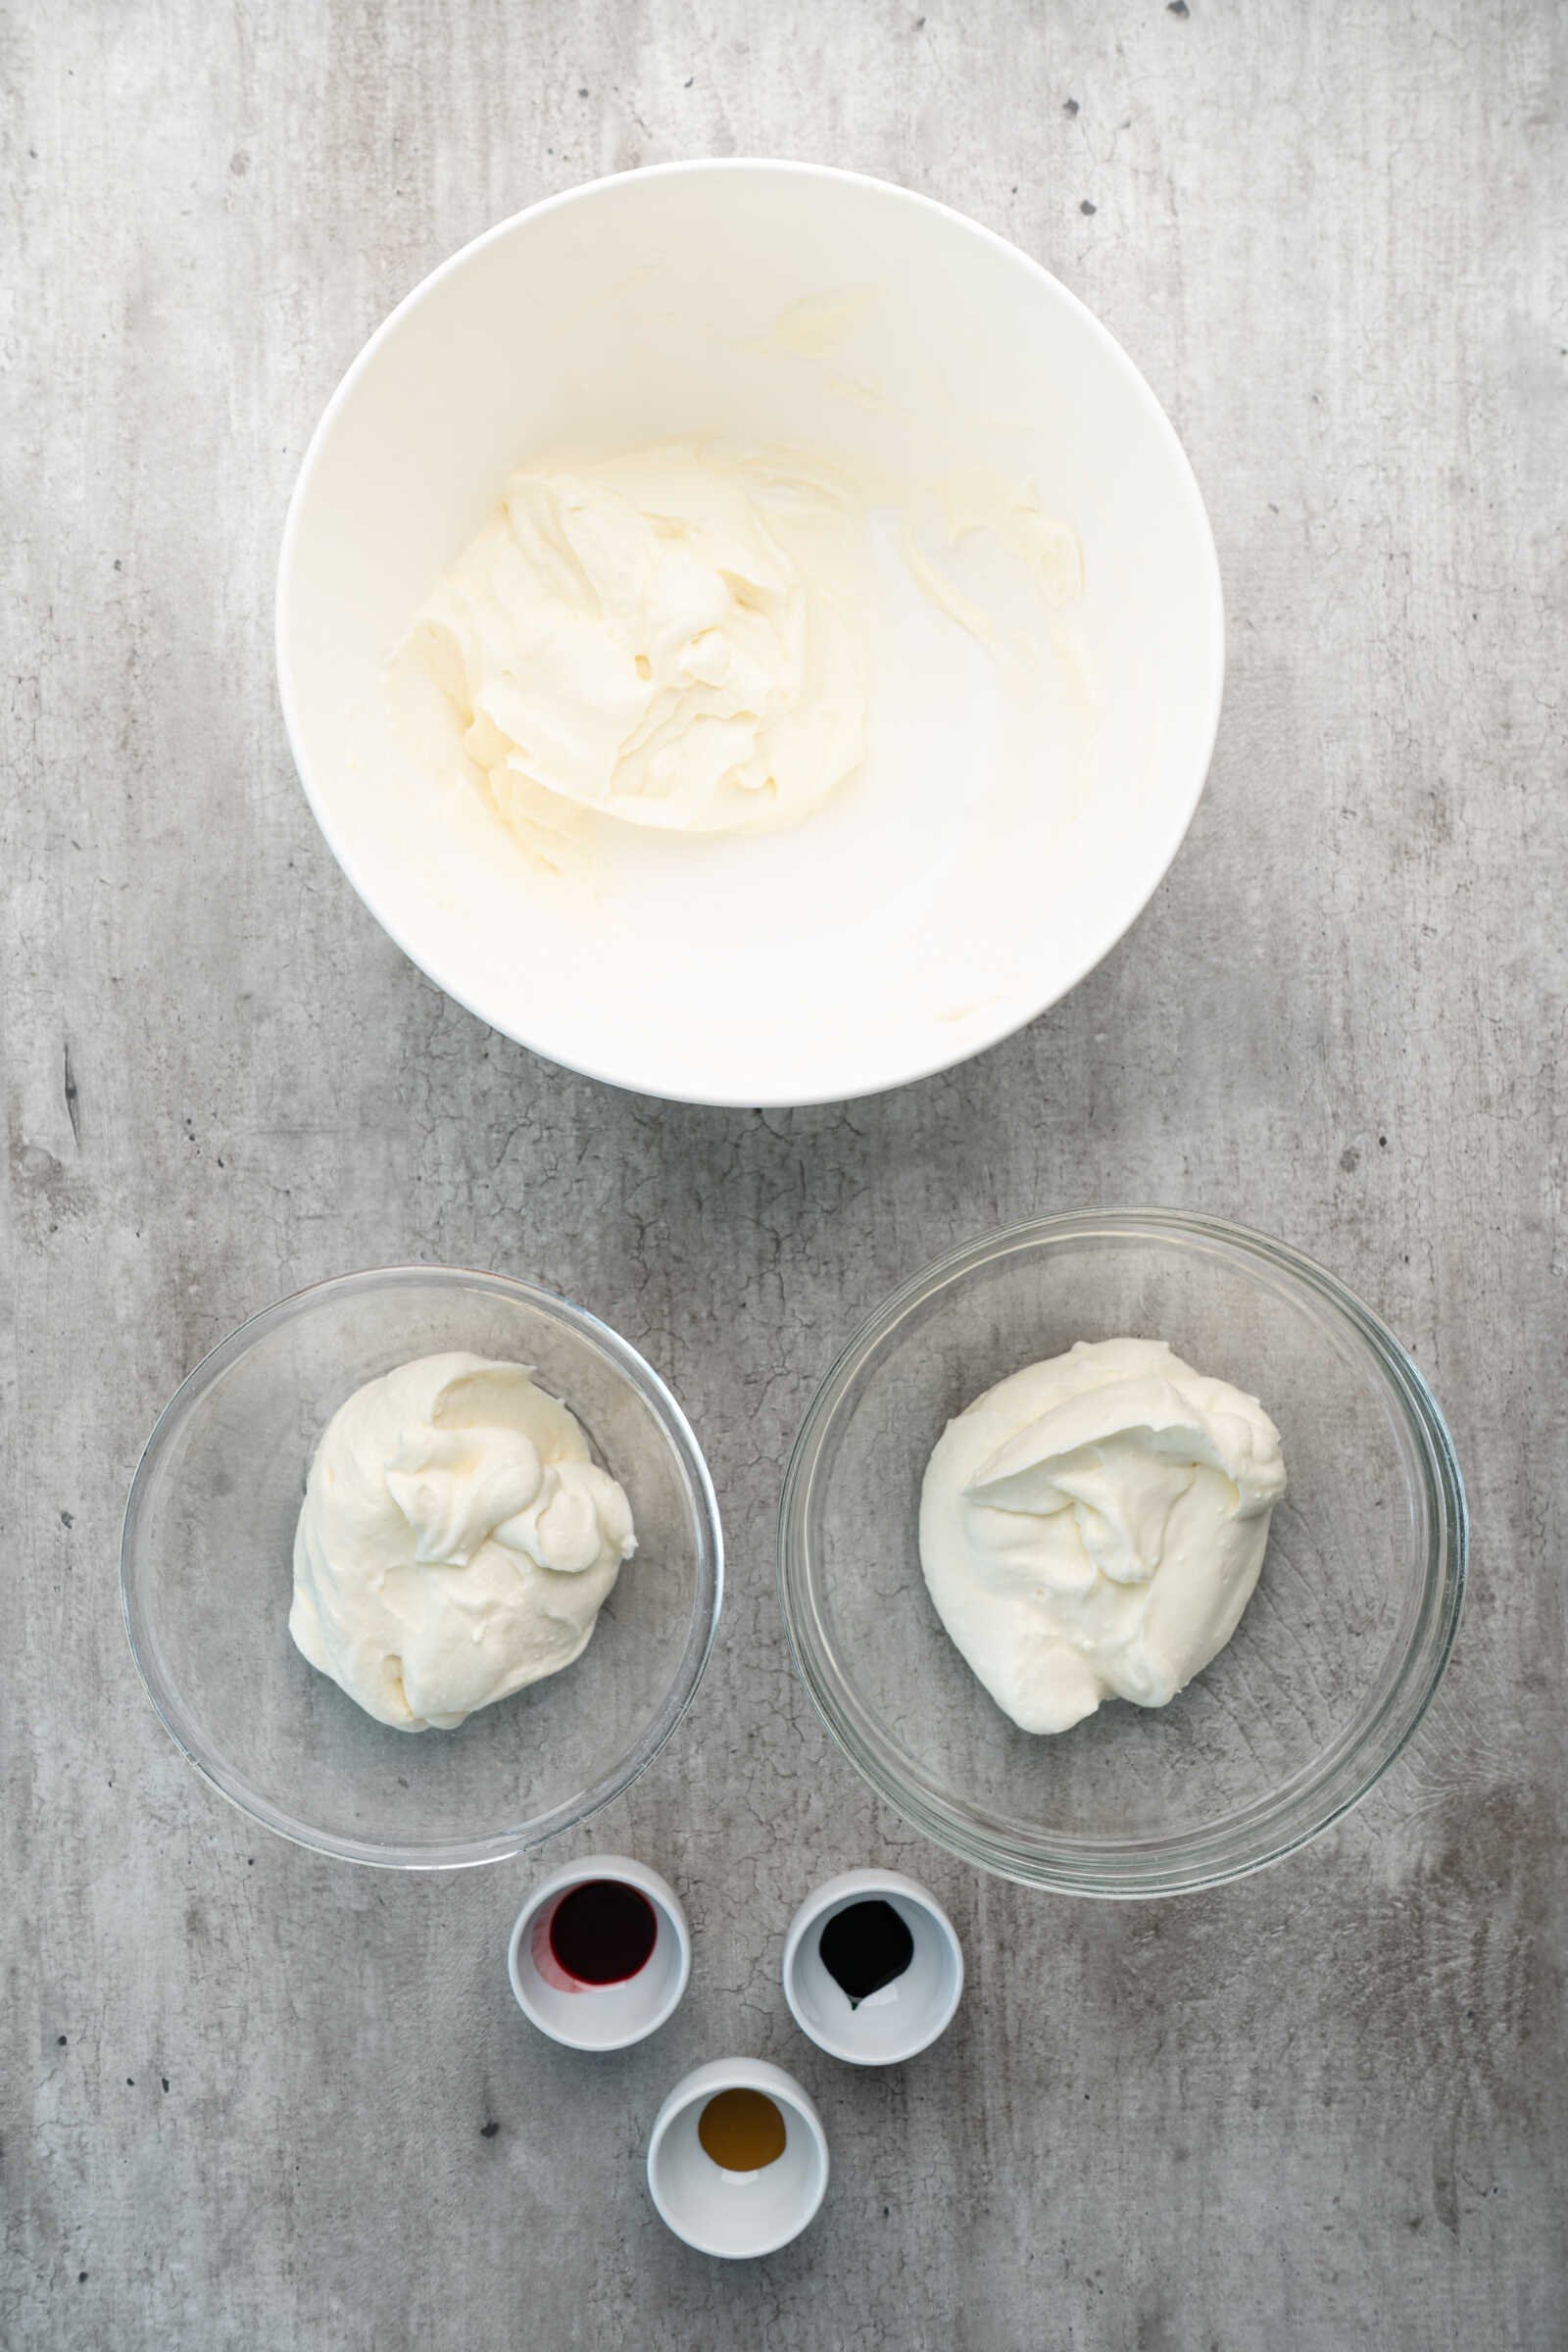
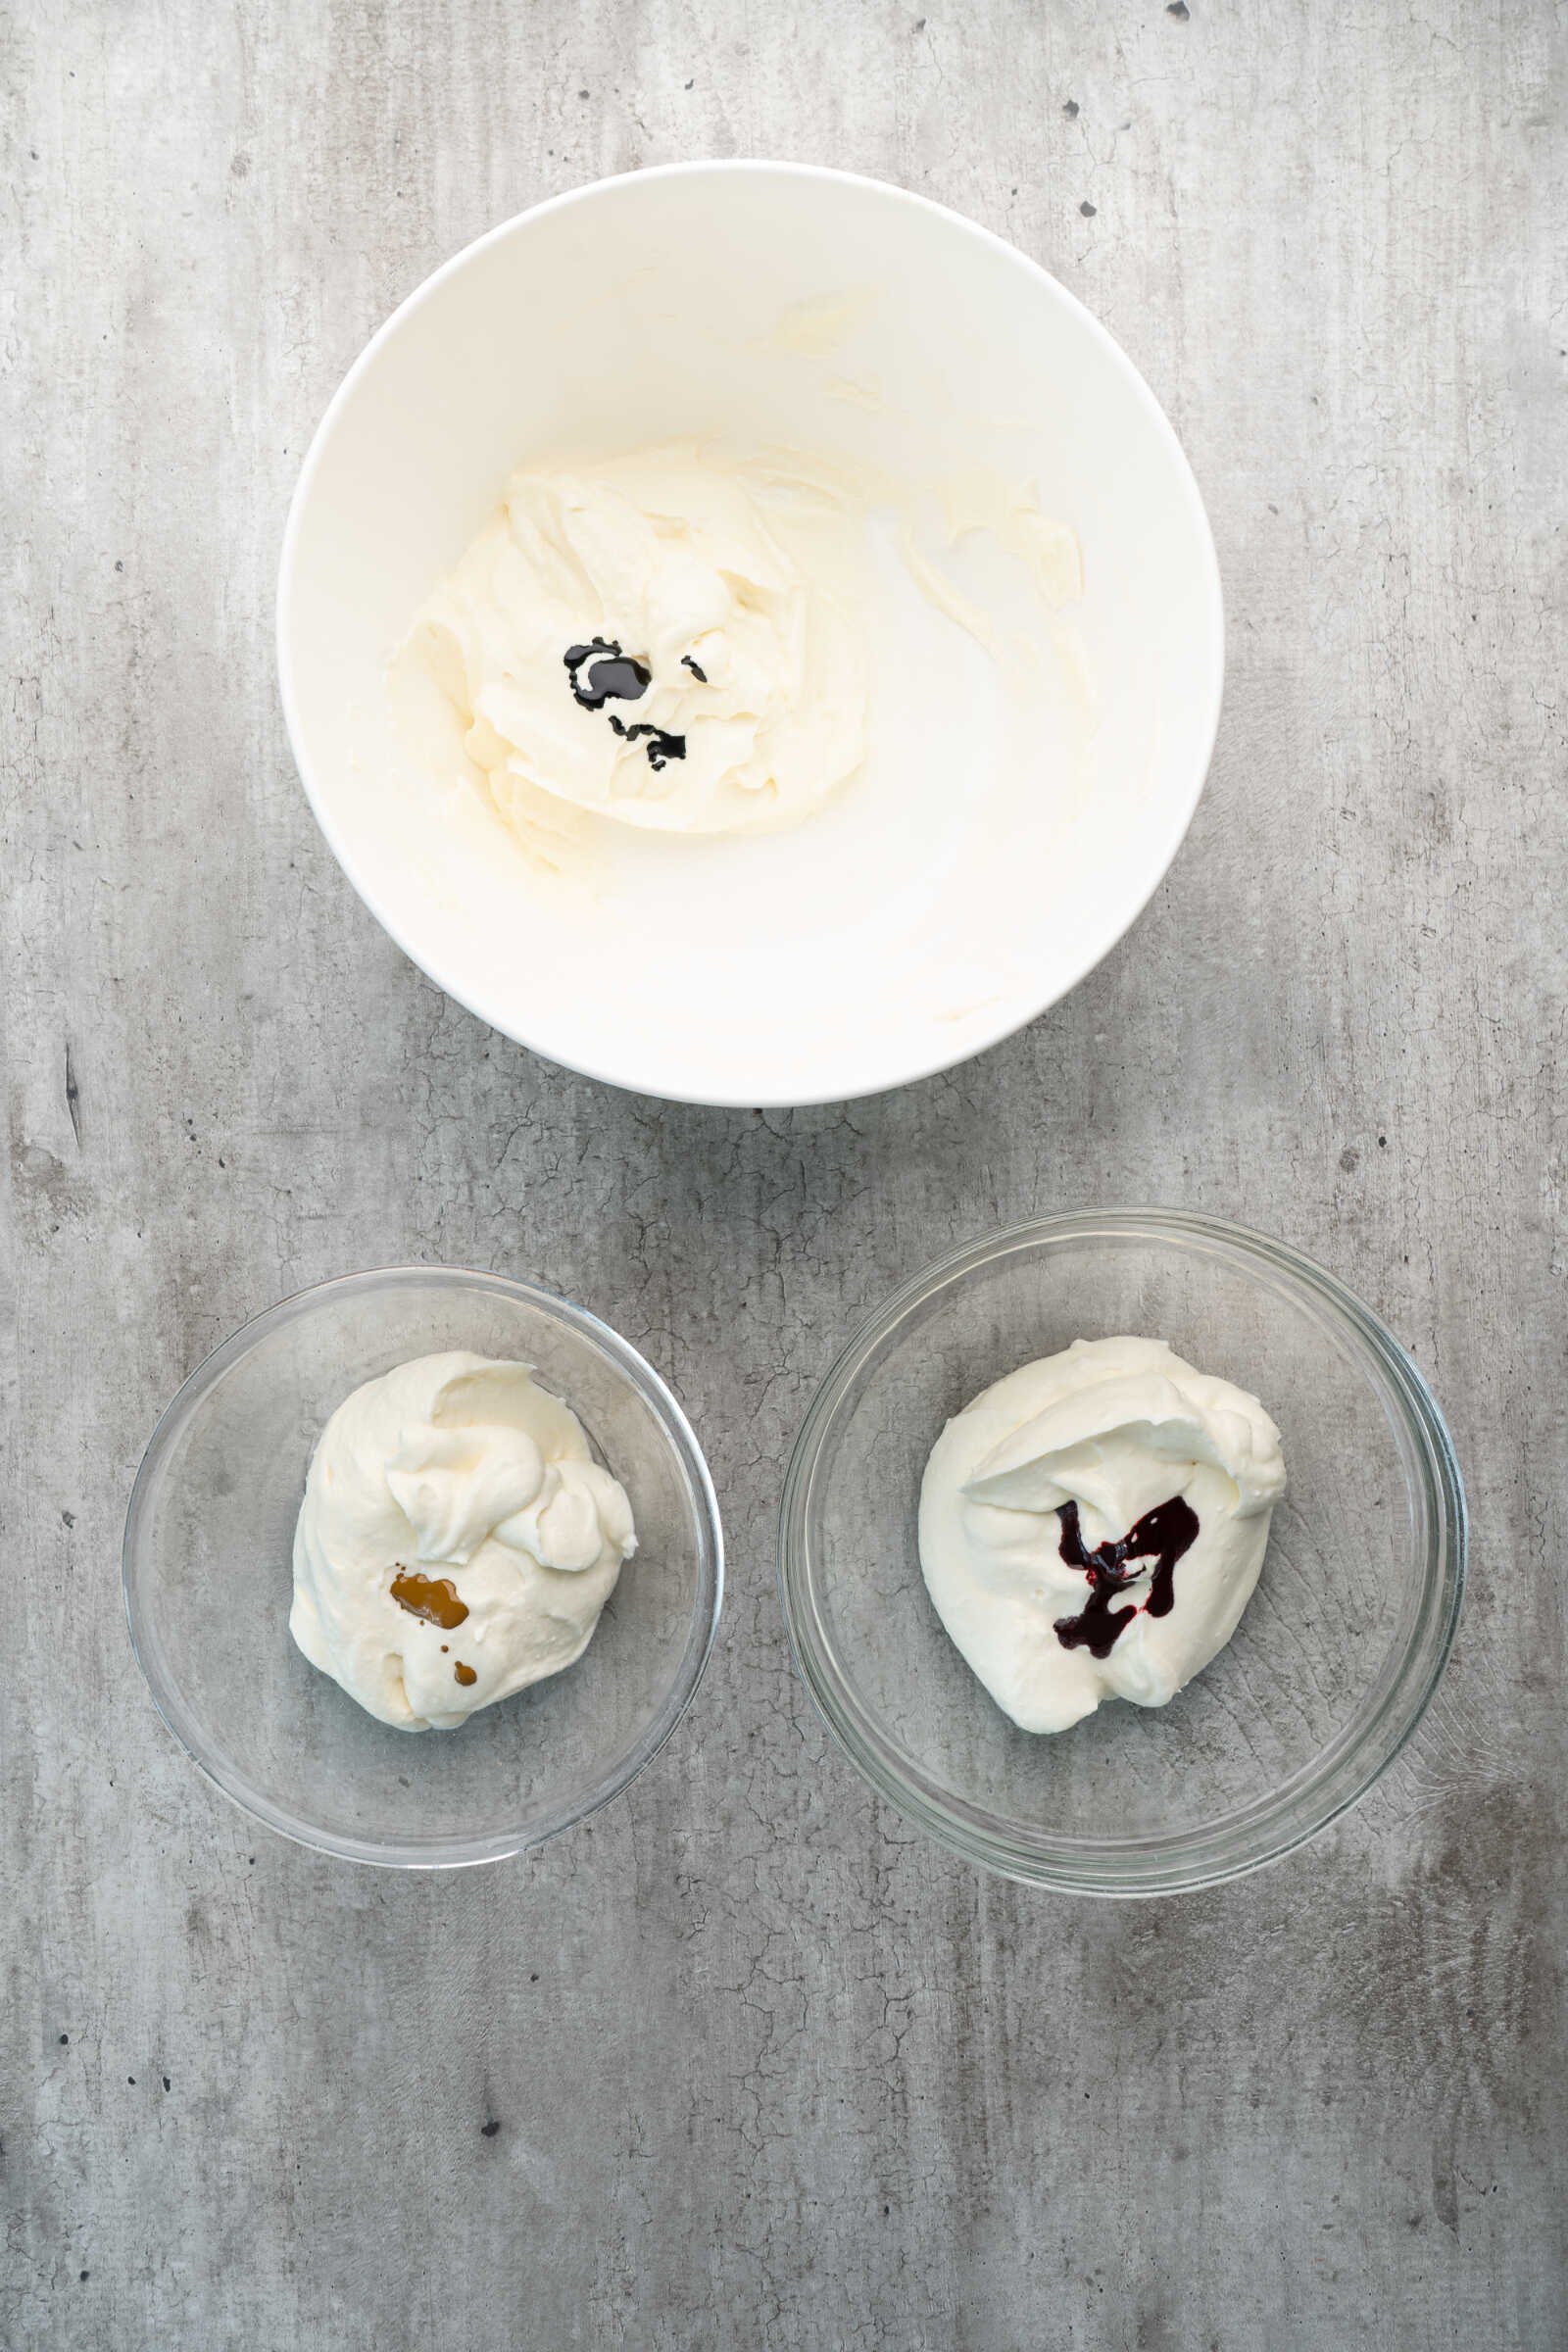
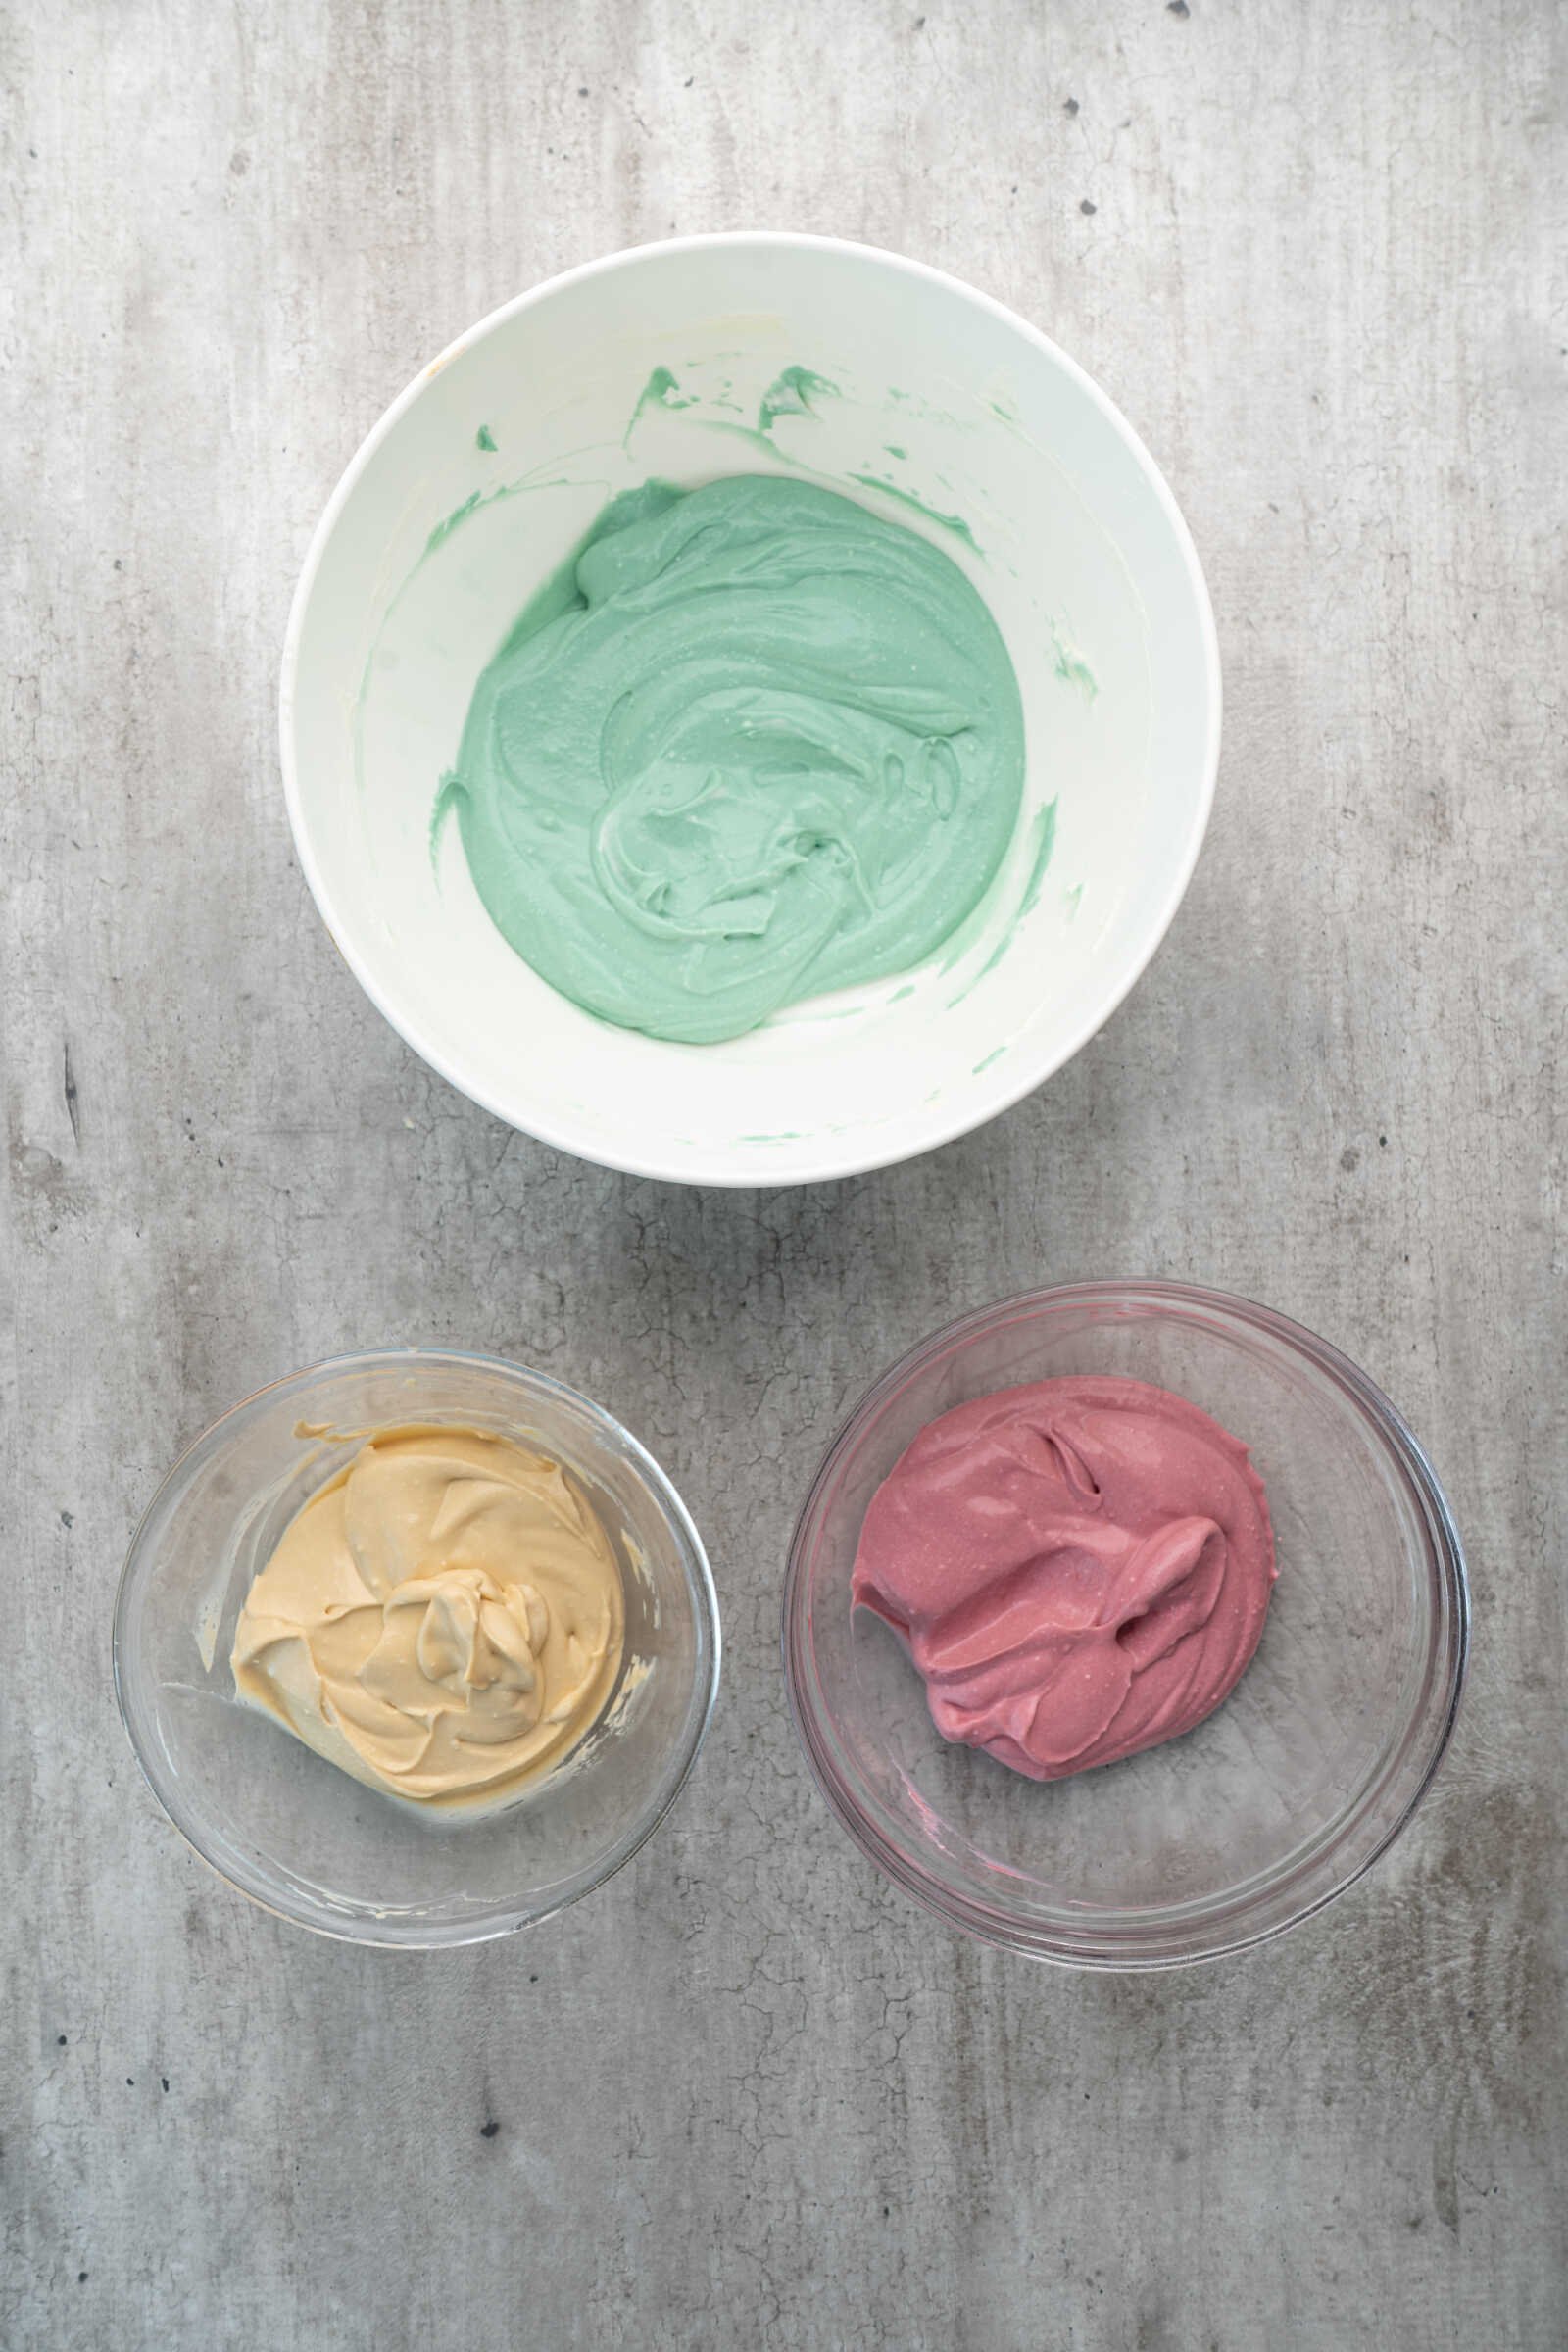
3. Make the Cheesecake Filling
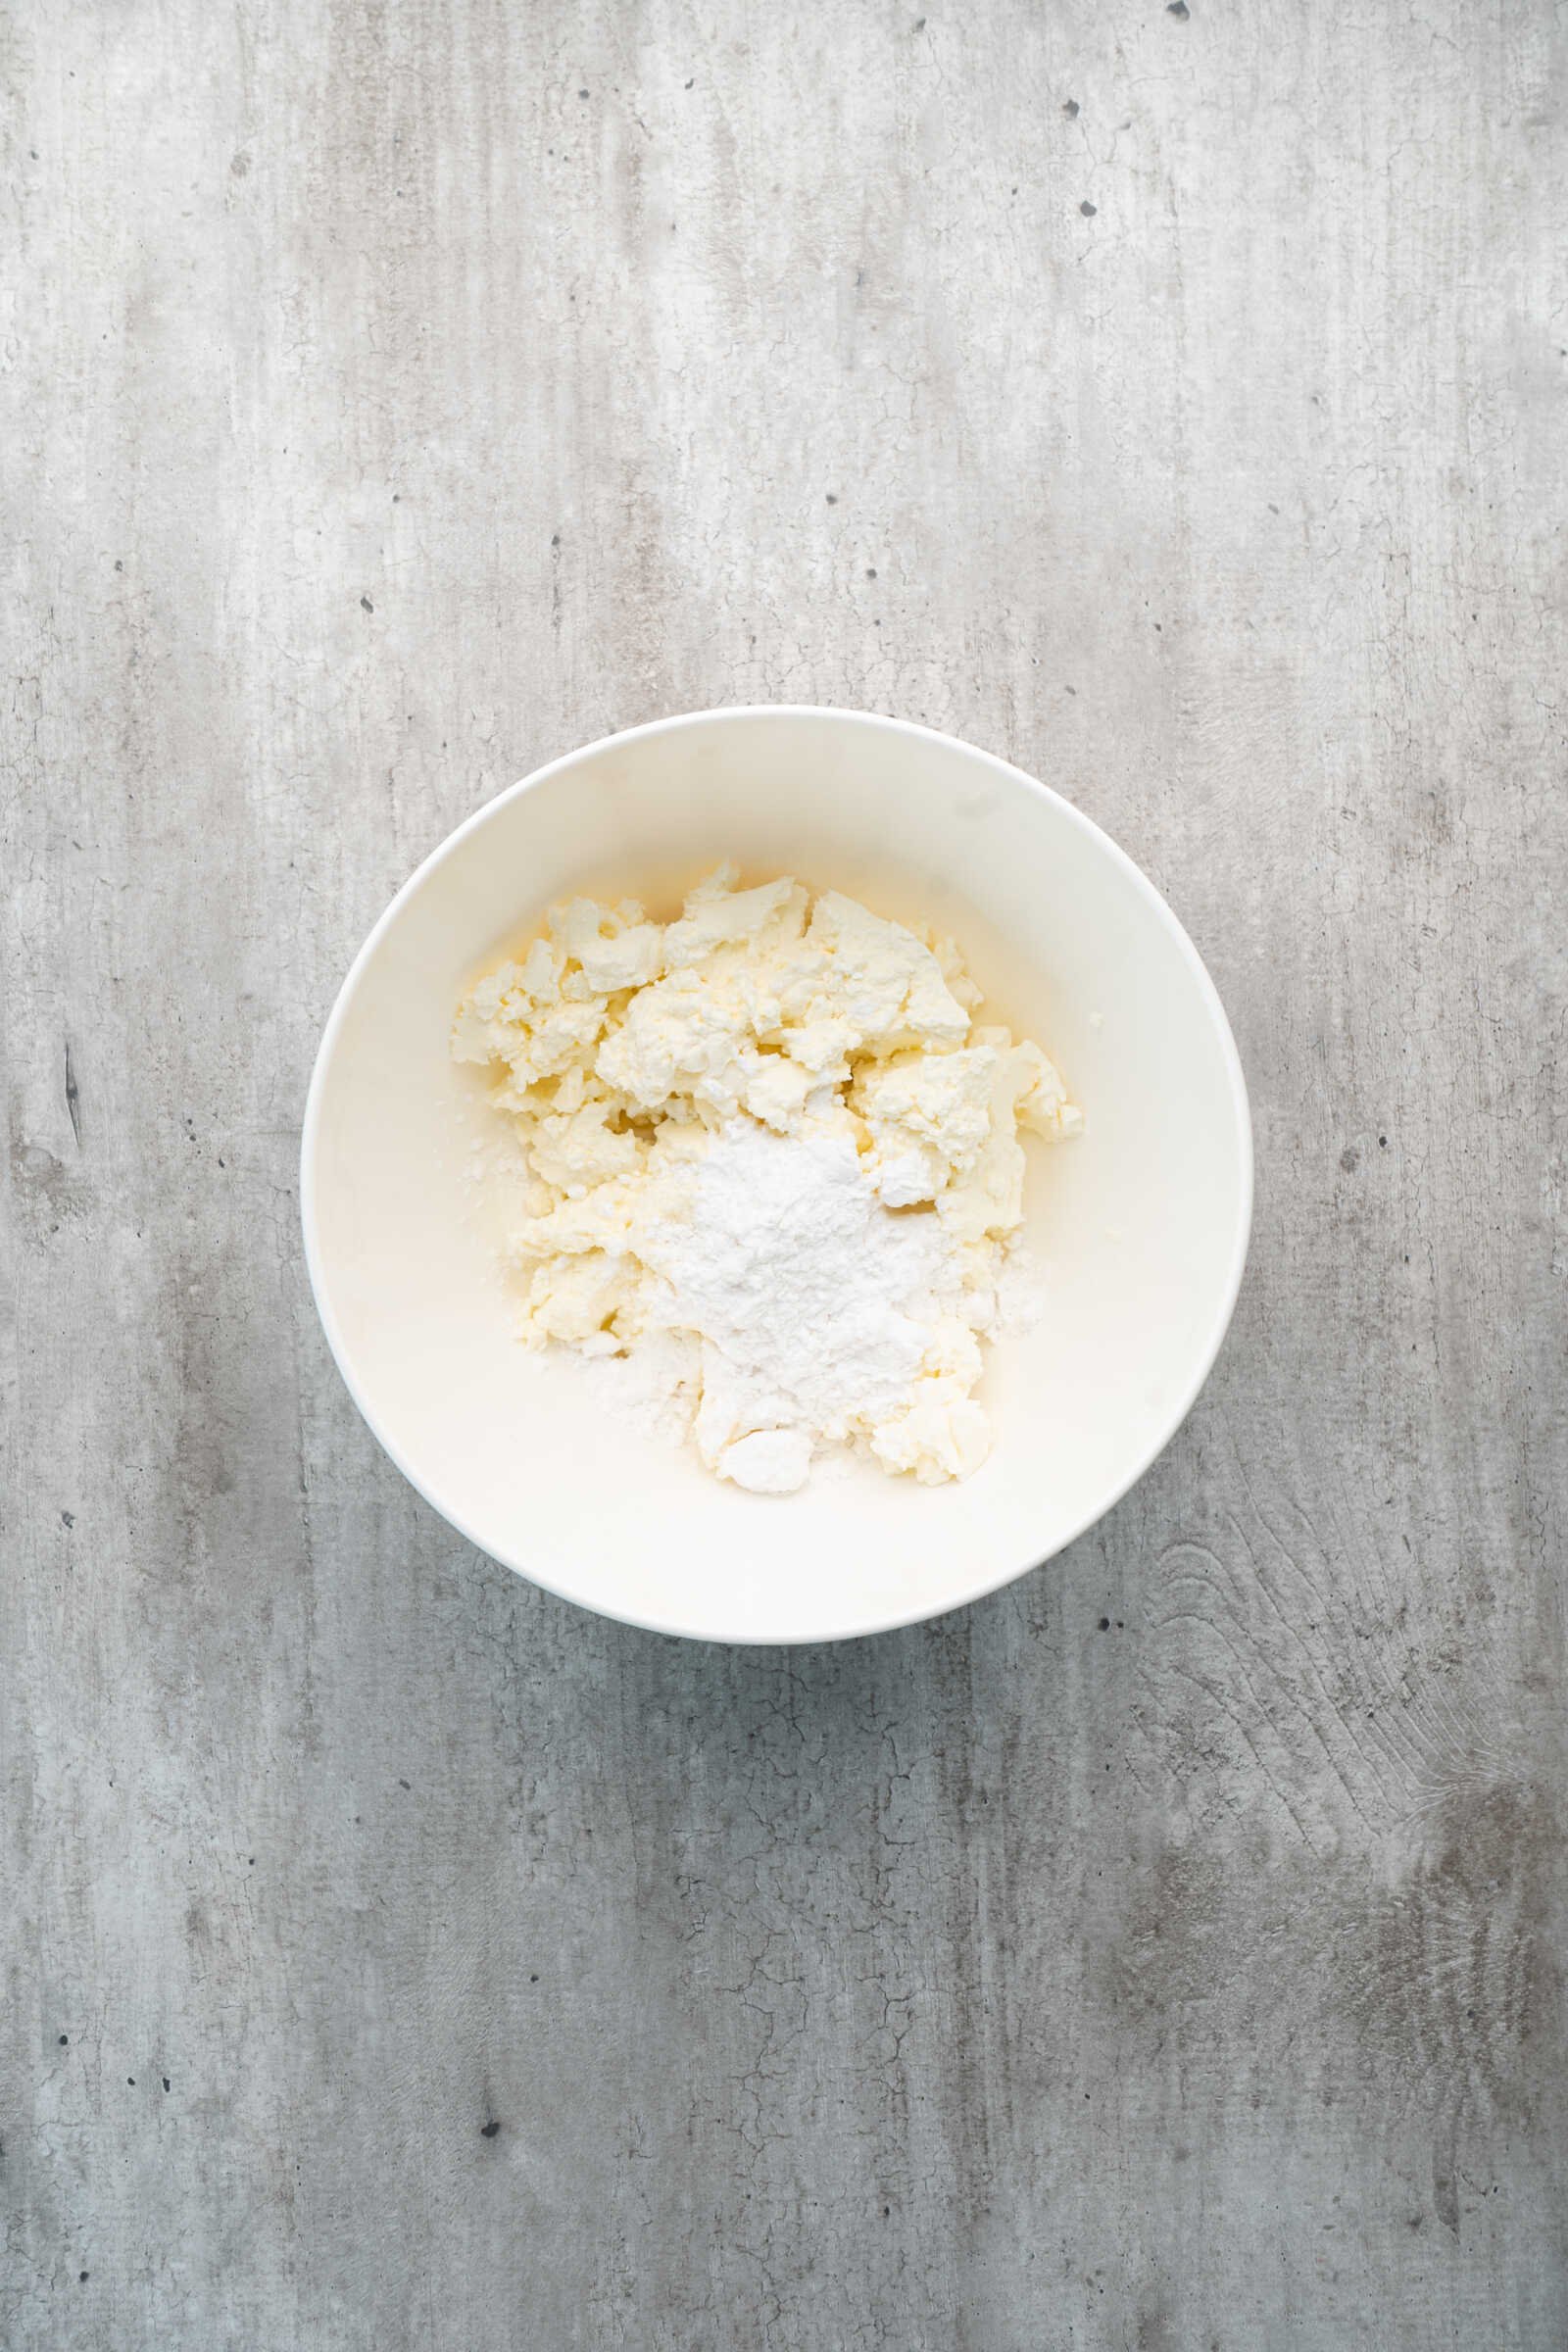
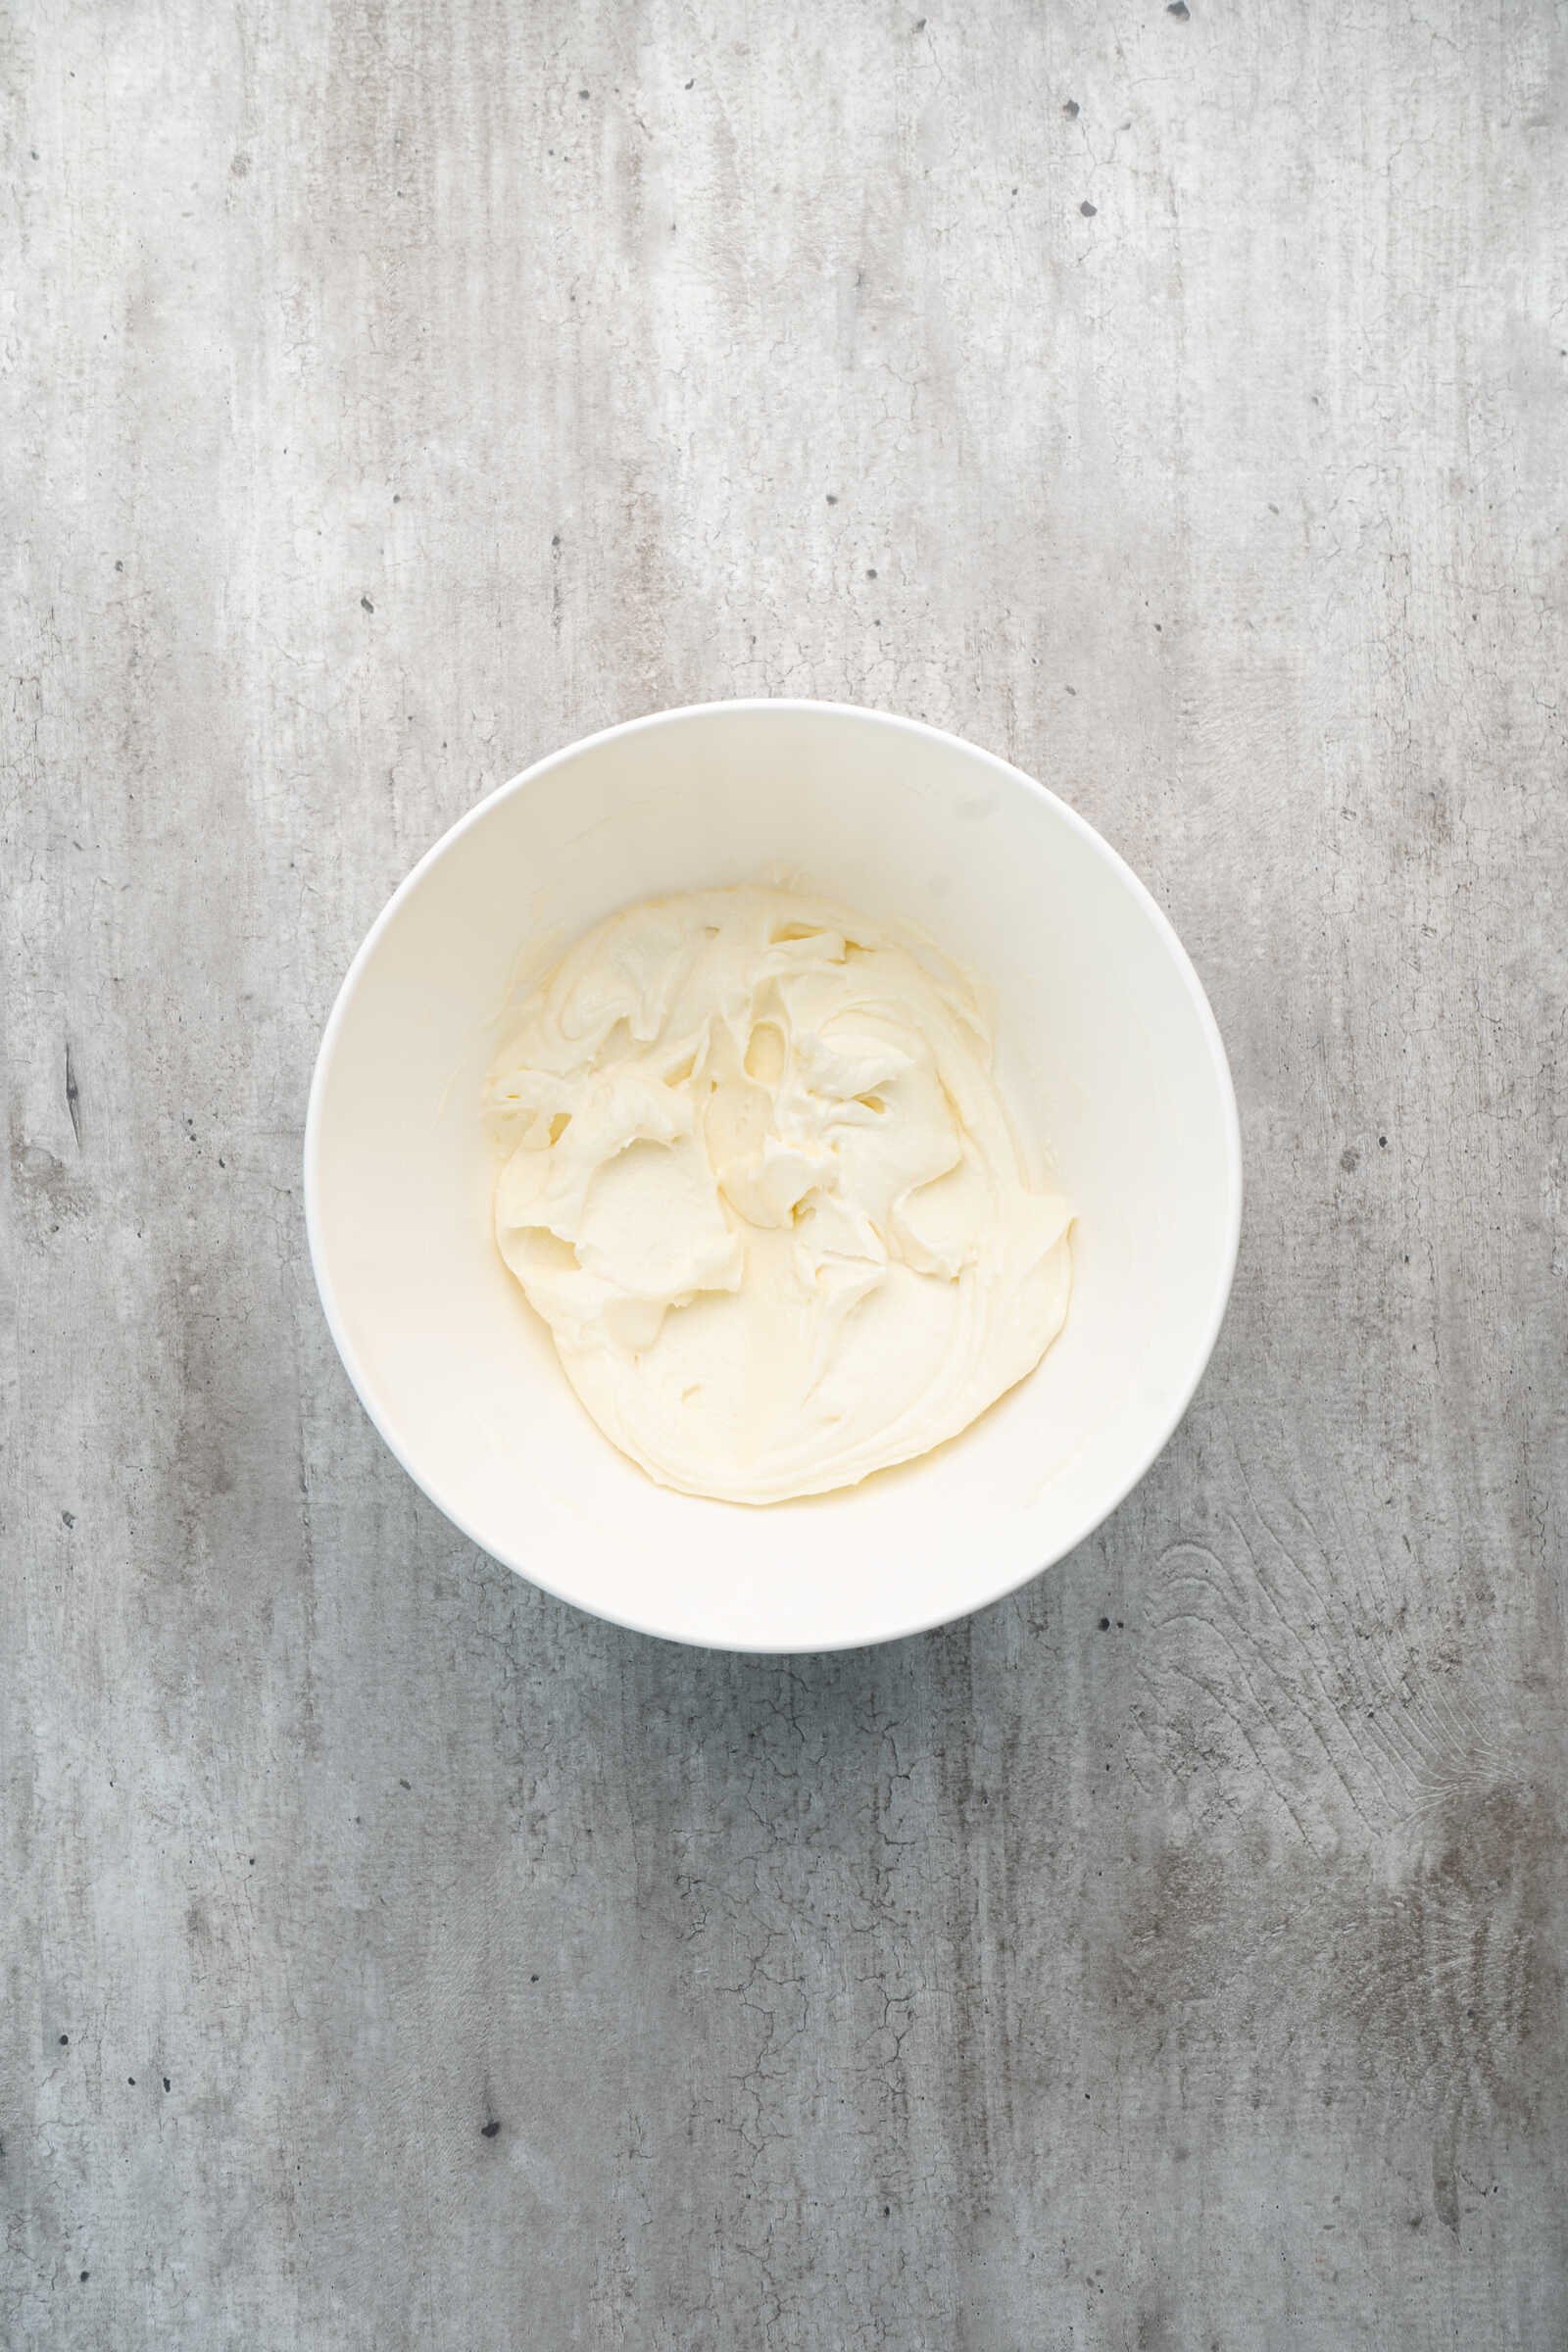
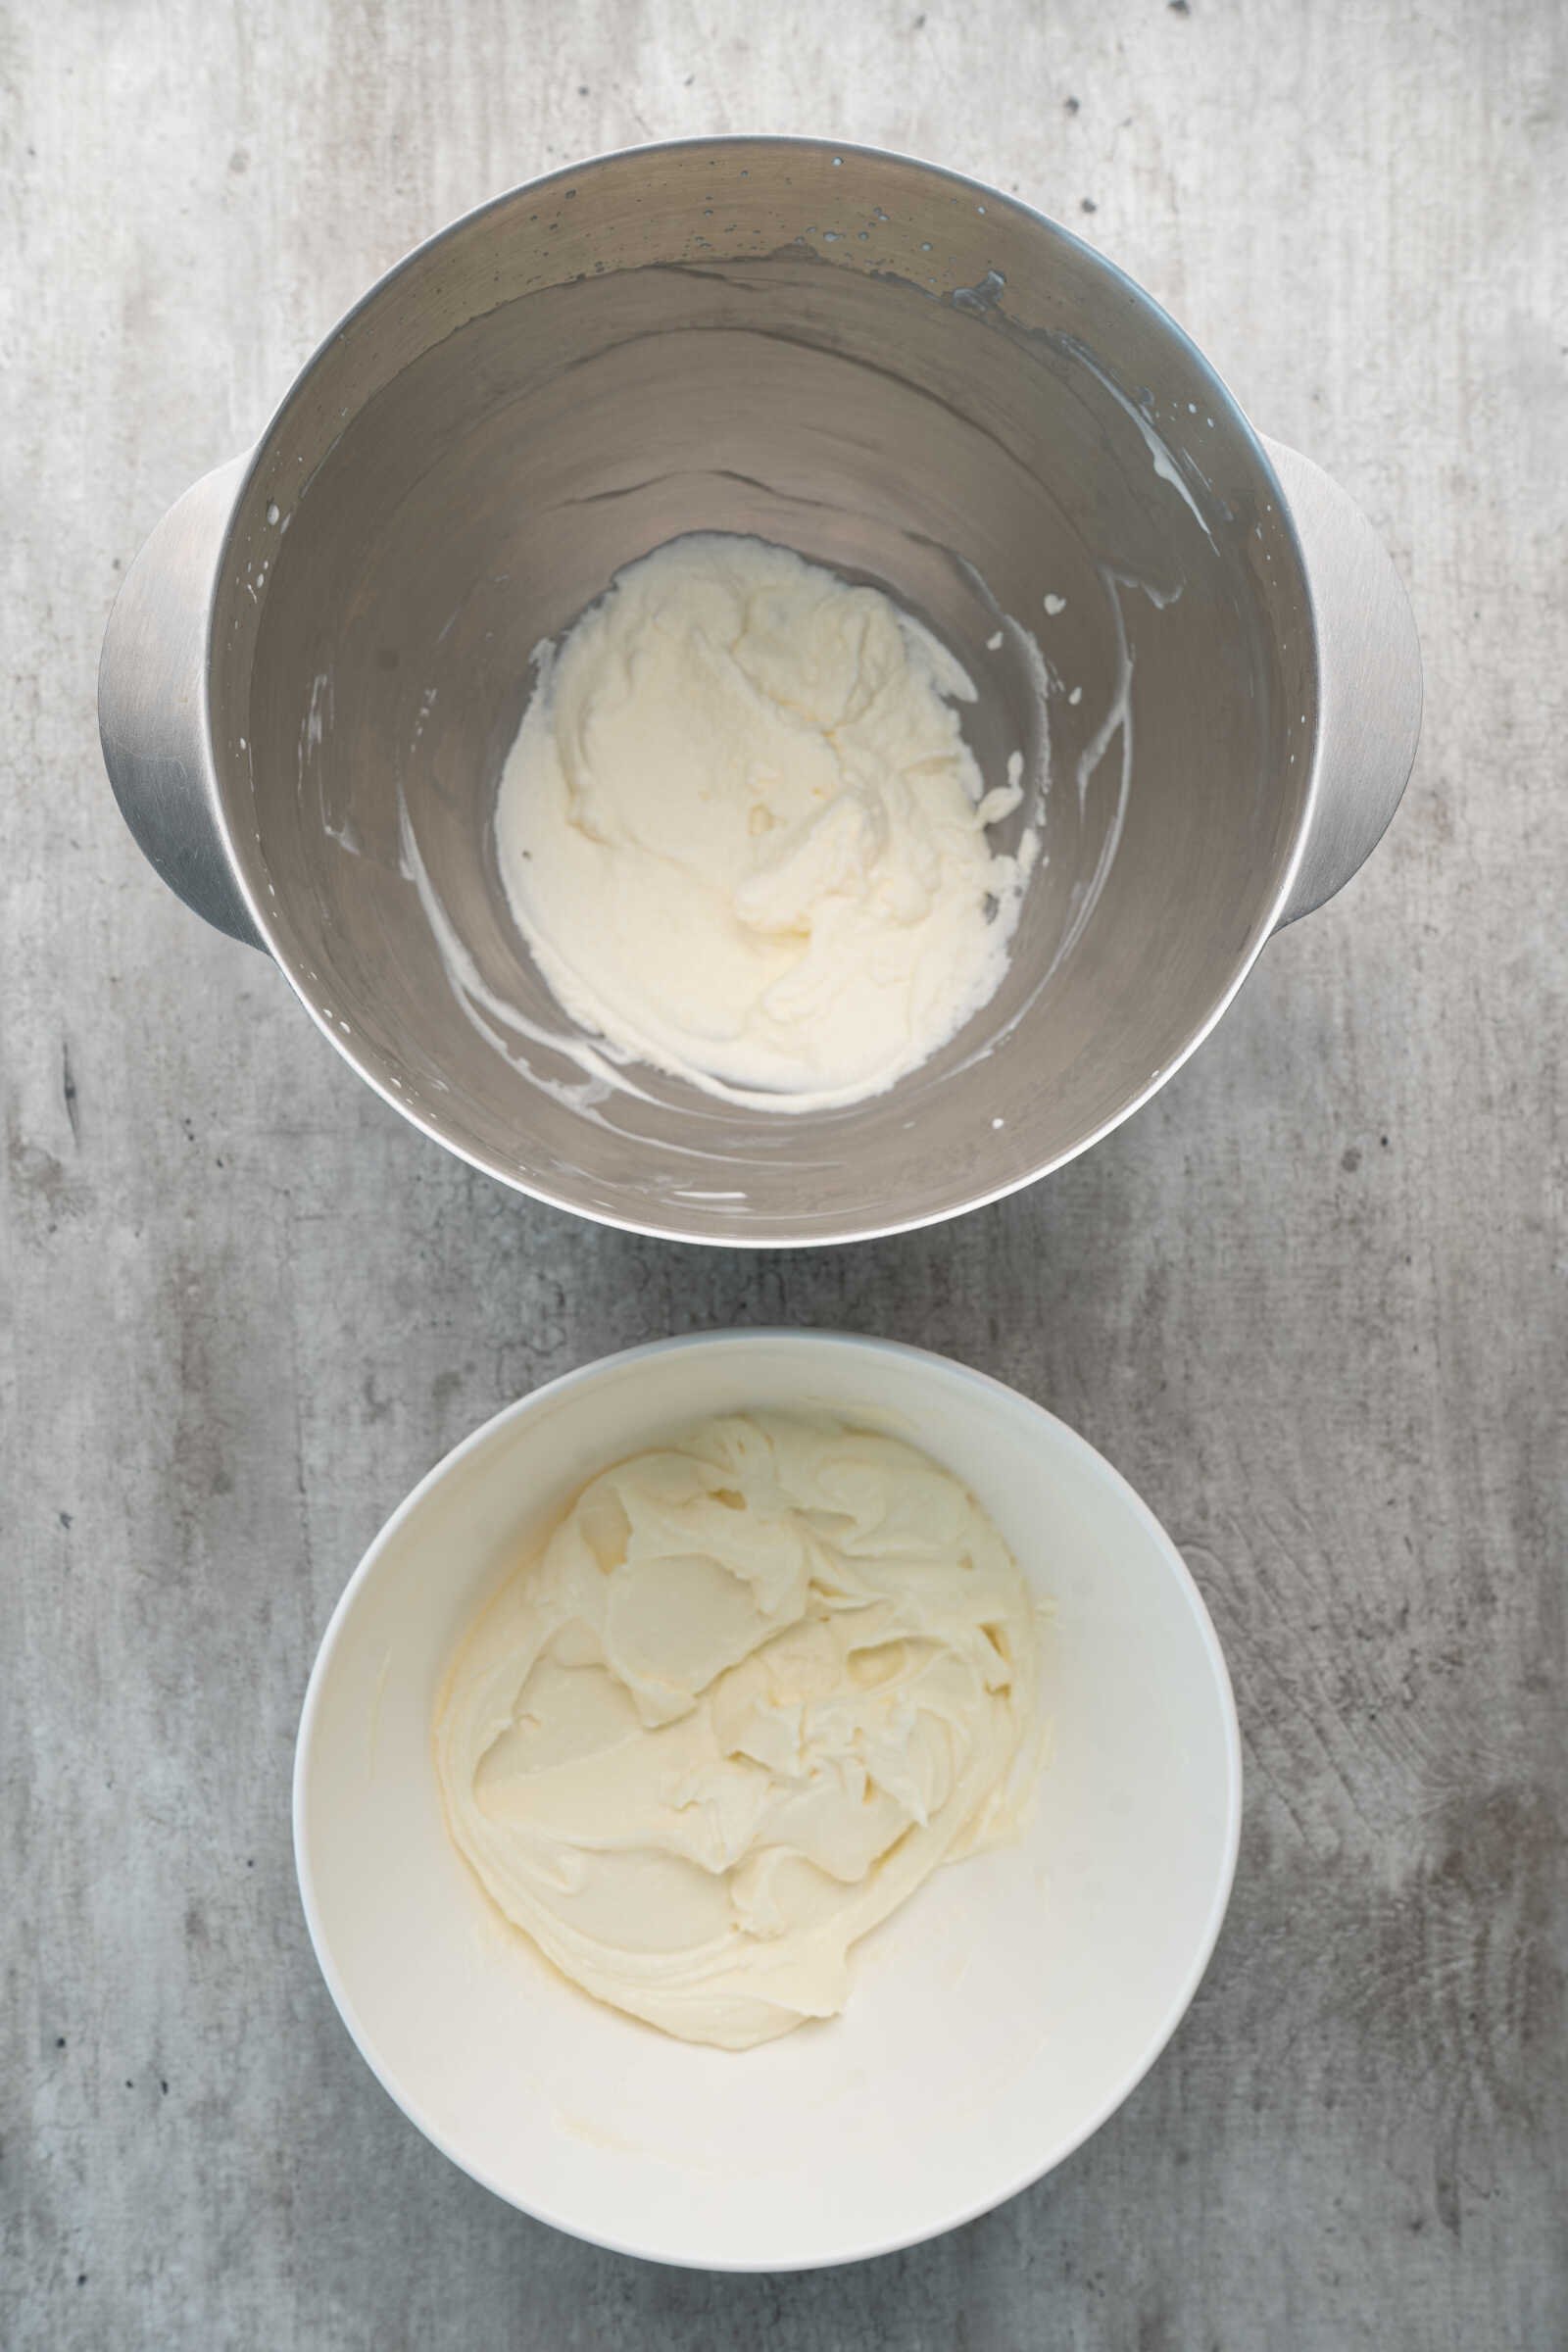
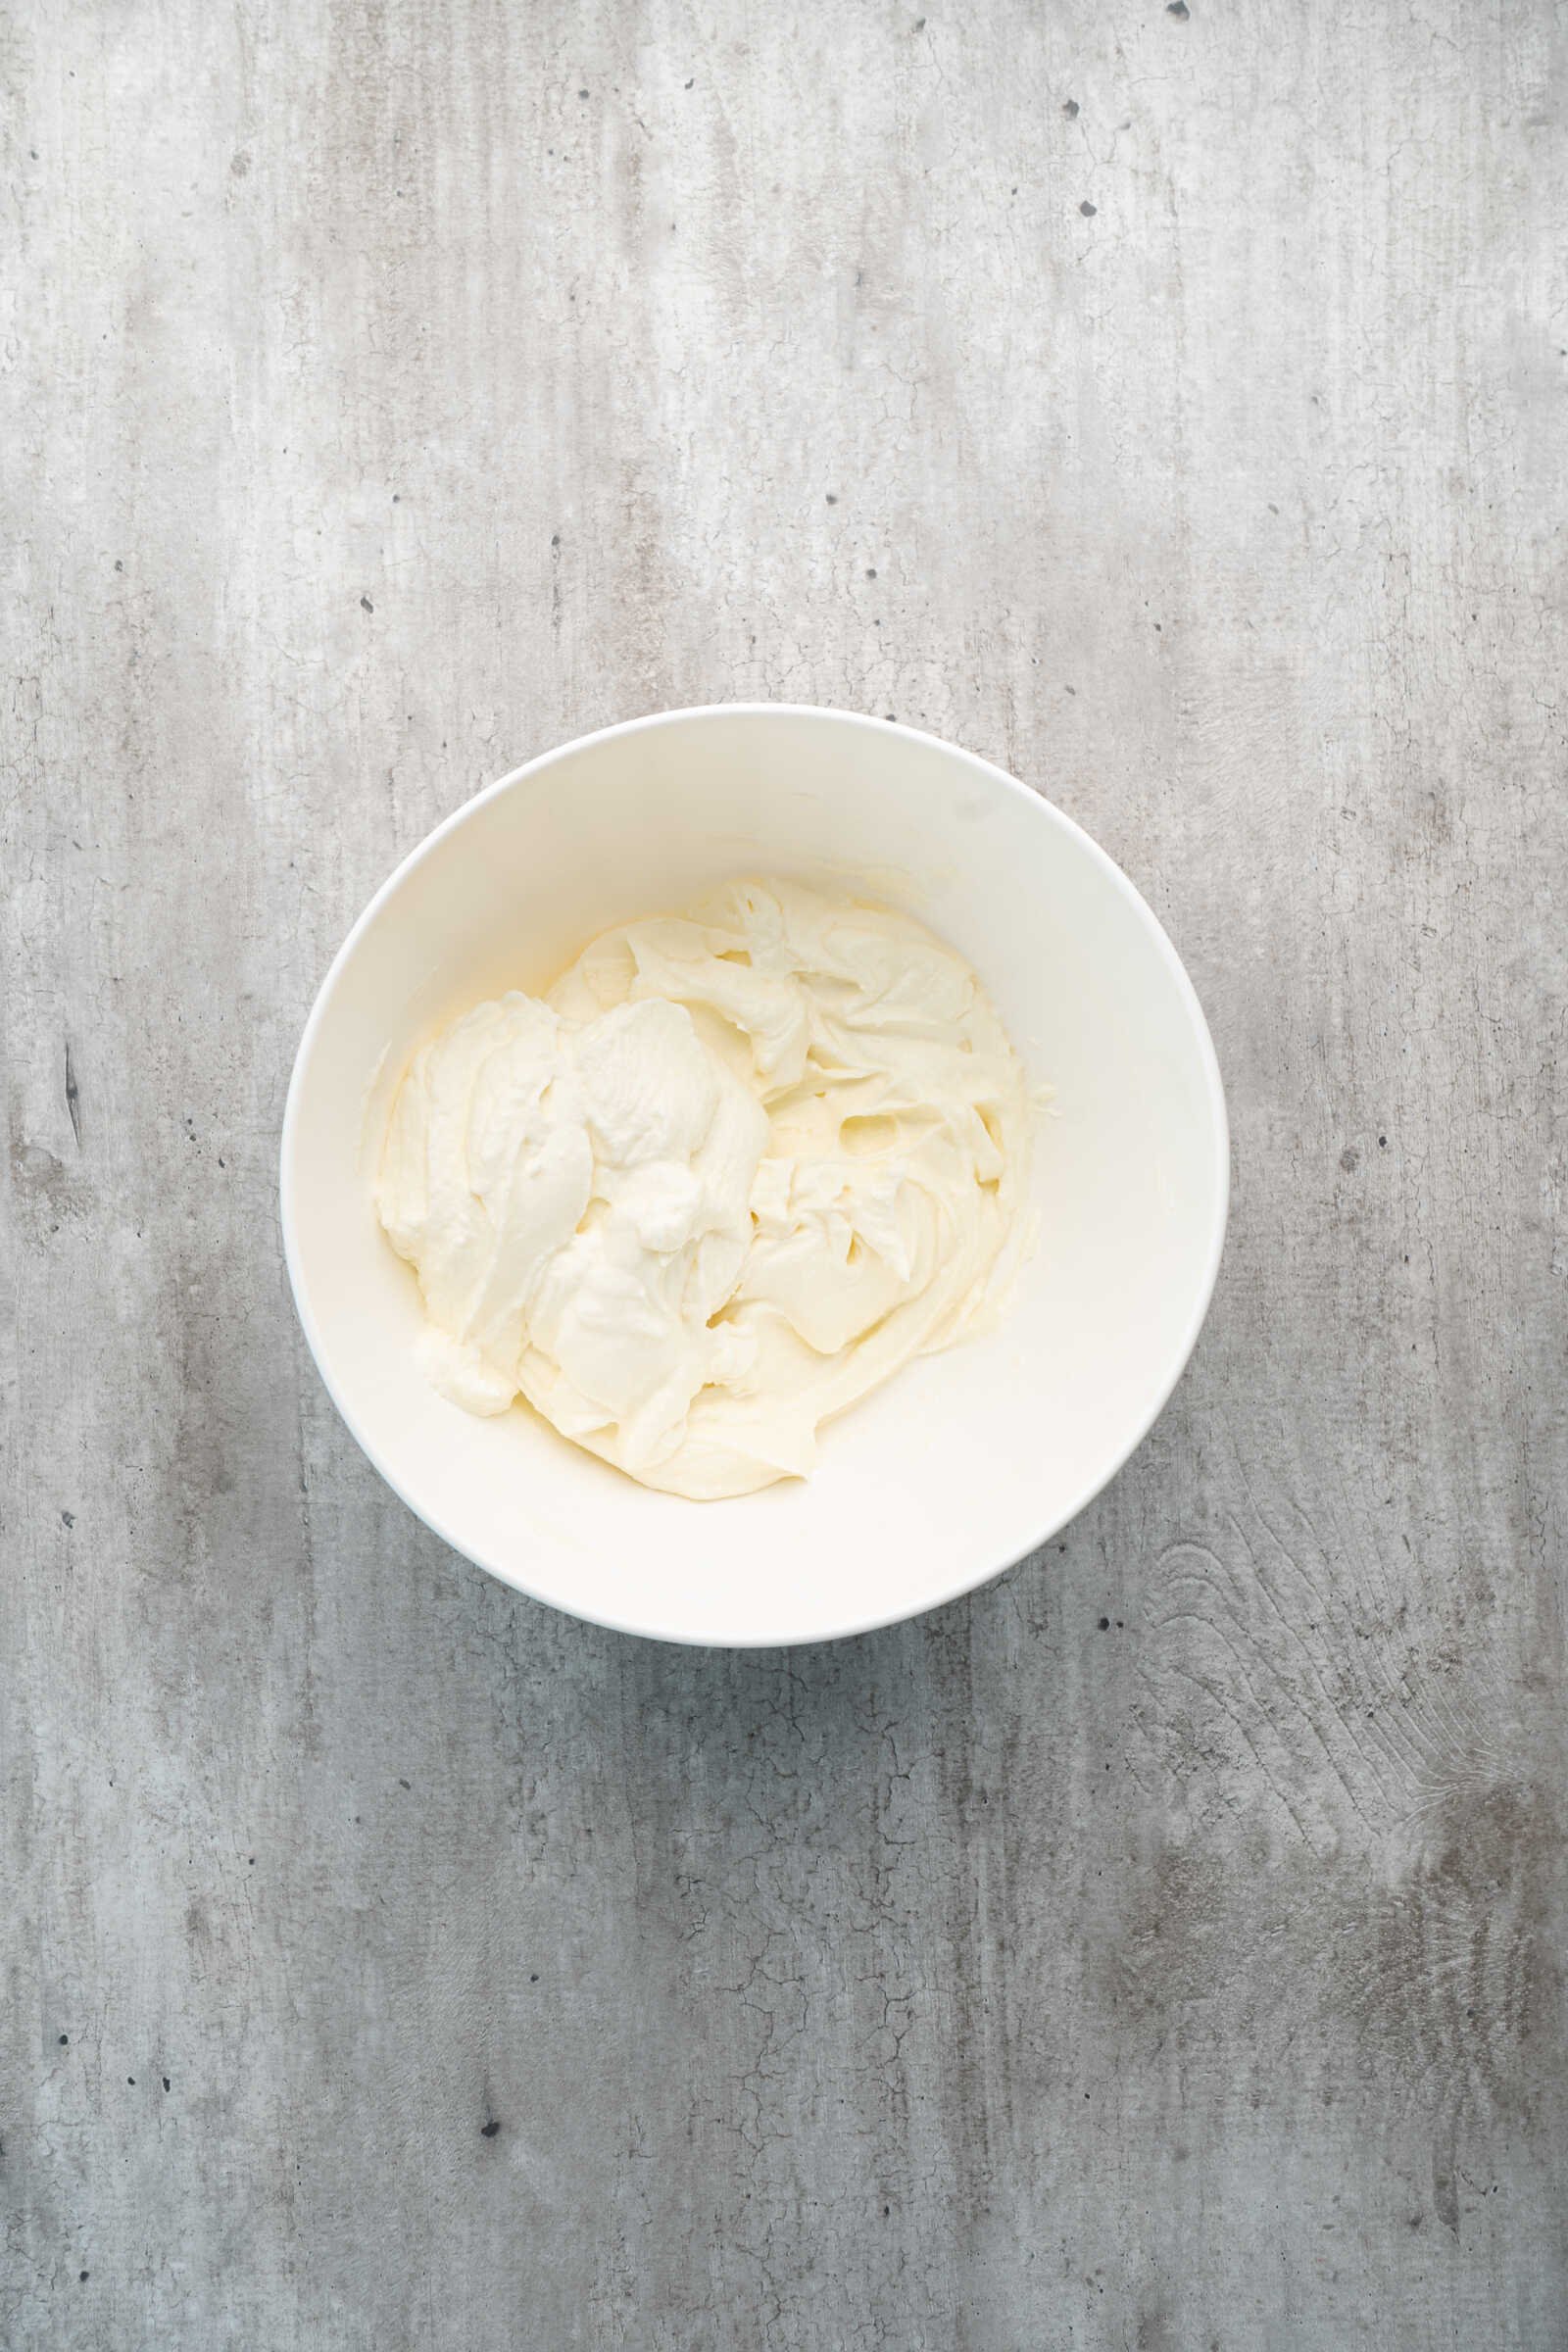
The filling is light, creamy, and easy to prepare. In a medium mixing bowl, beat together the cream cheese, lemon juice, and powdered sugar until smooth and creamy.
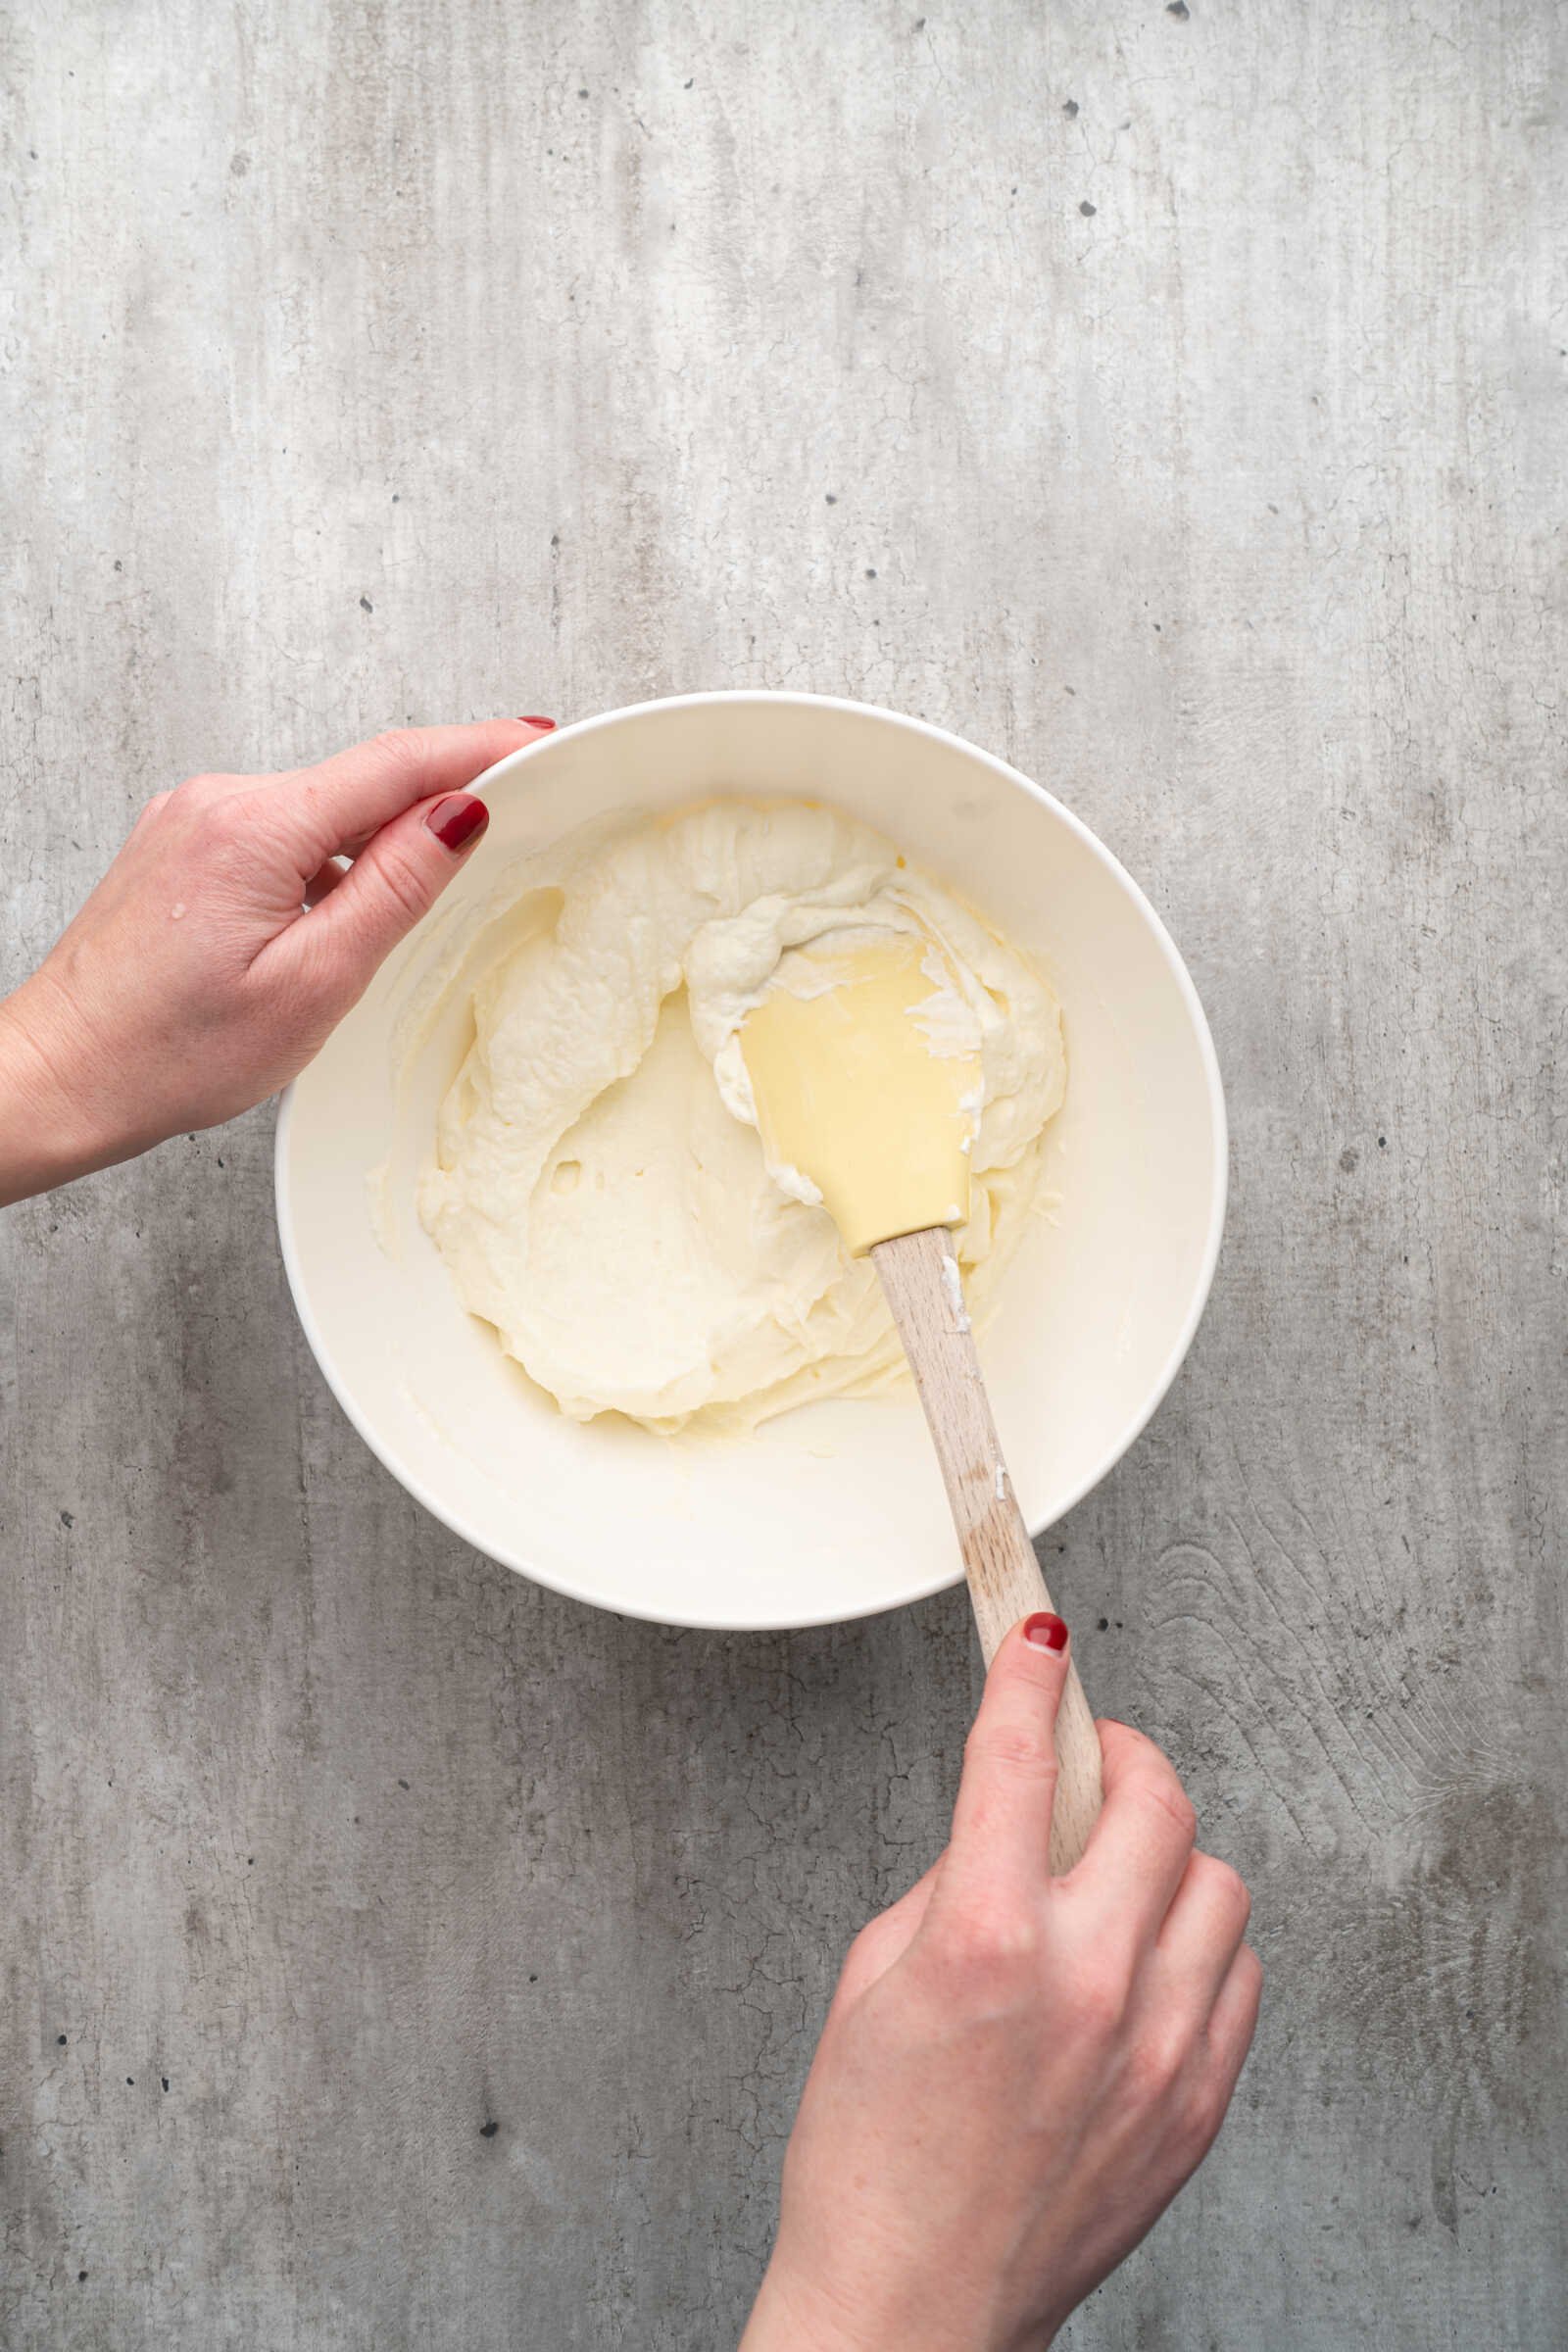
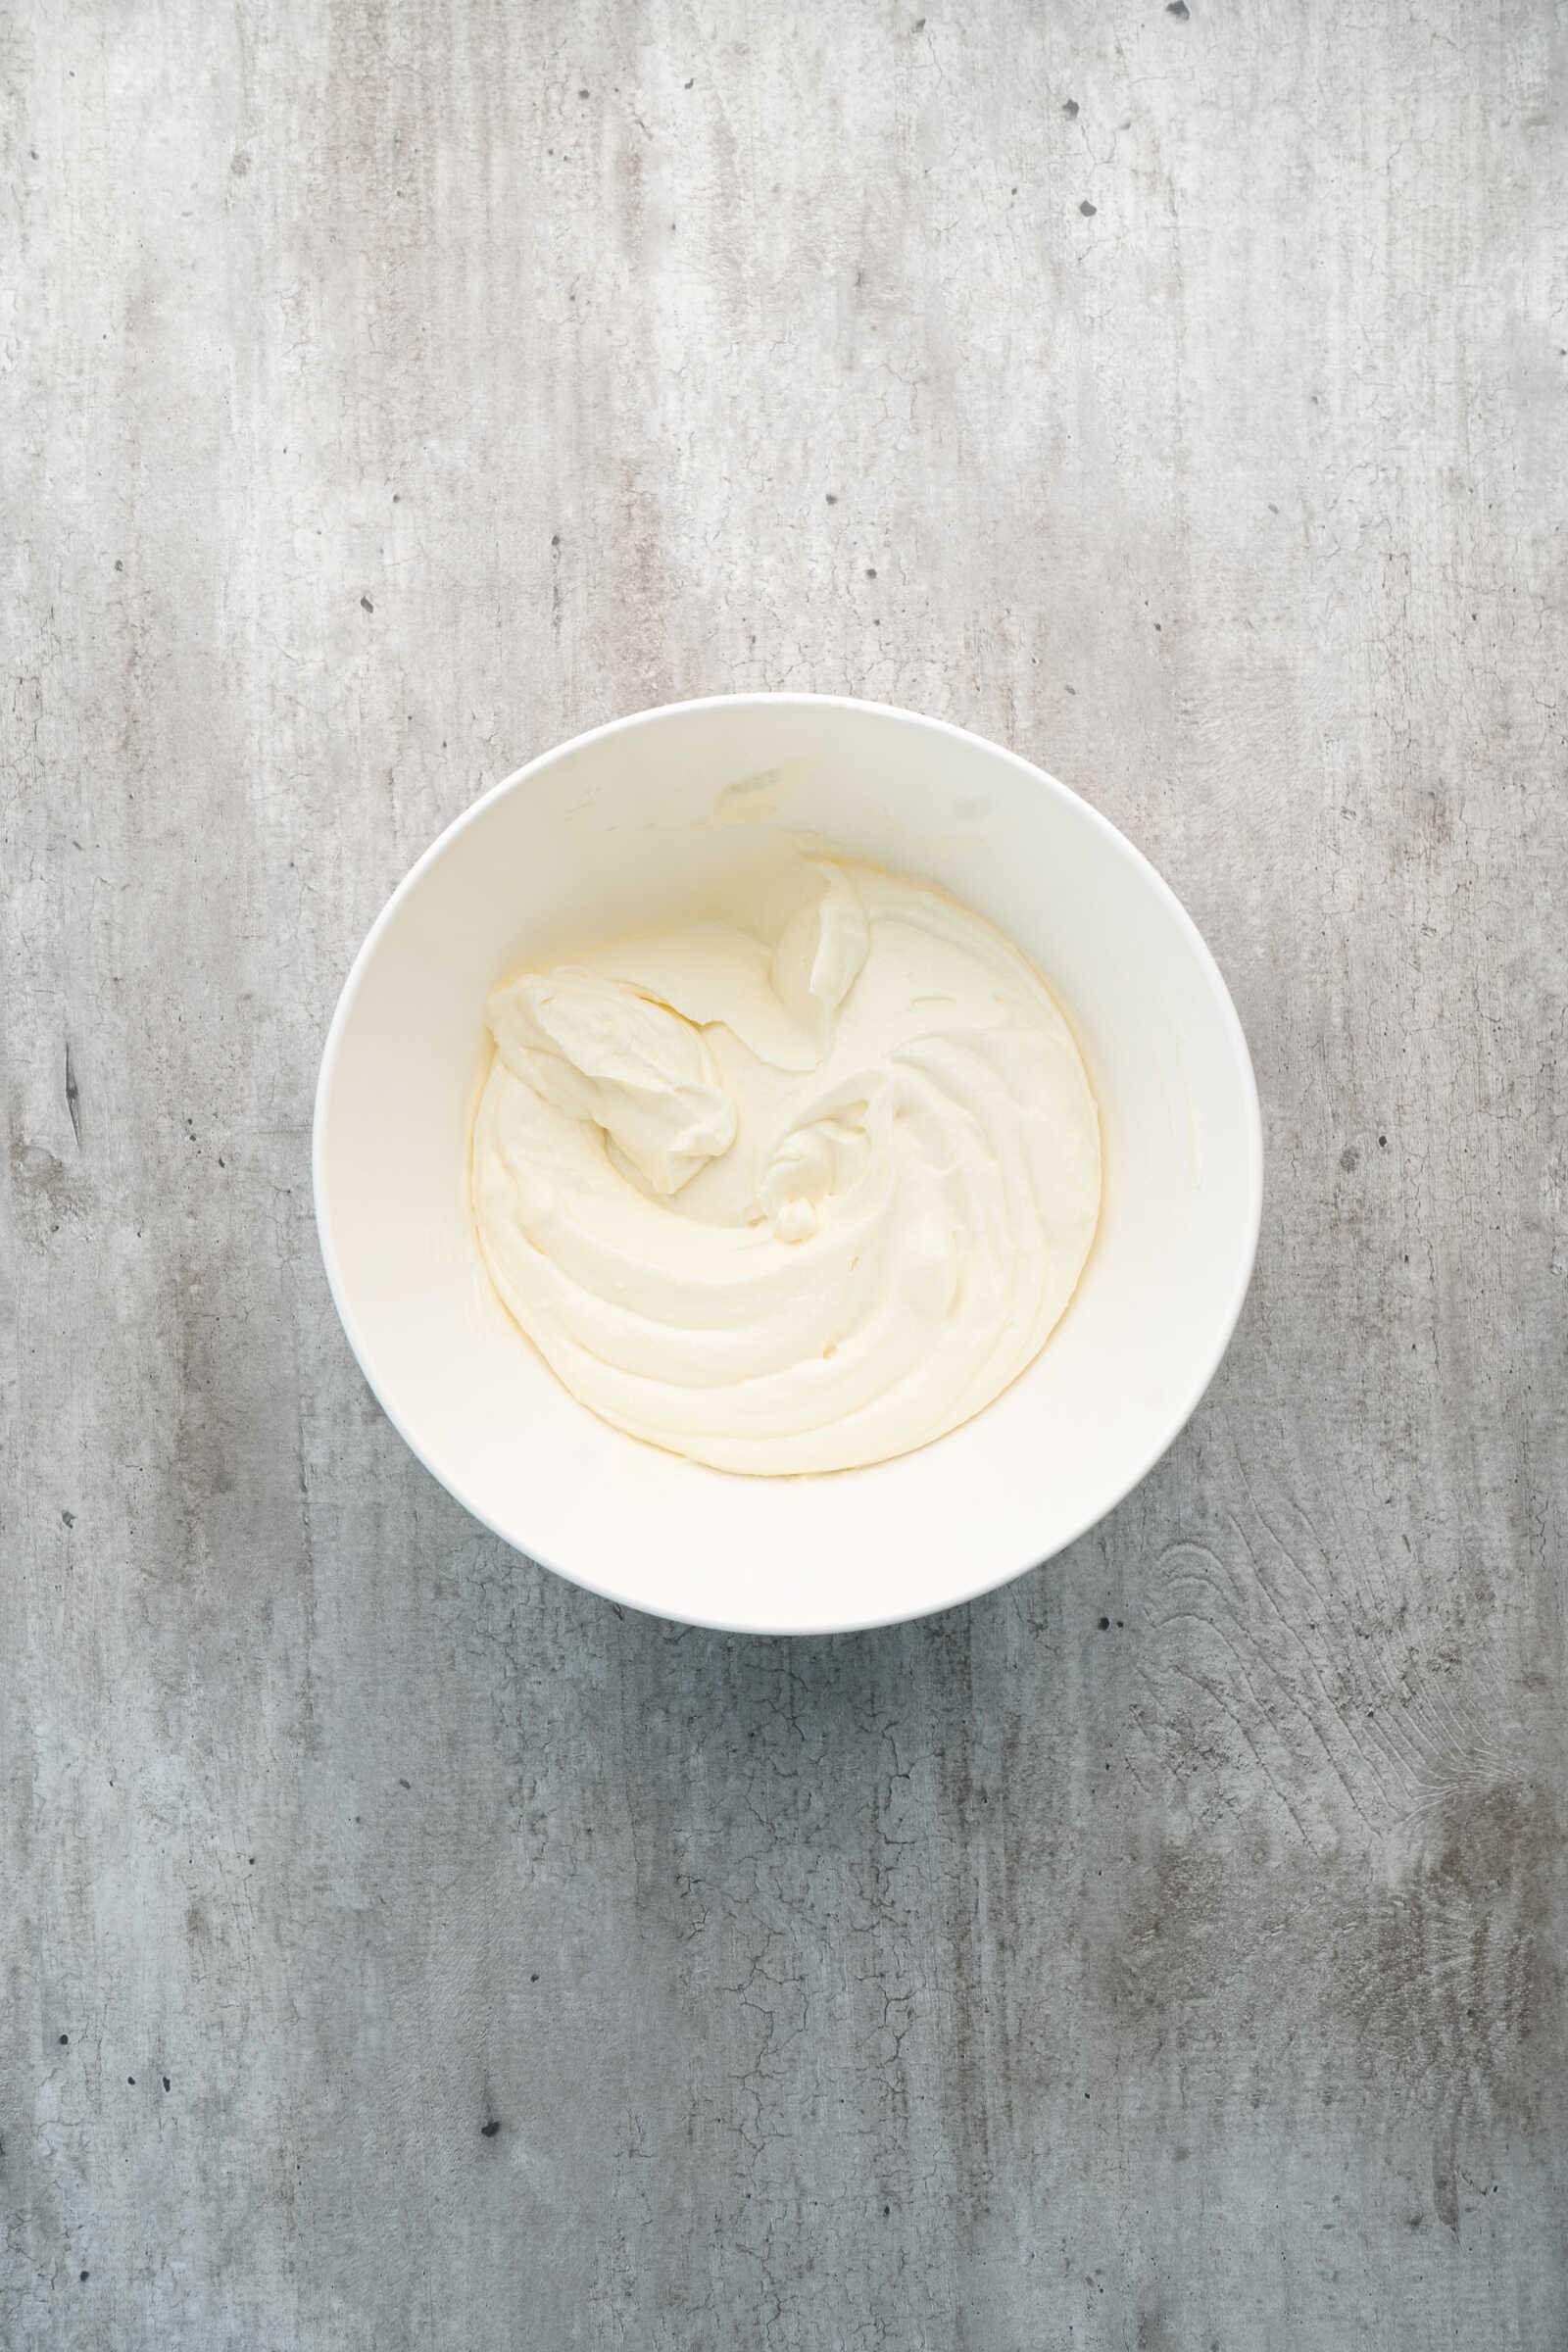
In a separate bowl, whip the heavy cream and vanilla extract until soft peaks form. Gently fold the whipped cream into the cream cheese mixture. Folding helps maintain the airy texture of the filling.
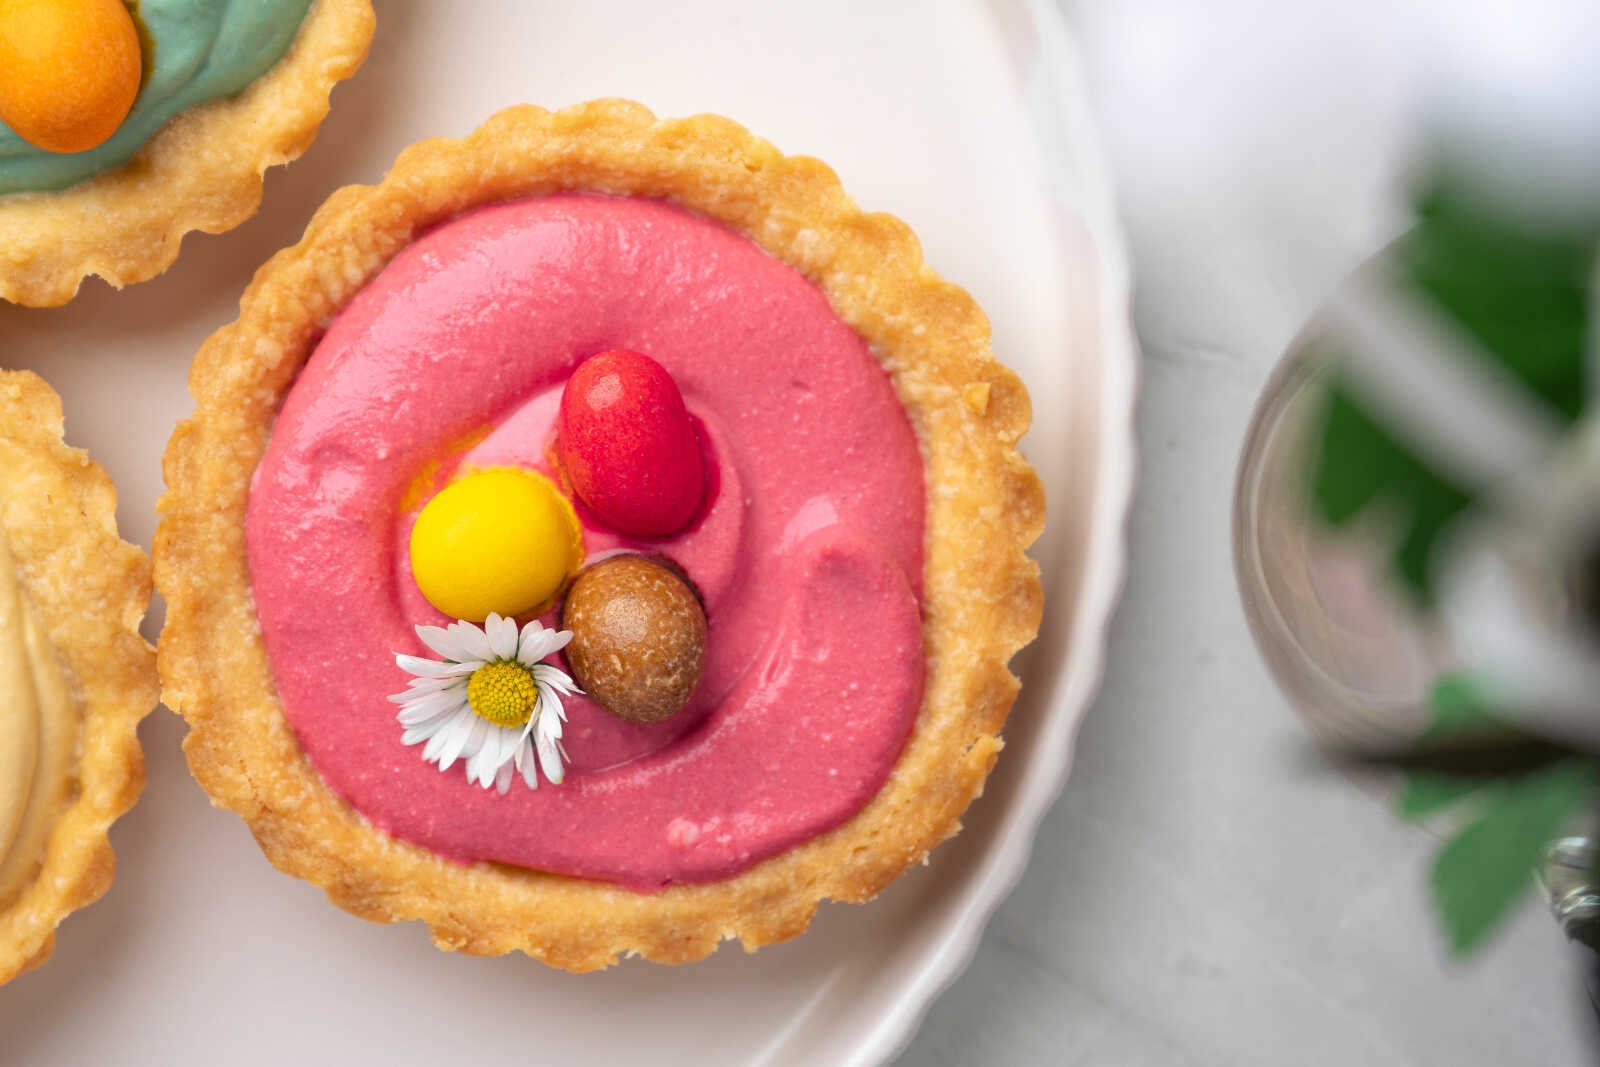
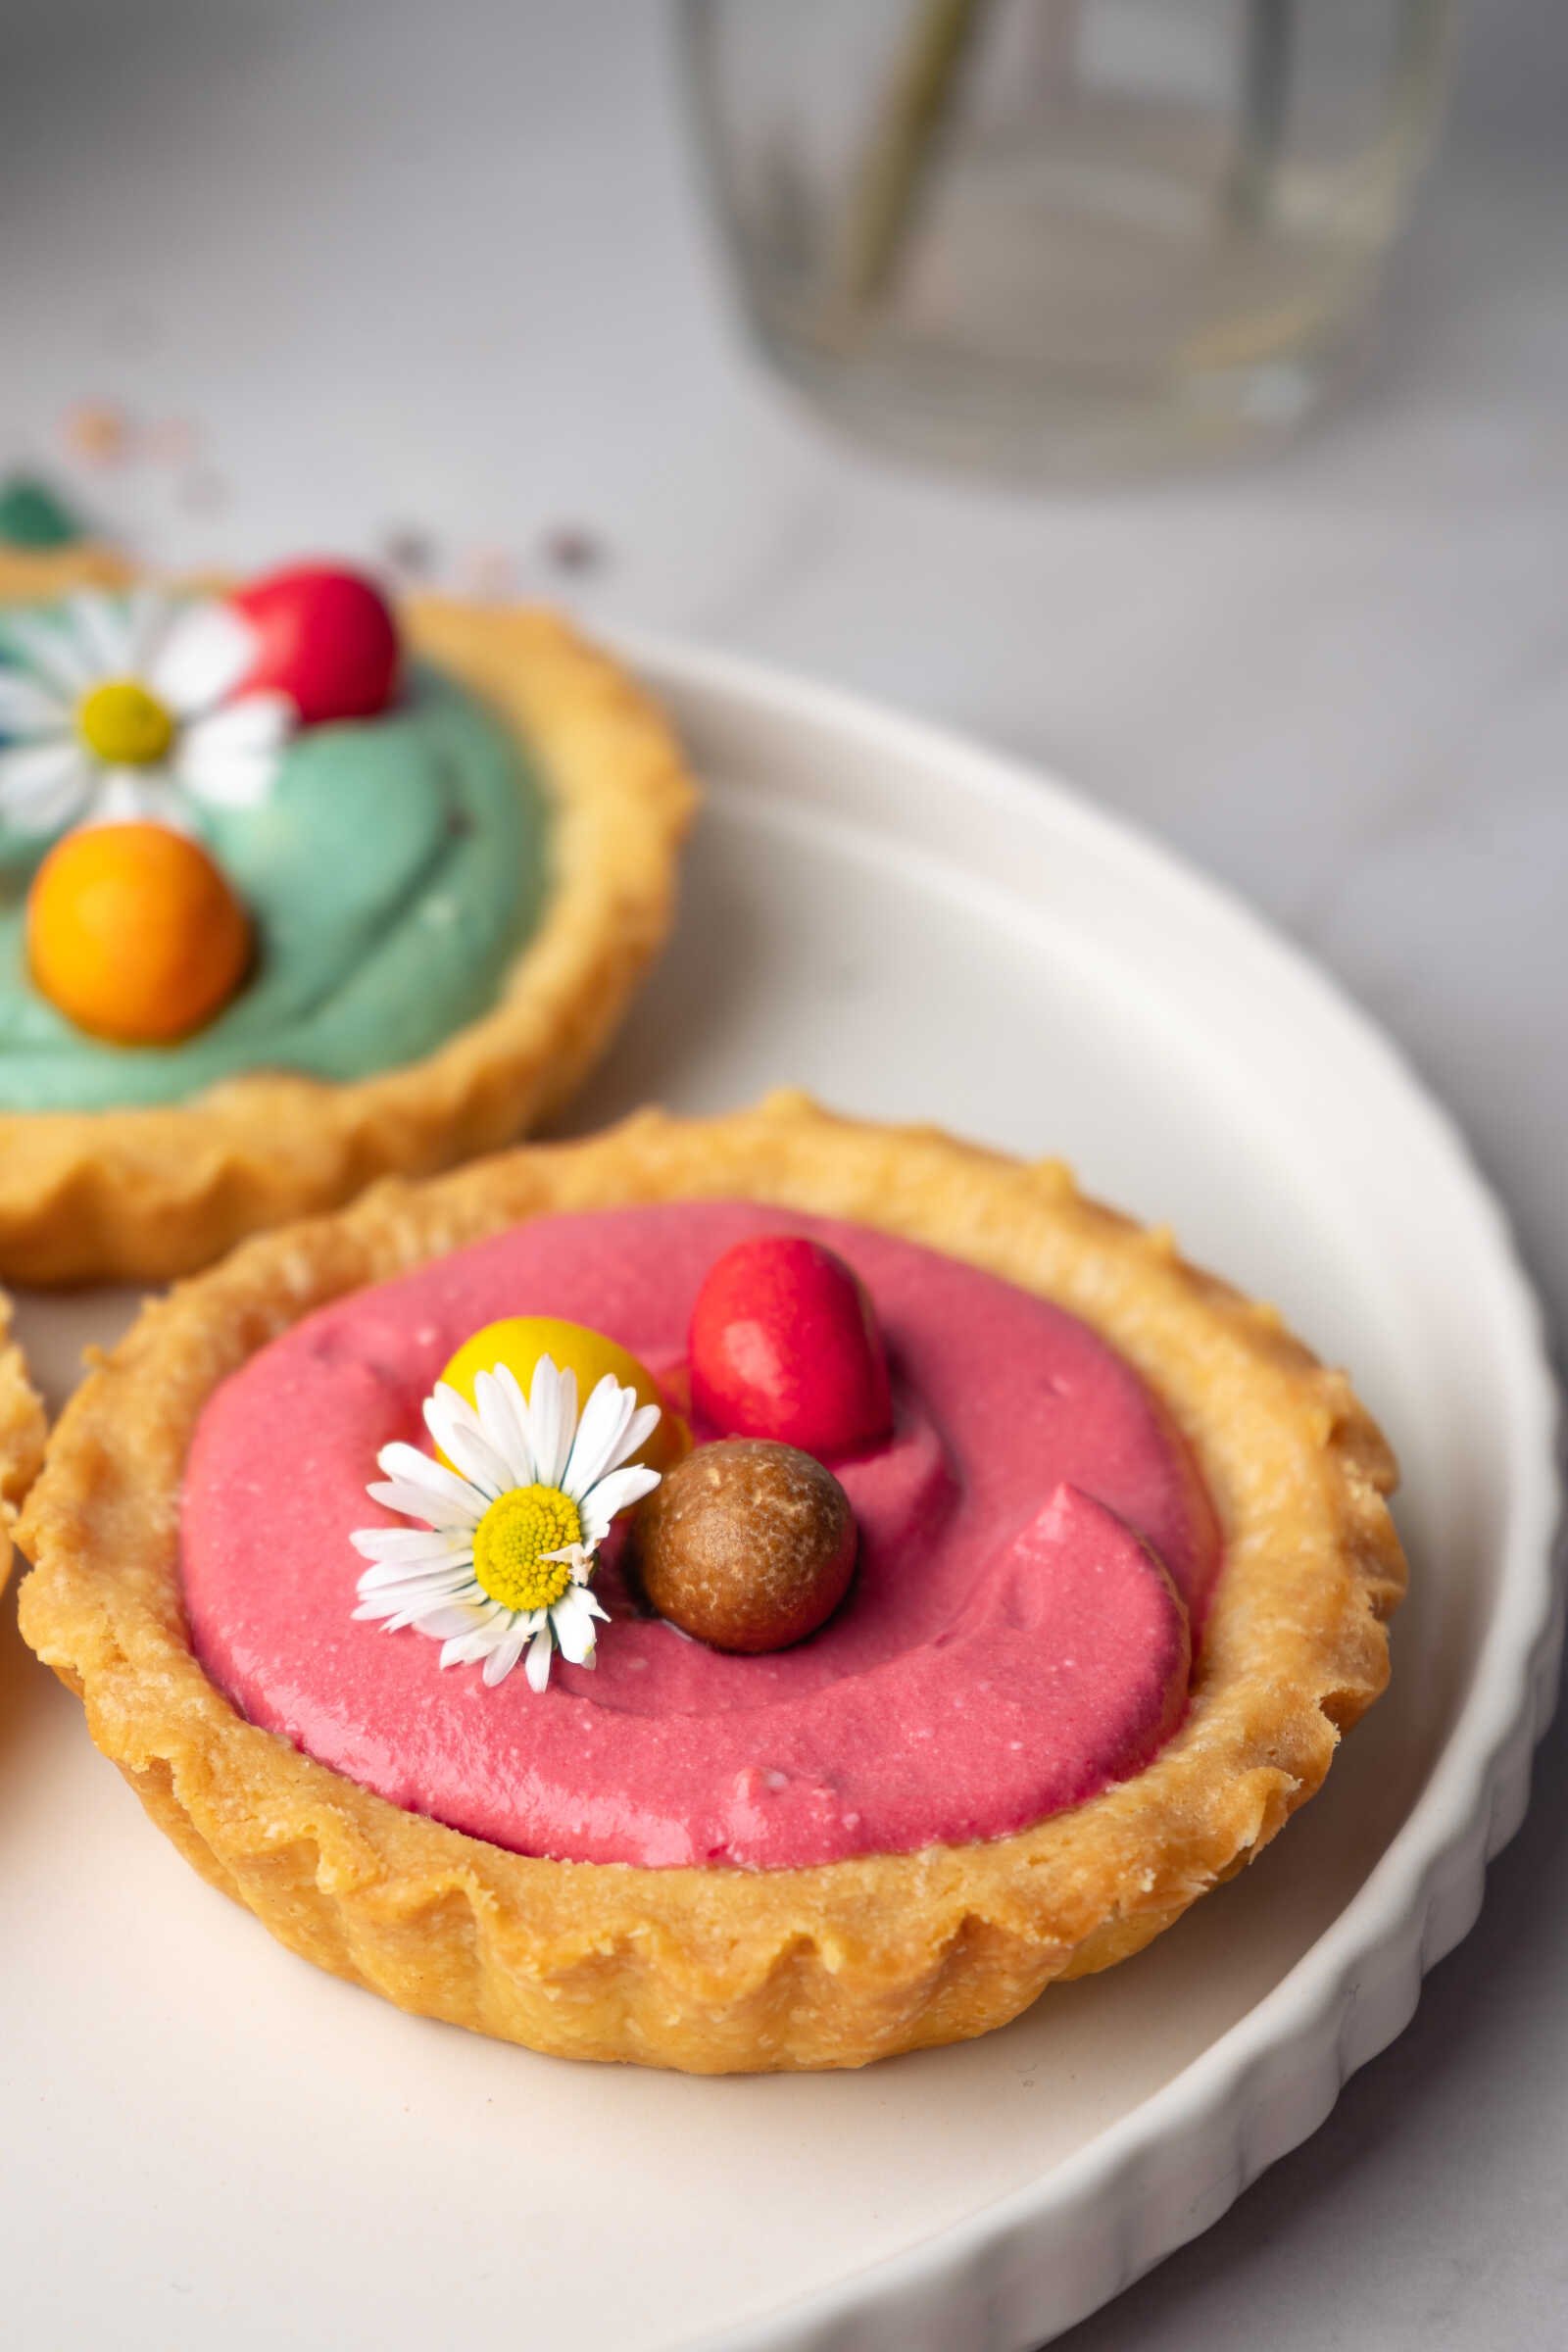
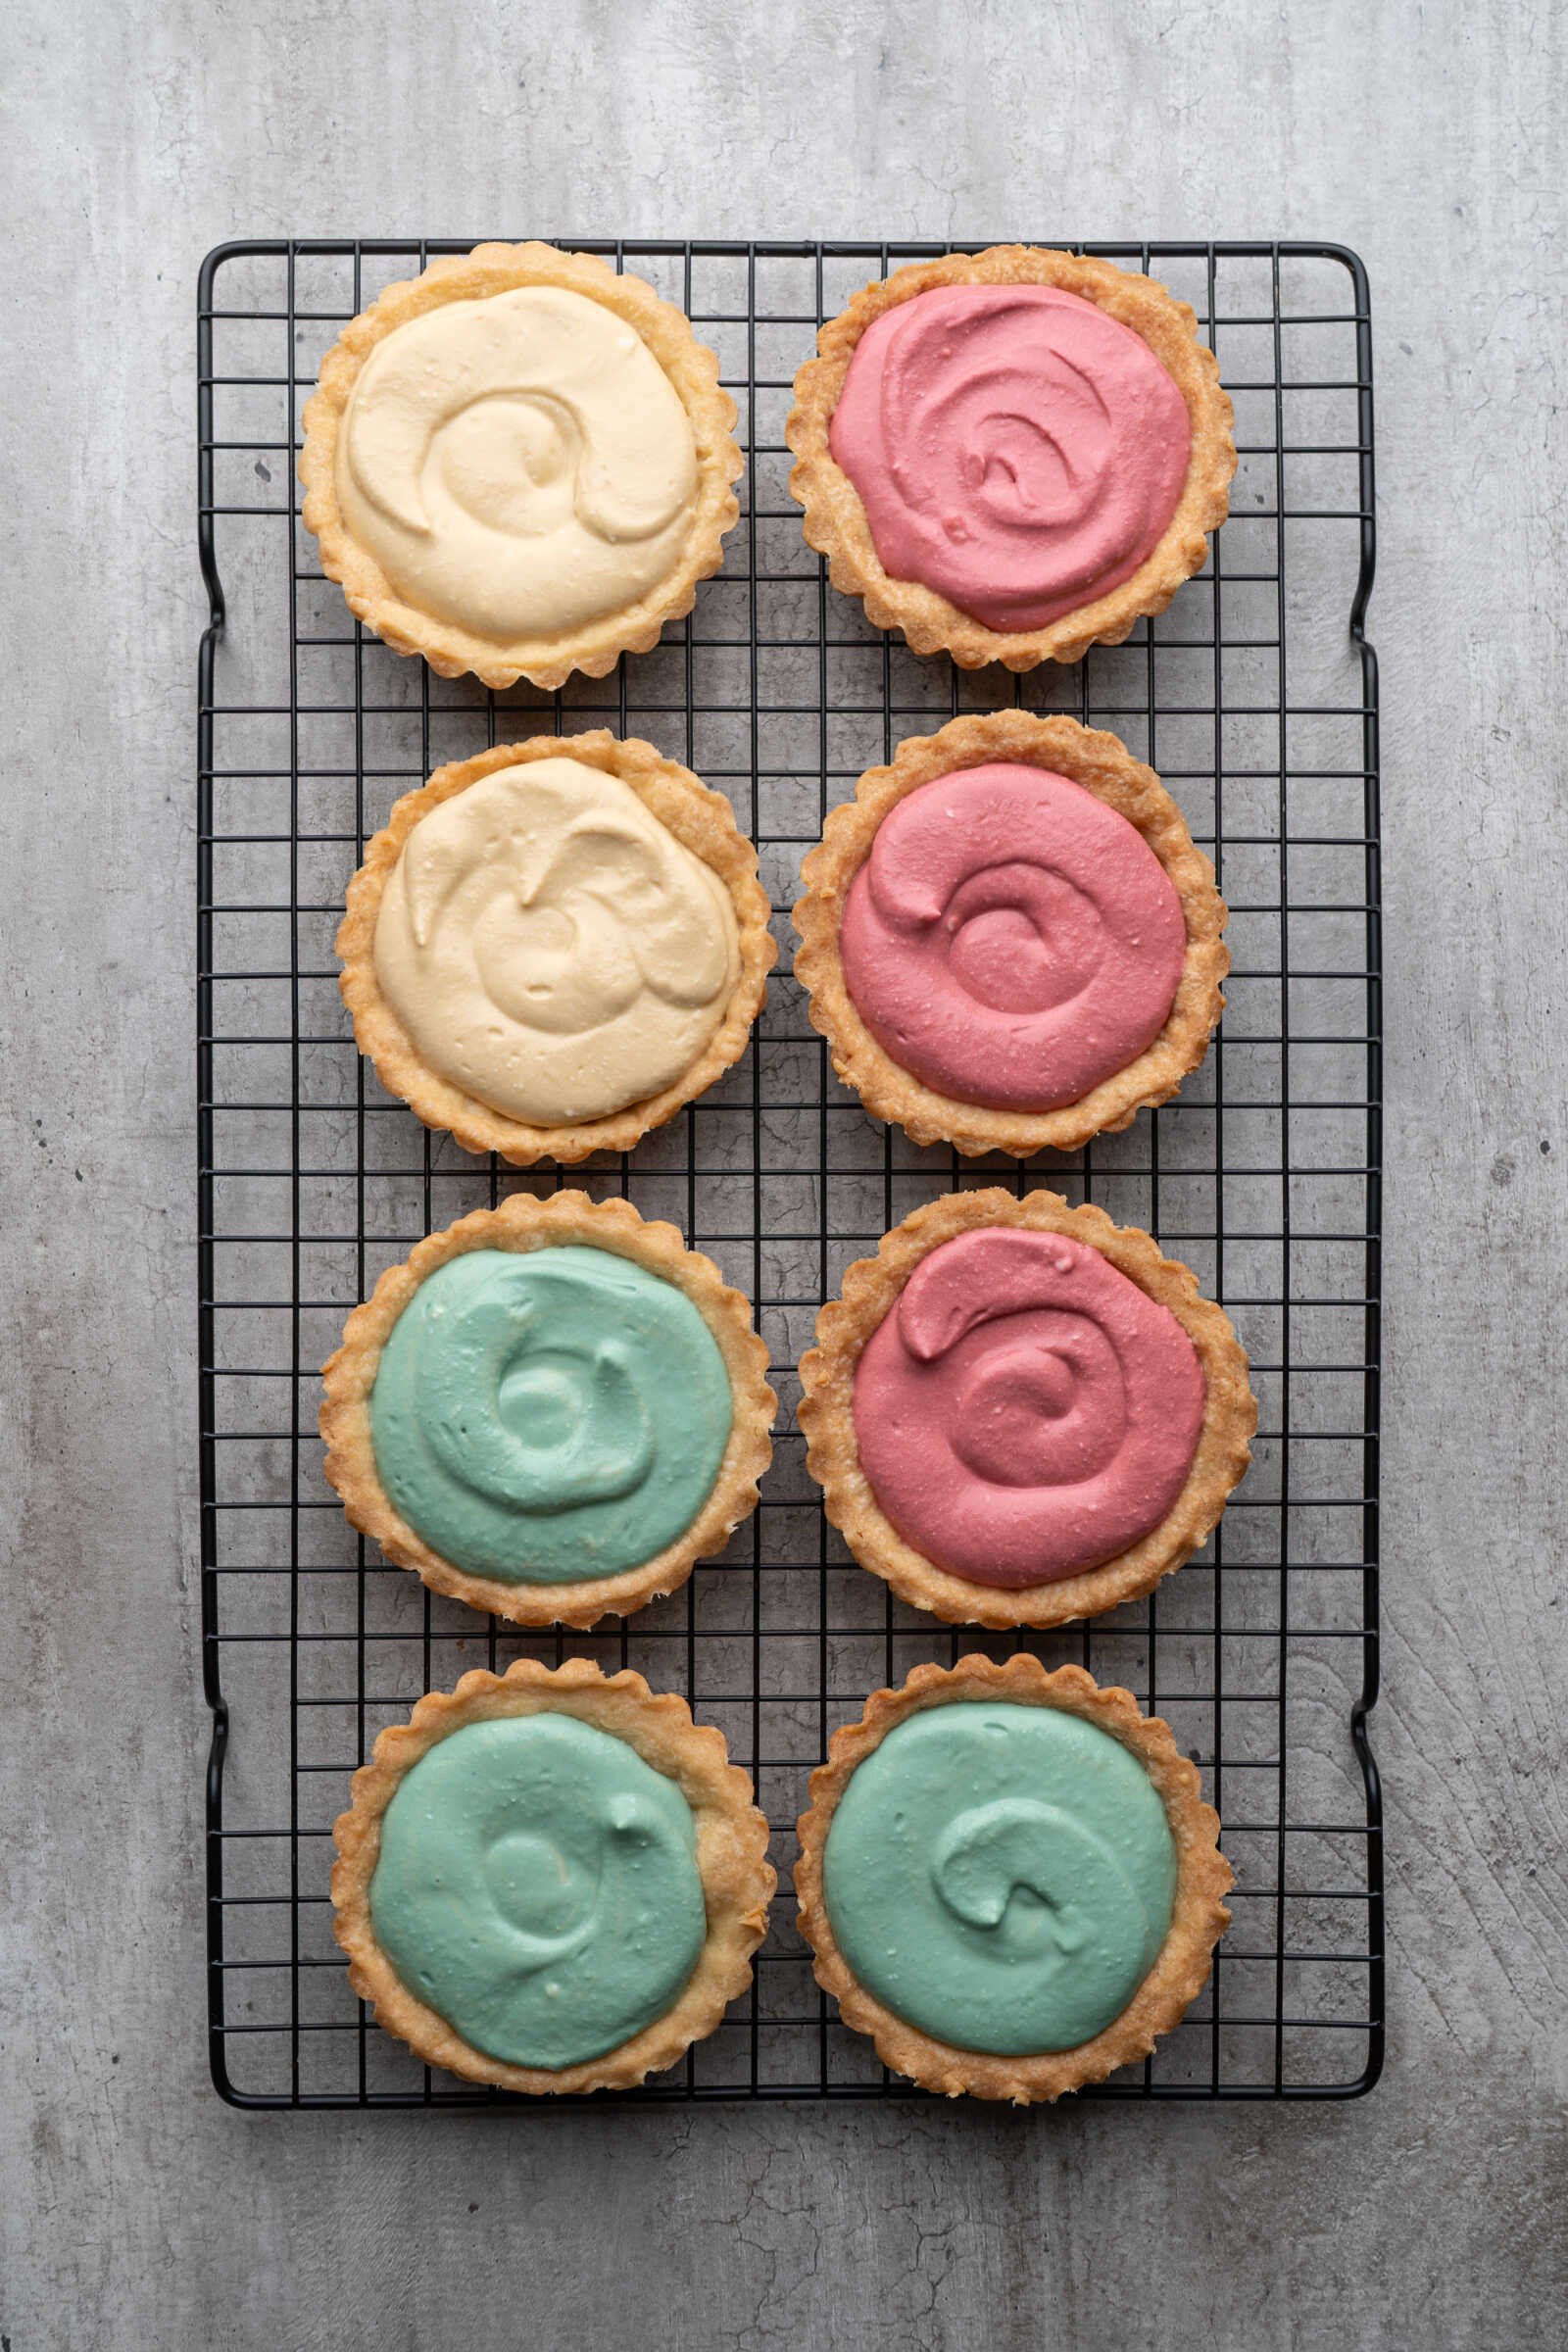
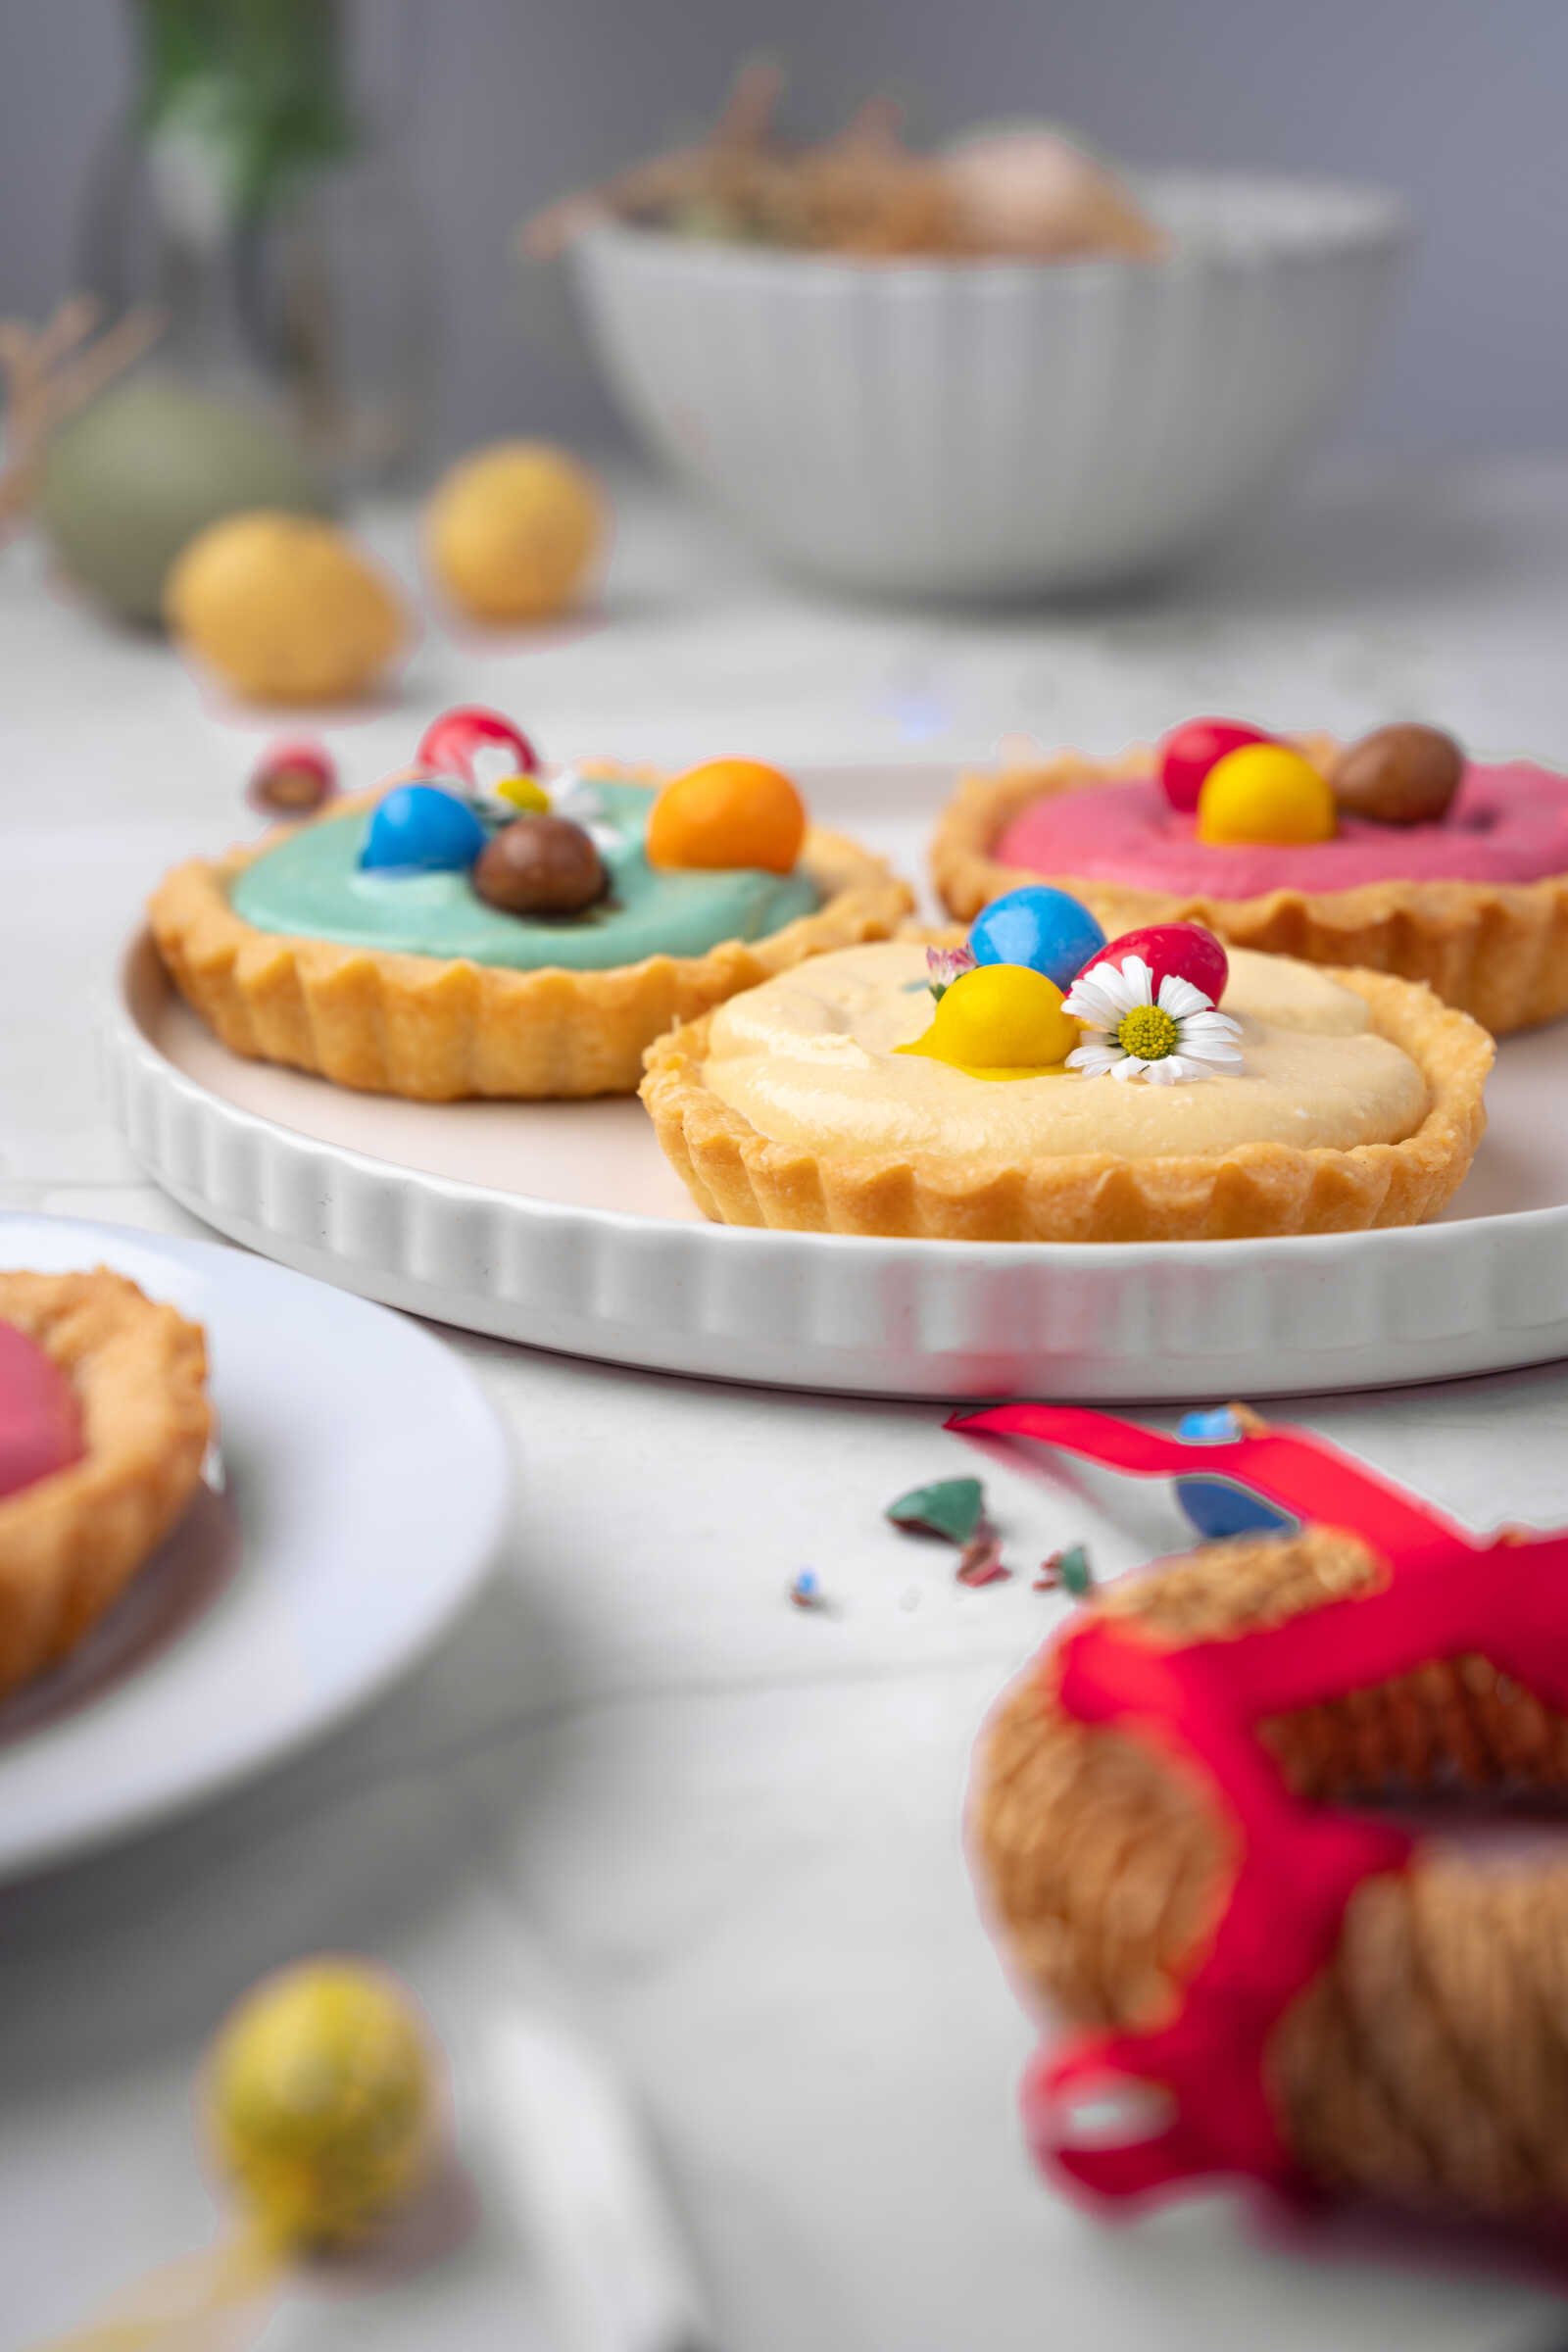
Divide the cheesecake mixture into two or more bowls and add a drop of gel food coloring to each to create pastel shades such as pink, yellow, lavender, or mint green. Stir gently until the color is evenly distributed.
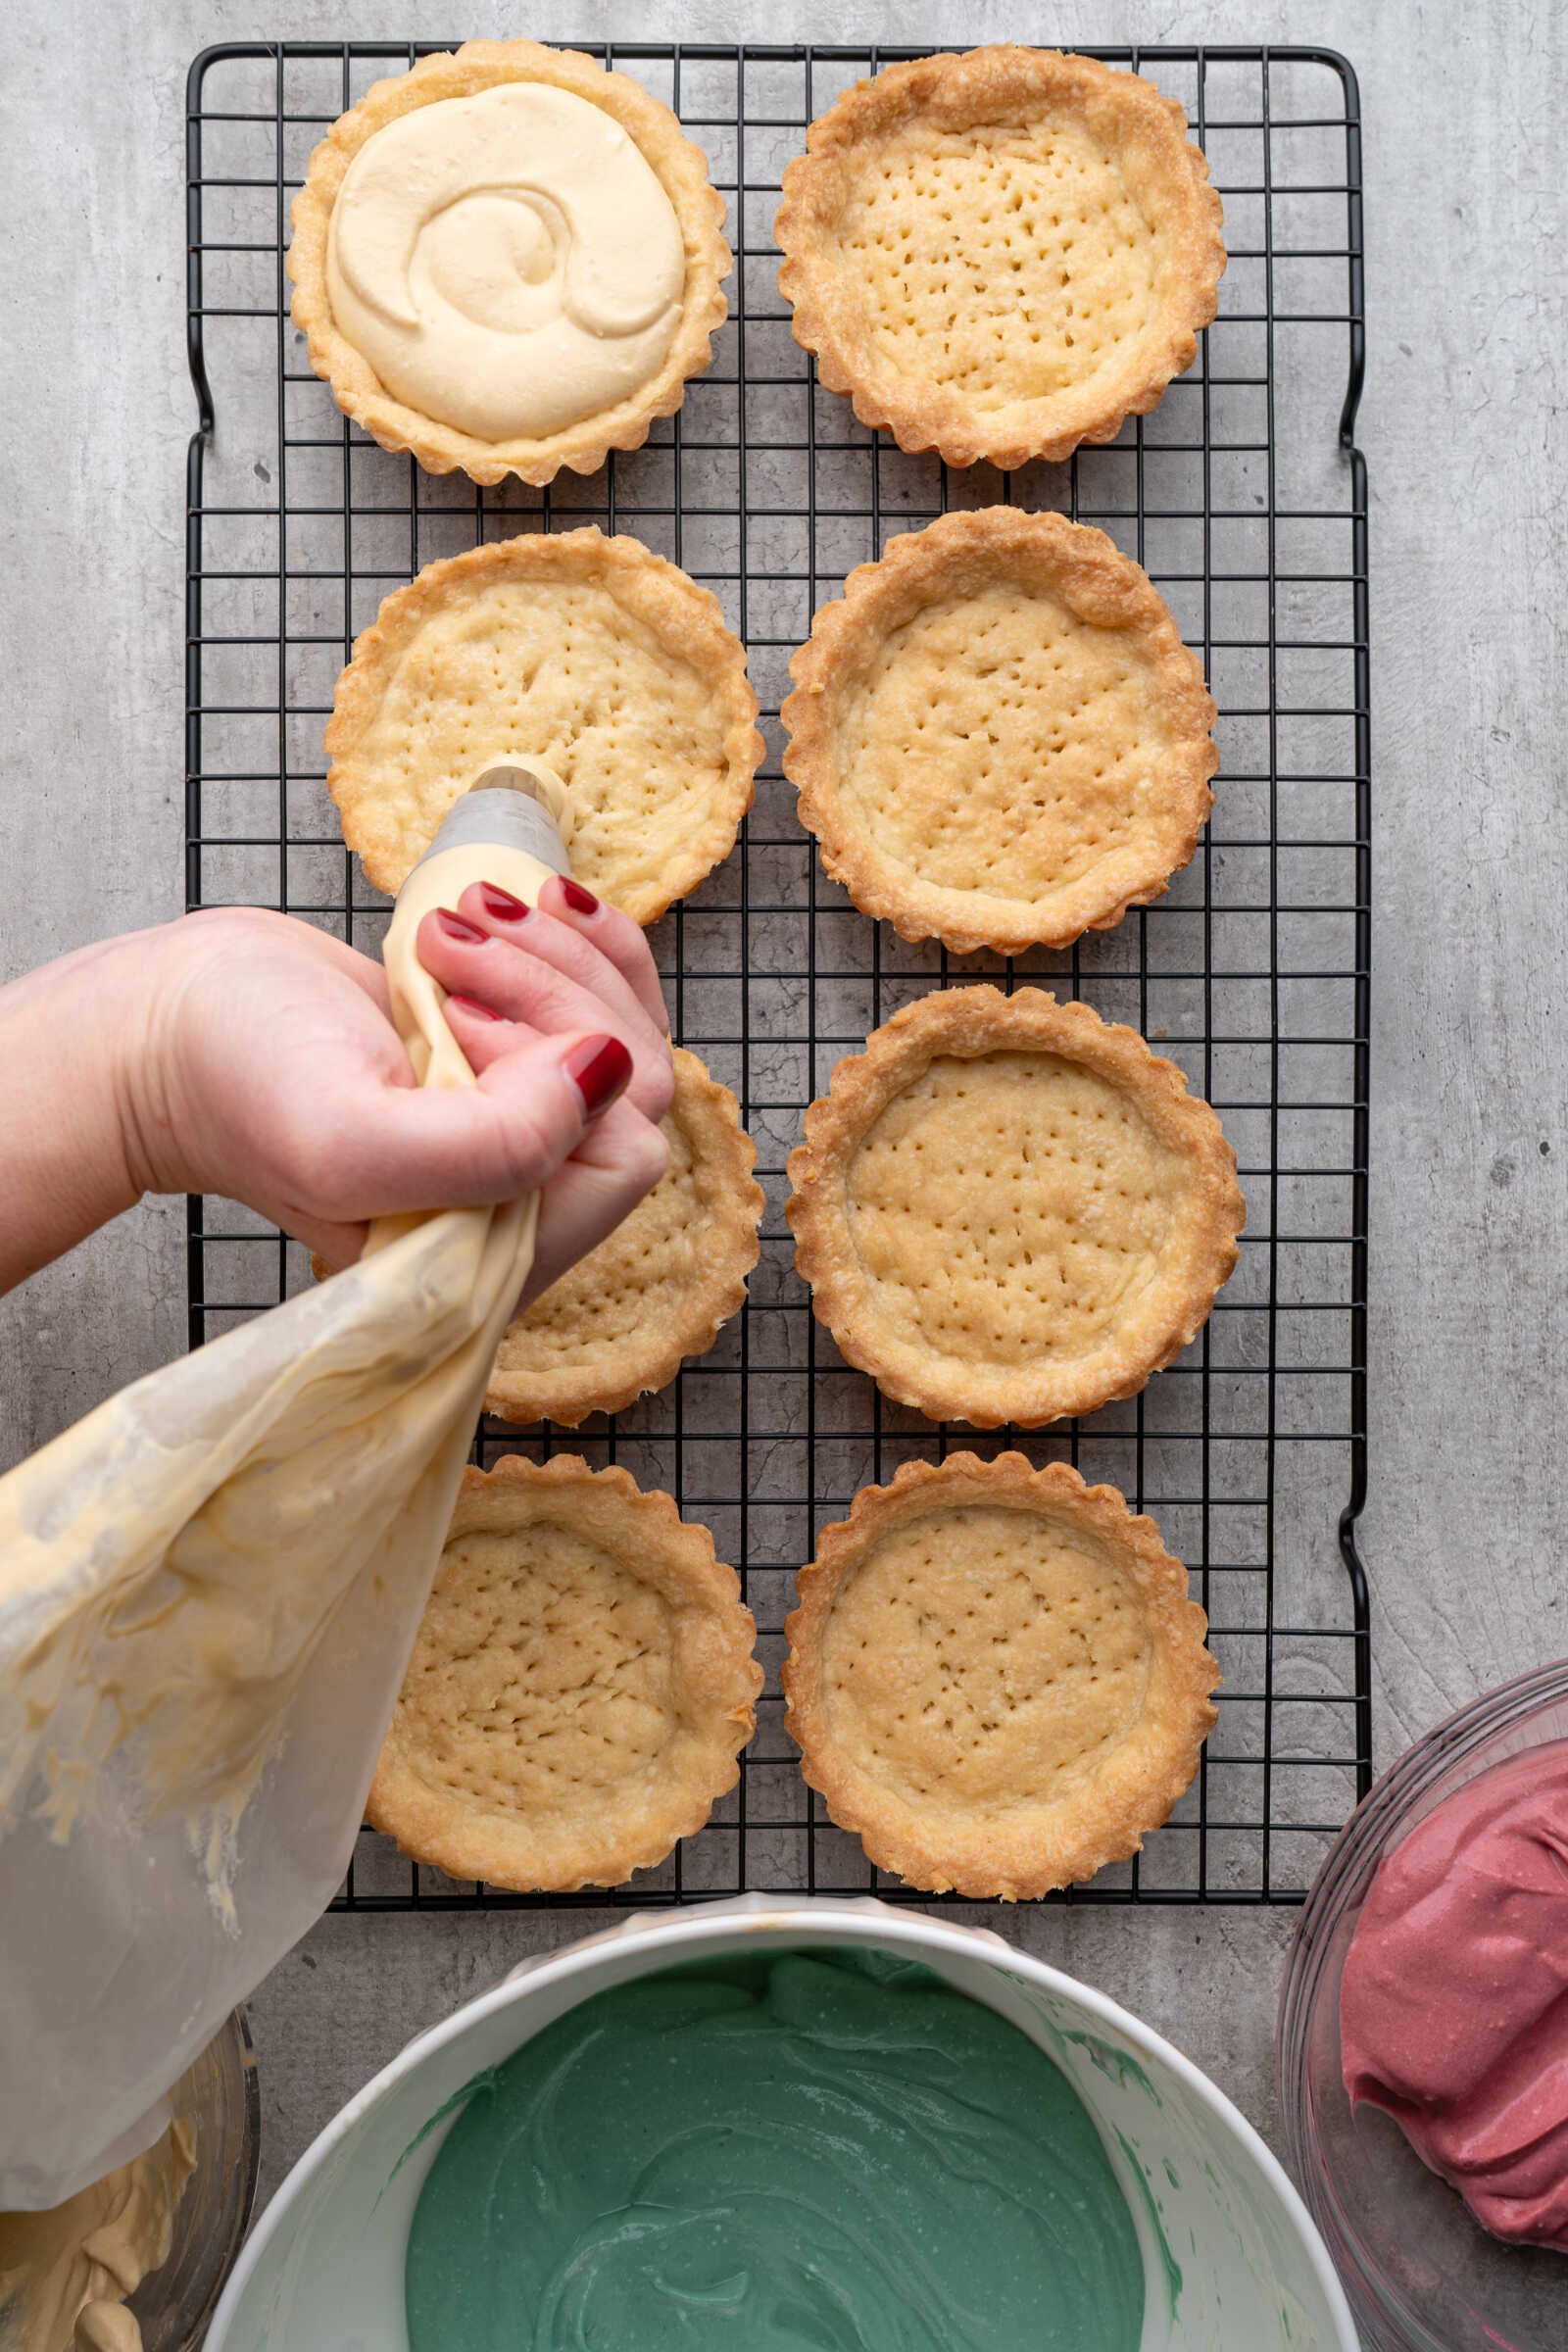
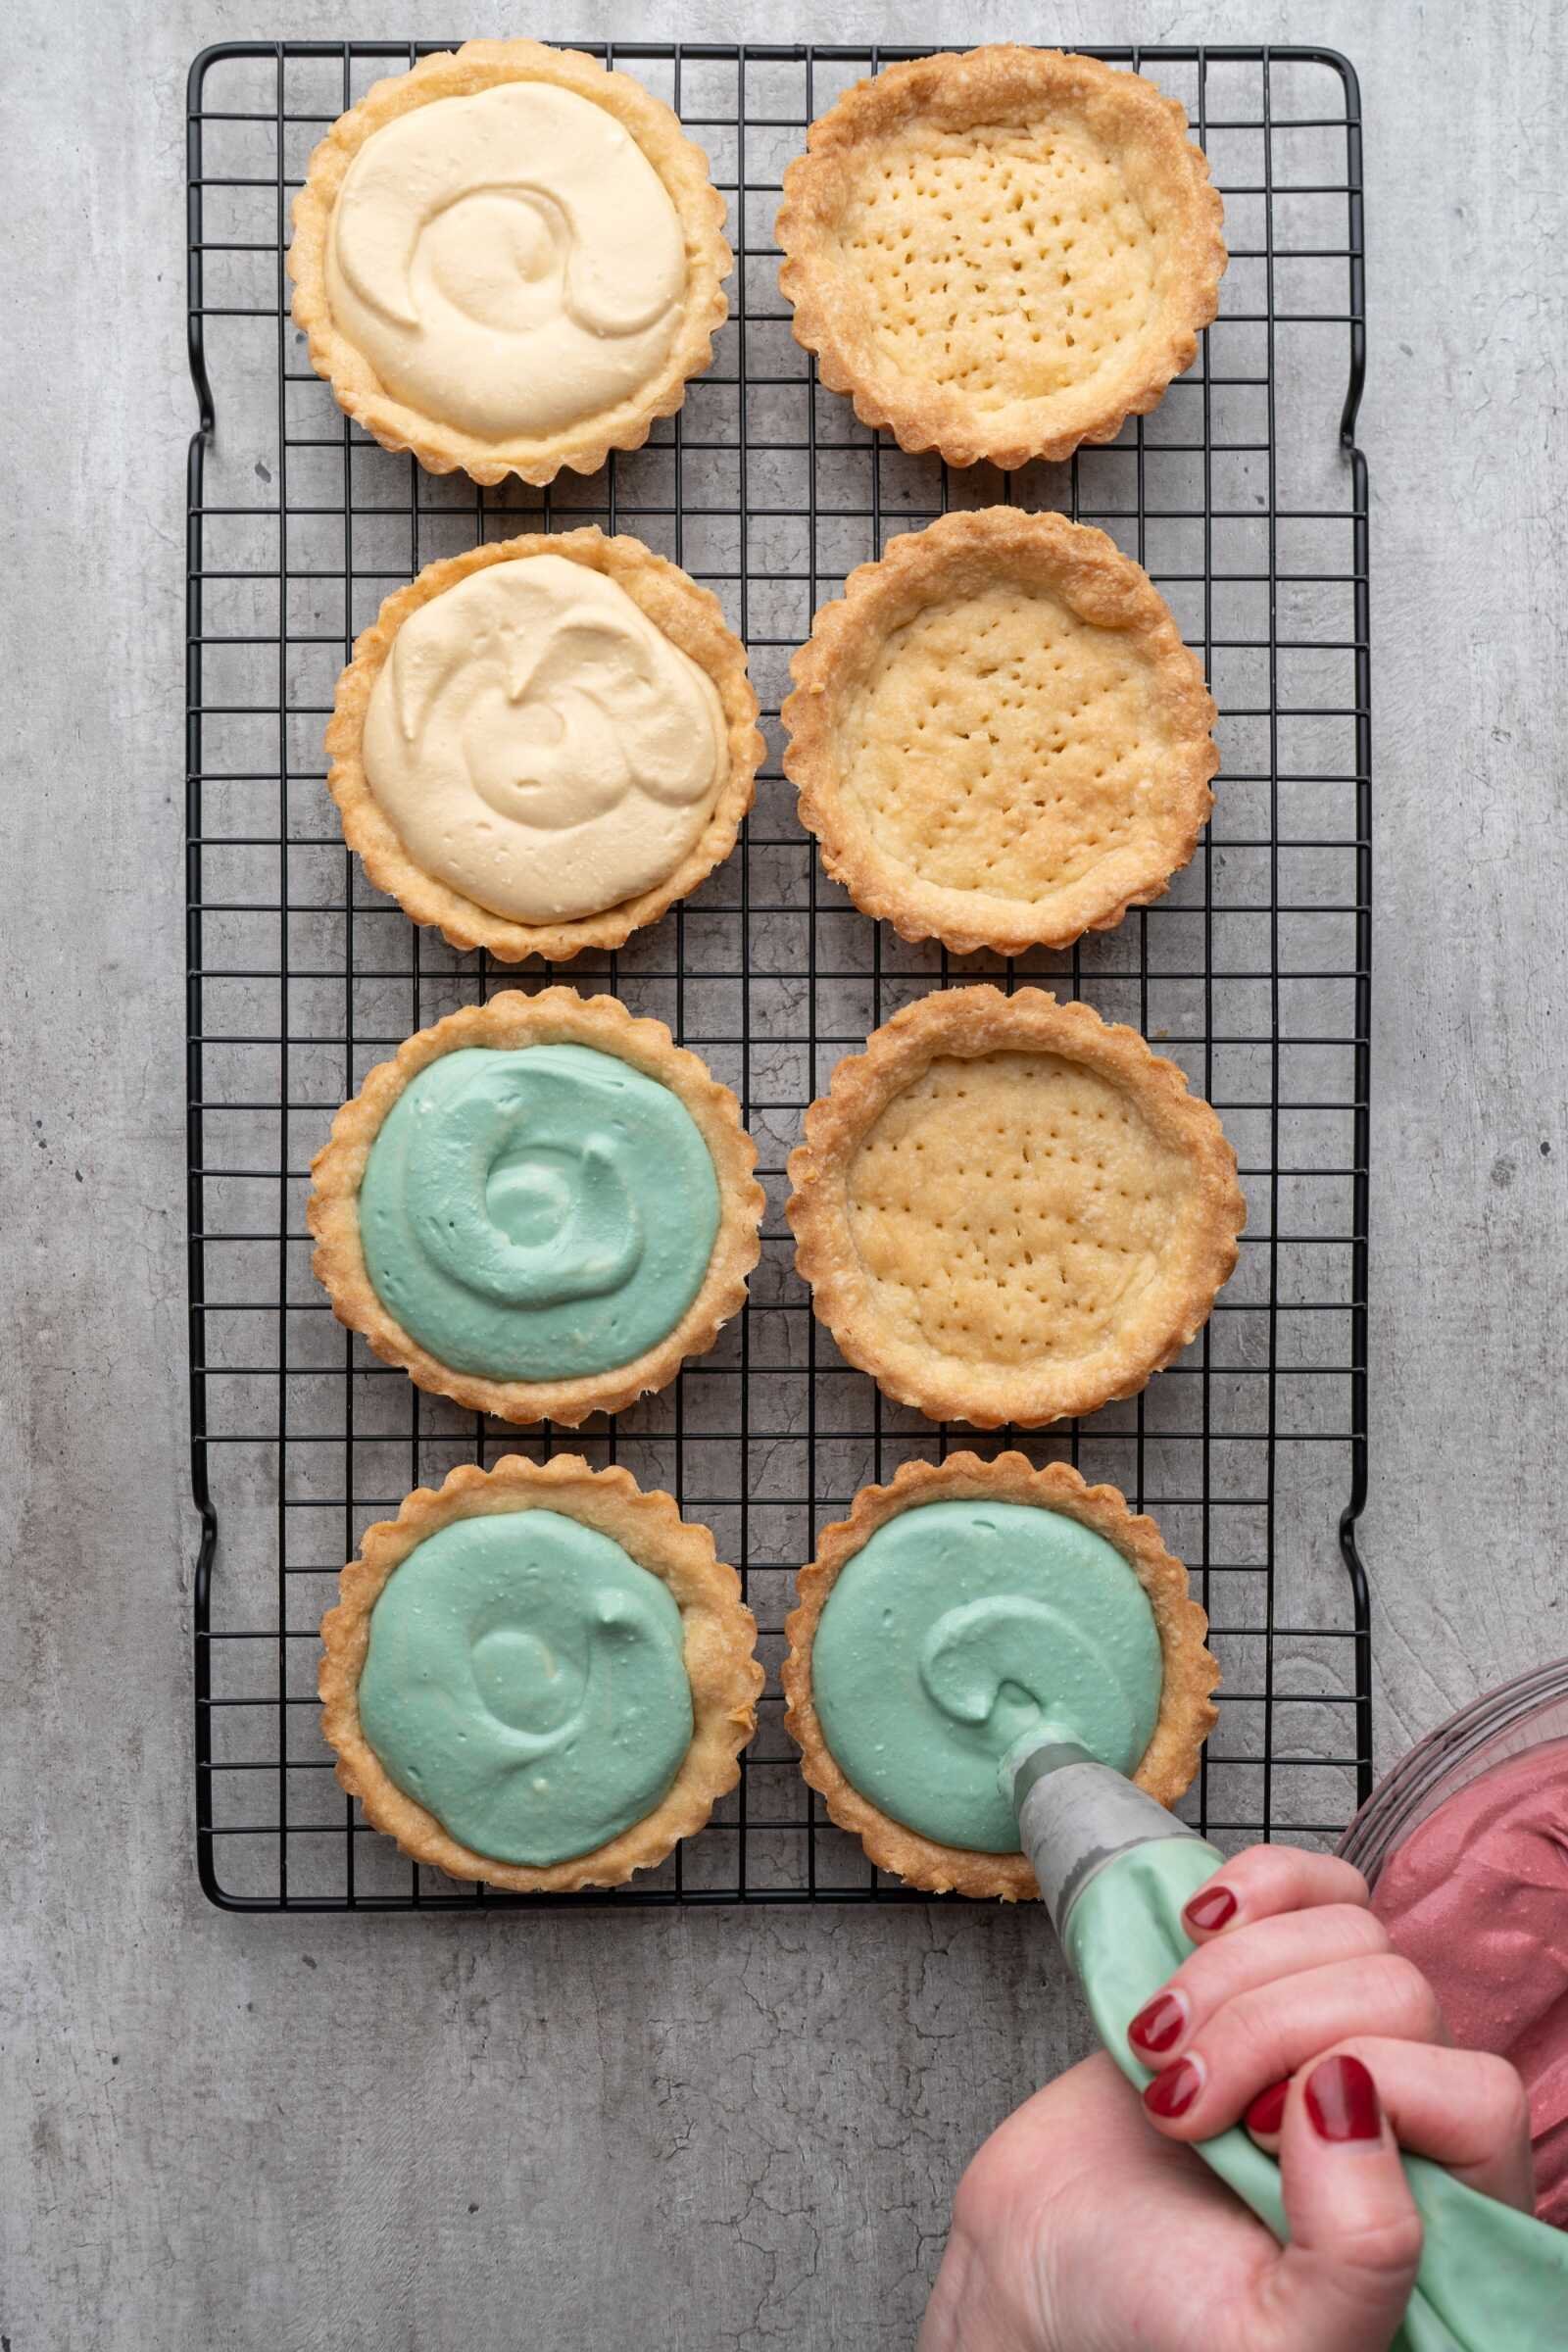
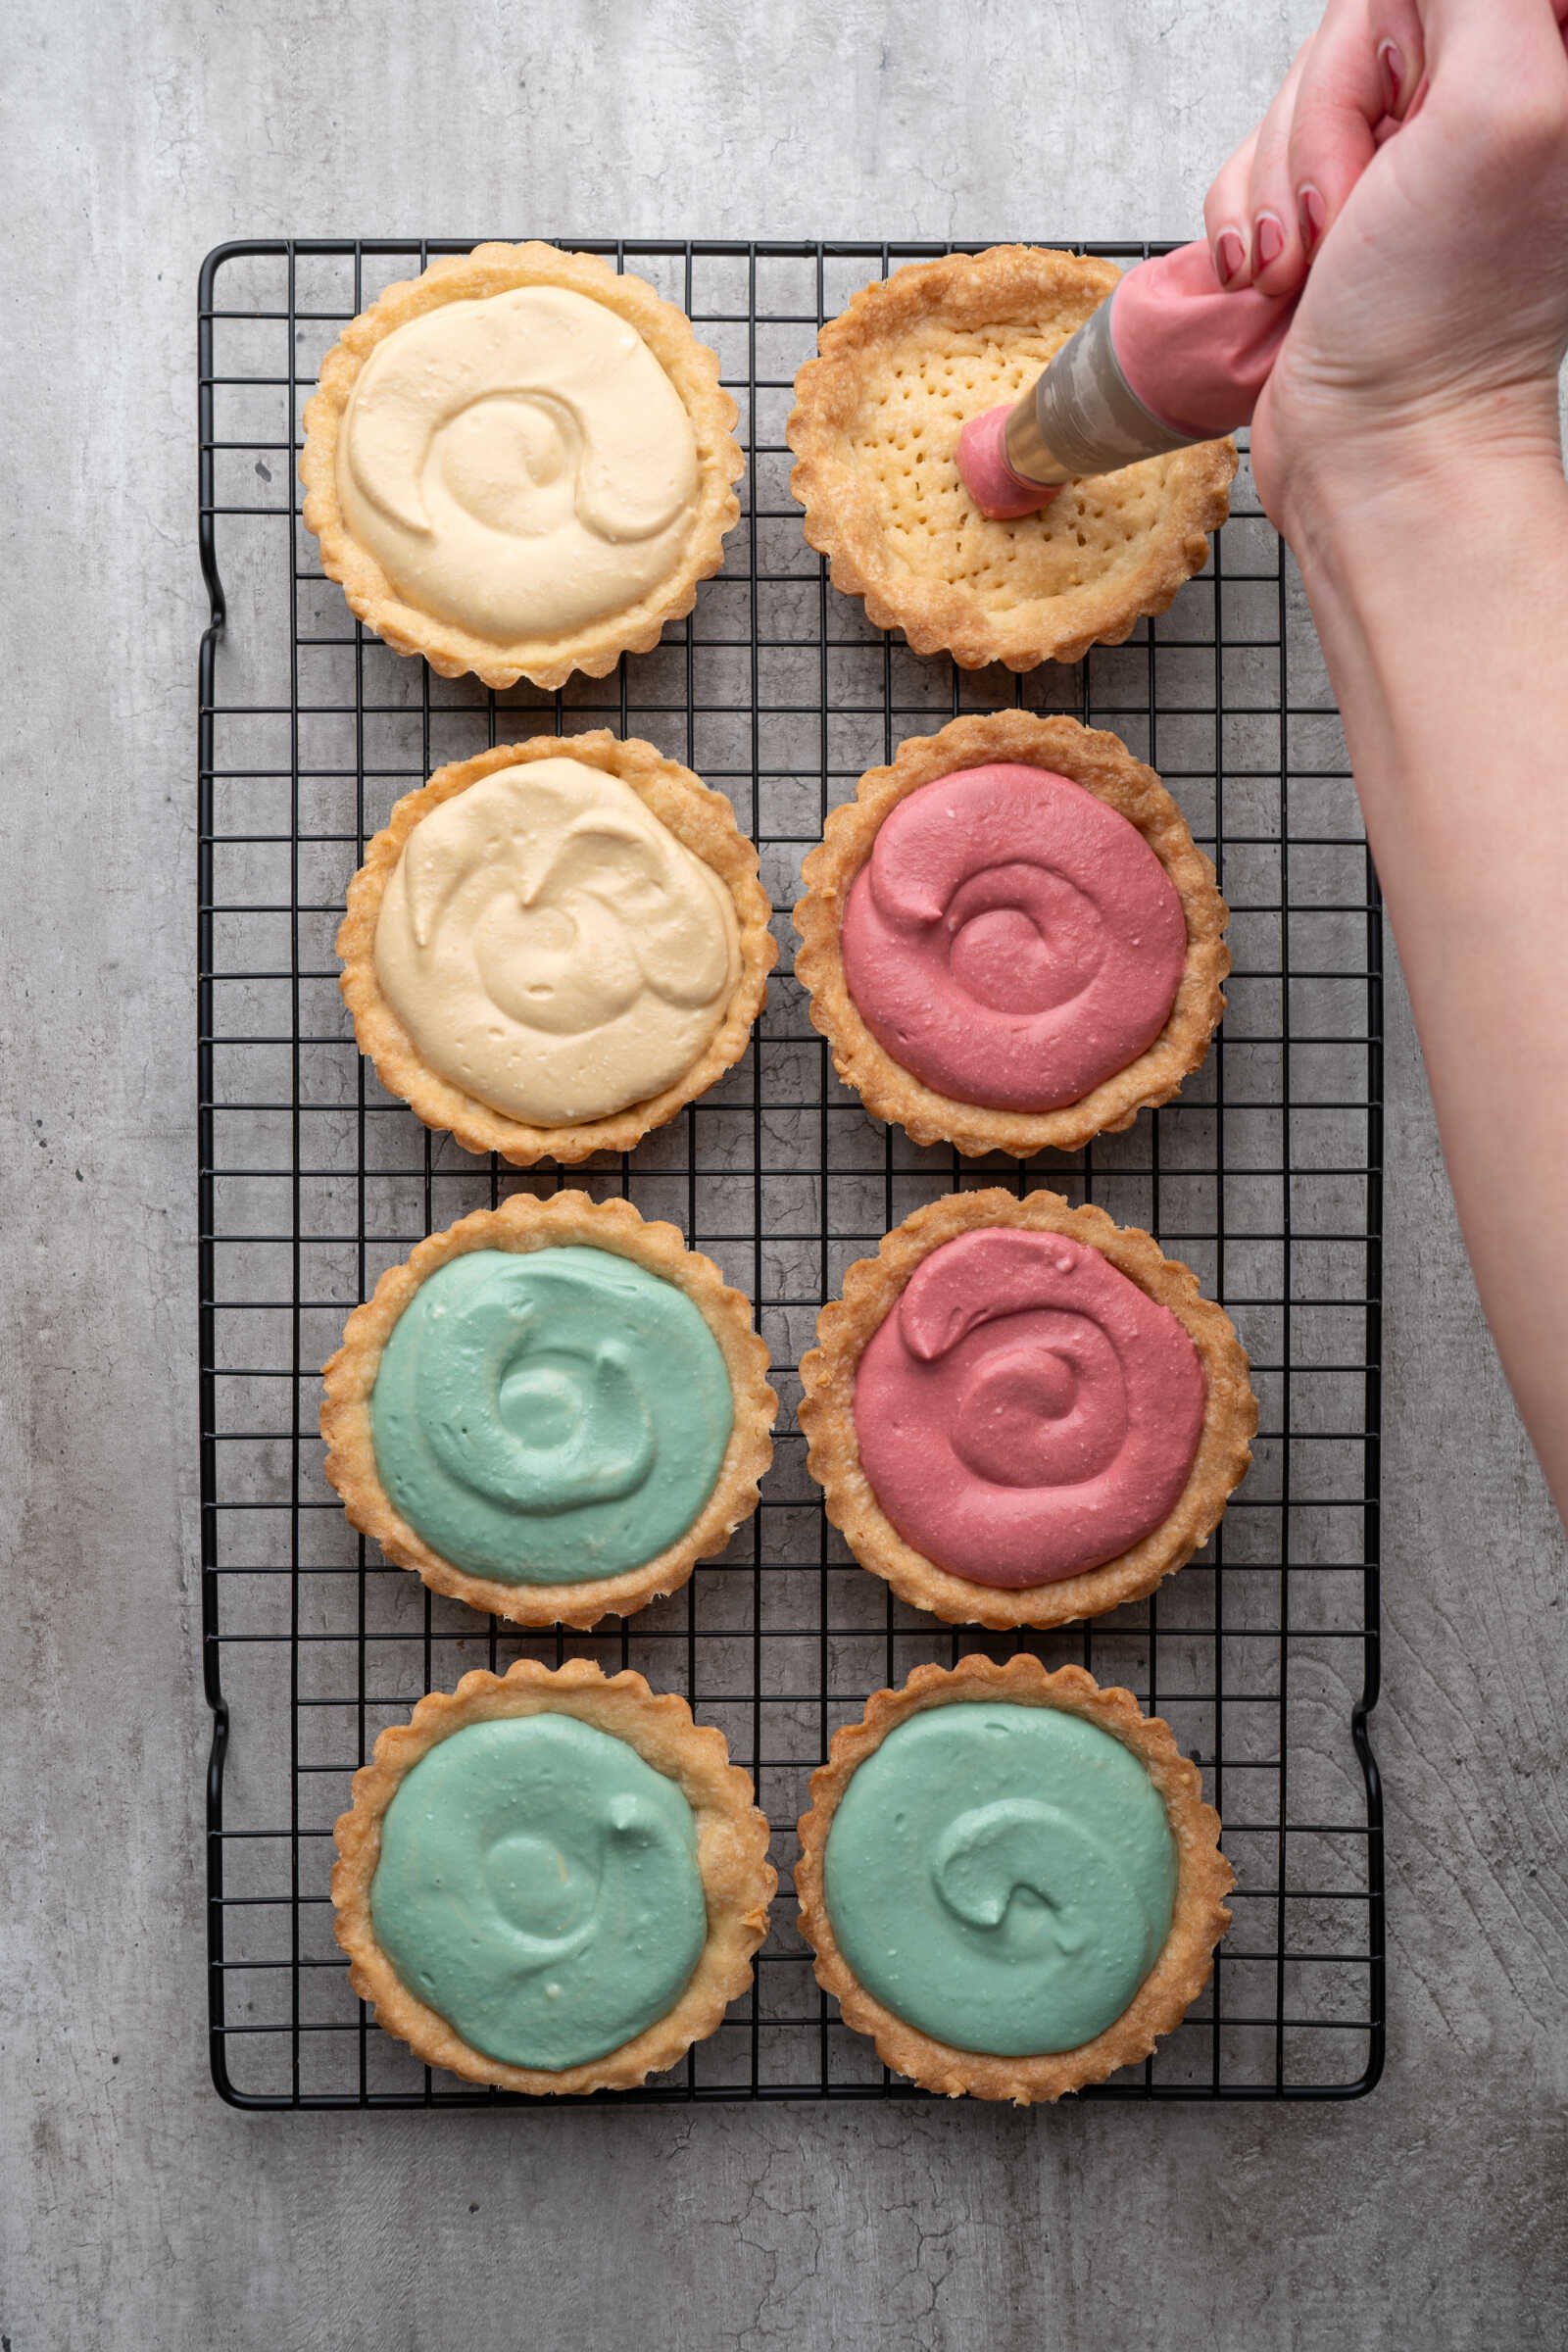
4. Assemble the Mini Cheesecake Tarts
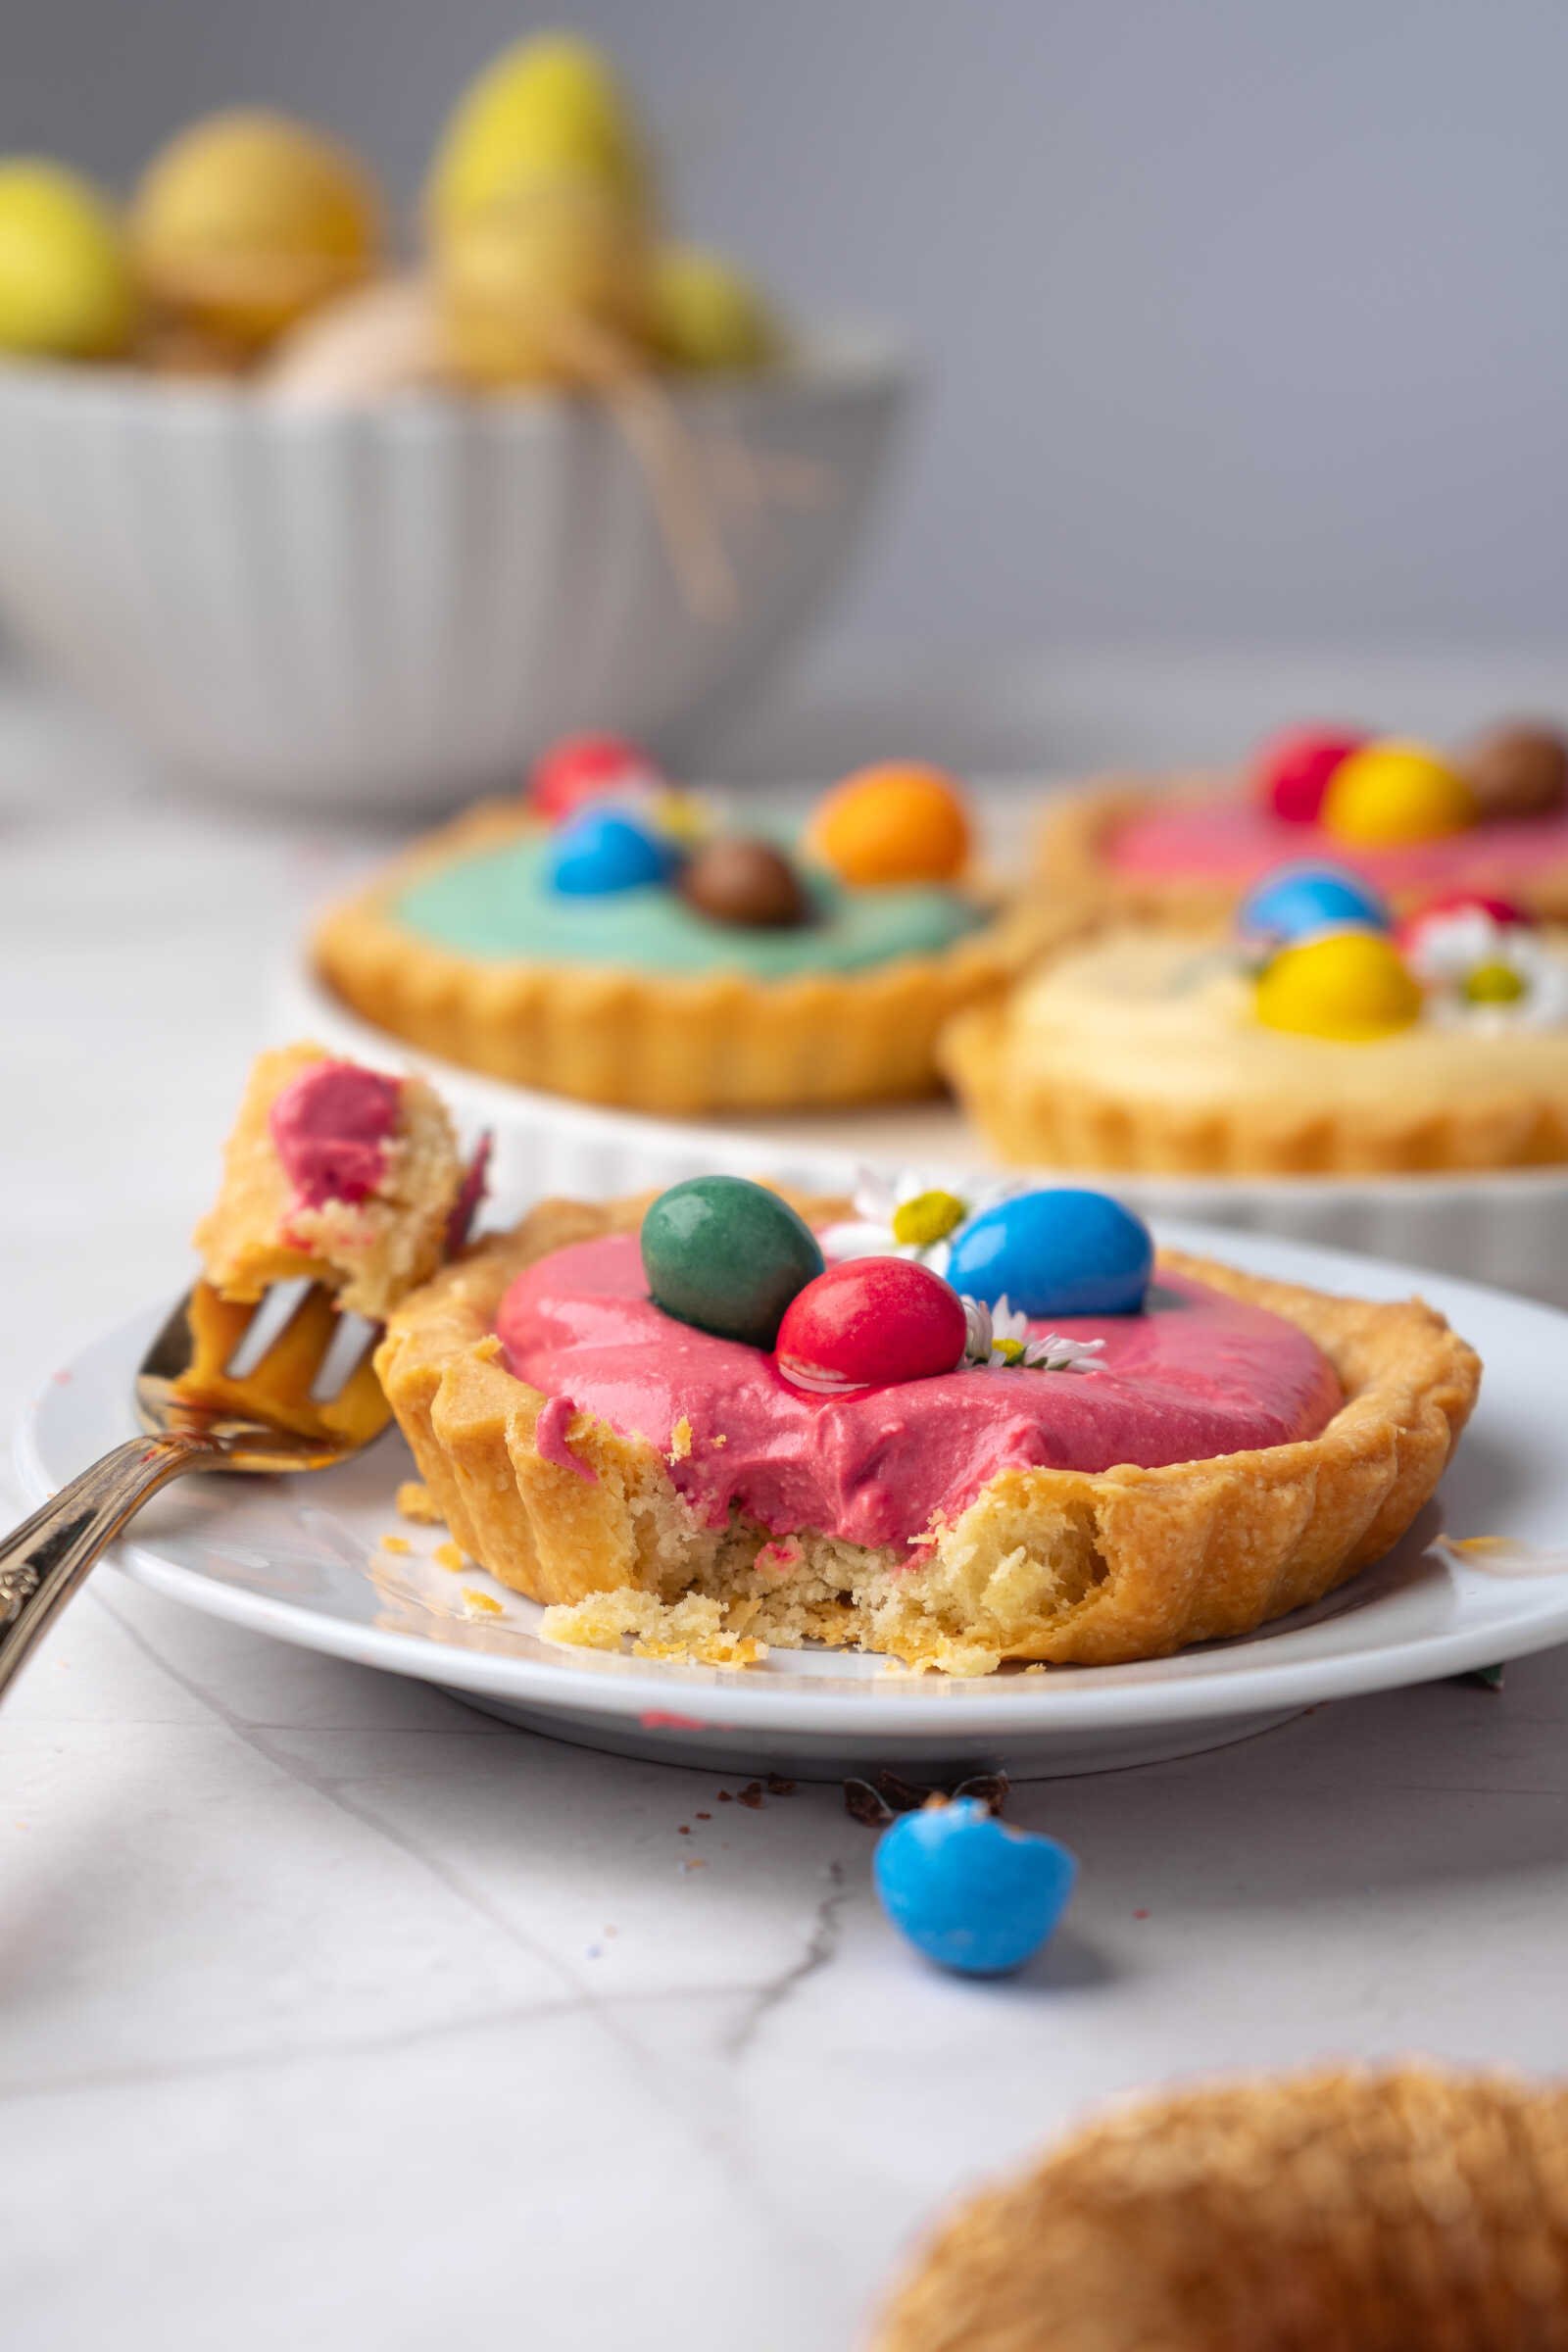
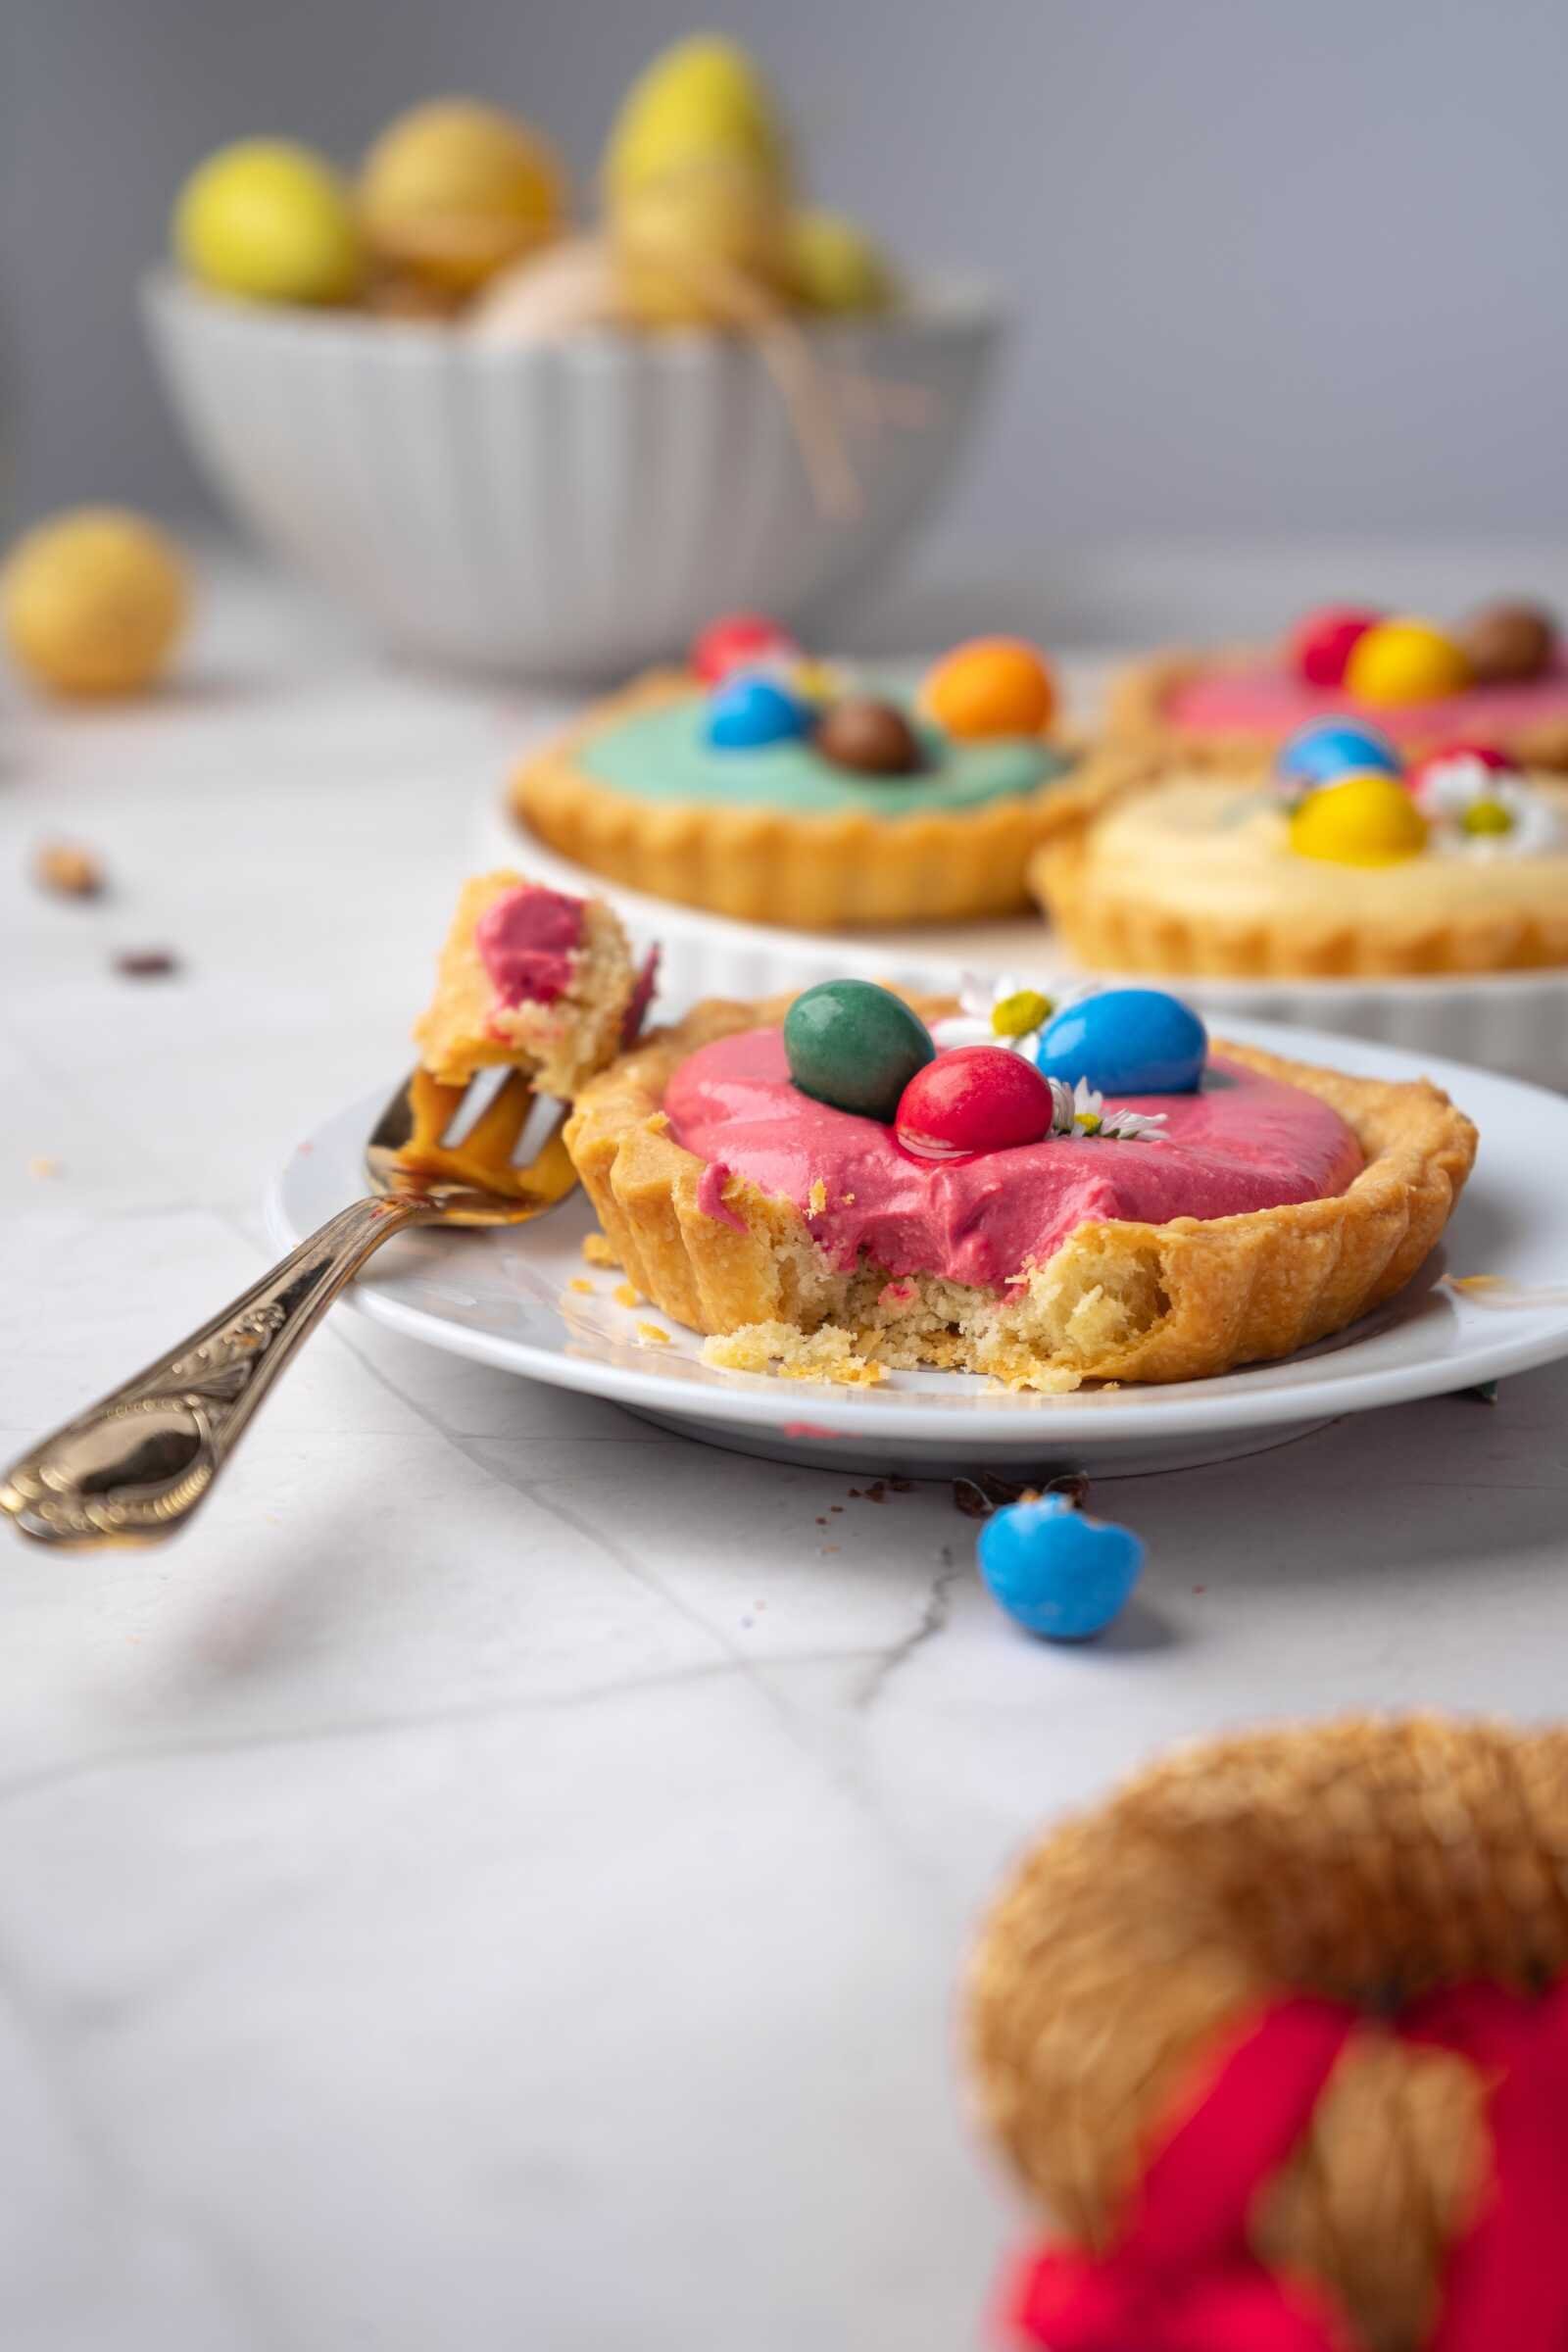
Once the tart shells are completely cooled, you can assemble the dessert. Spoon or pipe the pastel cheesecake filling into each tart shell, filling almost to the top.
Using a piping bag with a star tip can create beautiful swirls that make the tarts look bakery-worthy. After filling the shells, place the tarts in the refrigerator for at least two hours. This chilling time allows the filling to firm up and the flavors to develop.
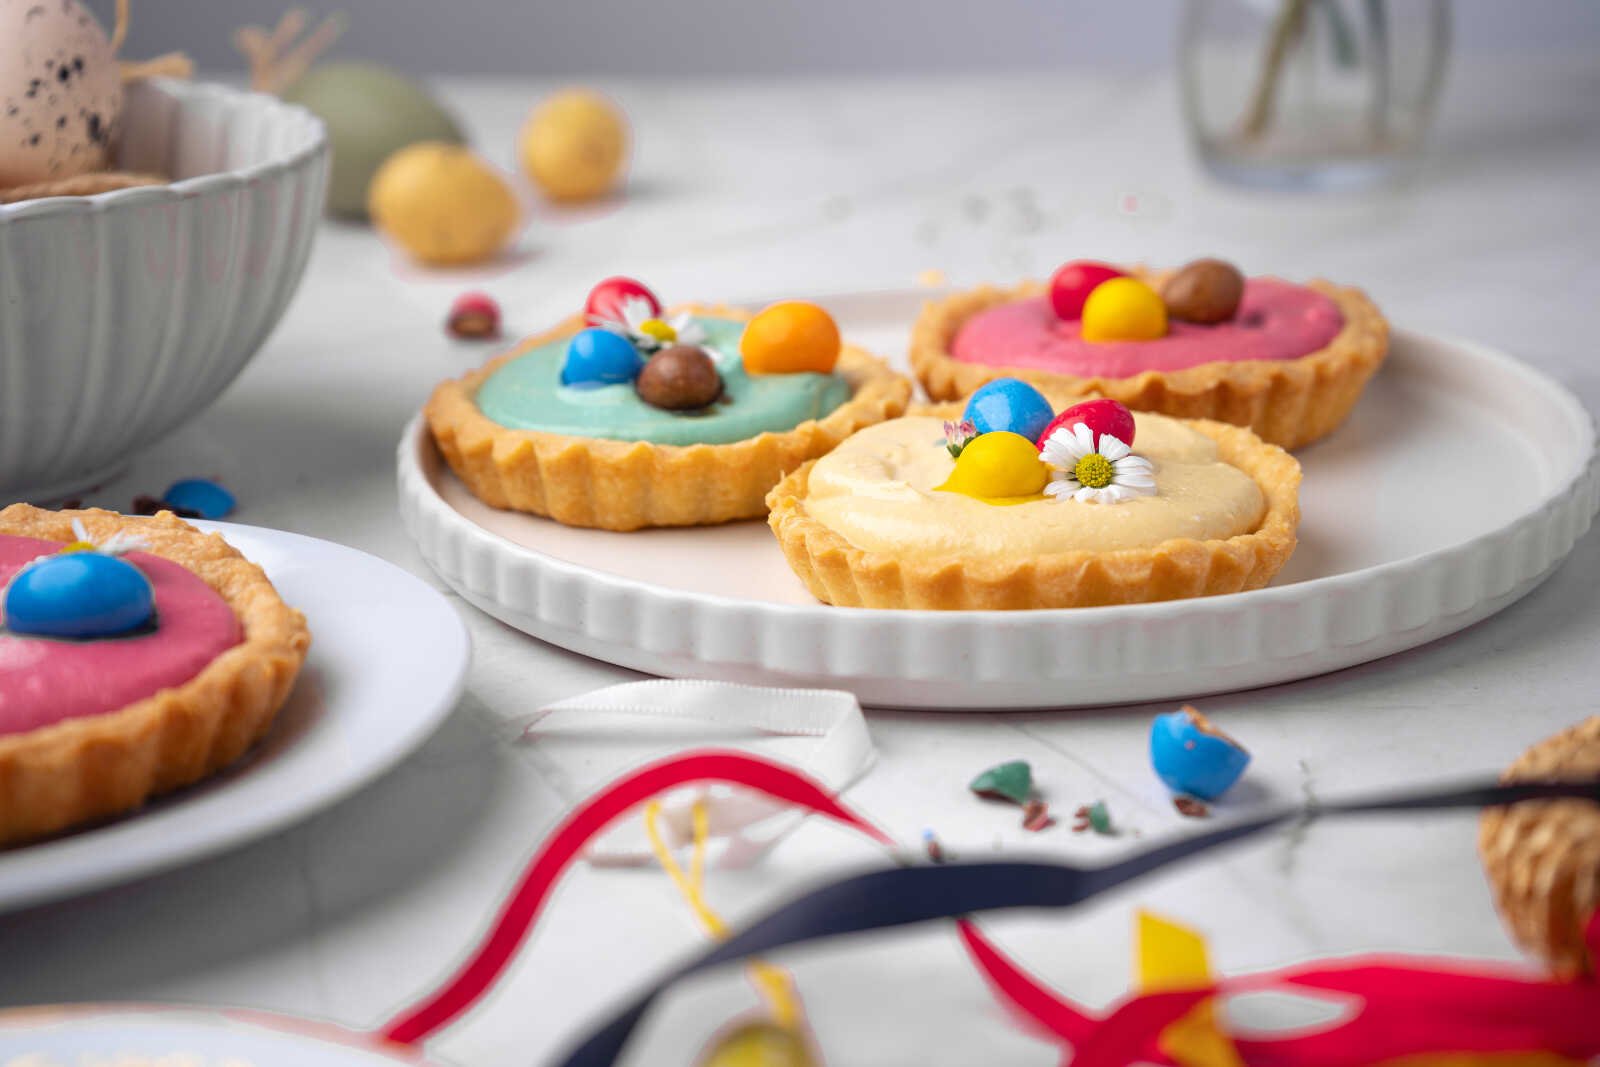
Just before serving, decorate the tarts with mini chocolate eggs, edible flowers, or colorful sprinkles for a cheerful springtime presentation.

Tips for Perfect Cheesecake Tarts
Follow these helpful tips to ensure your mini springtime cheesecake tarts turn out beautifully every time.
Use room temperature ingredients
Cream cheese and butter should be softened before mixing to ensure a smooth filling and dough.
Chill the dough properly
Skipping the chilling step can make the dough sticky and difficult to roll.
Blind bake the crust
Blind baking keeps the crust crisp and prevents it from becoming soggy once the filling is added.
Let the tart shells cool completely
Adding filling to warm shells can melt the cheesecake mixture.
Pipe the filling for a professional look
Using a piping bag creates pretty swirls and helps evenly distribute the filling.
Flavor Variations
These mini cheesecake tarts are easy to customize with different flavors.
Lemon Spring Cheesecake Tarts
Add extra lemon zest to the filling for a bright citrus flavor.
Strawberry Cheesecake Tarts
Swirl in strawberry puree or top with fresh sliced strawberries.
Raspberry Cheesecake Tarts
Add a small spoonful of raspberry jam beneath the filling.
Coconut Cheesecake Tarts
Sprinkle toasted coconut on top for a tropical twist.
Chocolate Easter Cheesecake Tarts
Drizzle melted chocolate over the finished tarts and garnish with chocolate eggs.
Decorating Ideas for Spring
Part of the charm of these mini cheesecake tarts is the beautiful decoration possibilities.
Here are a few fun ideas:
- Pastel frosting swirls with Easter candy eggs
- Edible flowers like pansies or violets
- Fresh berries such as raspberries or blueberries
- White chocolate curls
- Pastel sprinkles or sanding sugar
Mixing colors and decorations can create a stunning spring dessert display.
How to Store Cheesecake Tarts
These mini springtime cheesecake tarts store very well.
Refrigerator
Store the finished tarts in an airtight container in the refrigerator for up to 3 days.
Make Ahead
You can prepare the tart shells 1–2 days ahead and store them in an airtight container until ready to fill.
Freezing
The tart shells (without filling) freeze well for up to 1 month.
Serving Ideas
These charming tartlets pair beautifully with many springtime meals and celebrations.
Serve them with:
- Easter brunch spreads
- Spring tea parties
- Baby shower dessert tables
- Mother’s Day brunch
- Garden parties
- Bridal showers
You can also arrange the pastel tarts on a cake stand for an eye-catching spring dessert centerpiece.
Frequently Asked Questions
Can I use store-bought tart shells?
Yes! If you’re short on time, pre-made tart shells work well and make this recipe even faster.
Can I make these cheesecake tarts without food coloring?
Absolutely. The tarts will still taste delicious without coloring and can be decorated with fruit or flowers instead.
Can I use a graham cracker crust instead?
Yes, a graham cracker crust can be used for a more traditional cheesecake flavor.
Can I make them gluten-free?
Substitute the pastry flour with a gluten-free baking flour blend.
The Perfect Spring Dessert
These Mini Springtime Cheesecake Tarts are the kind of dessert that instantly brightens a table. Their pastel colors, creamy cheesecake filling, and crisp buttery crust create a beautiful balance of flavor and texture.
They’re festive enough for special occasions like Easter or spring parties, yet simple enough to make just because you’re craving something sweet and cheerful.
Best of all, these tartlets invite creativity. Whether you decorate them with chocolate eggs, edible flowers, or fresh berries, each tart can become a tiny work of art.
If you’re looking for a dessert that celebrates the beauty and joy of spring, these mini cheesecake tarts are sure to become a seasonal favorite.

3 Comments