
DIY Salt Dough Easter Eggs: Easy Easter Craft for Kids and Families
Easter is one of my favorite times of year to get creative with simple, meaningful crafts. Between decorating Easter baskets, planning spring brunch, and organizing fun activities for the kids, there’s something special about making decorations by hand. One of the easiest and most charming crafts to make at home is salt dough Easter eggs.
Salt dough crafts have been popular for generations because they’re affordable, simple, and incredibly versatile (you can even make salt dough Christmas tree ornaments). With just three pantry ingredients—flour, salt, and water—you can create beautiful Easter ornaments that can be painted, decorated, and even saved as keepsakes for years to come.
These DIY salt dough Easter eggs are perfect for families, classrooms, or anyone looking for a relaxing spring craft. Kids love shaping the dough and painting colorful designs, while adults appreciate the nostalgic charm of handmade decorations.
In this guide, I’ll walk you through everything you need to know to make your own salt dough Easter eggs, from preparing the dough to decorating and hanging them with ribbon.
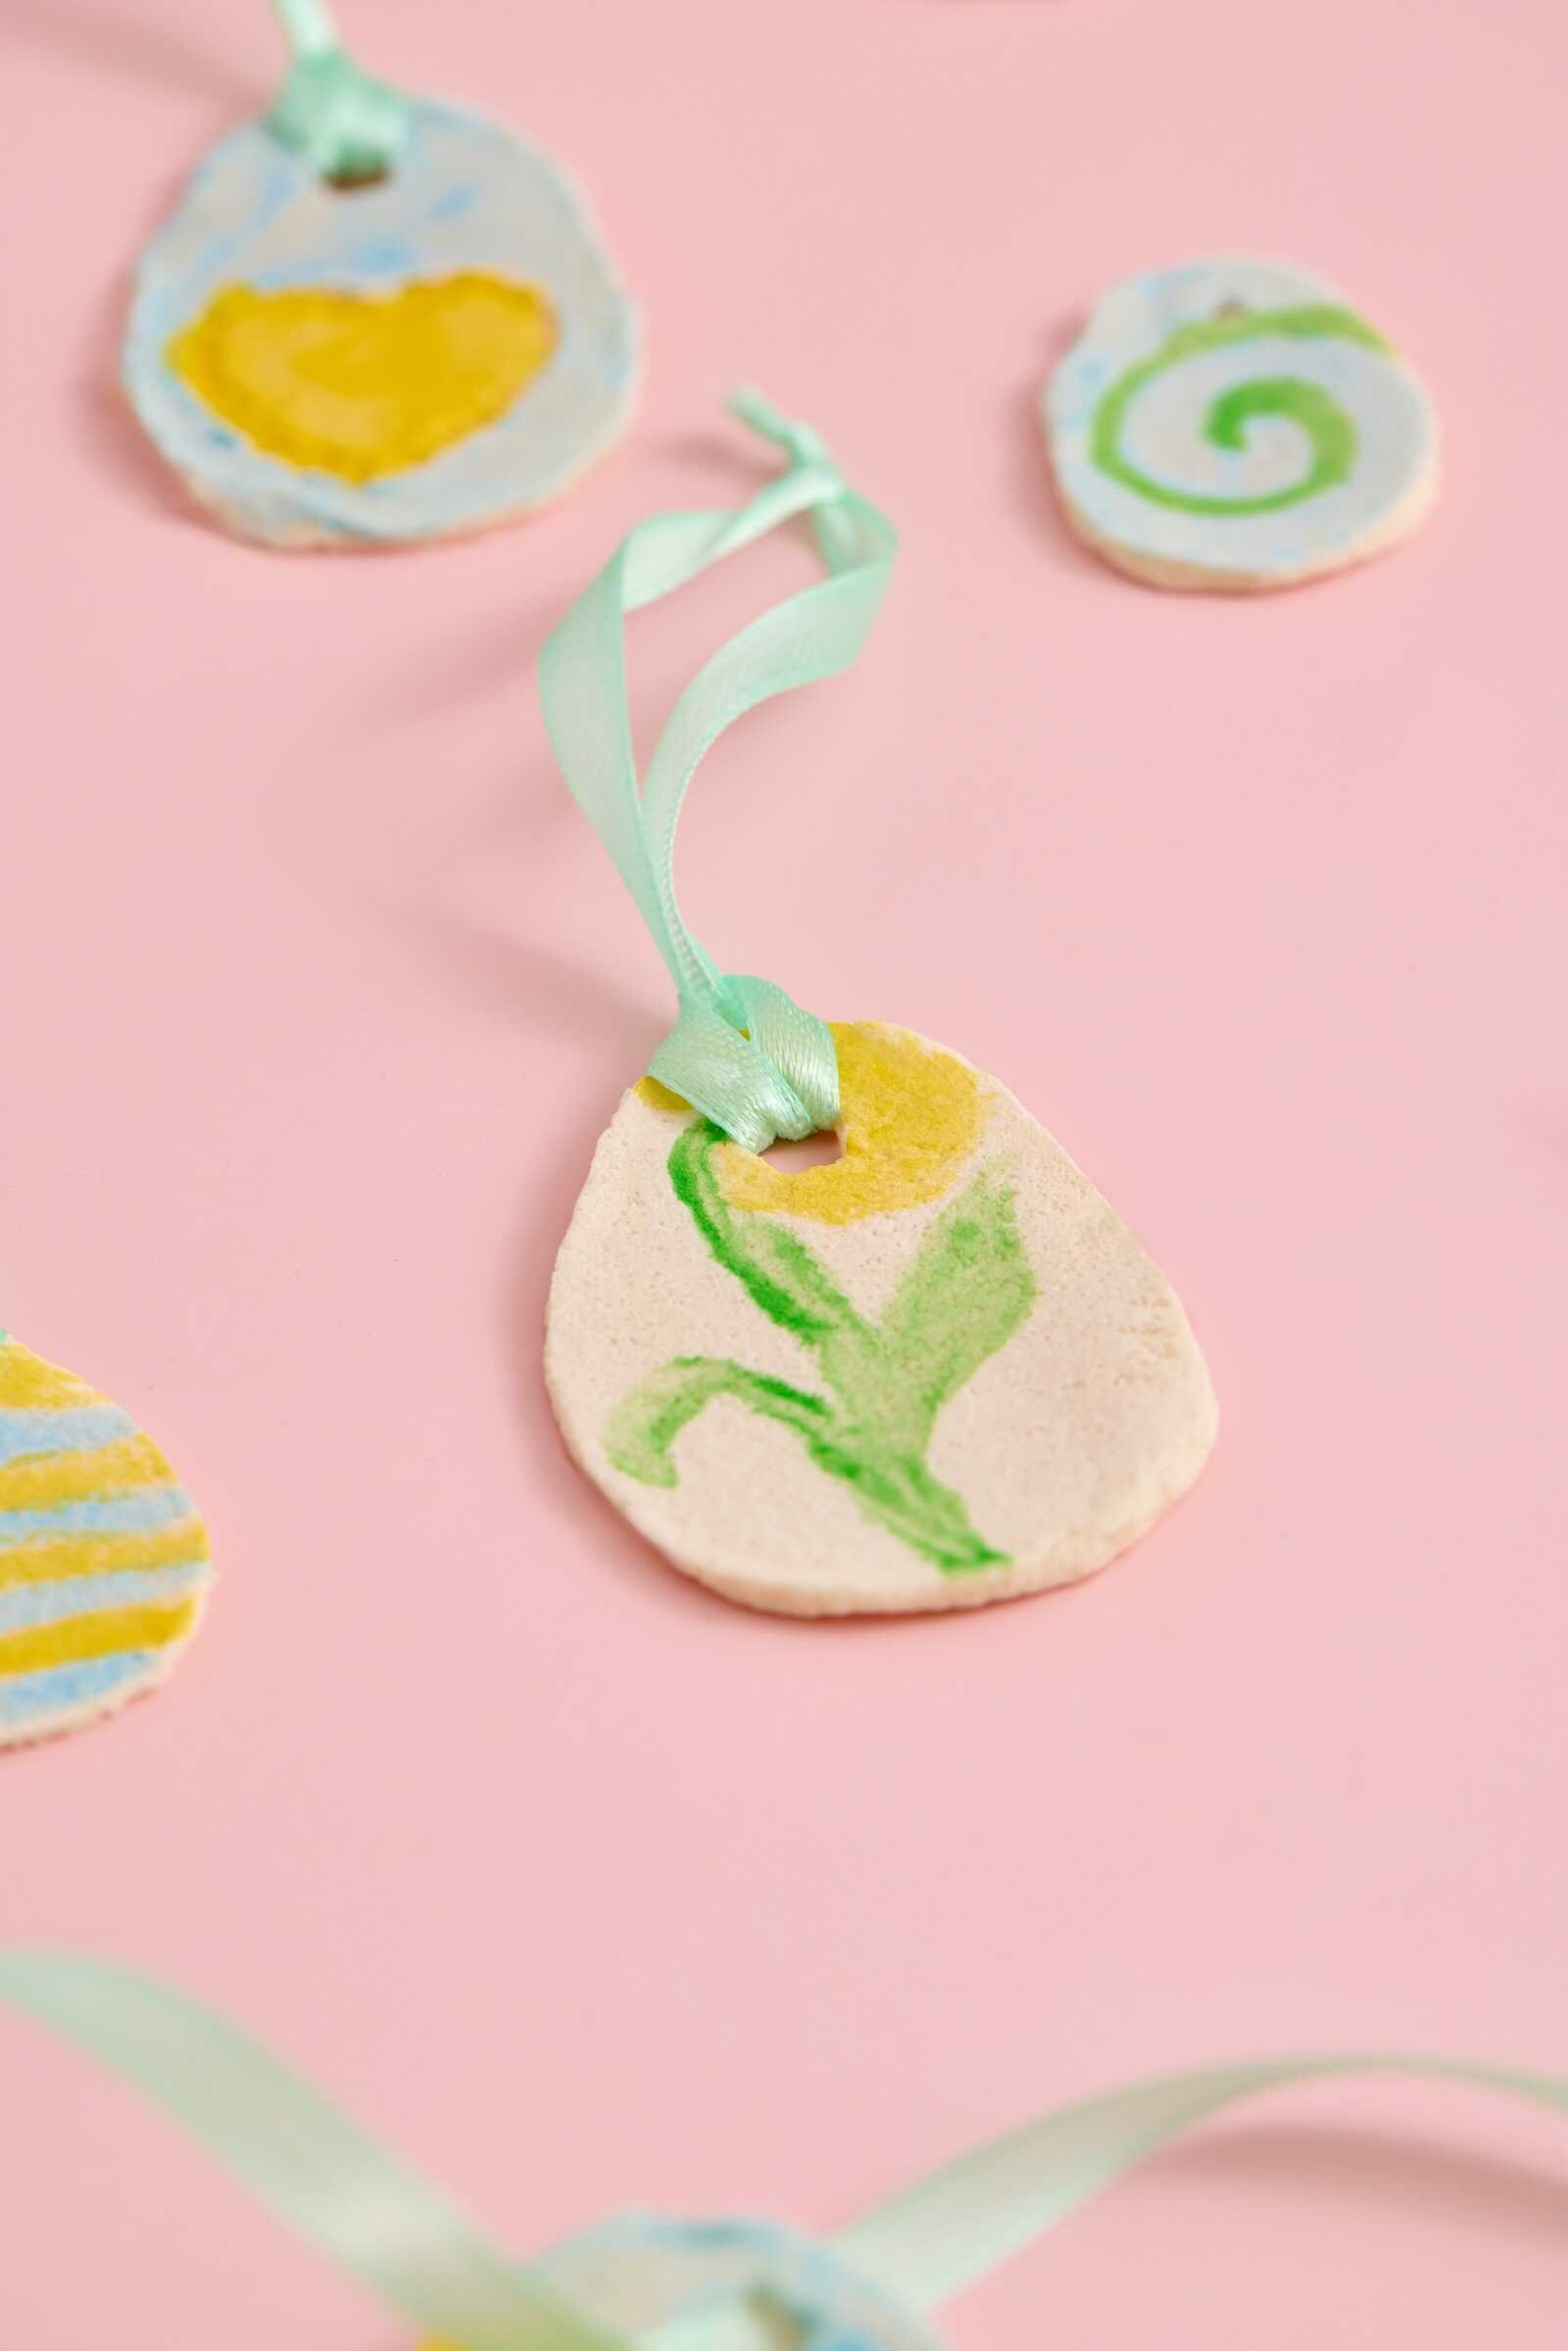
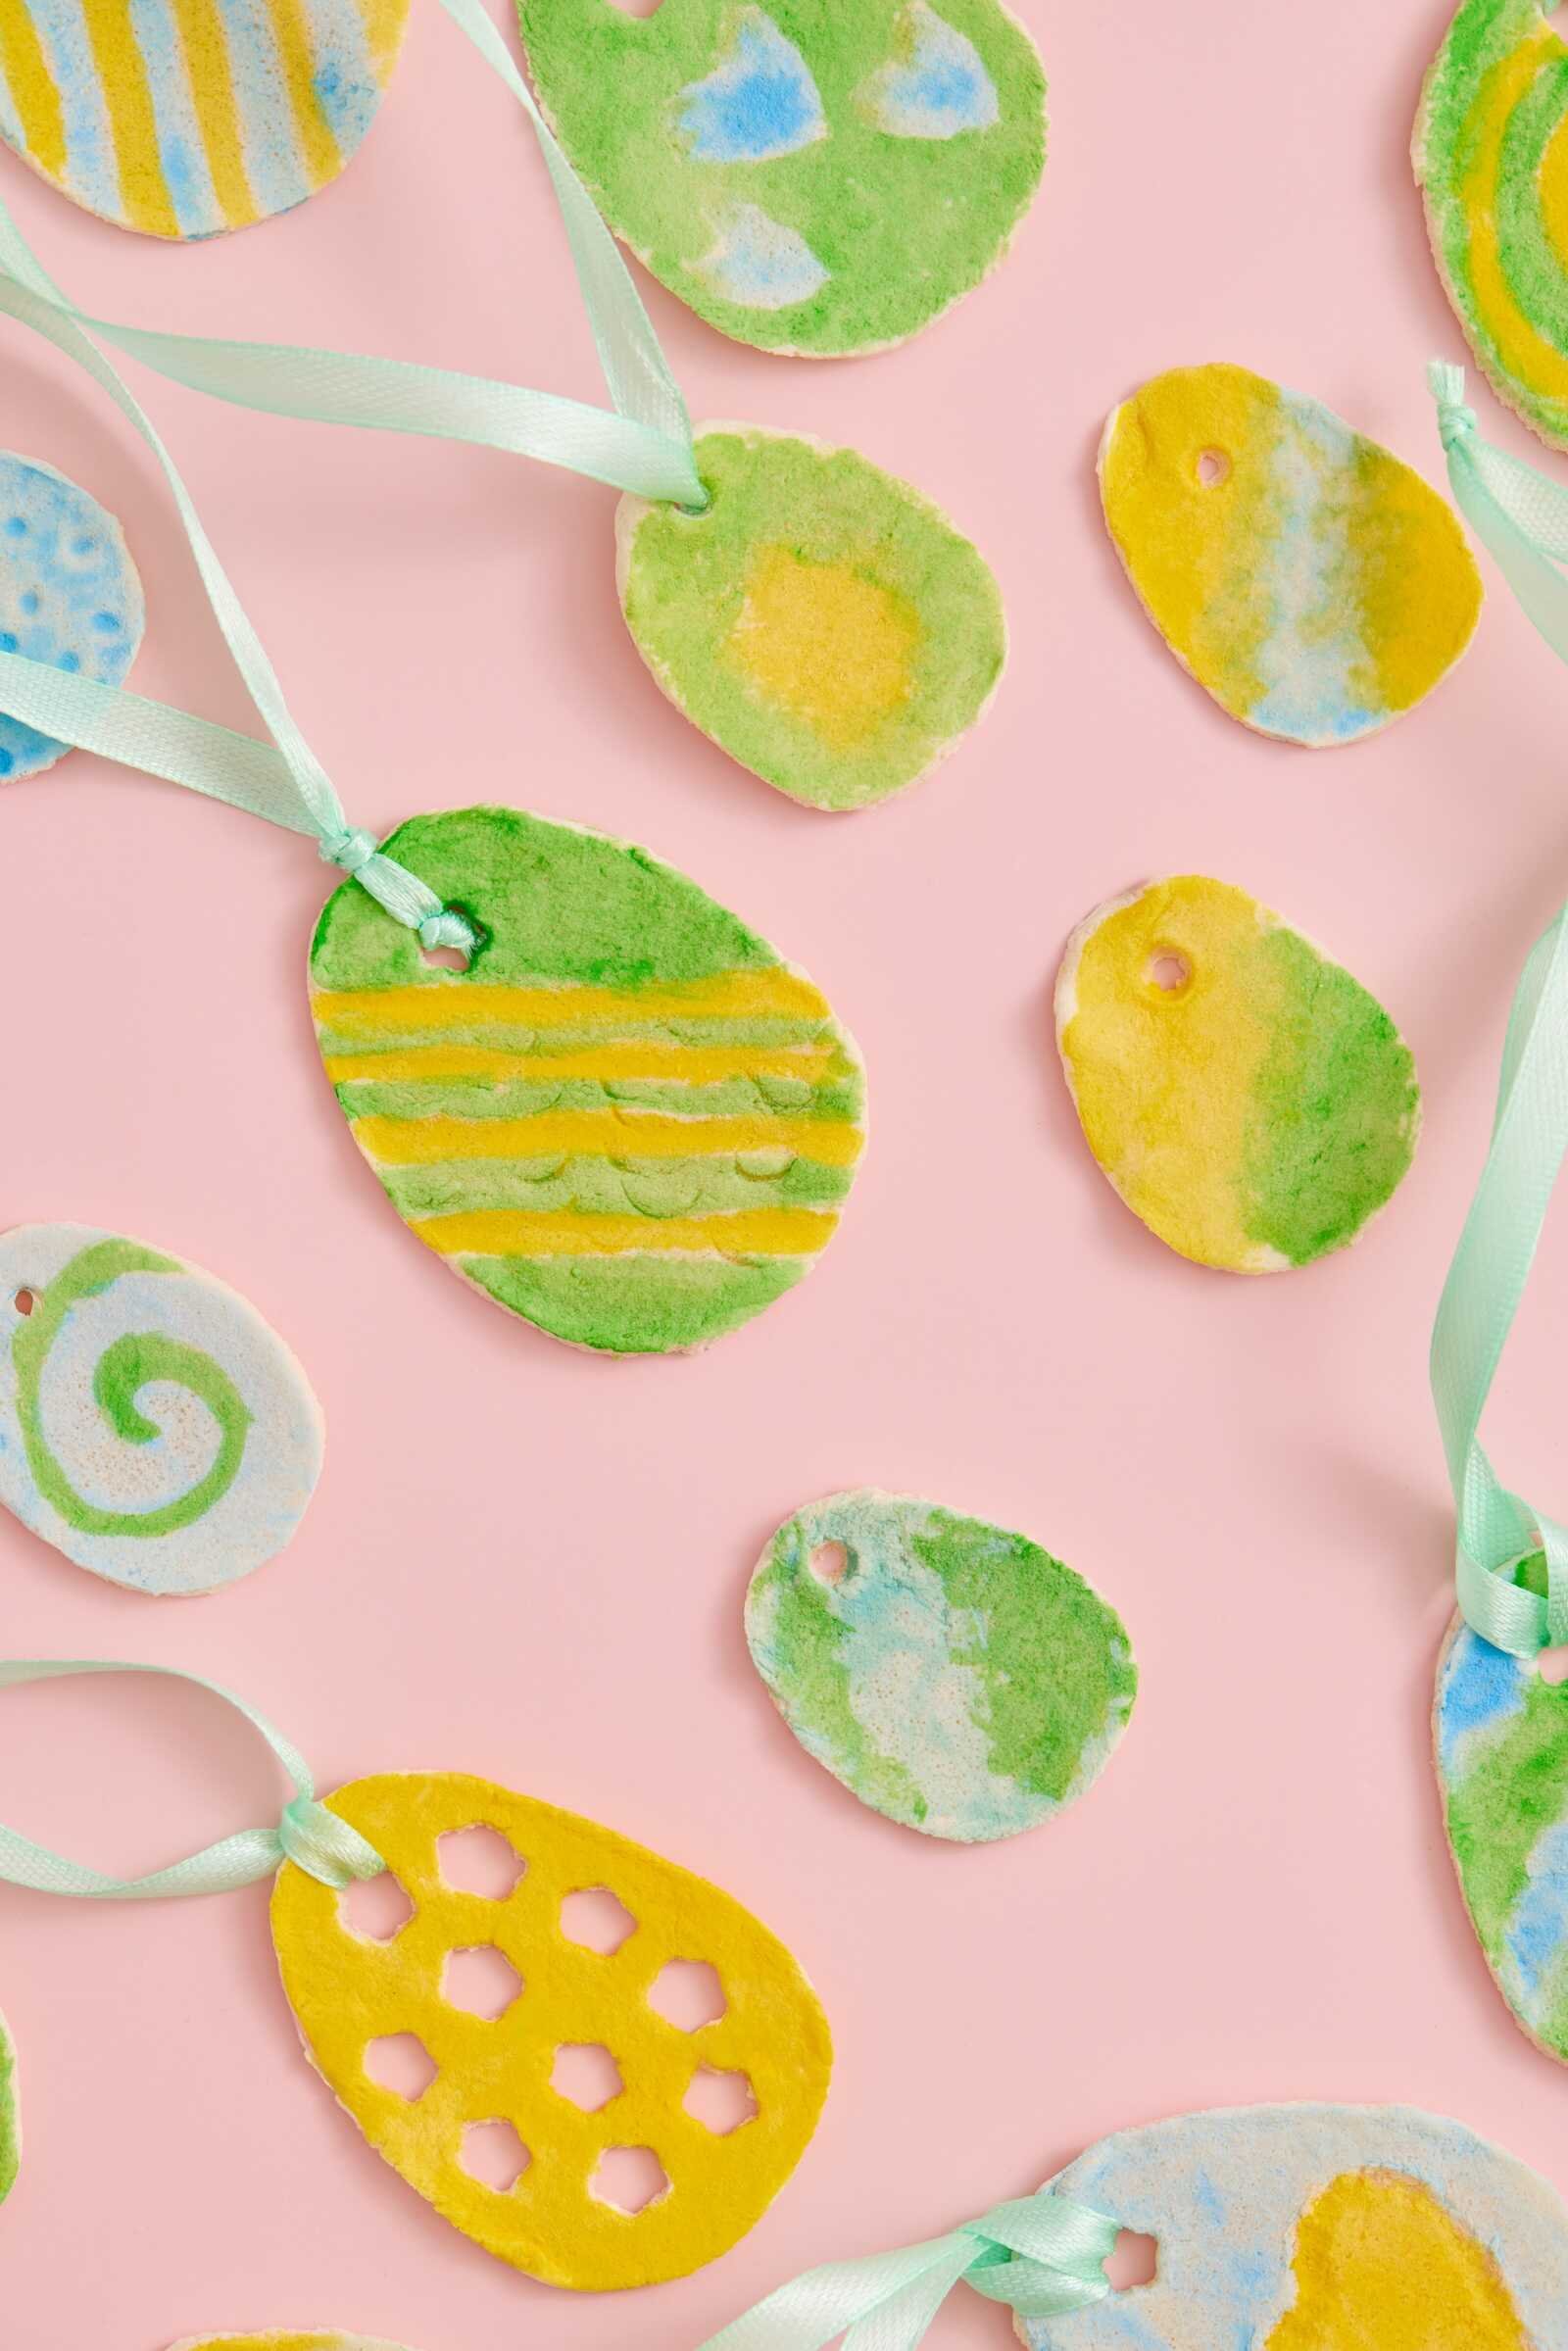
Table of Contents
Why Salt Dough Easter Eggs Are the Perfect Easter Craft
There are so many Easter craft ideas out there, but salt dough eggs remain a favorite for several reasons.
First, they’re incredibly budget-friendly. Most people already have flour and salt in their kitchen, making this a craft you can start without running to the store.
Second, they’re kid-friendly and safe. There are no complicated steps or dangerous tools involved, making it a great craft for younger children with adult supervision.
Third, they create beautiful keepsakes. Many families date the back of their salt dough ornaments and save them as holiday decorations year after year.
Salt dough eggs can also be used in many ways:
- Easter tree decorations
- Gift toppers
- Easter basket decorations
- Spring garlands
- Classroom crafts
- Handmade Easter gifts
Plus, decorating them in soft pastel colors instantly adds a touch of spring charm to your home.

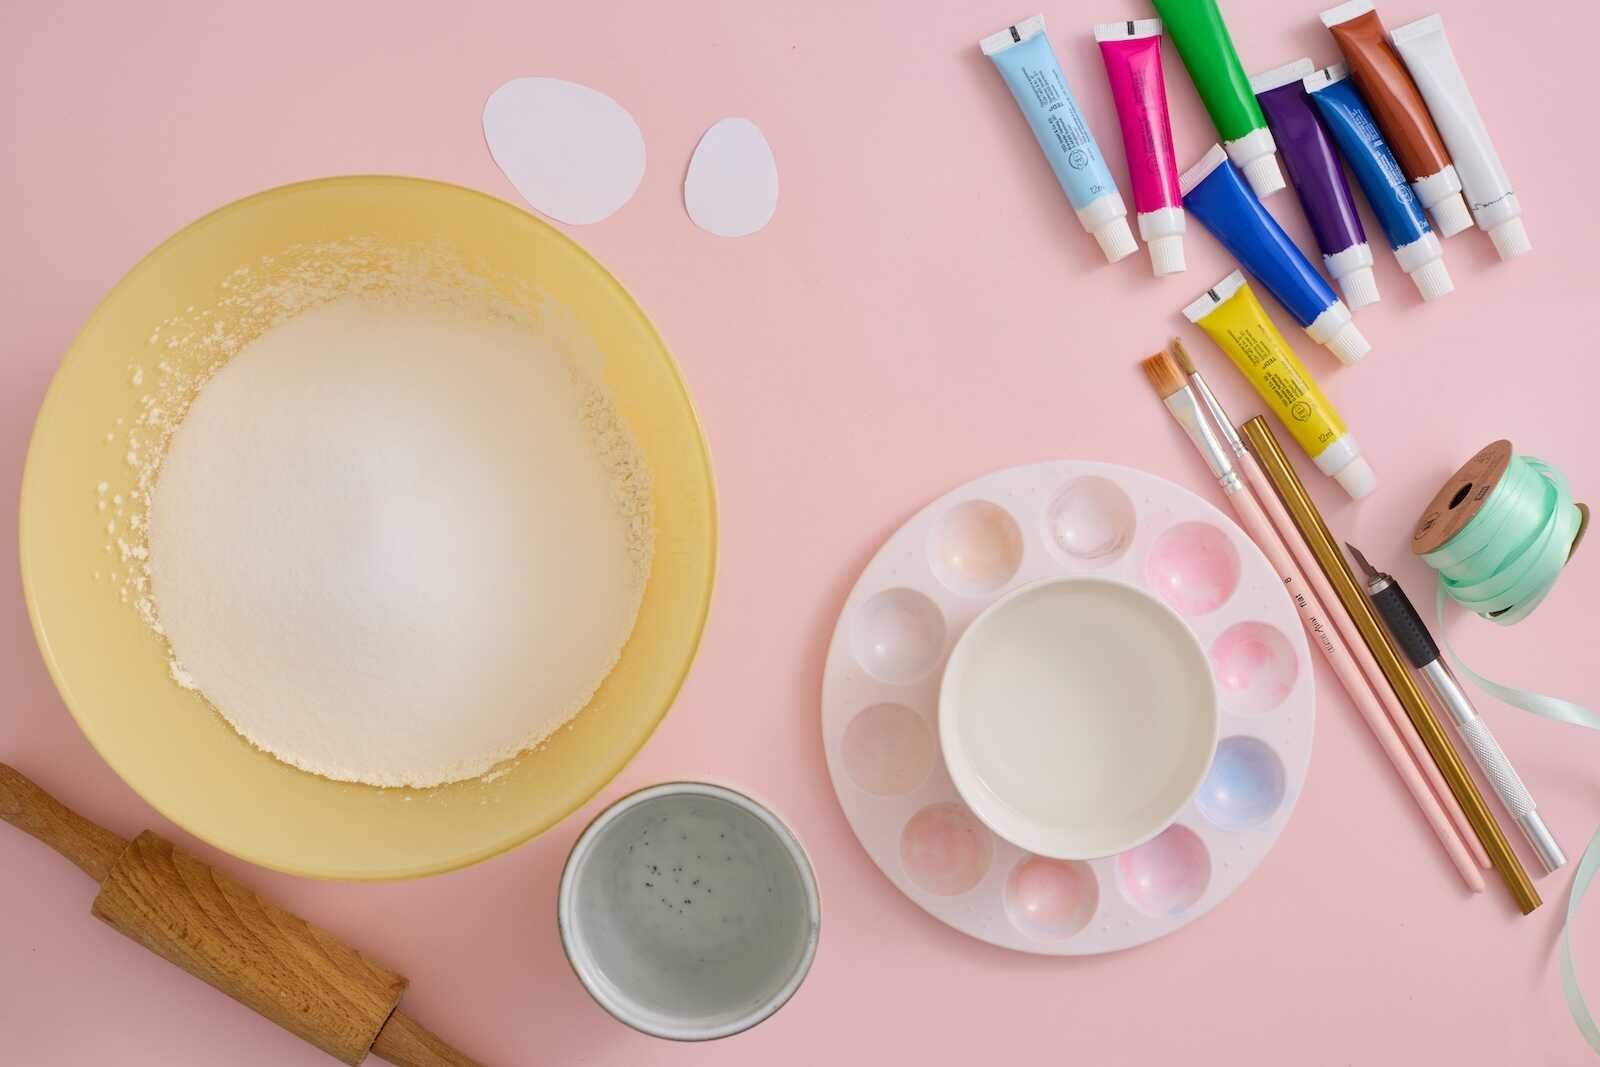
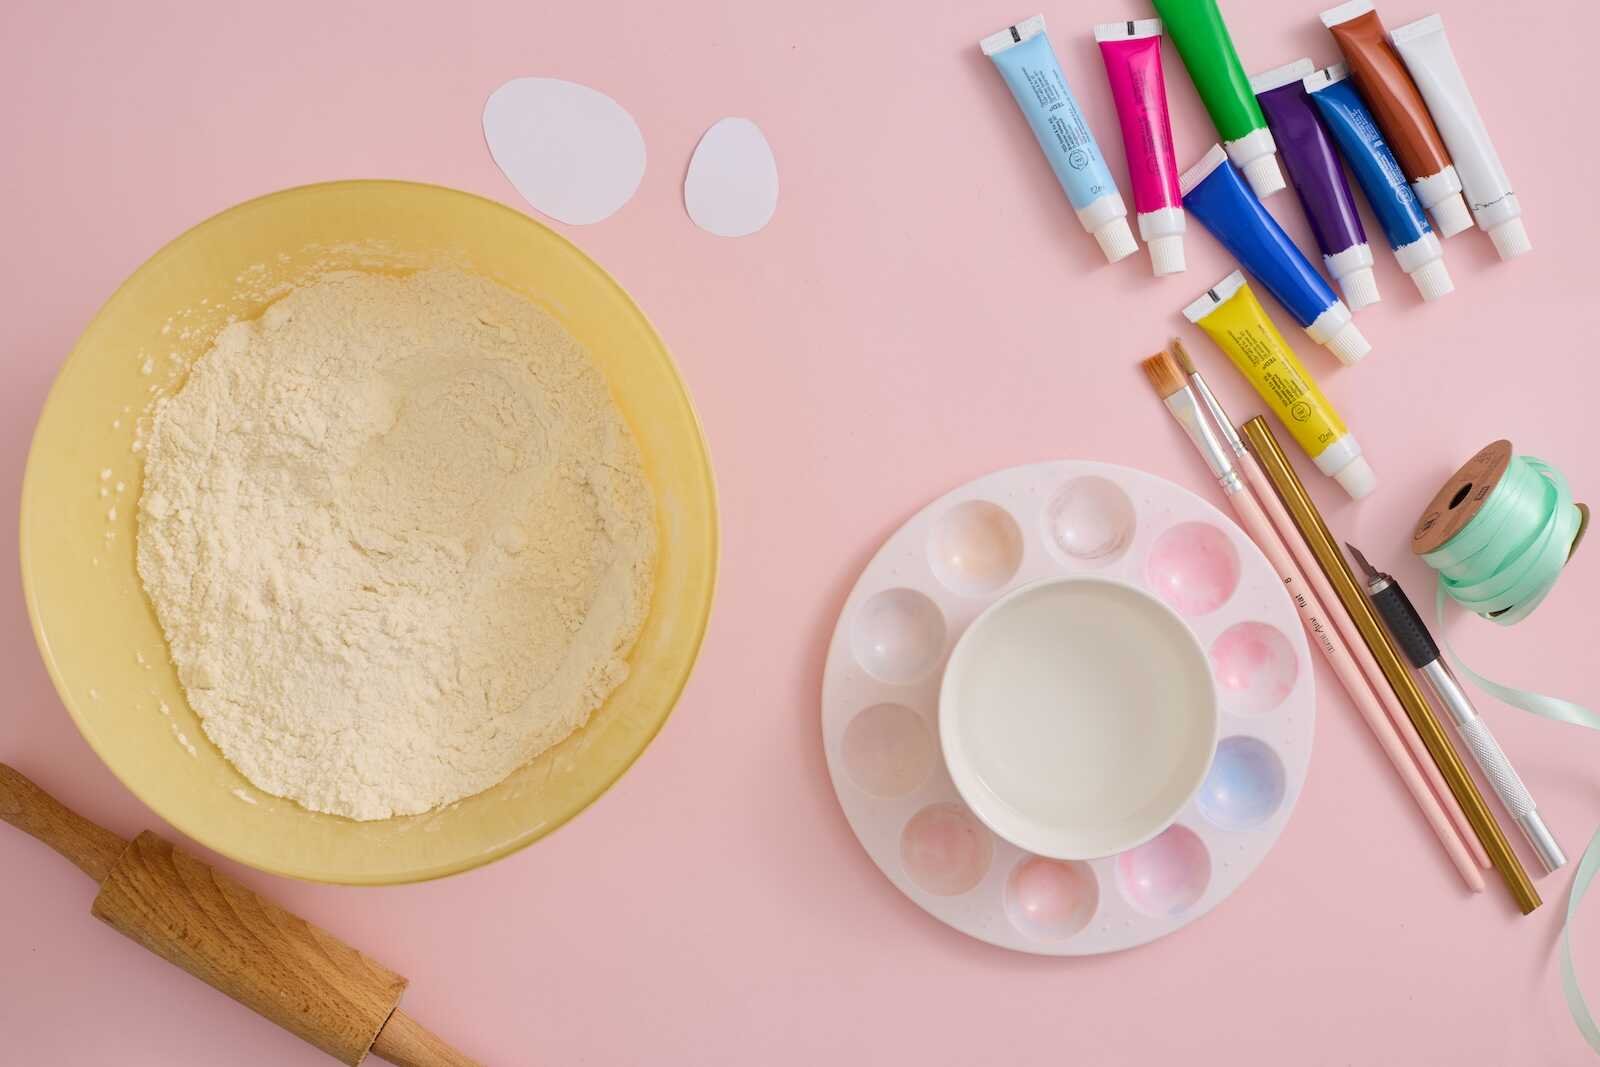
Ingredients & Supplies
You only need three simple ingredients to make salt dough.
• 2 cups flour
• 1 cup fine salt
• 1 cup water
Optional additions for decorating:
• Pastel food coloring or paints
• Ribbon (for hanging the eggs)

Tools You’ll Need
Before starting, gather the following tools.
• Mixing bowl
• Rolling pin
• Egg-shaped cookie cutter (or a knife and a template)
• Straw (for making holes)
• Paintbrushes for decorating
• Cup with water for rinsing paintbrushes
• Palette for mixing colors
Having everything ready ahead of time makes the crafting process smooth and enjoyable.
How to Make Salt Dough Easter Eggs
Follow these simple steps to create your own salt dough Easter ornaments.
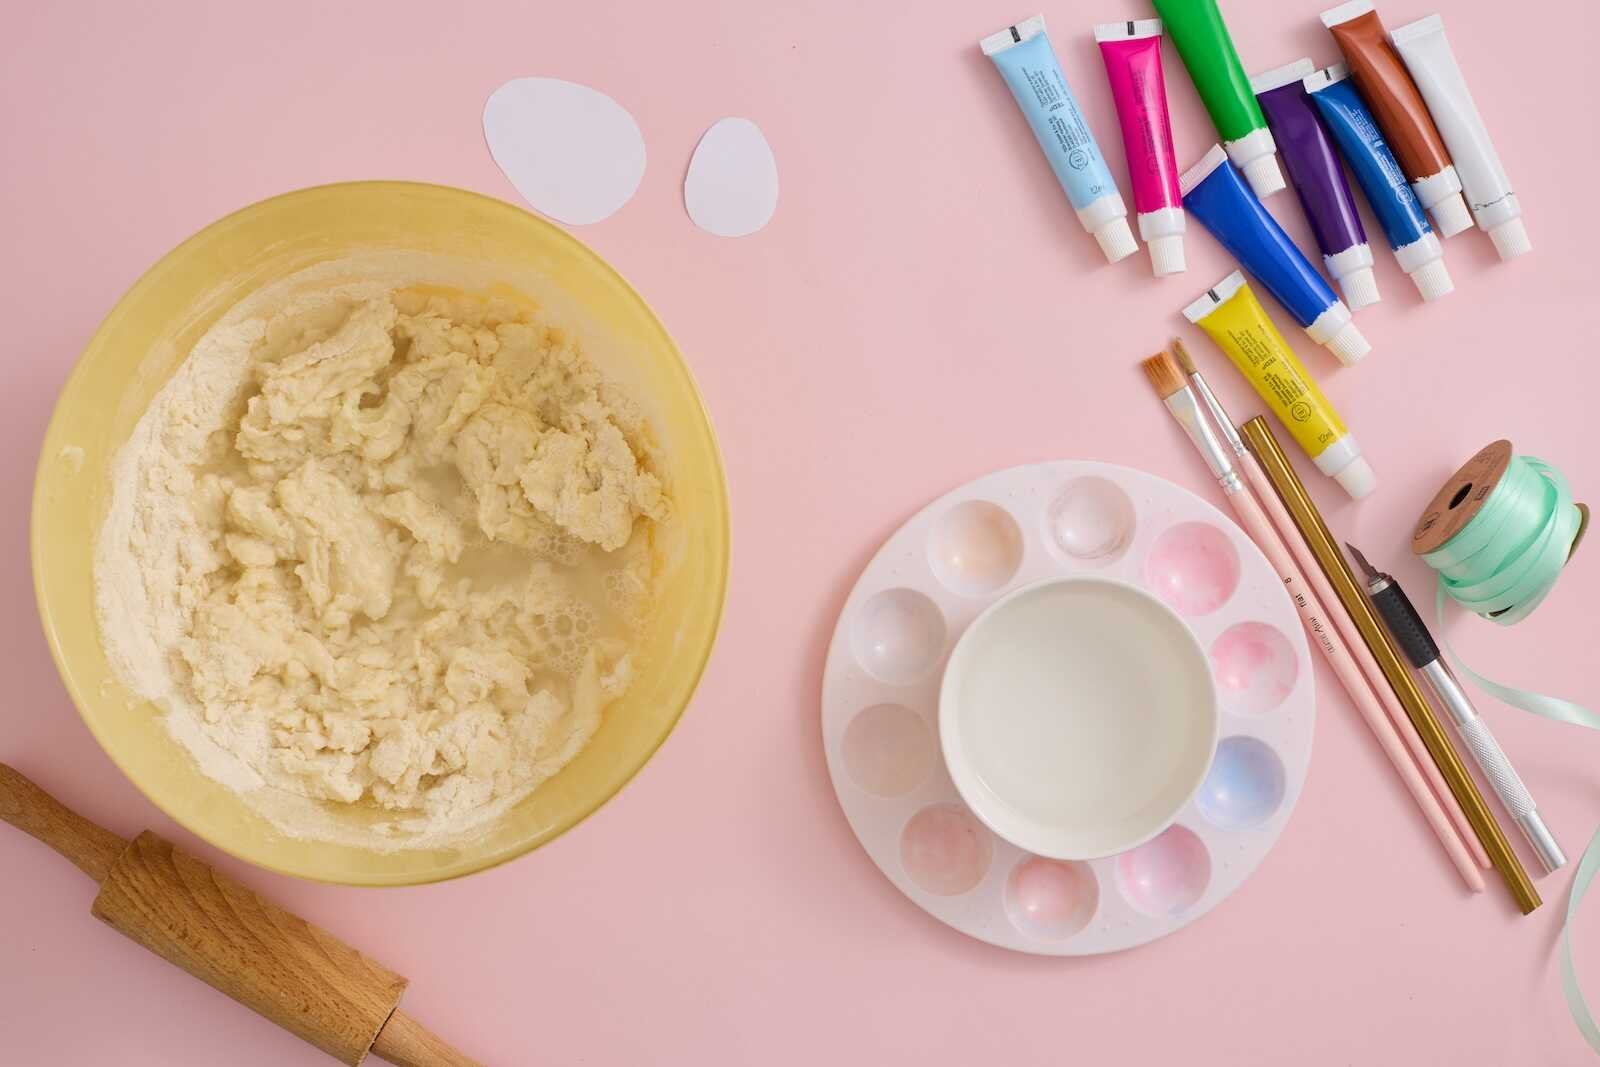
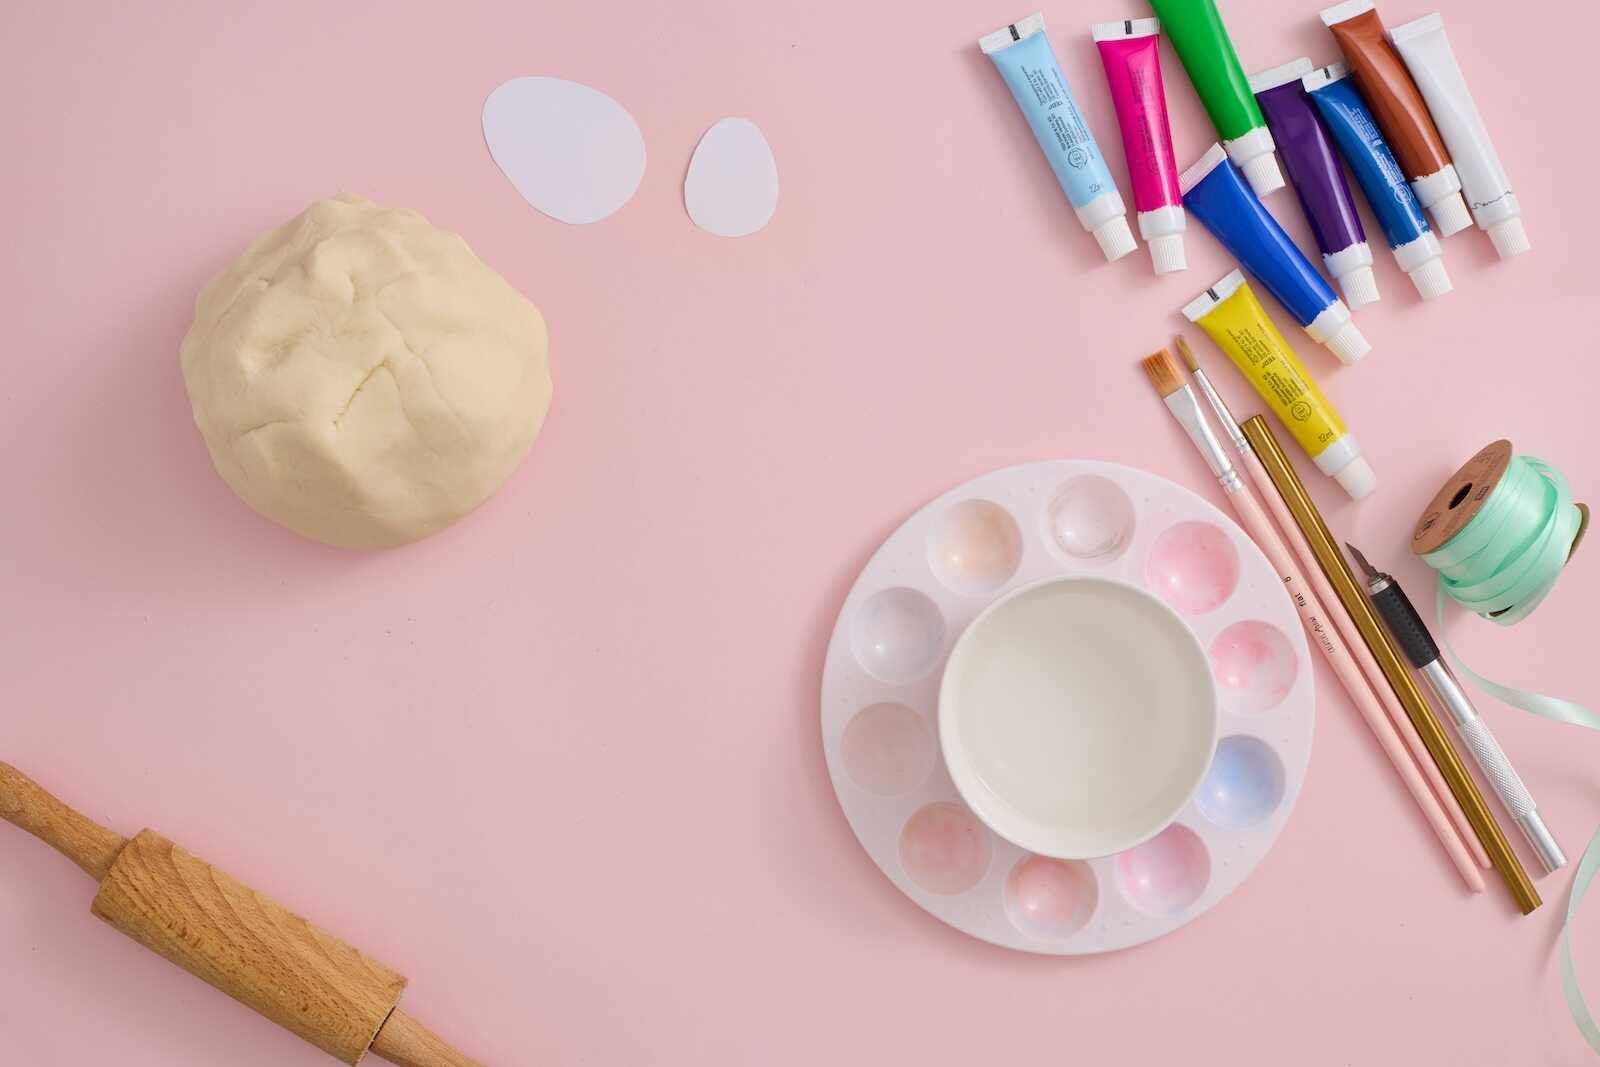
Step 1: Prepare the Dough
Start by mixing the ingredients to create your salt dough base.
In a large mixing bowl, combine 2 cups of flour and 1 cup of fine salt. Stir them together so the salt is evenly distributed throughout the flour.
Next, gradually add 1 cup of water while mixing. It’s important to add the water slowly rather than all at once. This allows you to control the texture and prevent the dough from becoming too sticky.
Once the ingredients begin to come together, switch to kneading the dough with your hands.
Knead the dough for about 5–10 minutes until it becomes:
• Smooth
• Elastic
• Non-sticky
If the dough feels too sticky, add a small amount of flour. If it feels too dry, add a teaspoon of water at a time.
The final dough should feel similar to playdough.
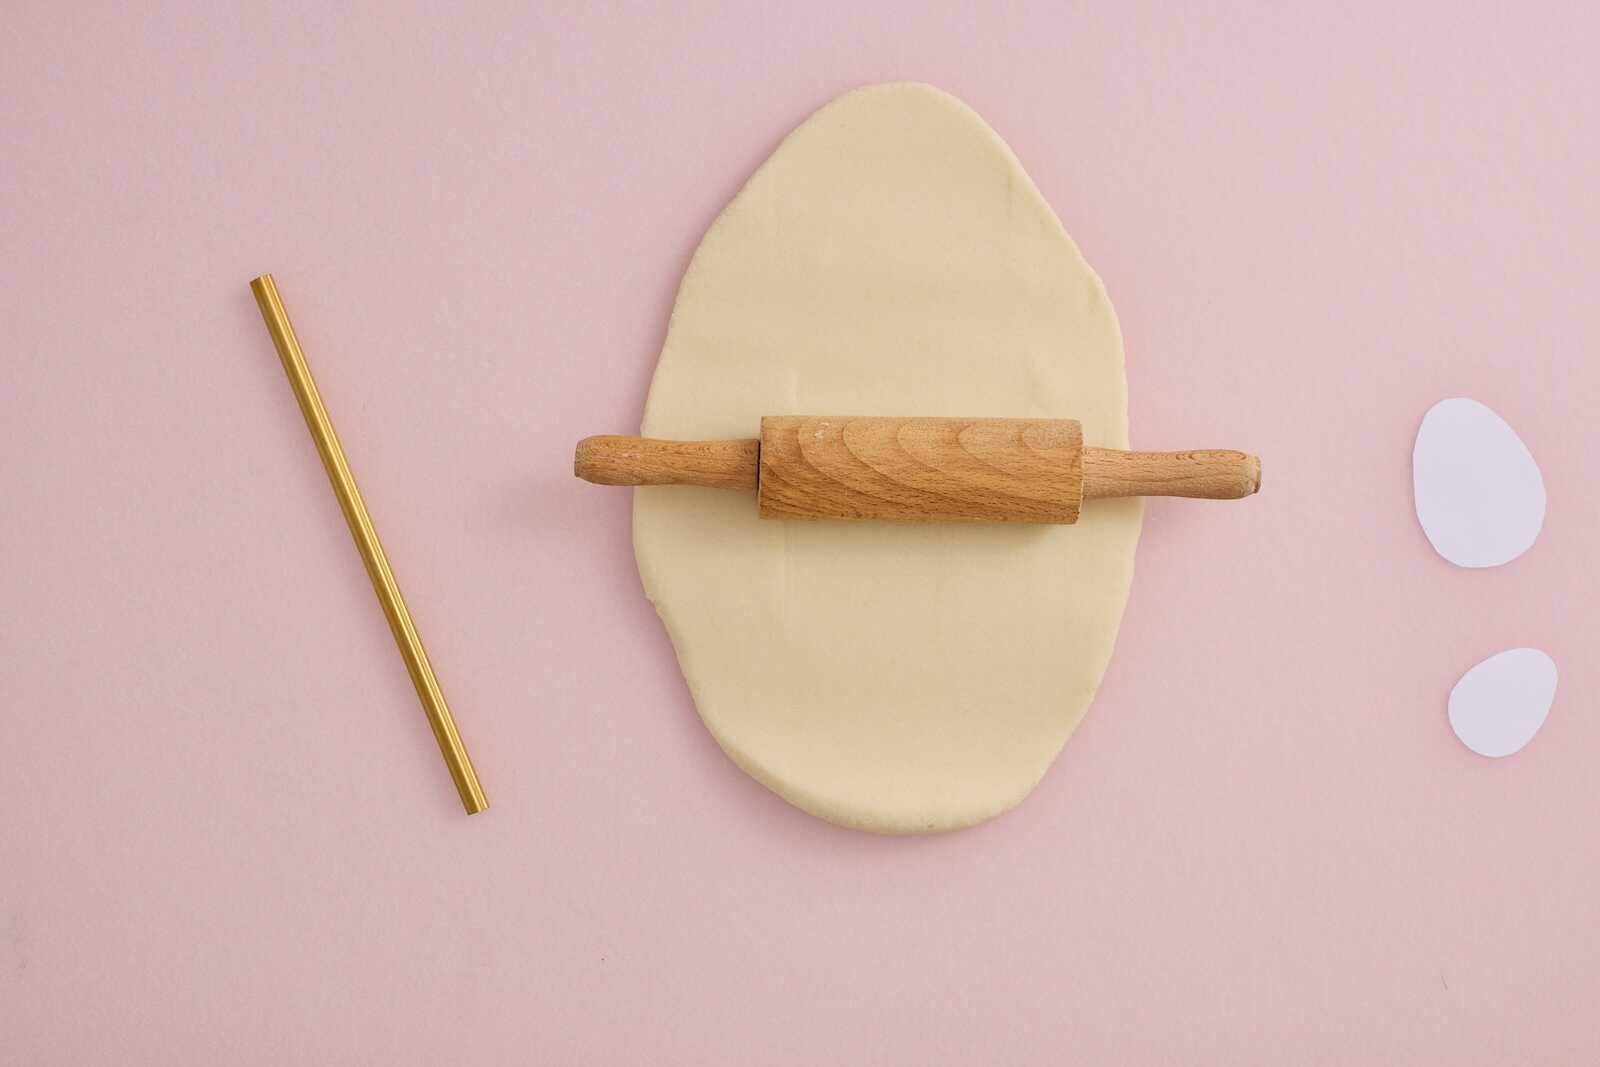
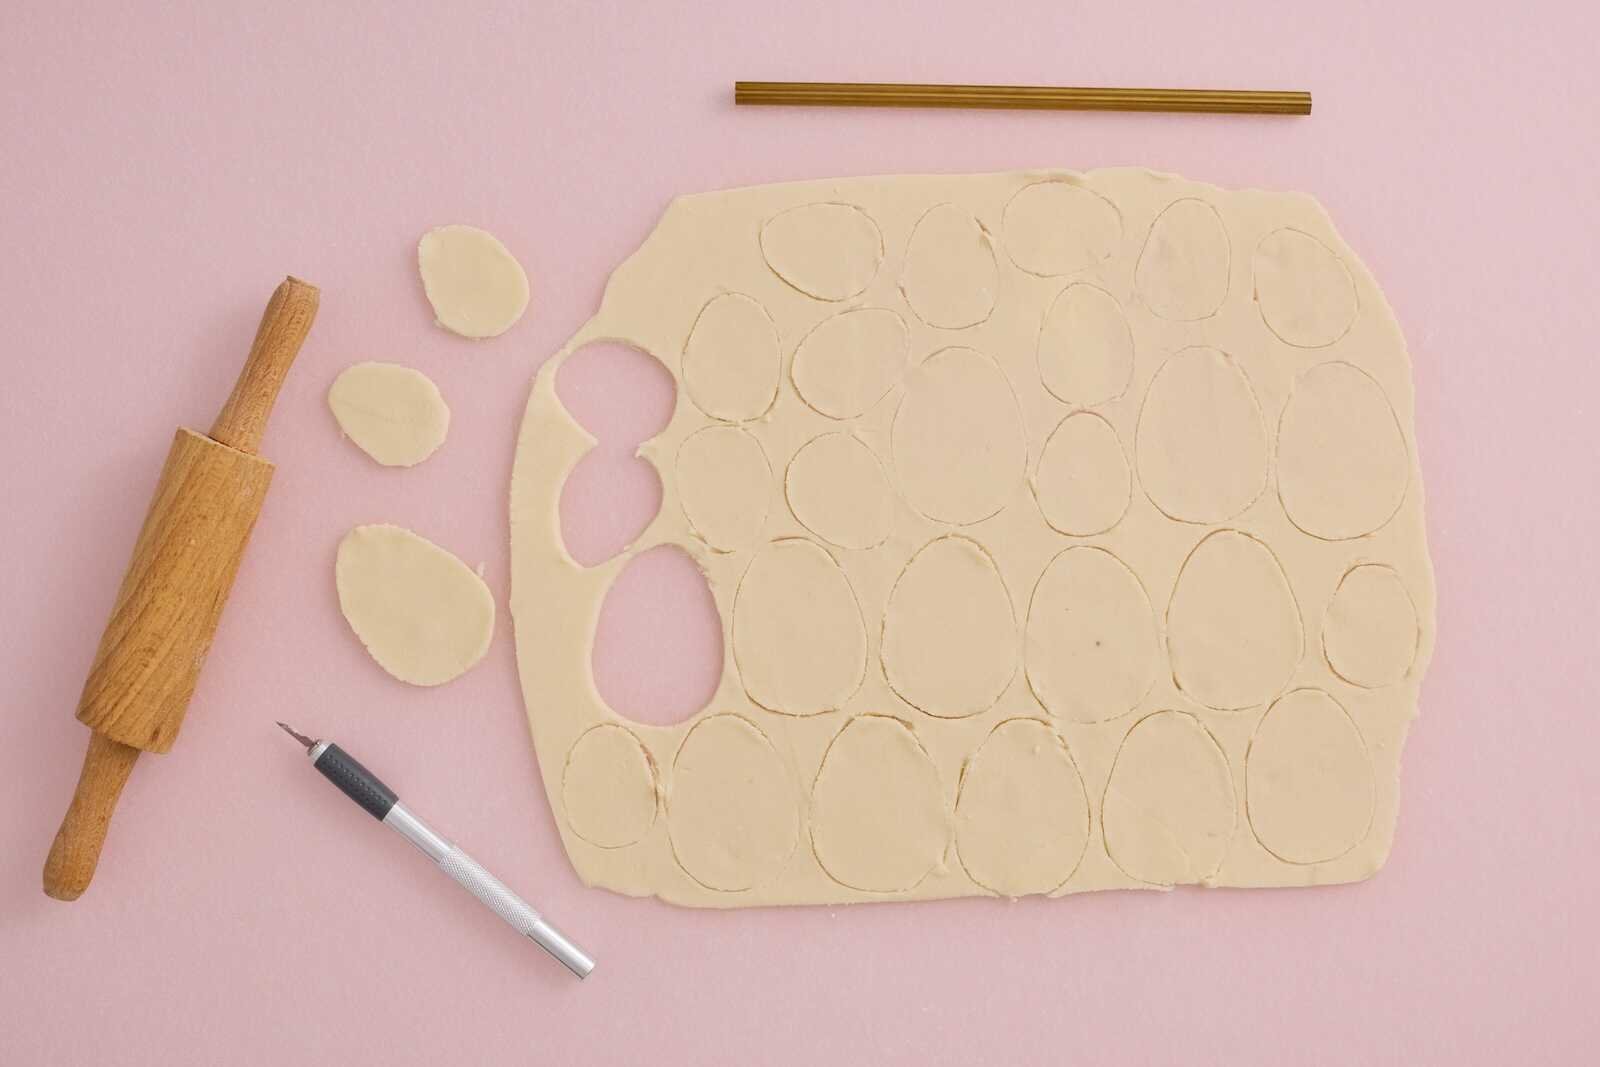
Step 2: Shape the Easter Eggs
Once your dough is ready, it’s time to create the egg shapes.
Lightly dust your work surface with flour and use a rolling pin to roll out the dough. Aim for about ¼ inch (0.5 cm) thickness.
Keeping the dough evenly thick ensures that the ornaments dry evenly and remain sturdy.
Next, cut out egg shapes using an egg-shaped cookie cutter. If you don’t have one, you can easily use a knife and a simple egg template made from paper.
Place each cut-out egg onto a baking sheet lined with parchment paper.
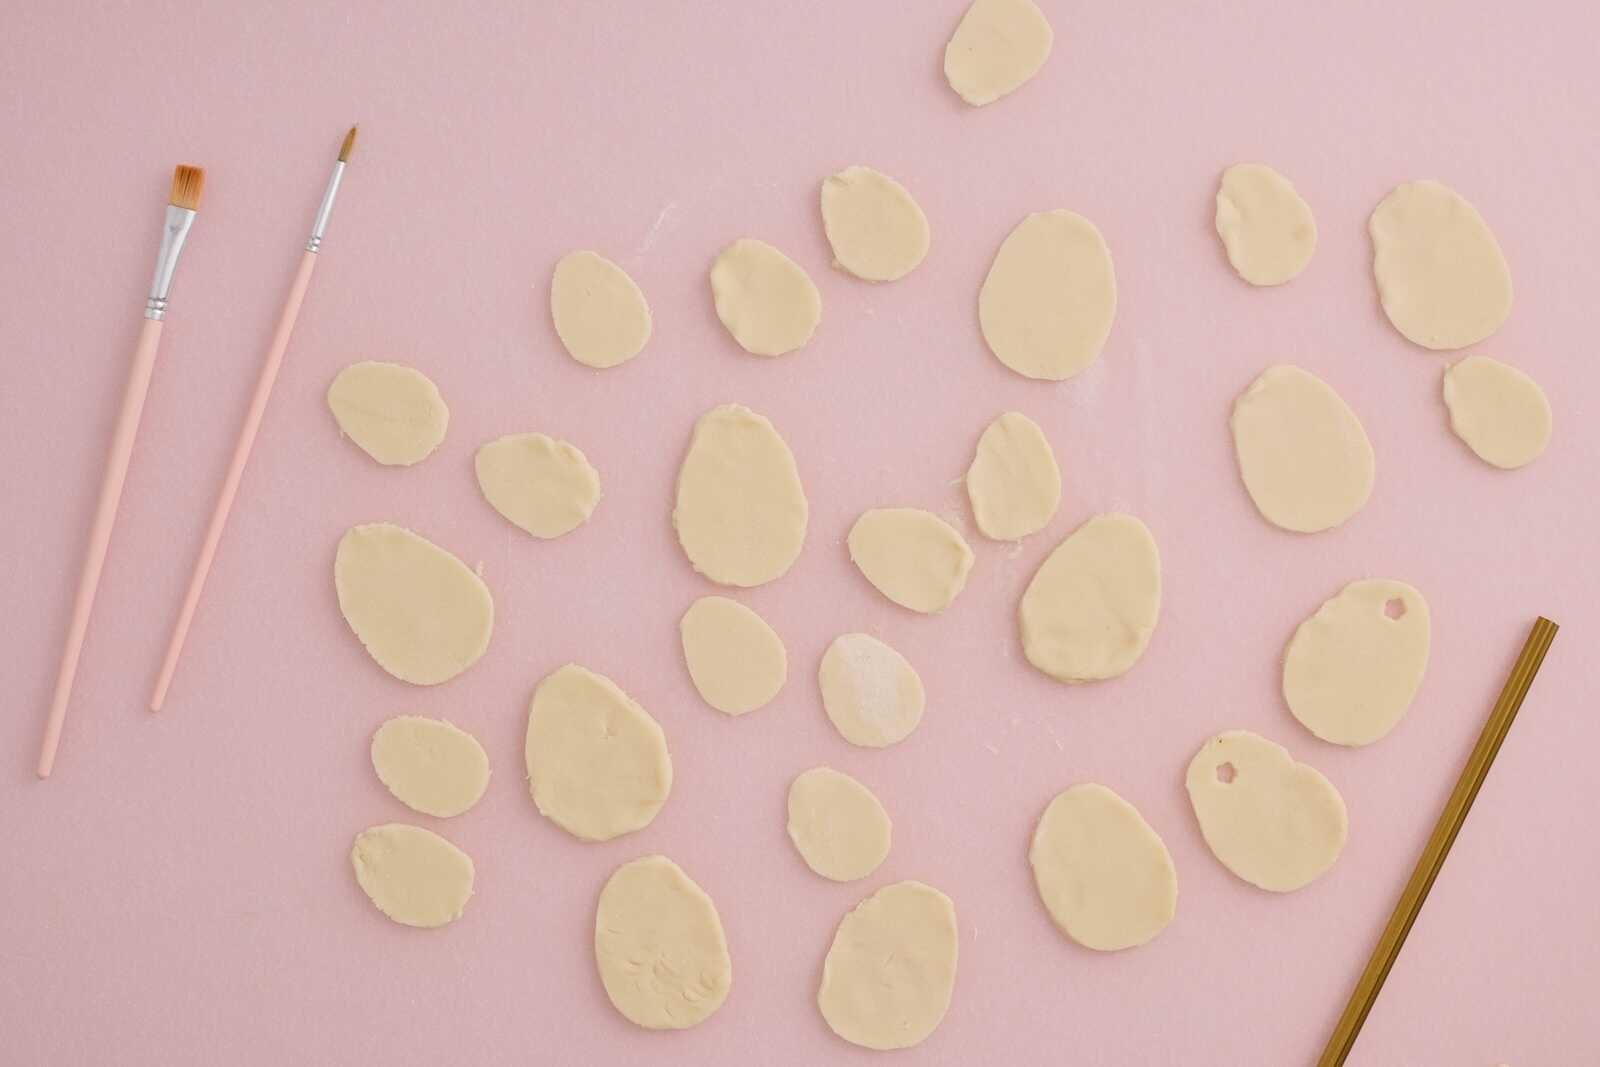
Step 3: Make Holes for Hanging
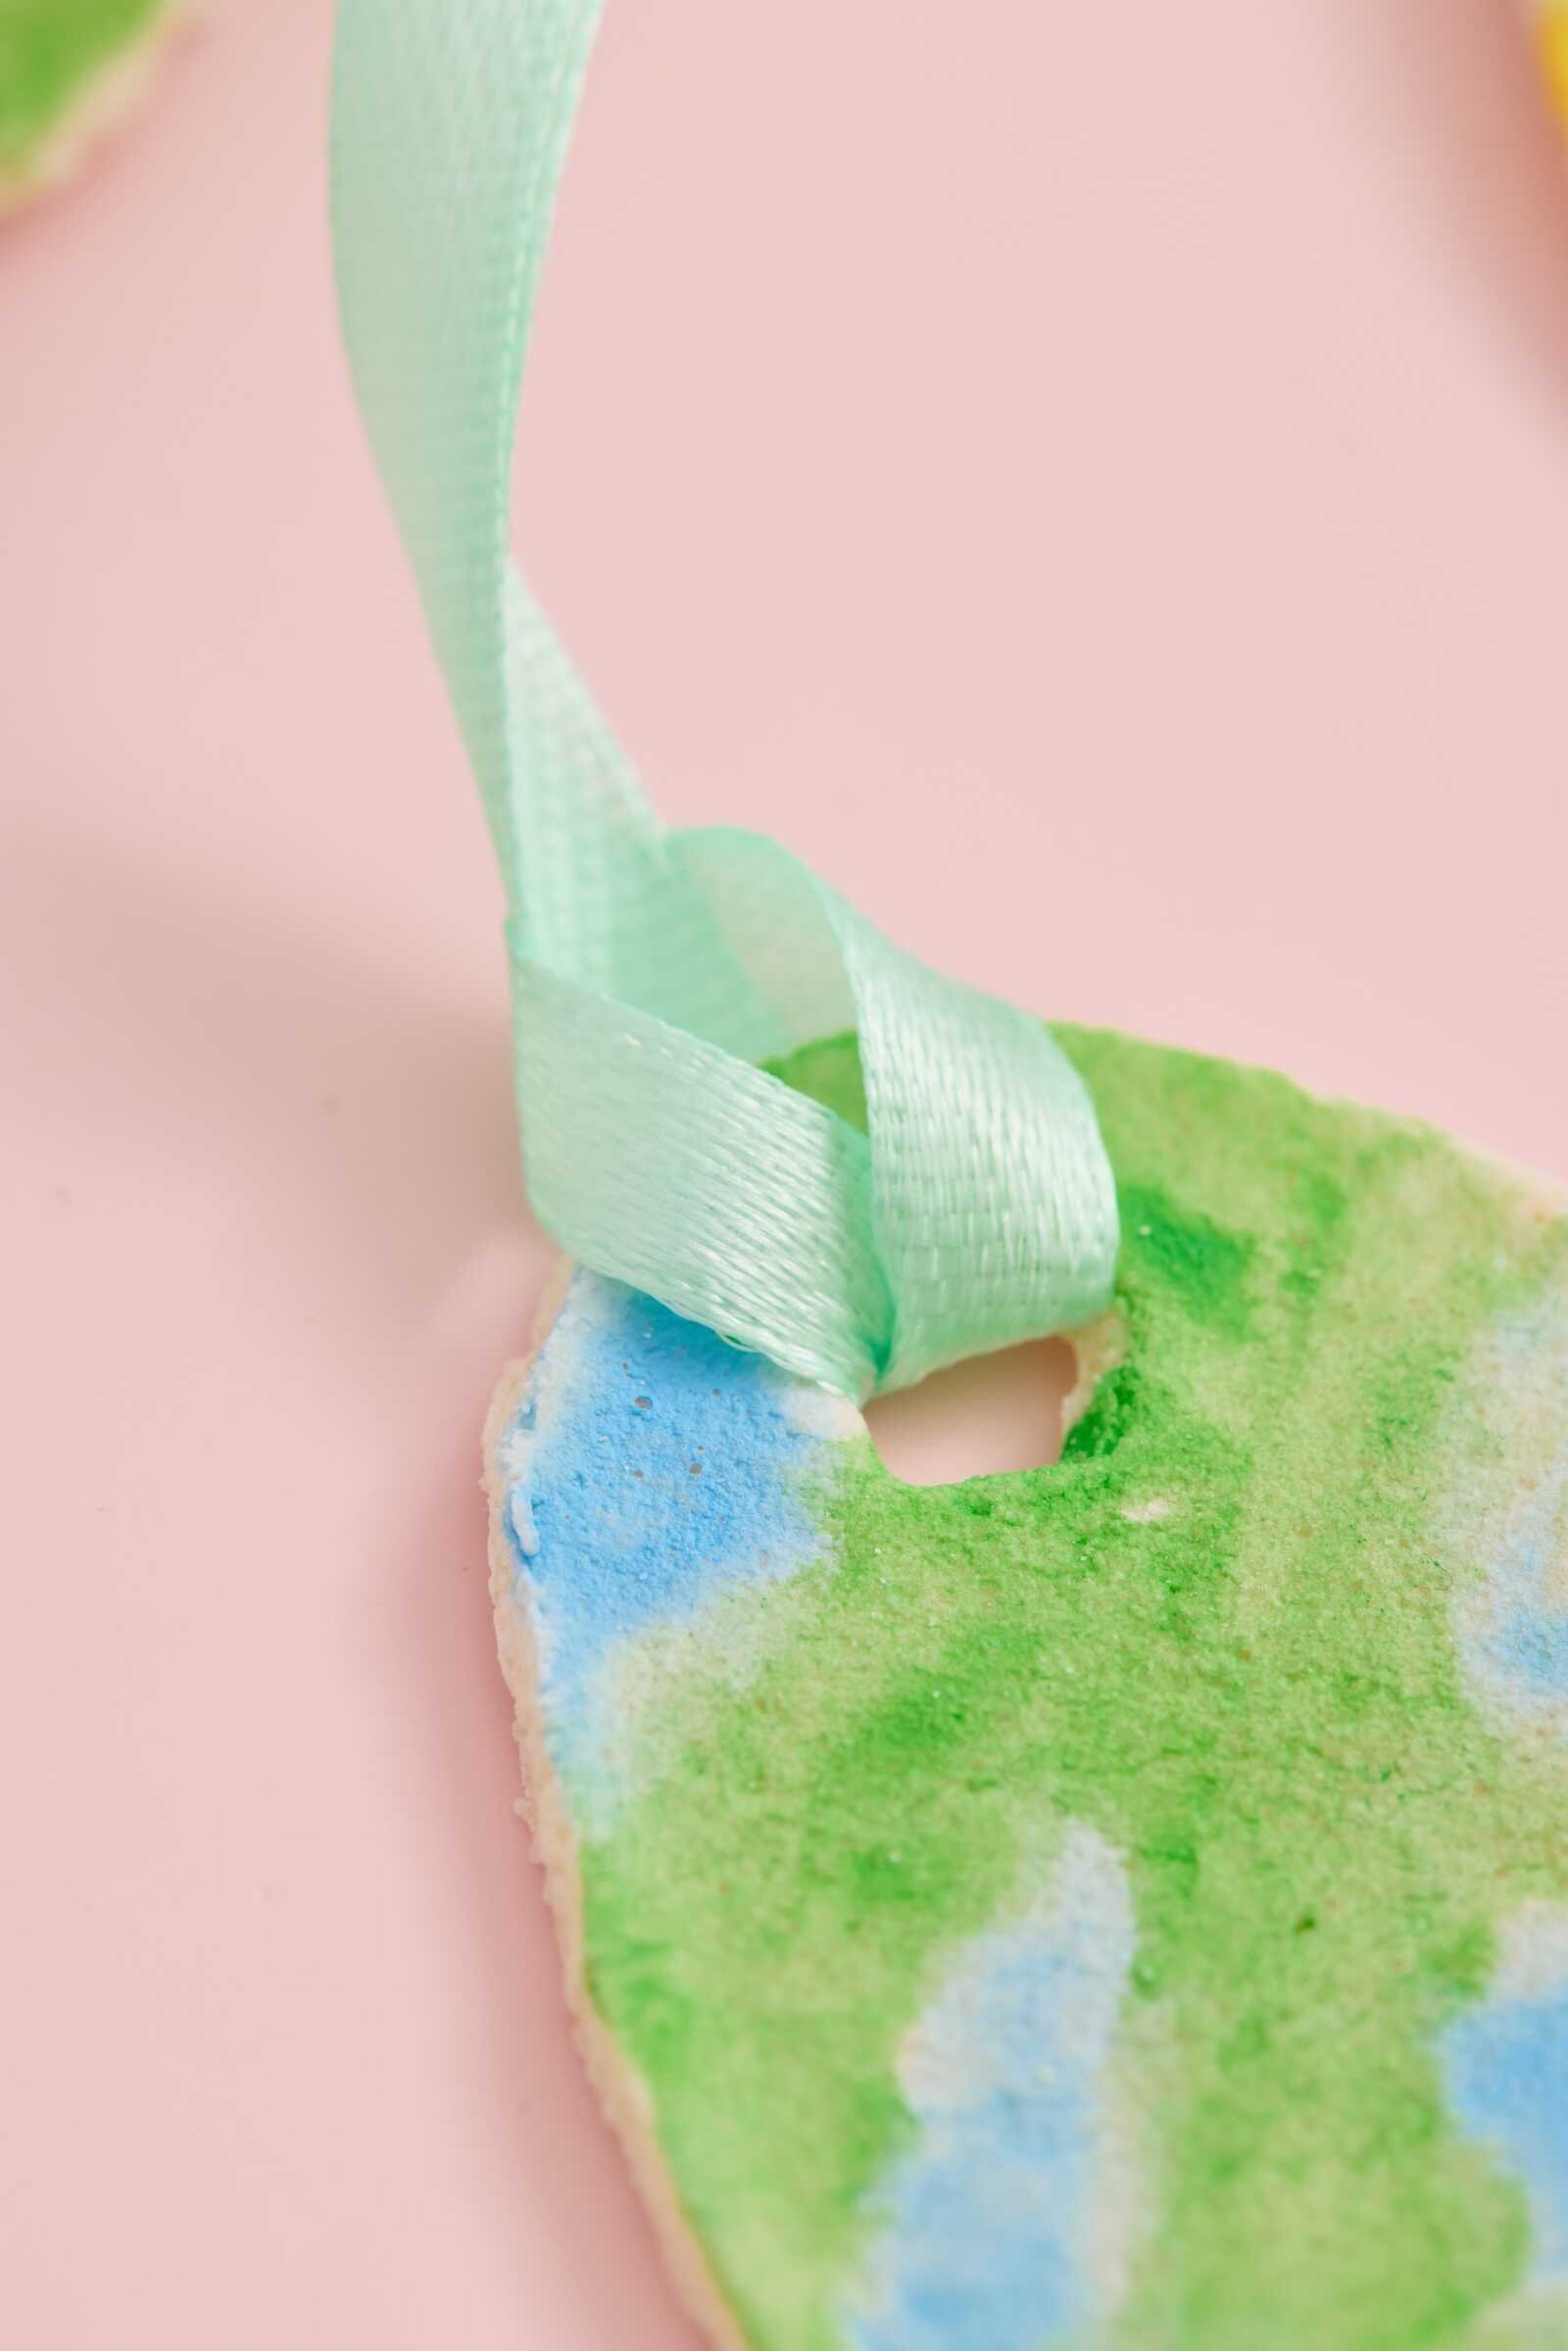
Before the dough dries, you’ll need to create a small hole at the top of each egg.
Use a straw to gently punch a hole near the top of the ornament. This hole will later hold the ribbon so you can hang the egg as a decoration.
Make sure the hole isn’t too close to the edge, or it may break once the dough dries.
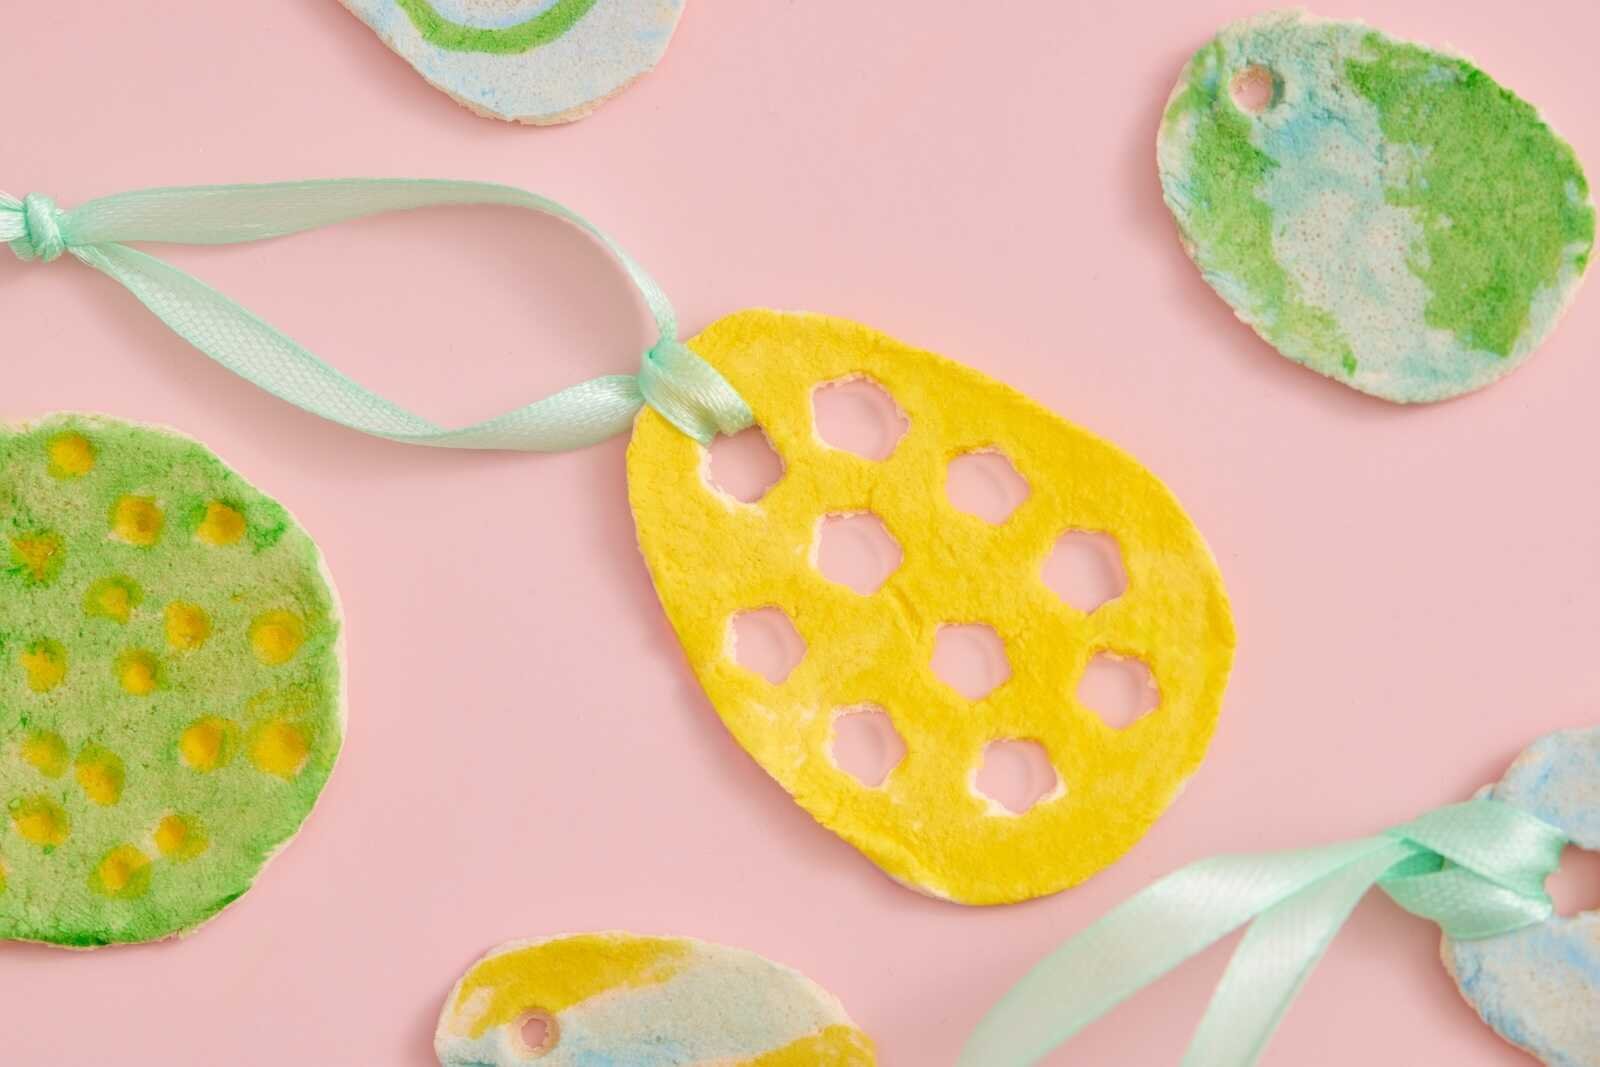
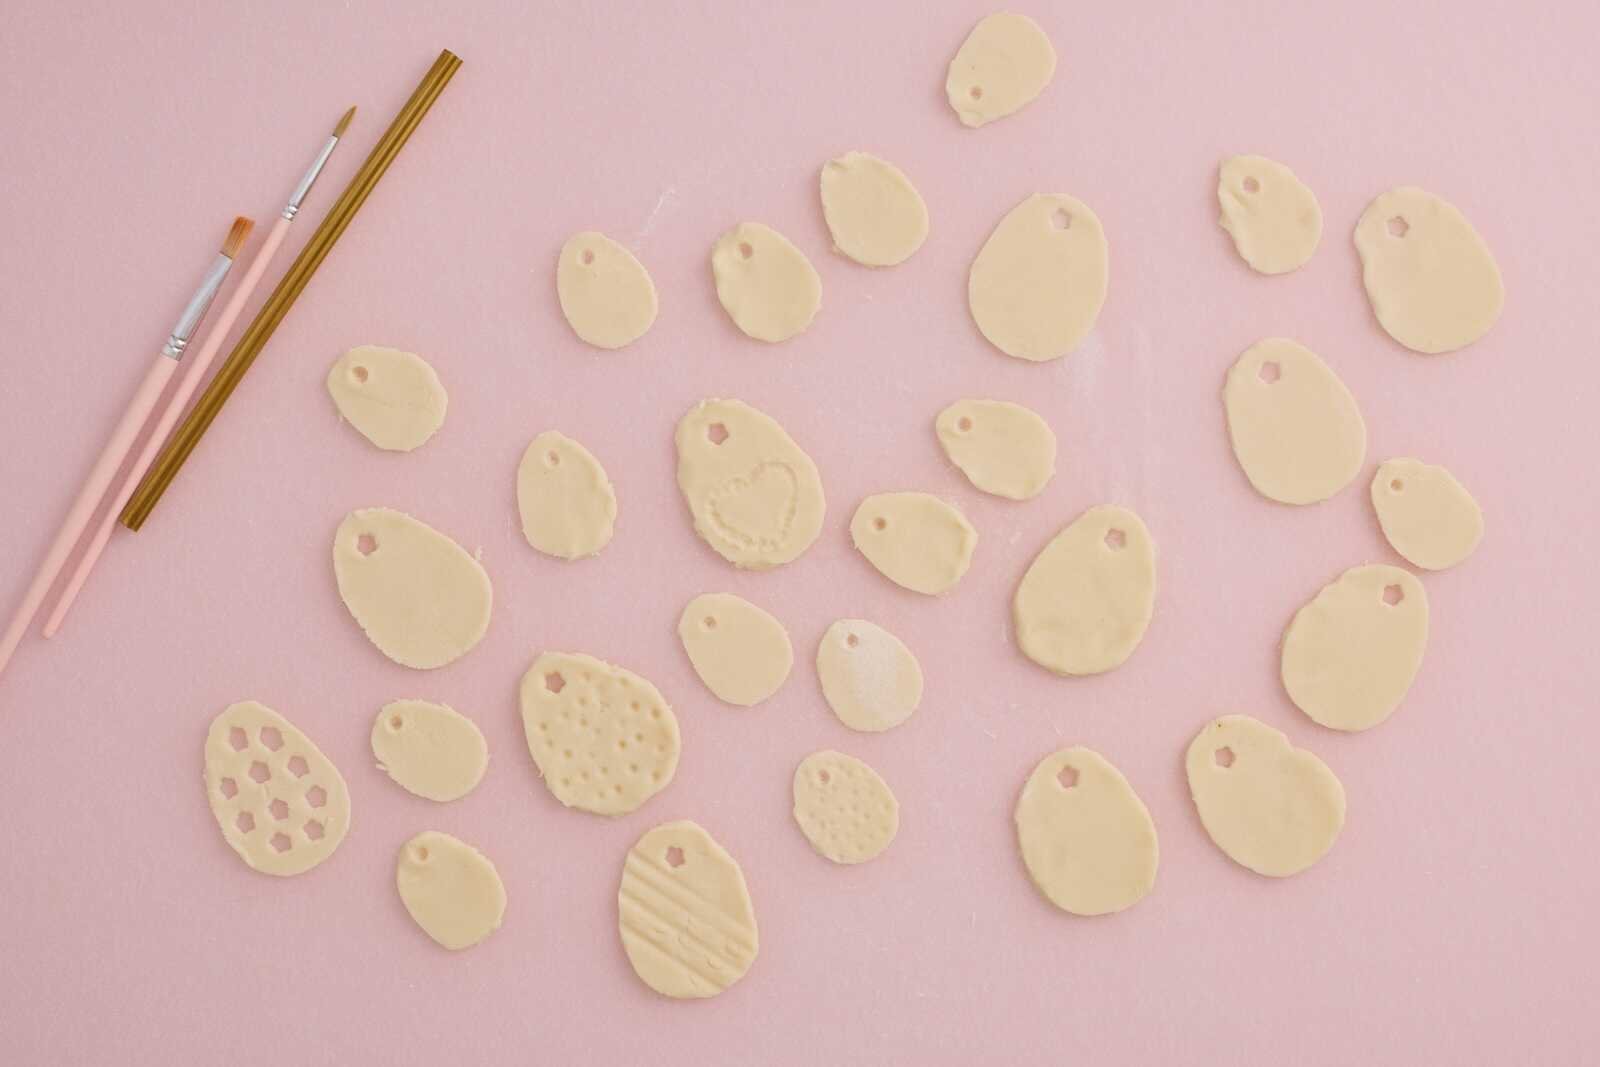
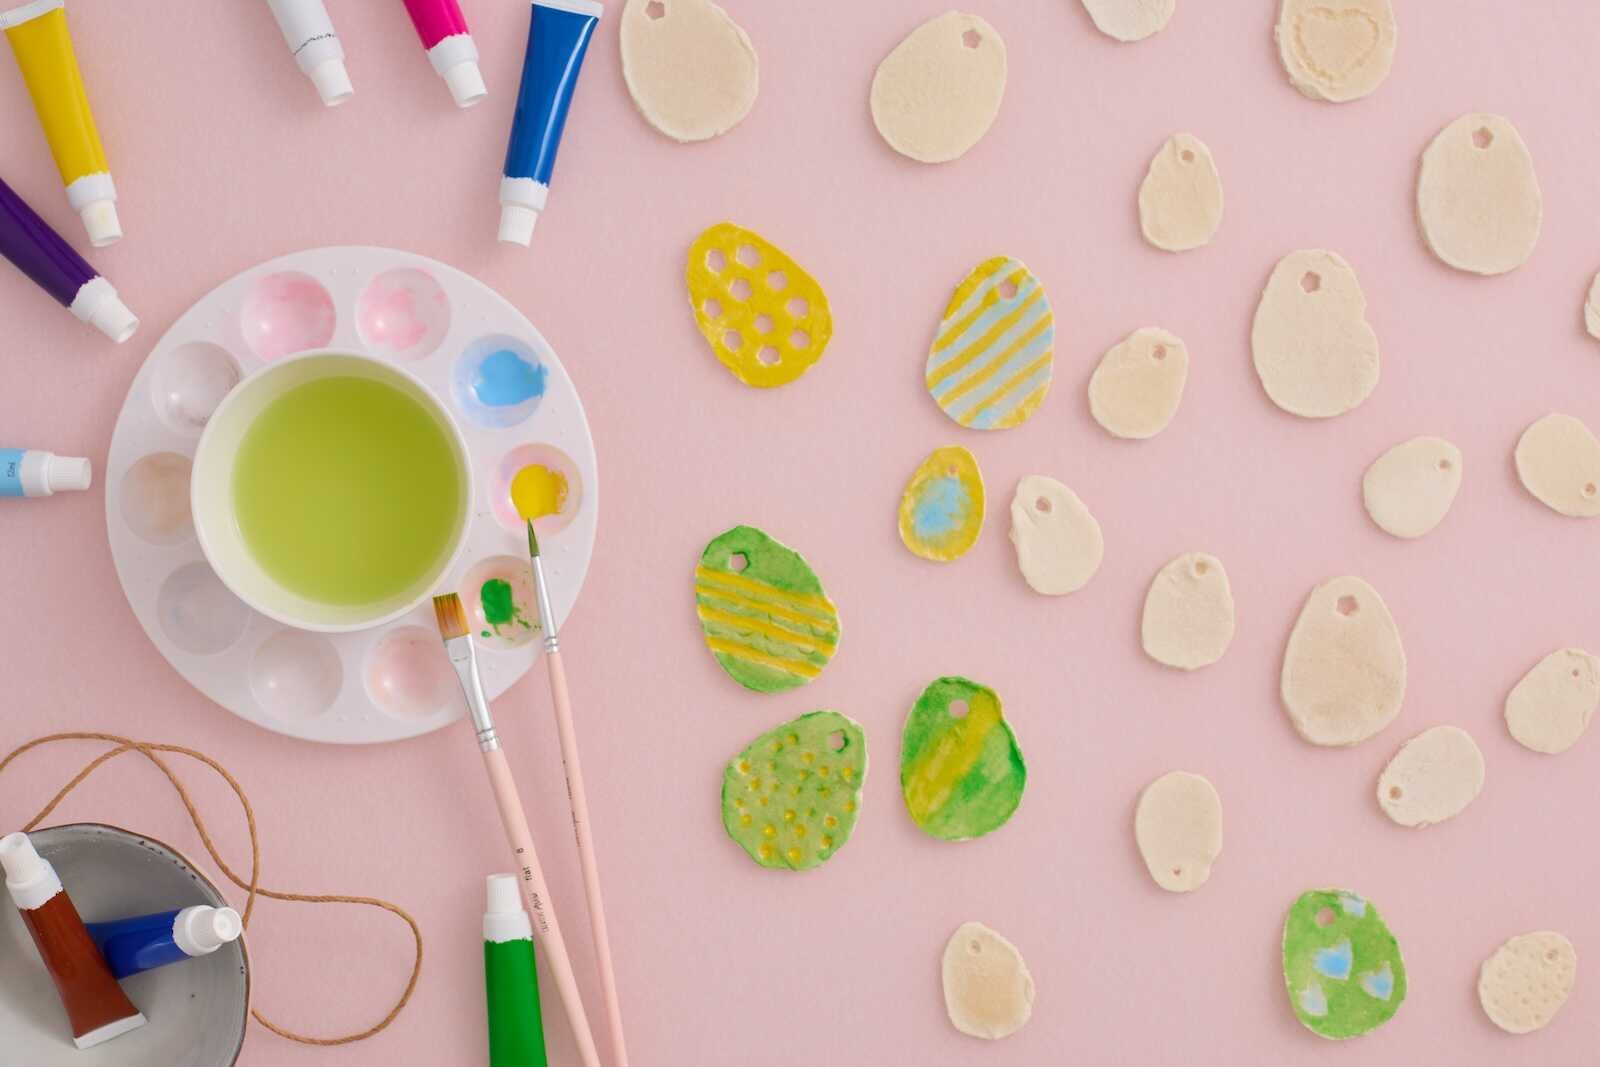
Step 4: Add Texture and Patterns
One of the most fun parts of this craft is adding texture before the dough dries.
You can decorate the surface using household objects such as:
• Bottle caps
• Lace fabric
• Rubber stamps
• Leaves
• Forks or toothpicks
Simply press the item gently into the dough to leave a beautiful pattern.
This step gives each salt dough Easter egg a unique handmade look.
Step 5: Dry the Salt Dough Eggs
Now it’s time to dry the ornaments so they become firm and durable. You can choose between two drying methods.
Oven Drying Method
If you want faster results, you can dry the eggs in the oven.
Set your oven to 210°F (100°C) and place the baking sheet inside.
Bake the salt dough eggs for 1.5 to 2 hours, flipping them halfway through to ensure even drying.
Keep an eye on them to make sure they don’t brown. The goal is to dry the dough rather than bake it.
Air Drying Method
If you prefer a natural method, air drying works just as well.
Simply place the salt dough eggs on a tray or rack in a dry area.
Allow them to dry for 24–48 hours, depending on:
• Thickness of the dough
• Room temperature
• Humidity levels
Once they feel completely hard, they’re ready for decorating.
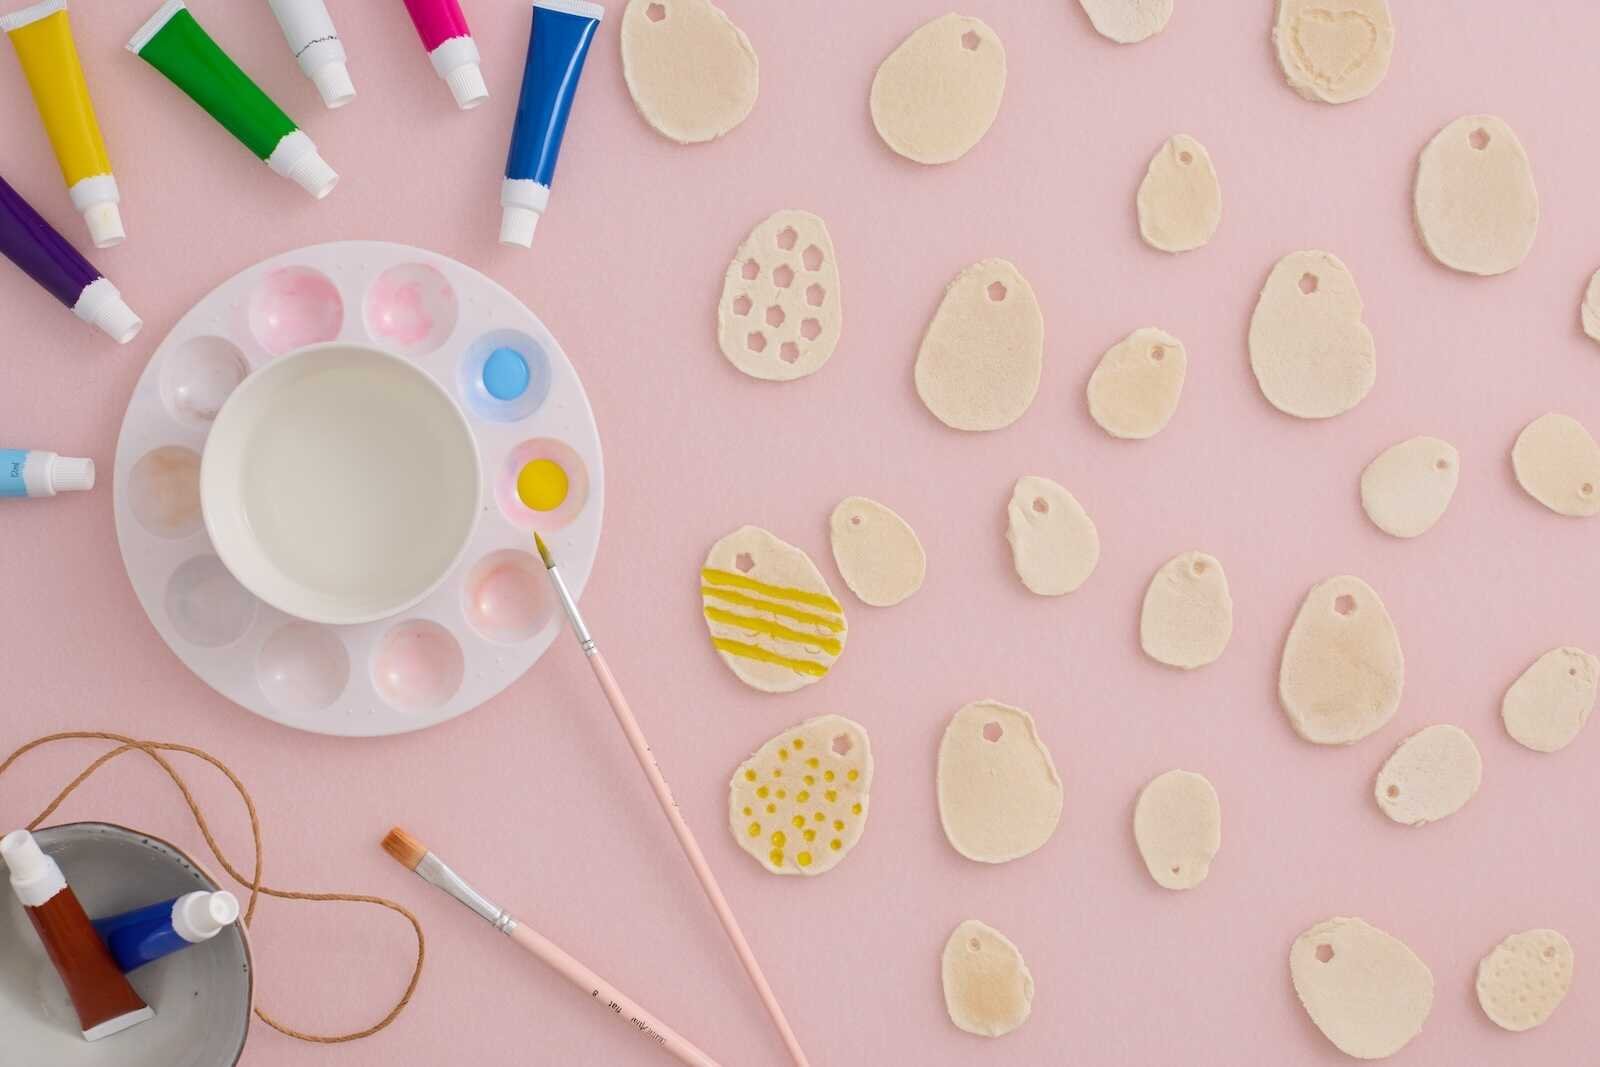
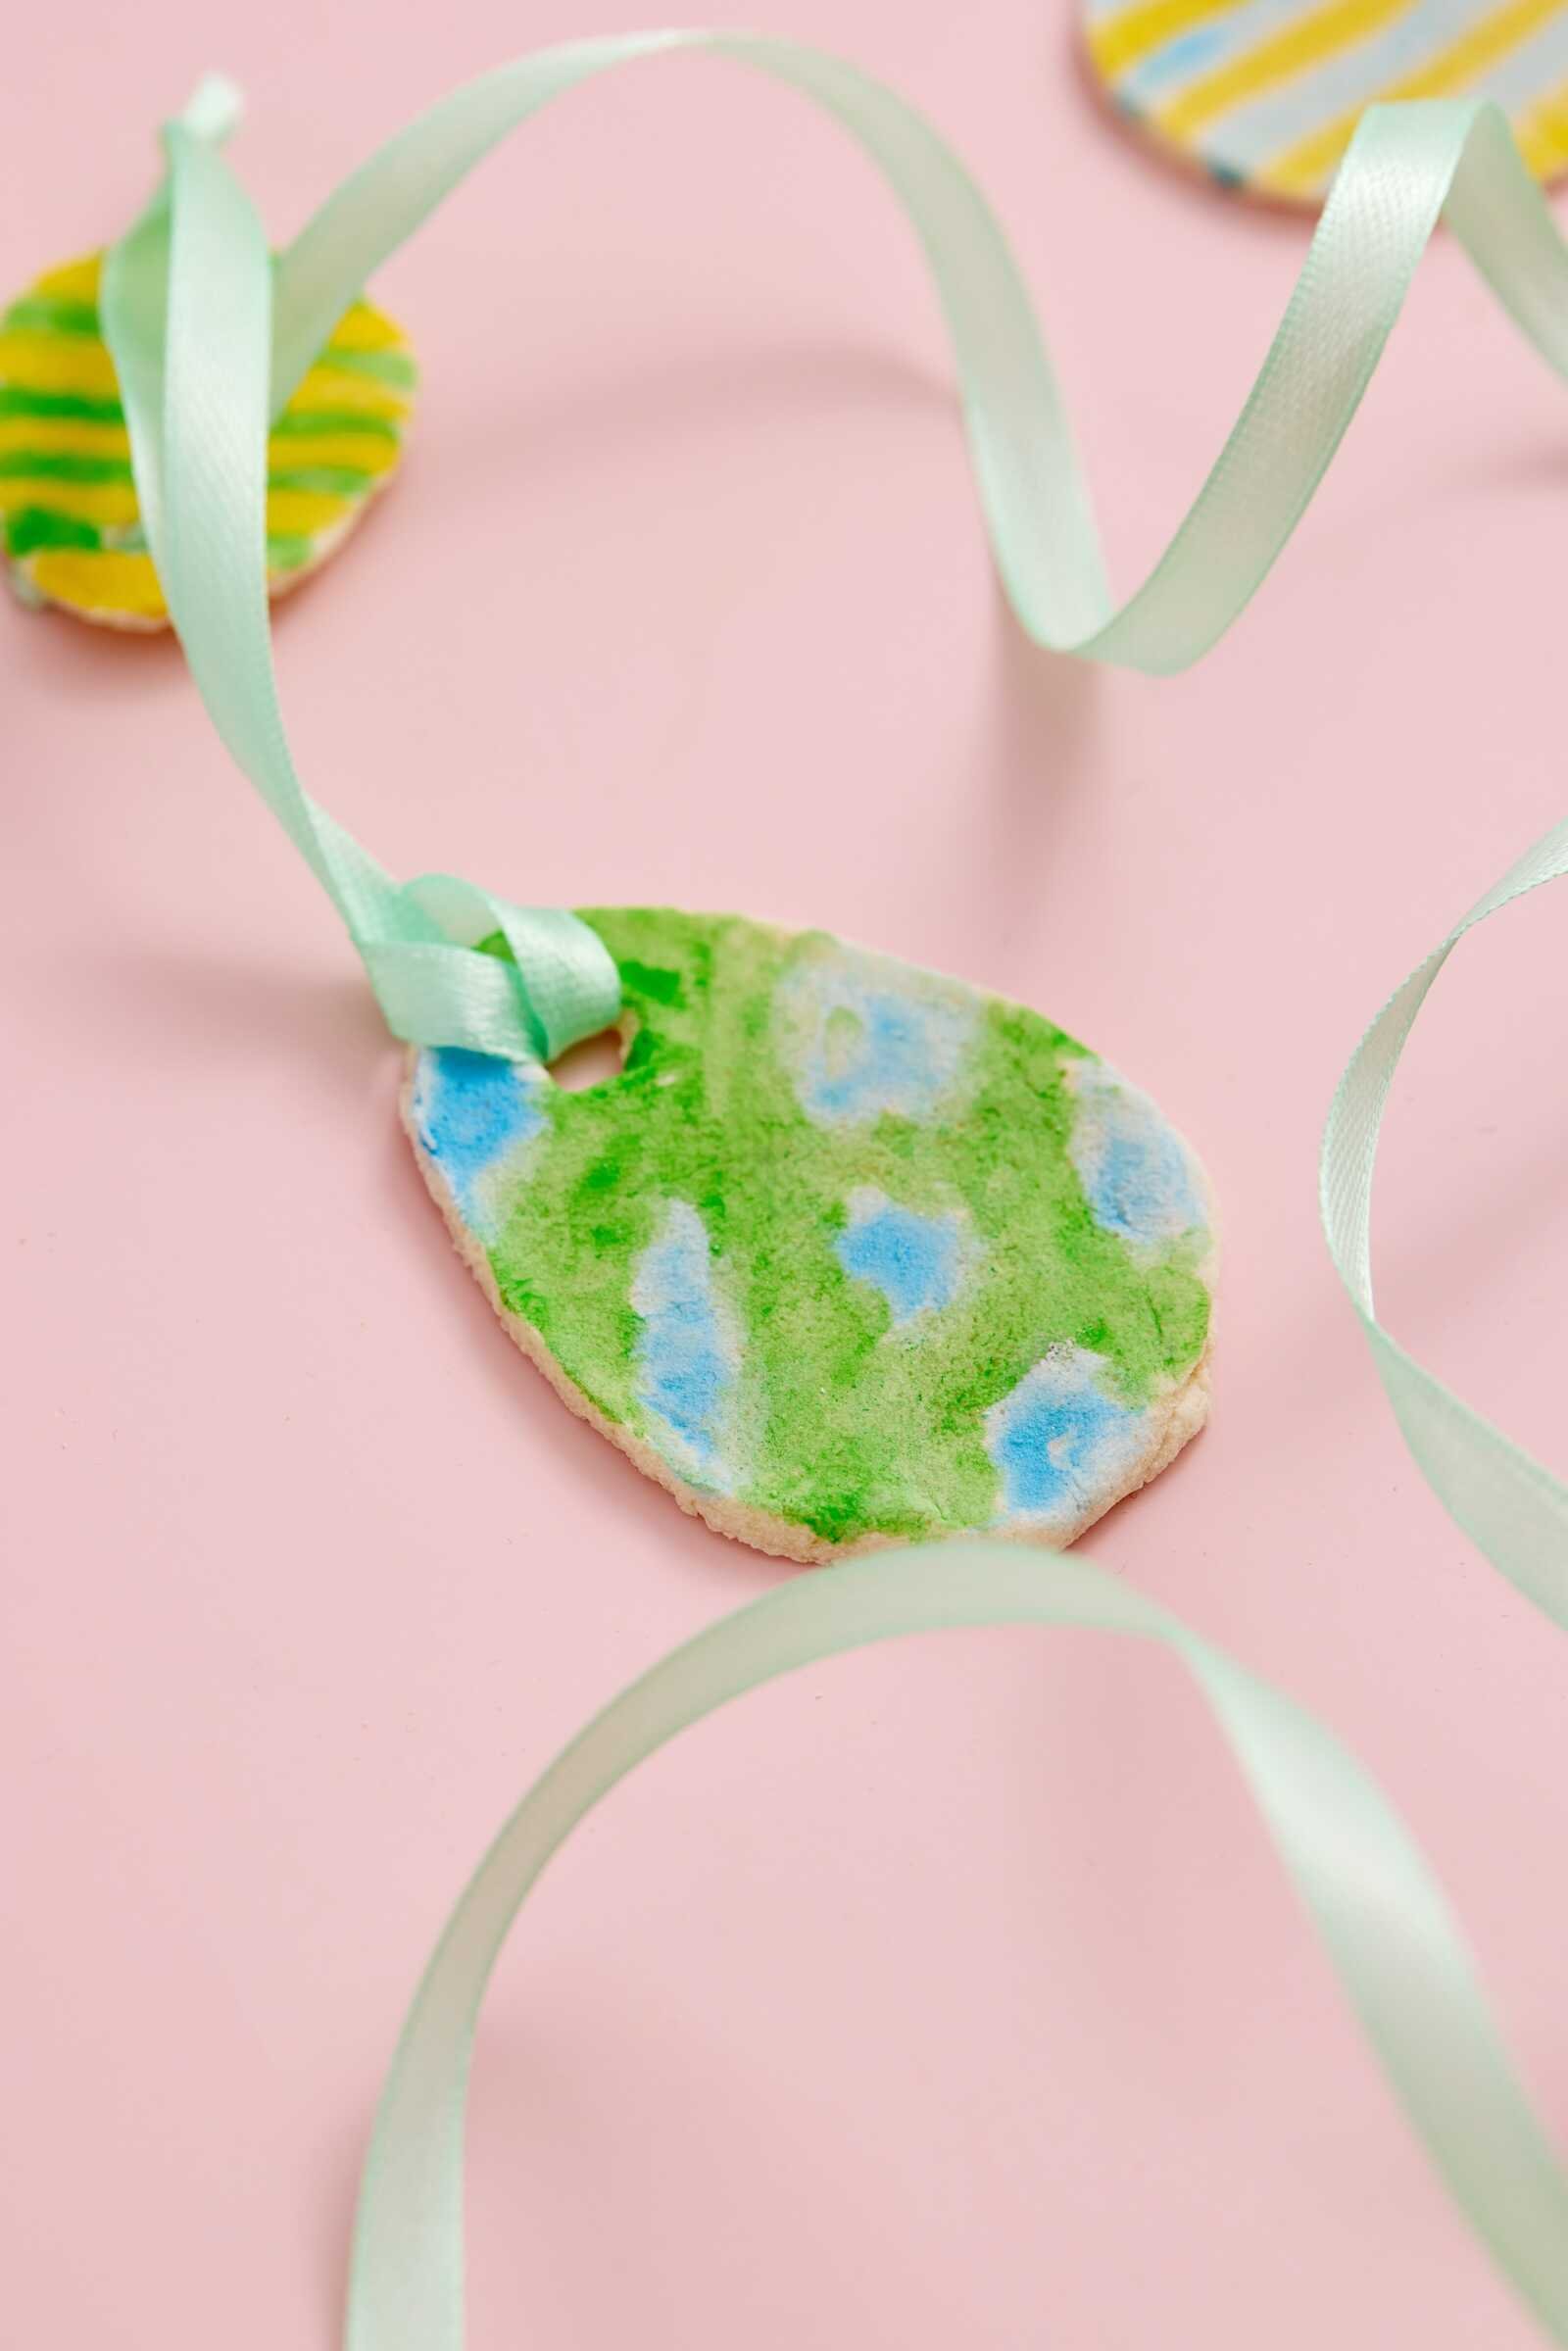
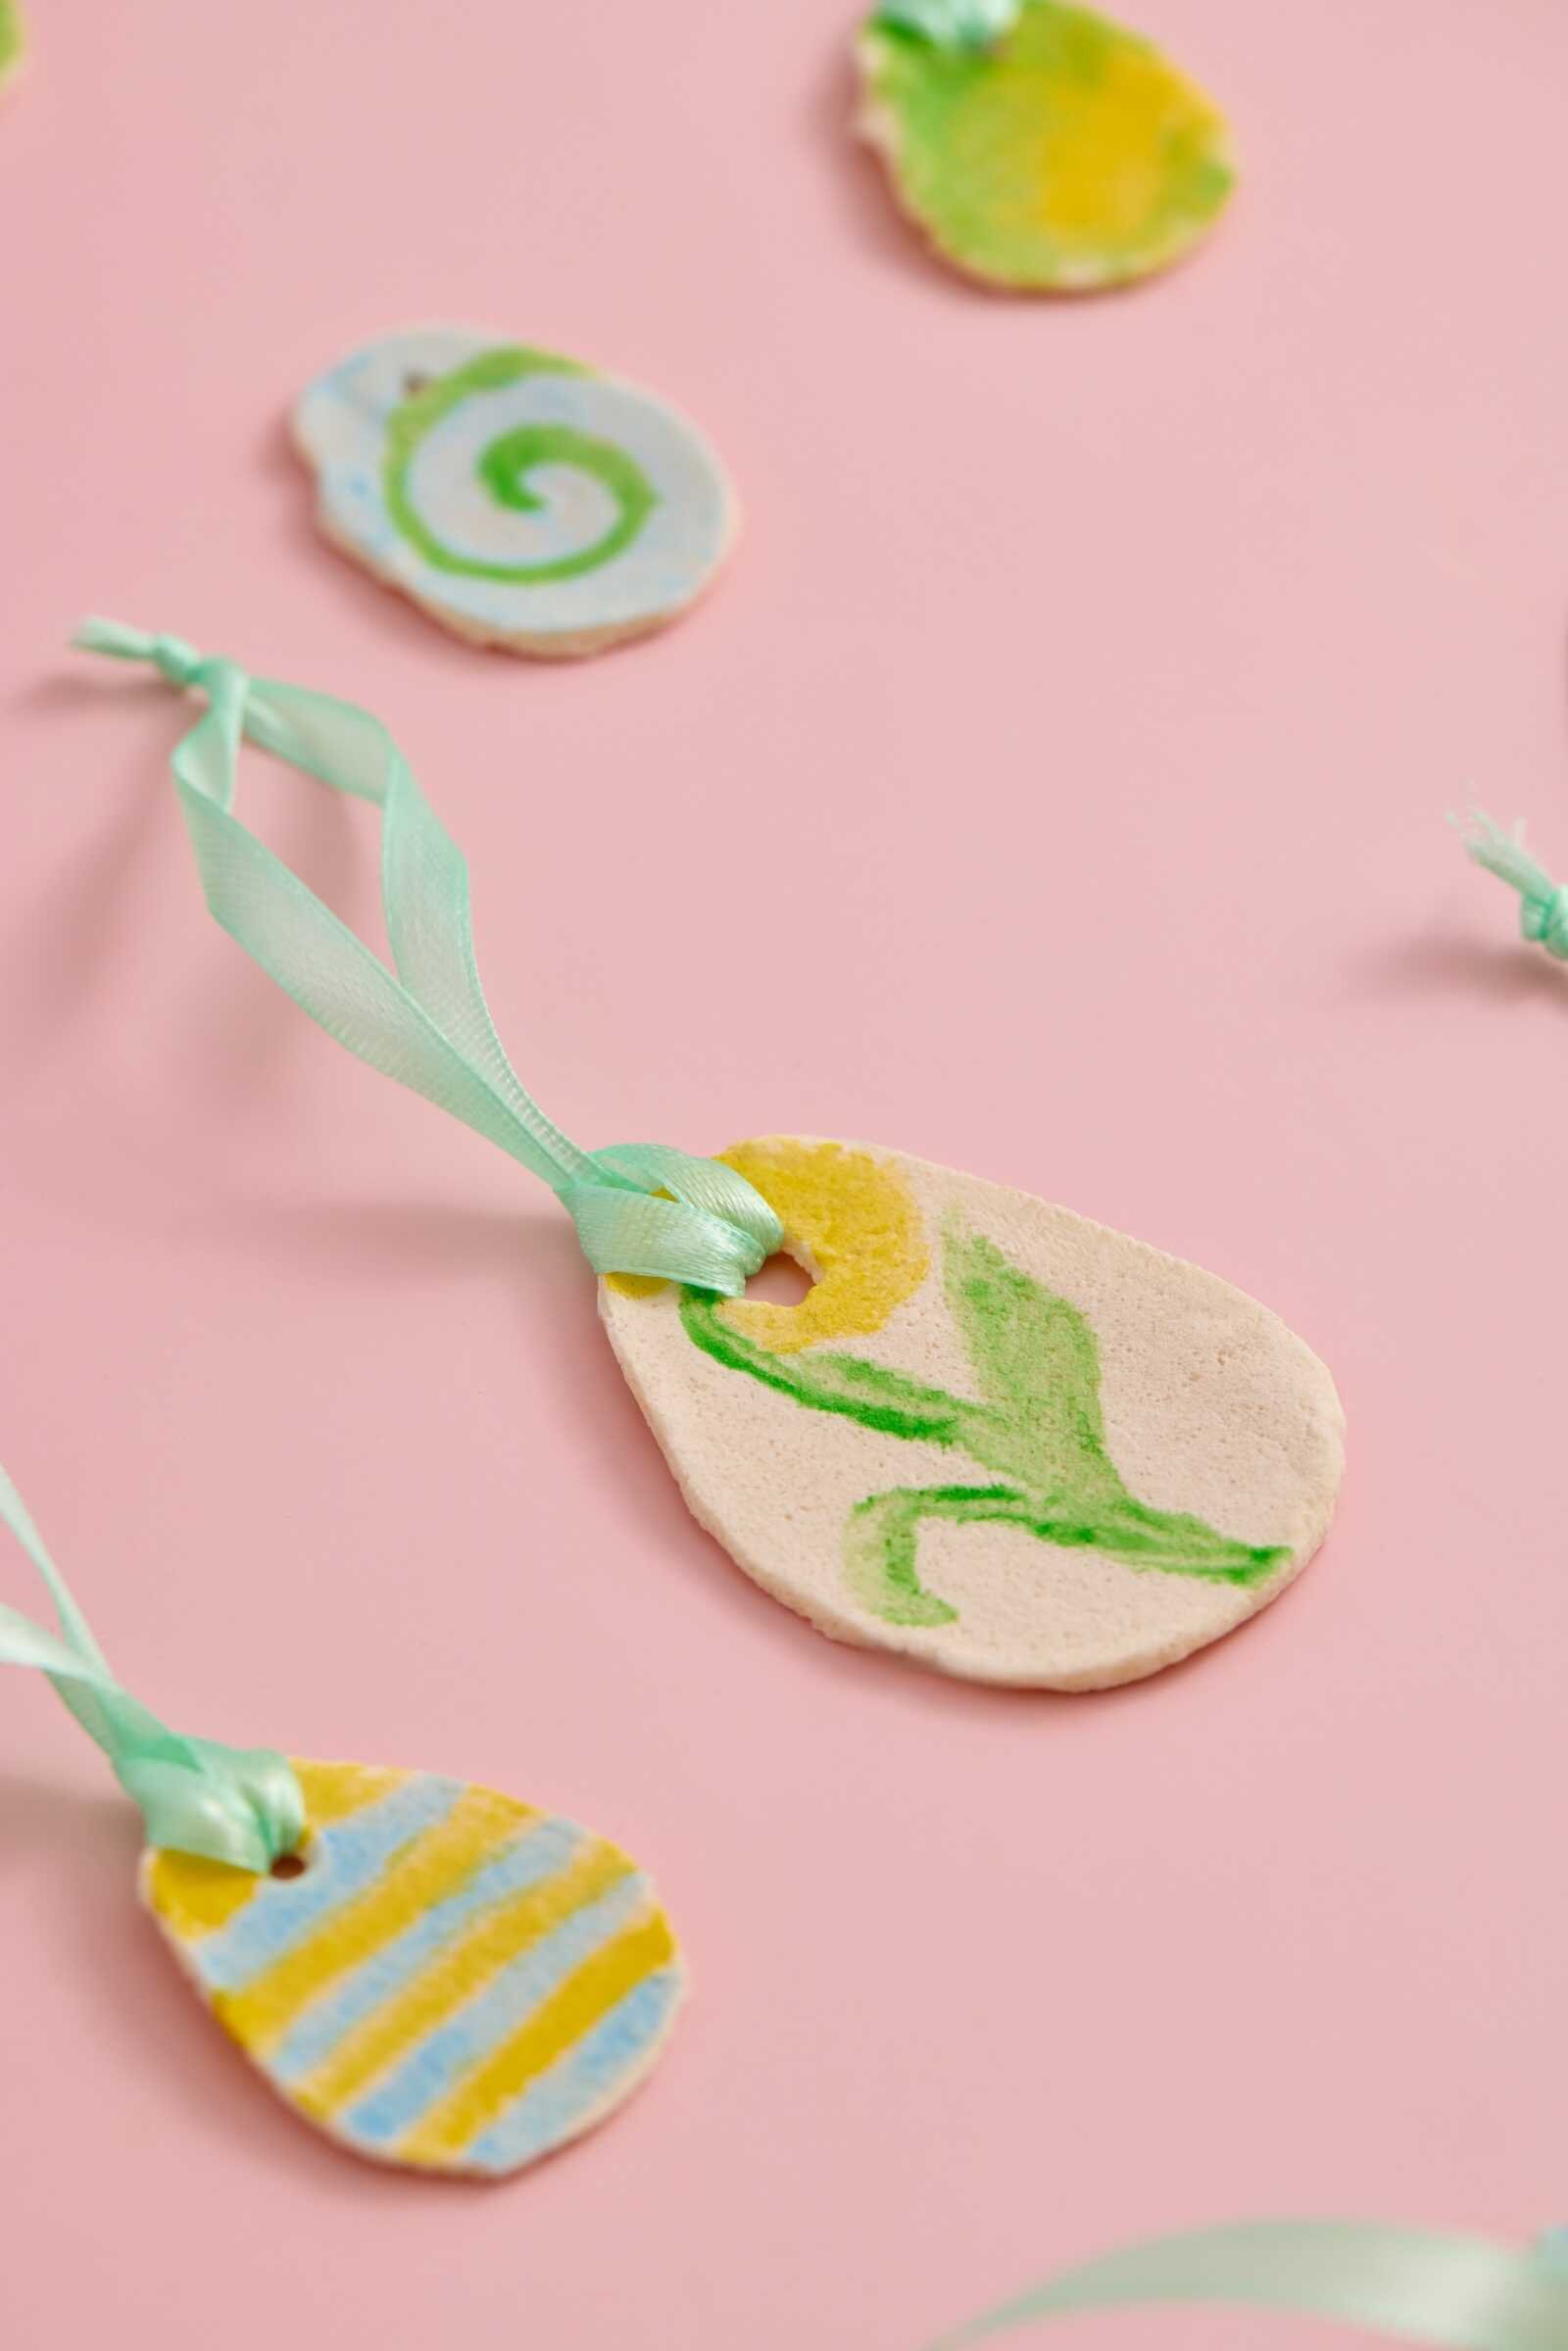
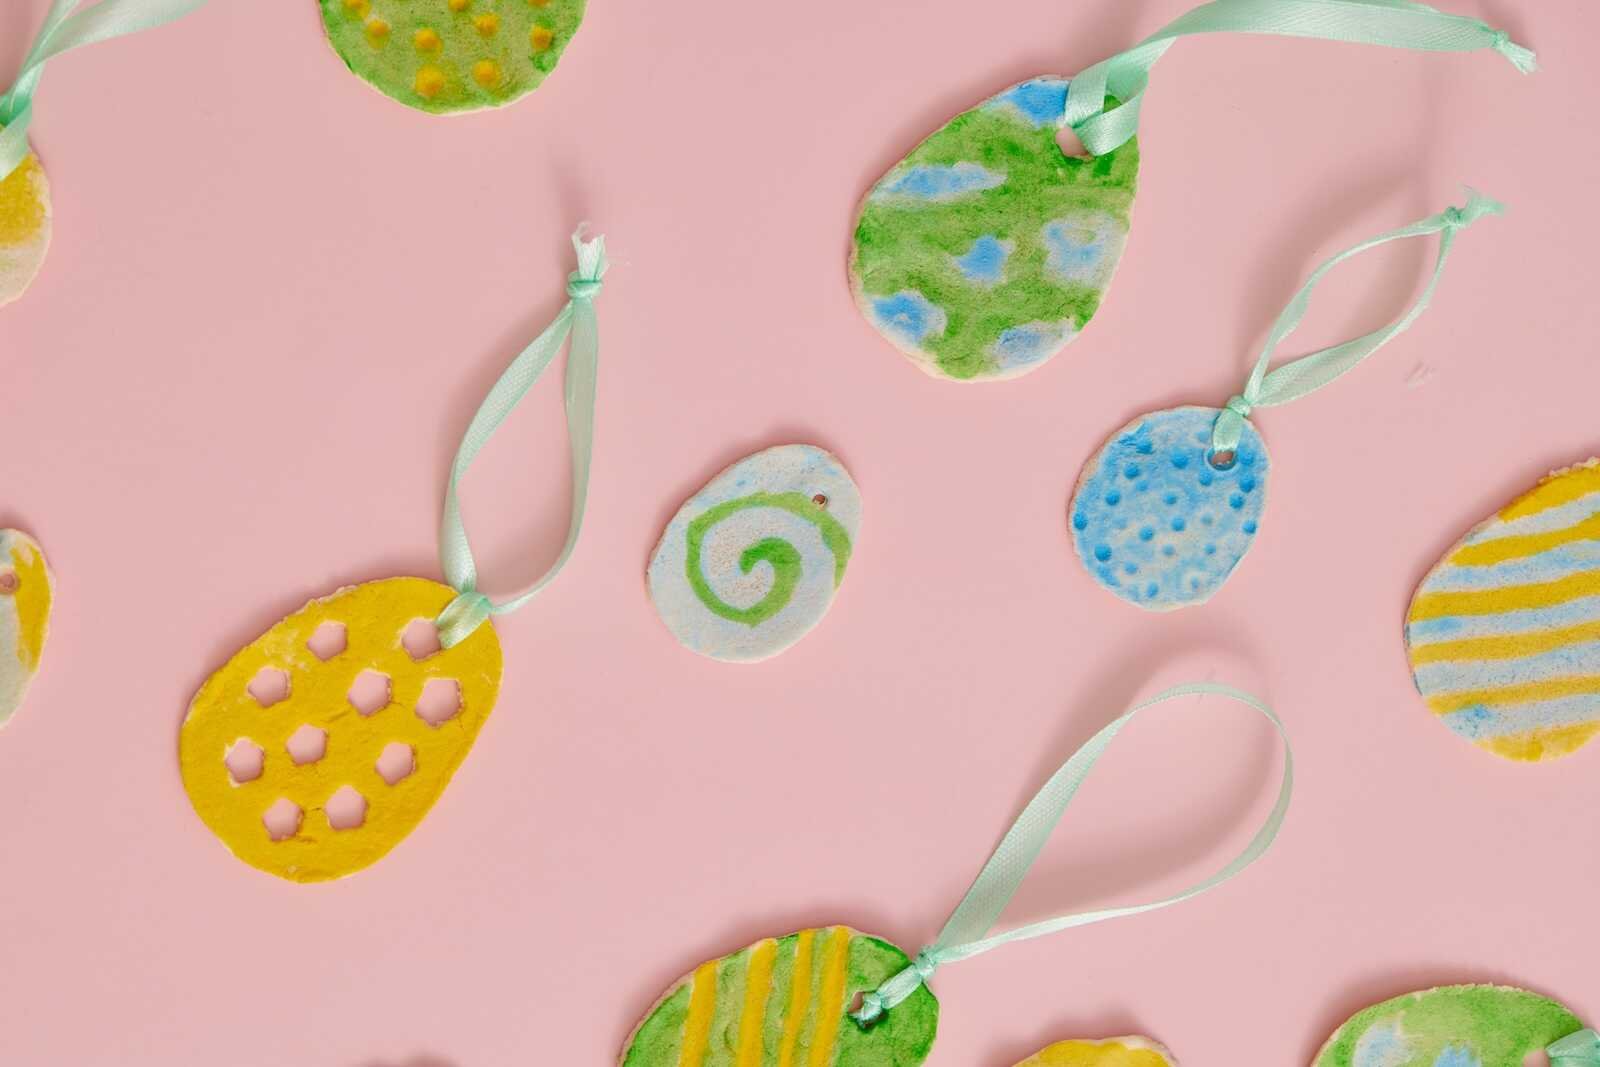
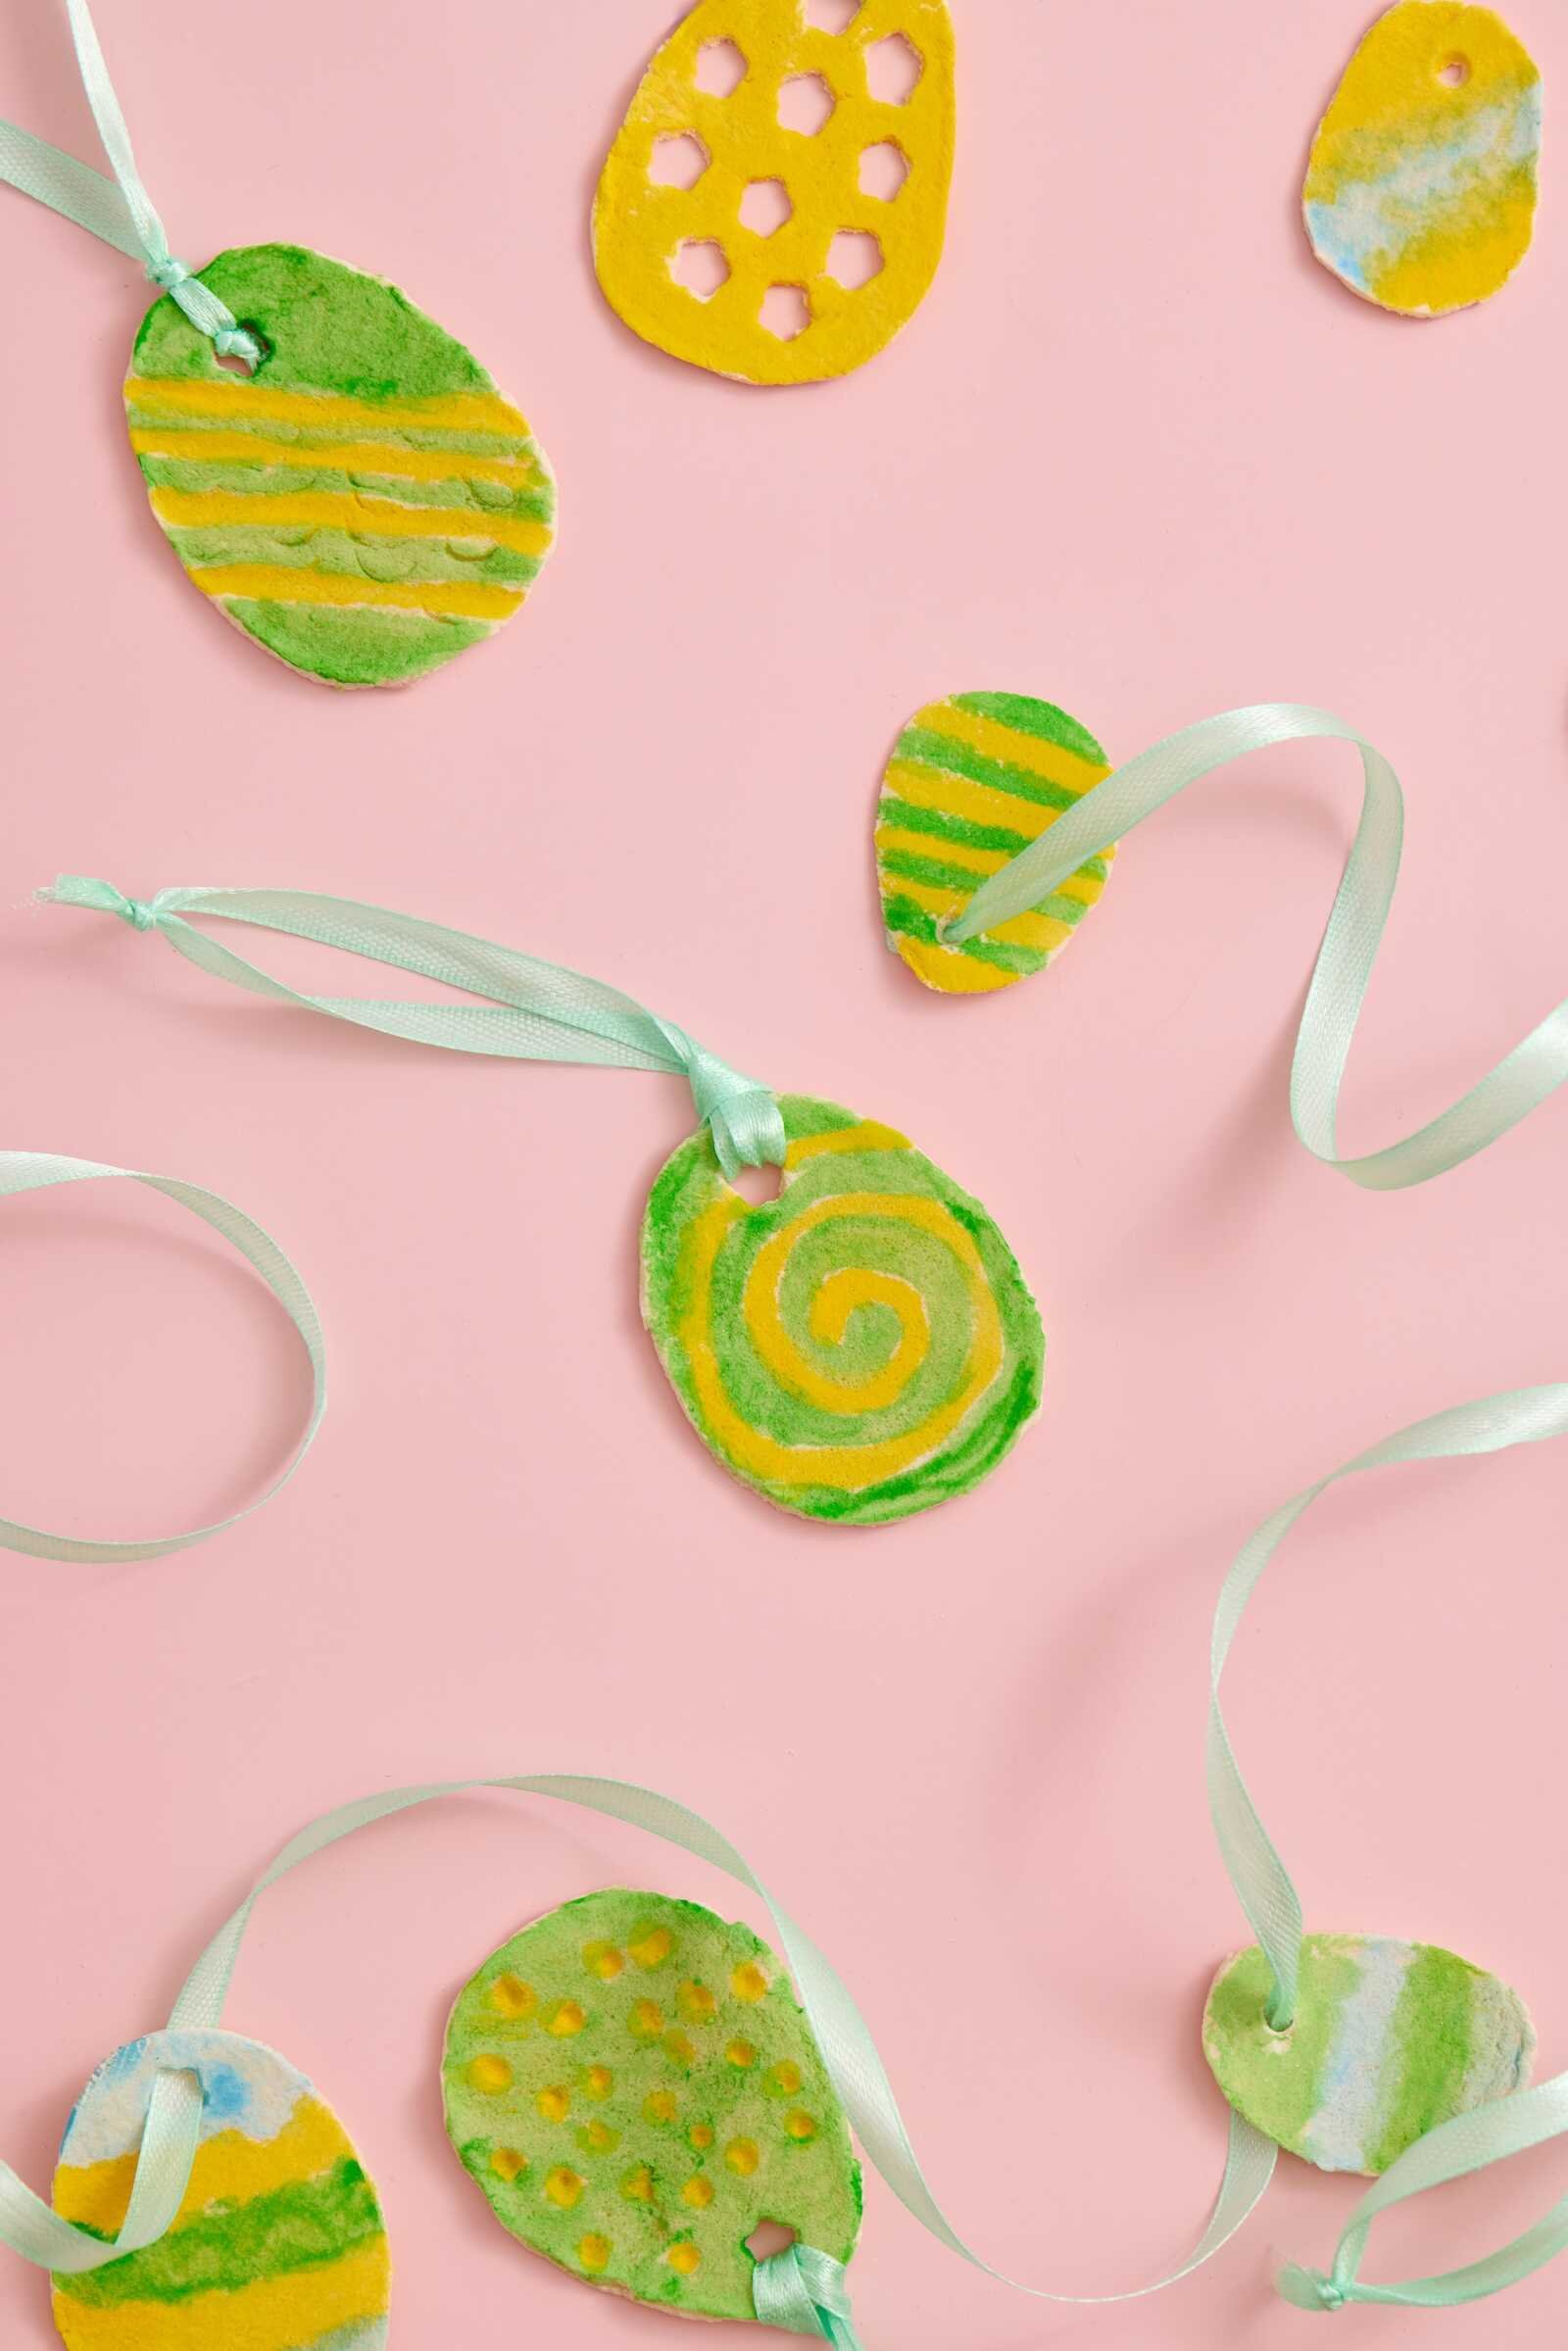
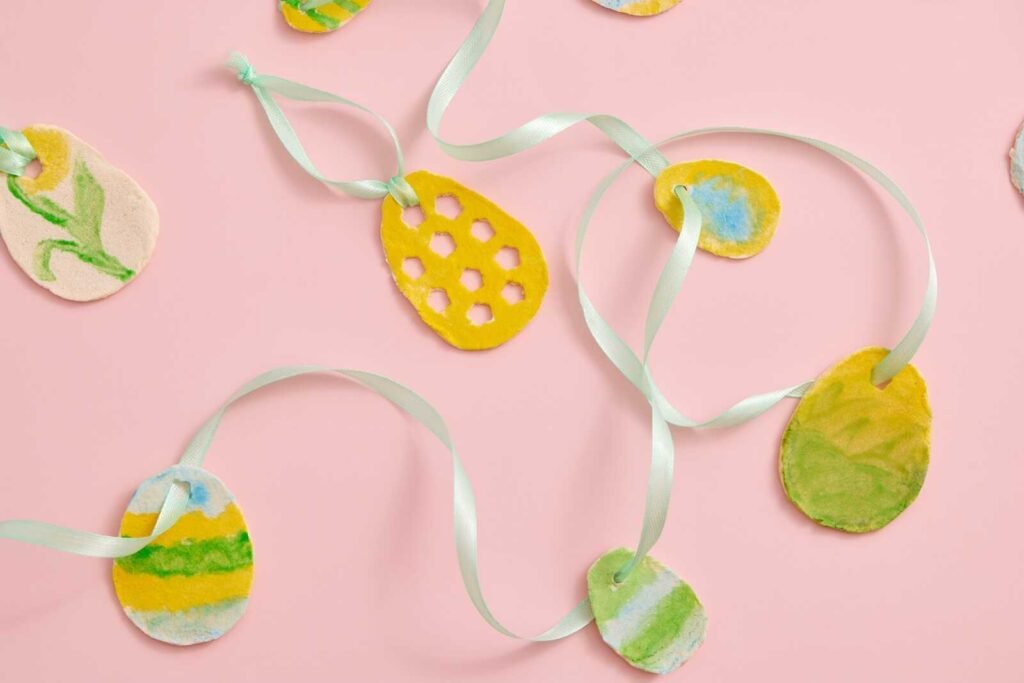
Step 6: Decorating the Salt Dough Easter Eggs
This is where creativity really shines. Once the eggs are fully dry, it’s time to paint and decorate them. Gouache or acrylic paints work best because they provide bright colors and good coverage. Pastel shades are especially popular for Easter decorations.
Some beautiful color choices include:
• Soft pink
• Baby blue
• Lavender
• Mint green
• Pale yellow
• Peach
You can decorate your eggs in many different ways.
Simple Painted Eggs
Paint each egg in a single pastel color for a minimalist look. This style works beautifully for Easter trees or garlands.
Polka Dot Easter Eggs
Use the end of a paintbrush to create small polka dots across the egg surface. This creates a playful and cheerful pattern.
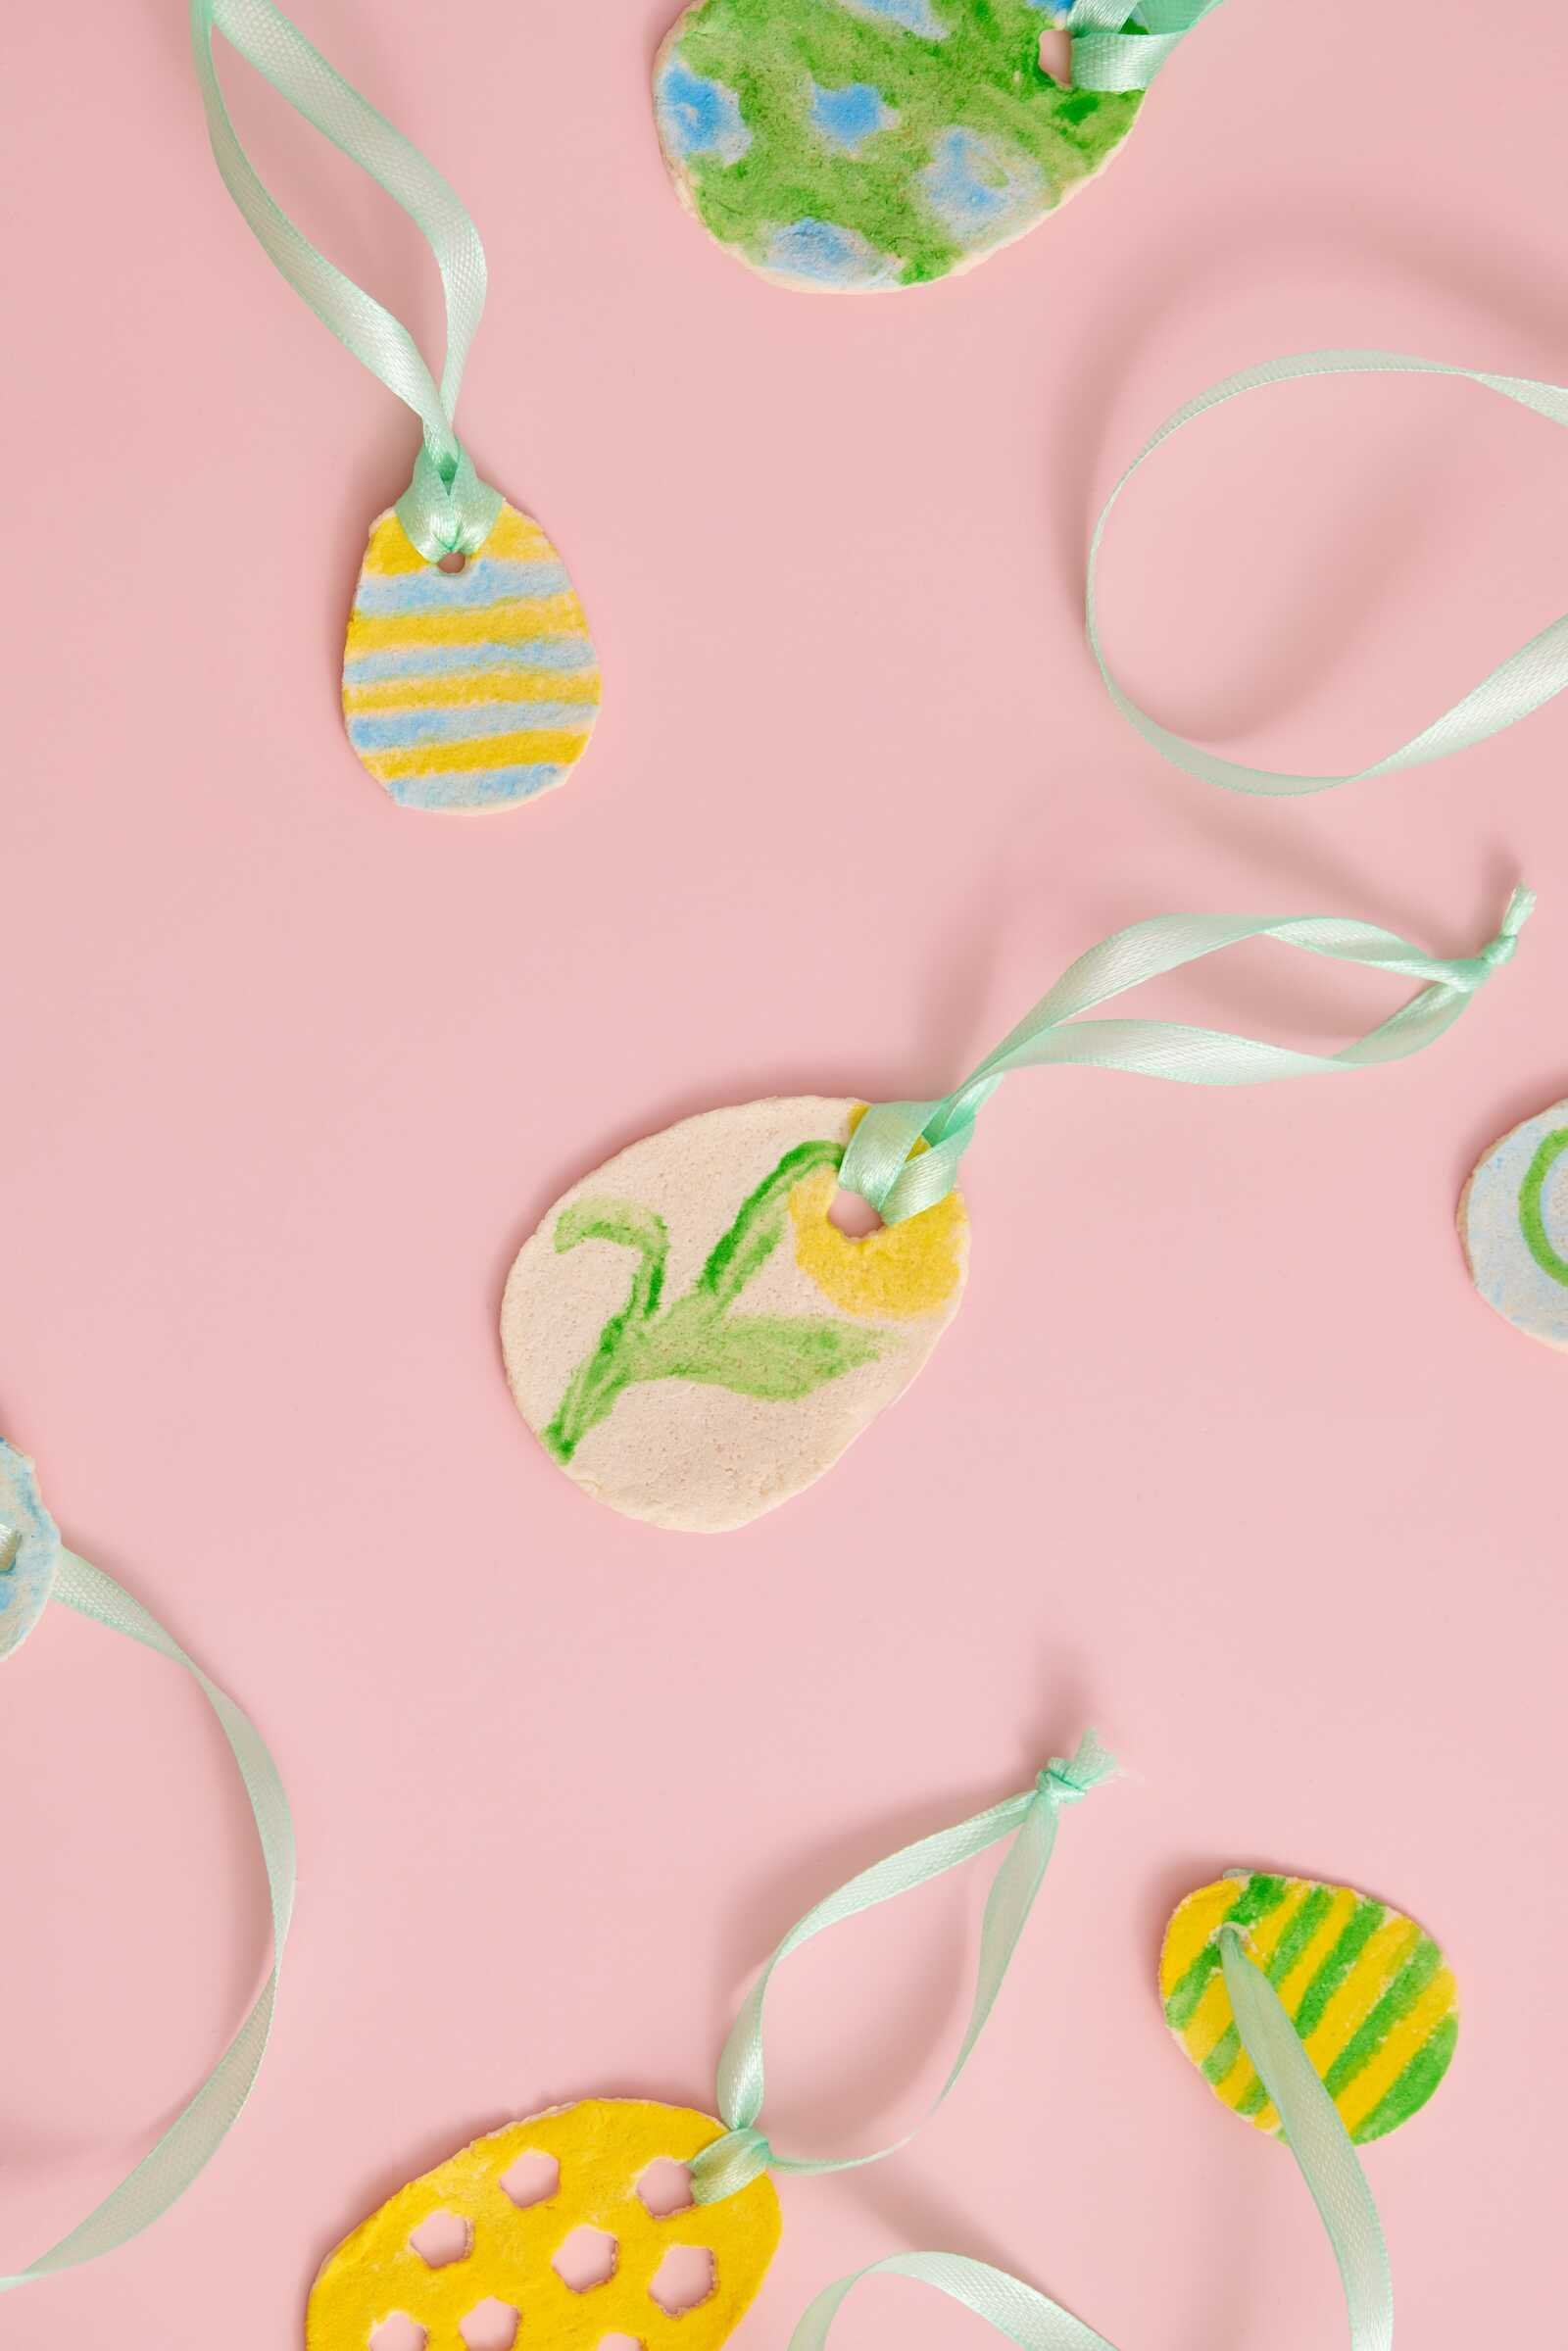
Floral Designs
Paint small flowers, leaves, and vines for a delicate spring design. This style works especially well on soft pastel backgrounds.
Abstract Patterns
Try stripes, zigzags, or color blocking to give your eggs a modern look. Kids especially love experimenting with bright patterns.

Optional Step: Seal the Eggs
To make your salt dough eggs more durable, you can seal them with a clear varnish.
Acrylic sealant or craft varnish will:
• Protect the paint
• Add a slight shine
• Help preserve the ornament for years
This step is optional but recommended if you plan to reuse the eggs every Easter.
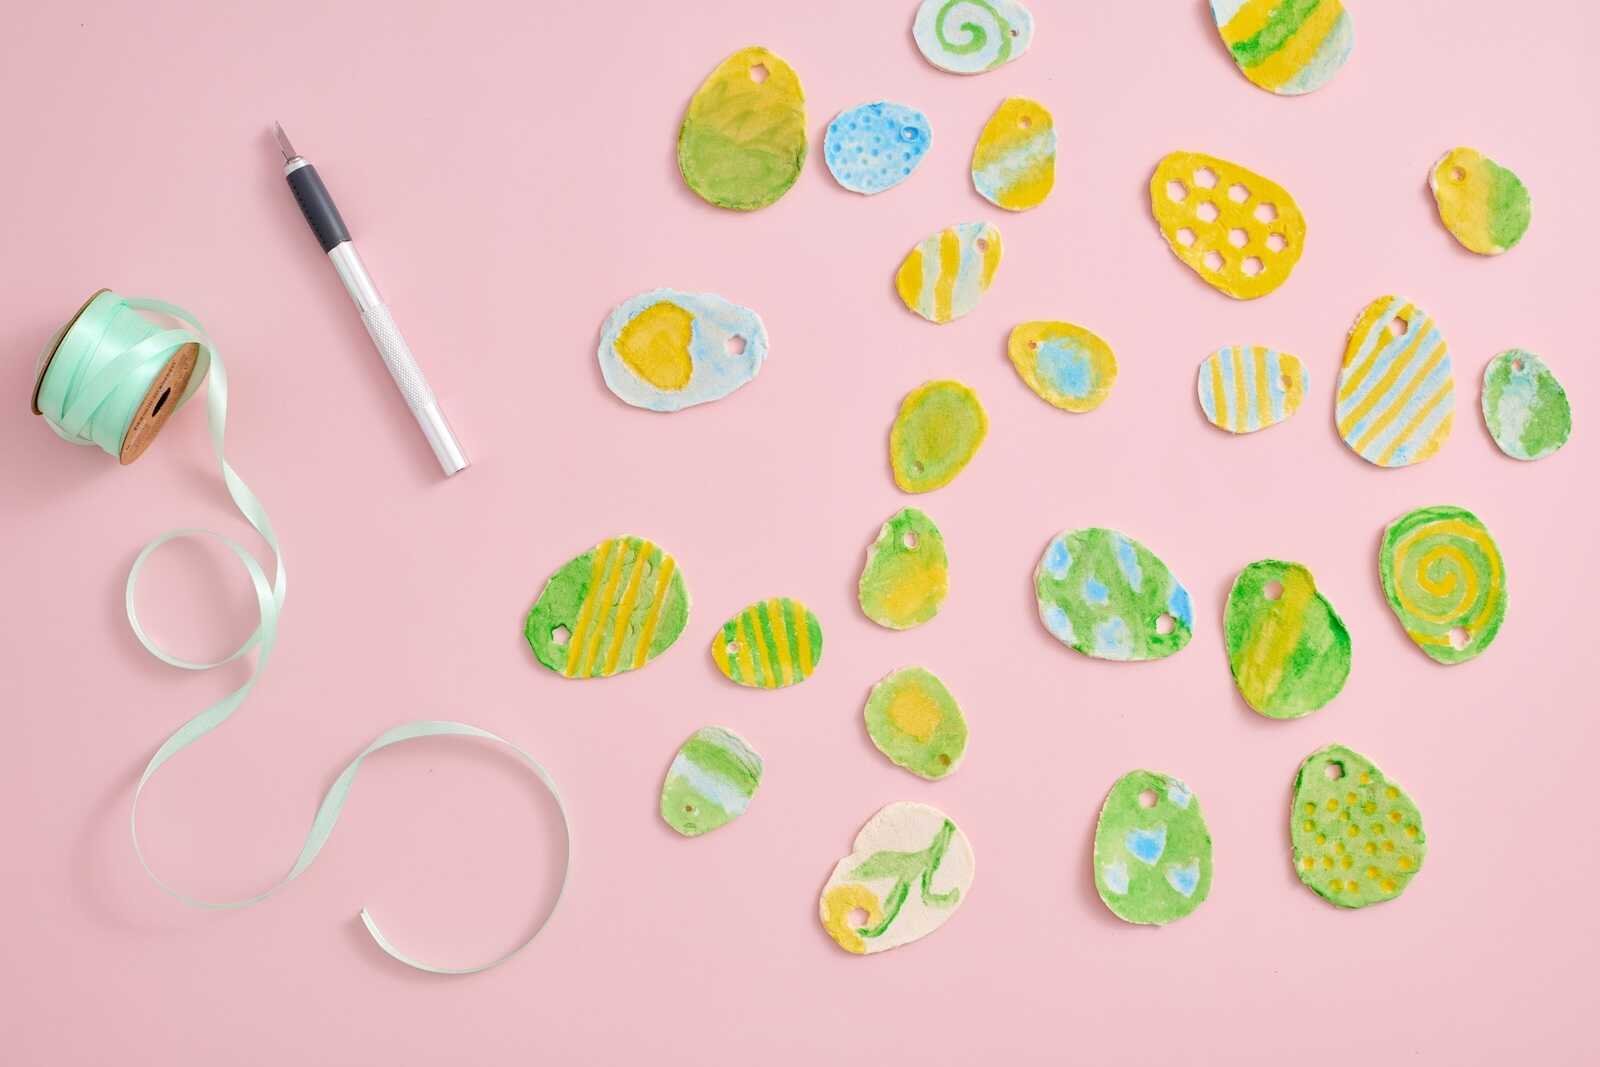
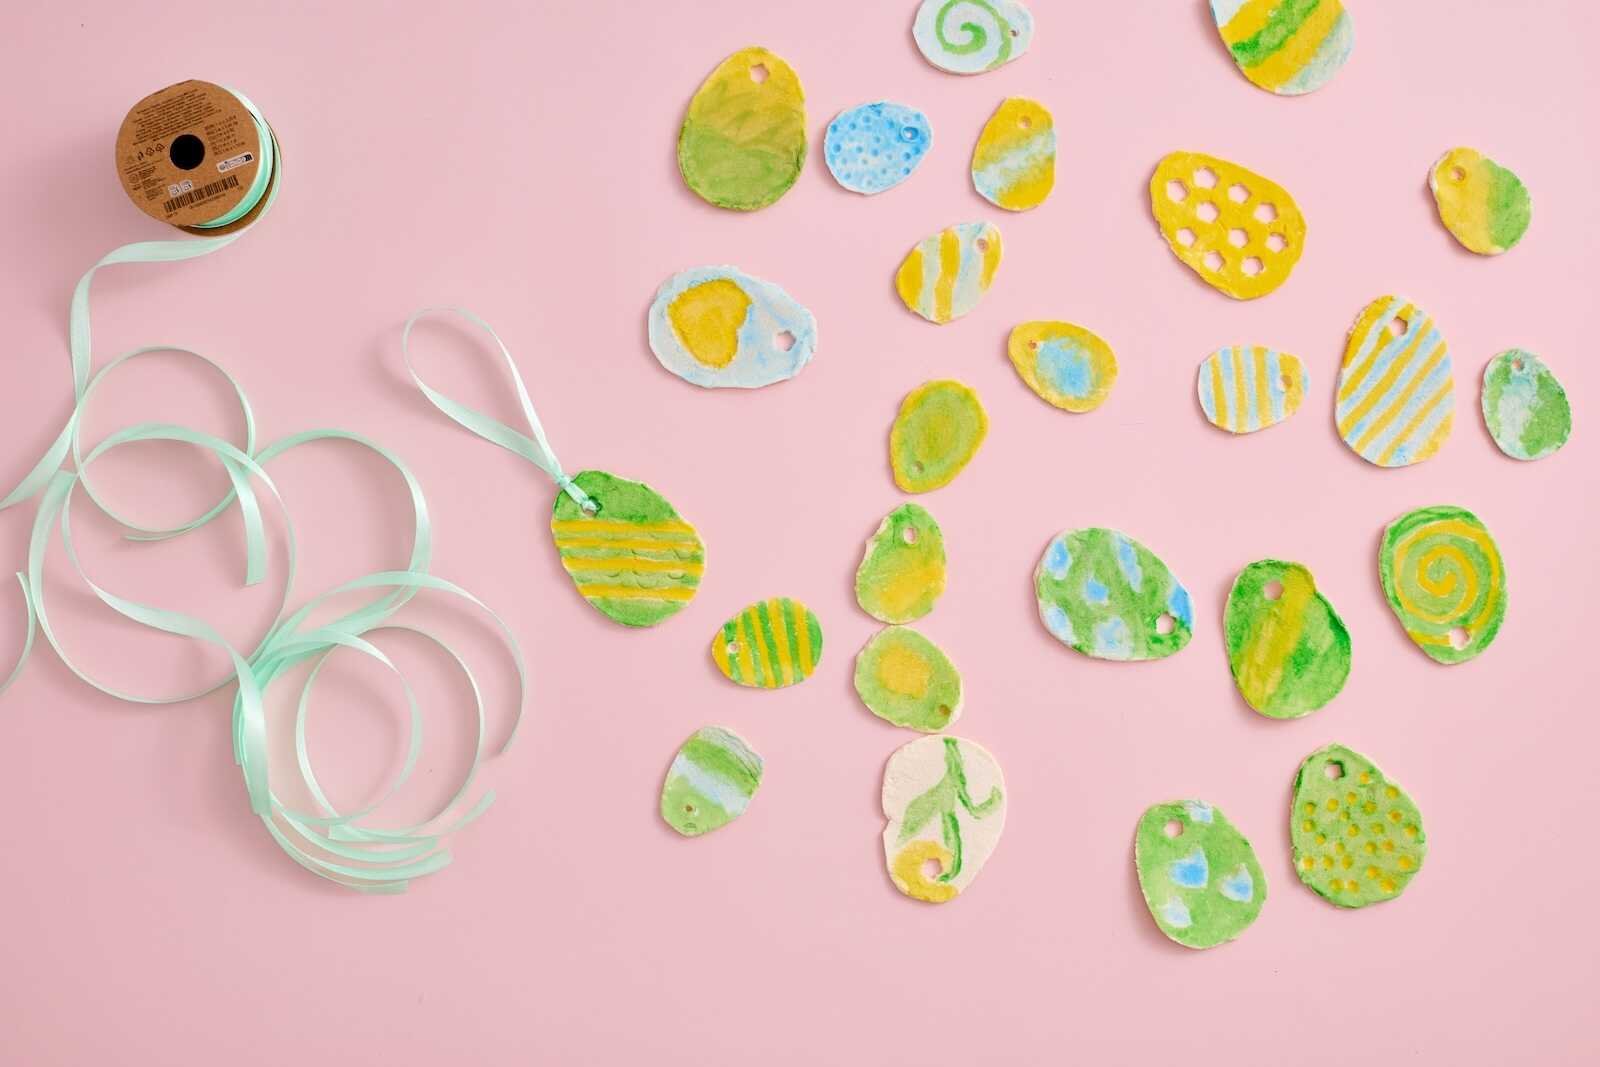
Step 7: Add the Ribbon
The final step is adding a ribbon so your eggs can be hung as decorations. Cut a small piece of ribbon and thread it through the hole at the top of the egg. Tie the ends into a knot or small bow. Now your salt dough Easter egg is ready to hang beautifully.
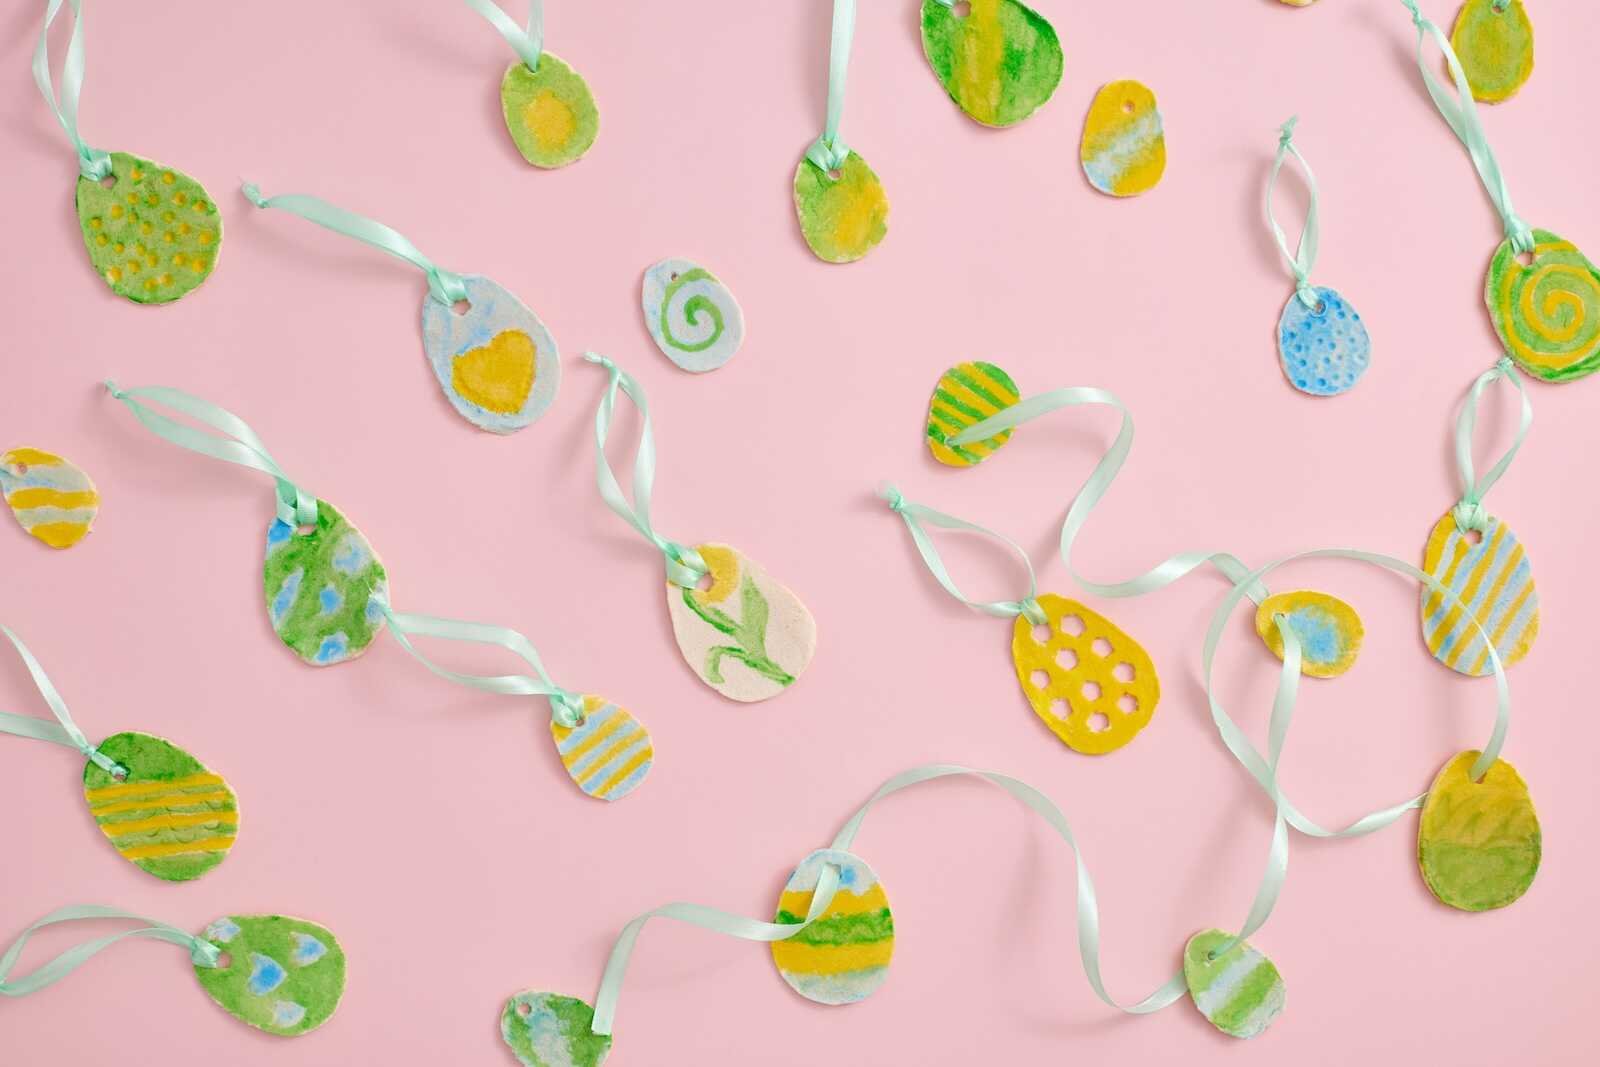
Creative Ways to Use Salt Dough Easter Eggs
Once you’ve made your eggs, there are so many fun ways to display them.
Easter Tree Decorations
Many families decorate small branches with hanging ornaments for Easter. Salt dough eggs make perfect Easter tree decorations. Simply hang them from twigs placed in a vase.
Easter Basket Decorations
Attach the eggs to the outside of Easter baskets using ribbon. This adds a personalized handmade touch.
Gift Tags
Write a name on the back of the egg and use it as a gift tag for Easter presents. It doubles as a keepsake ornament.
Easter Garland
Thread several eggs onto a string to create a festive Easter garland. Hang it across a mantel, window, or wall.
Classroom Craft
Salt dough eggs are also perfect for:
• School activities
• Preschool crafts
• Sunday school projects
Teachers love this craft because it’s easy and inexpensive.
Tips for Perfect Salt Dough Eggs
To get the best results, keep these tips in mind.
- Use fine salt instead of coarse salt for smoother dough.
- Roll evenly so all eggs dry at the same speed.
- Avoid thick shapes because they take longer to dry.
- Make holes large enough for ribbon before drying.
- Let them dry completely before painting.
These small details make a big difference in the final result.
Making Salt Dough Eggs a Family Tradition
One of the most special things about salt dough crafts is how they turn into family traditions.
Each year, kids can create new designs and add them to the collection.
Some families even:
• Write the year on the back
• Add children’s names
• Save them in a keepsake box
Over time, these simple crafts become treasured holiday memories.
Why Kids Love This Easter Craft
Salt dough Easter eggs are especially popular with kids because they combine multiple fun activities.
Children get to:
• Mix the dough
• Roll and cut shapes
• Add textures
• Paint colorful designs
• Hang their creations
It’s a great way to encourage creativity while also spending quality time together.
Final Thoughts
Making salt dough Easter eggs is a simple, affordable, and meaningful way to celebrate Easter traditions. With just flour, salt, and water, you can create beautiful handmade ornaments that bring color and creativity into your home.
Whether you’re crafting with kids, decorating for Easter brunch, or making handmade gifts, these charming ornaments are sure to become a favorite tradition.
The best part is that every egg is unique—just like the memories you create while making them. So gather your supplies, roll out the dough, and start crafting your own DIY salt dough Easter eggs this spring.


2 Comments