How to DIY Marbled Easter Eggs Using Oil: A Fun Easter Tradition!
Dyeing eggs for Easter is one of those simple traditions that families keep coming back to year after year. What started long ago as a symbol of new life has turned into a fun, colorful activity that kids and parents can enjoy together. These days, it’s less about doing things “the traditional way” and more about making memories—whether that means using bright dyes, trying creative techniques like marbling, or just embracing the mess at the kitchen table. It’s an easy, hands-on way to slow down, get a little crafty, and celebrate the season together.
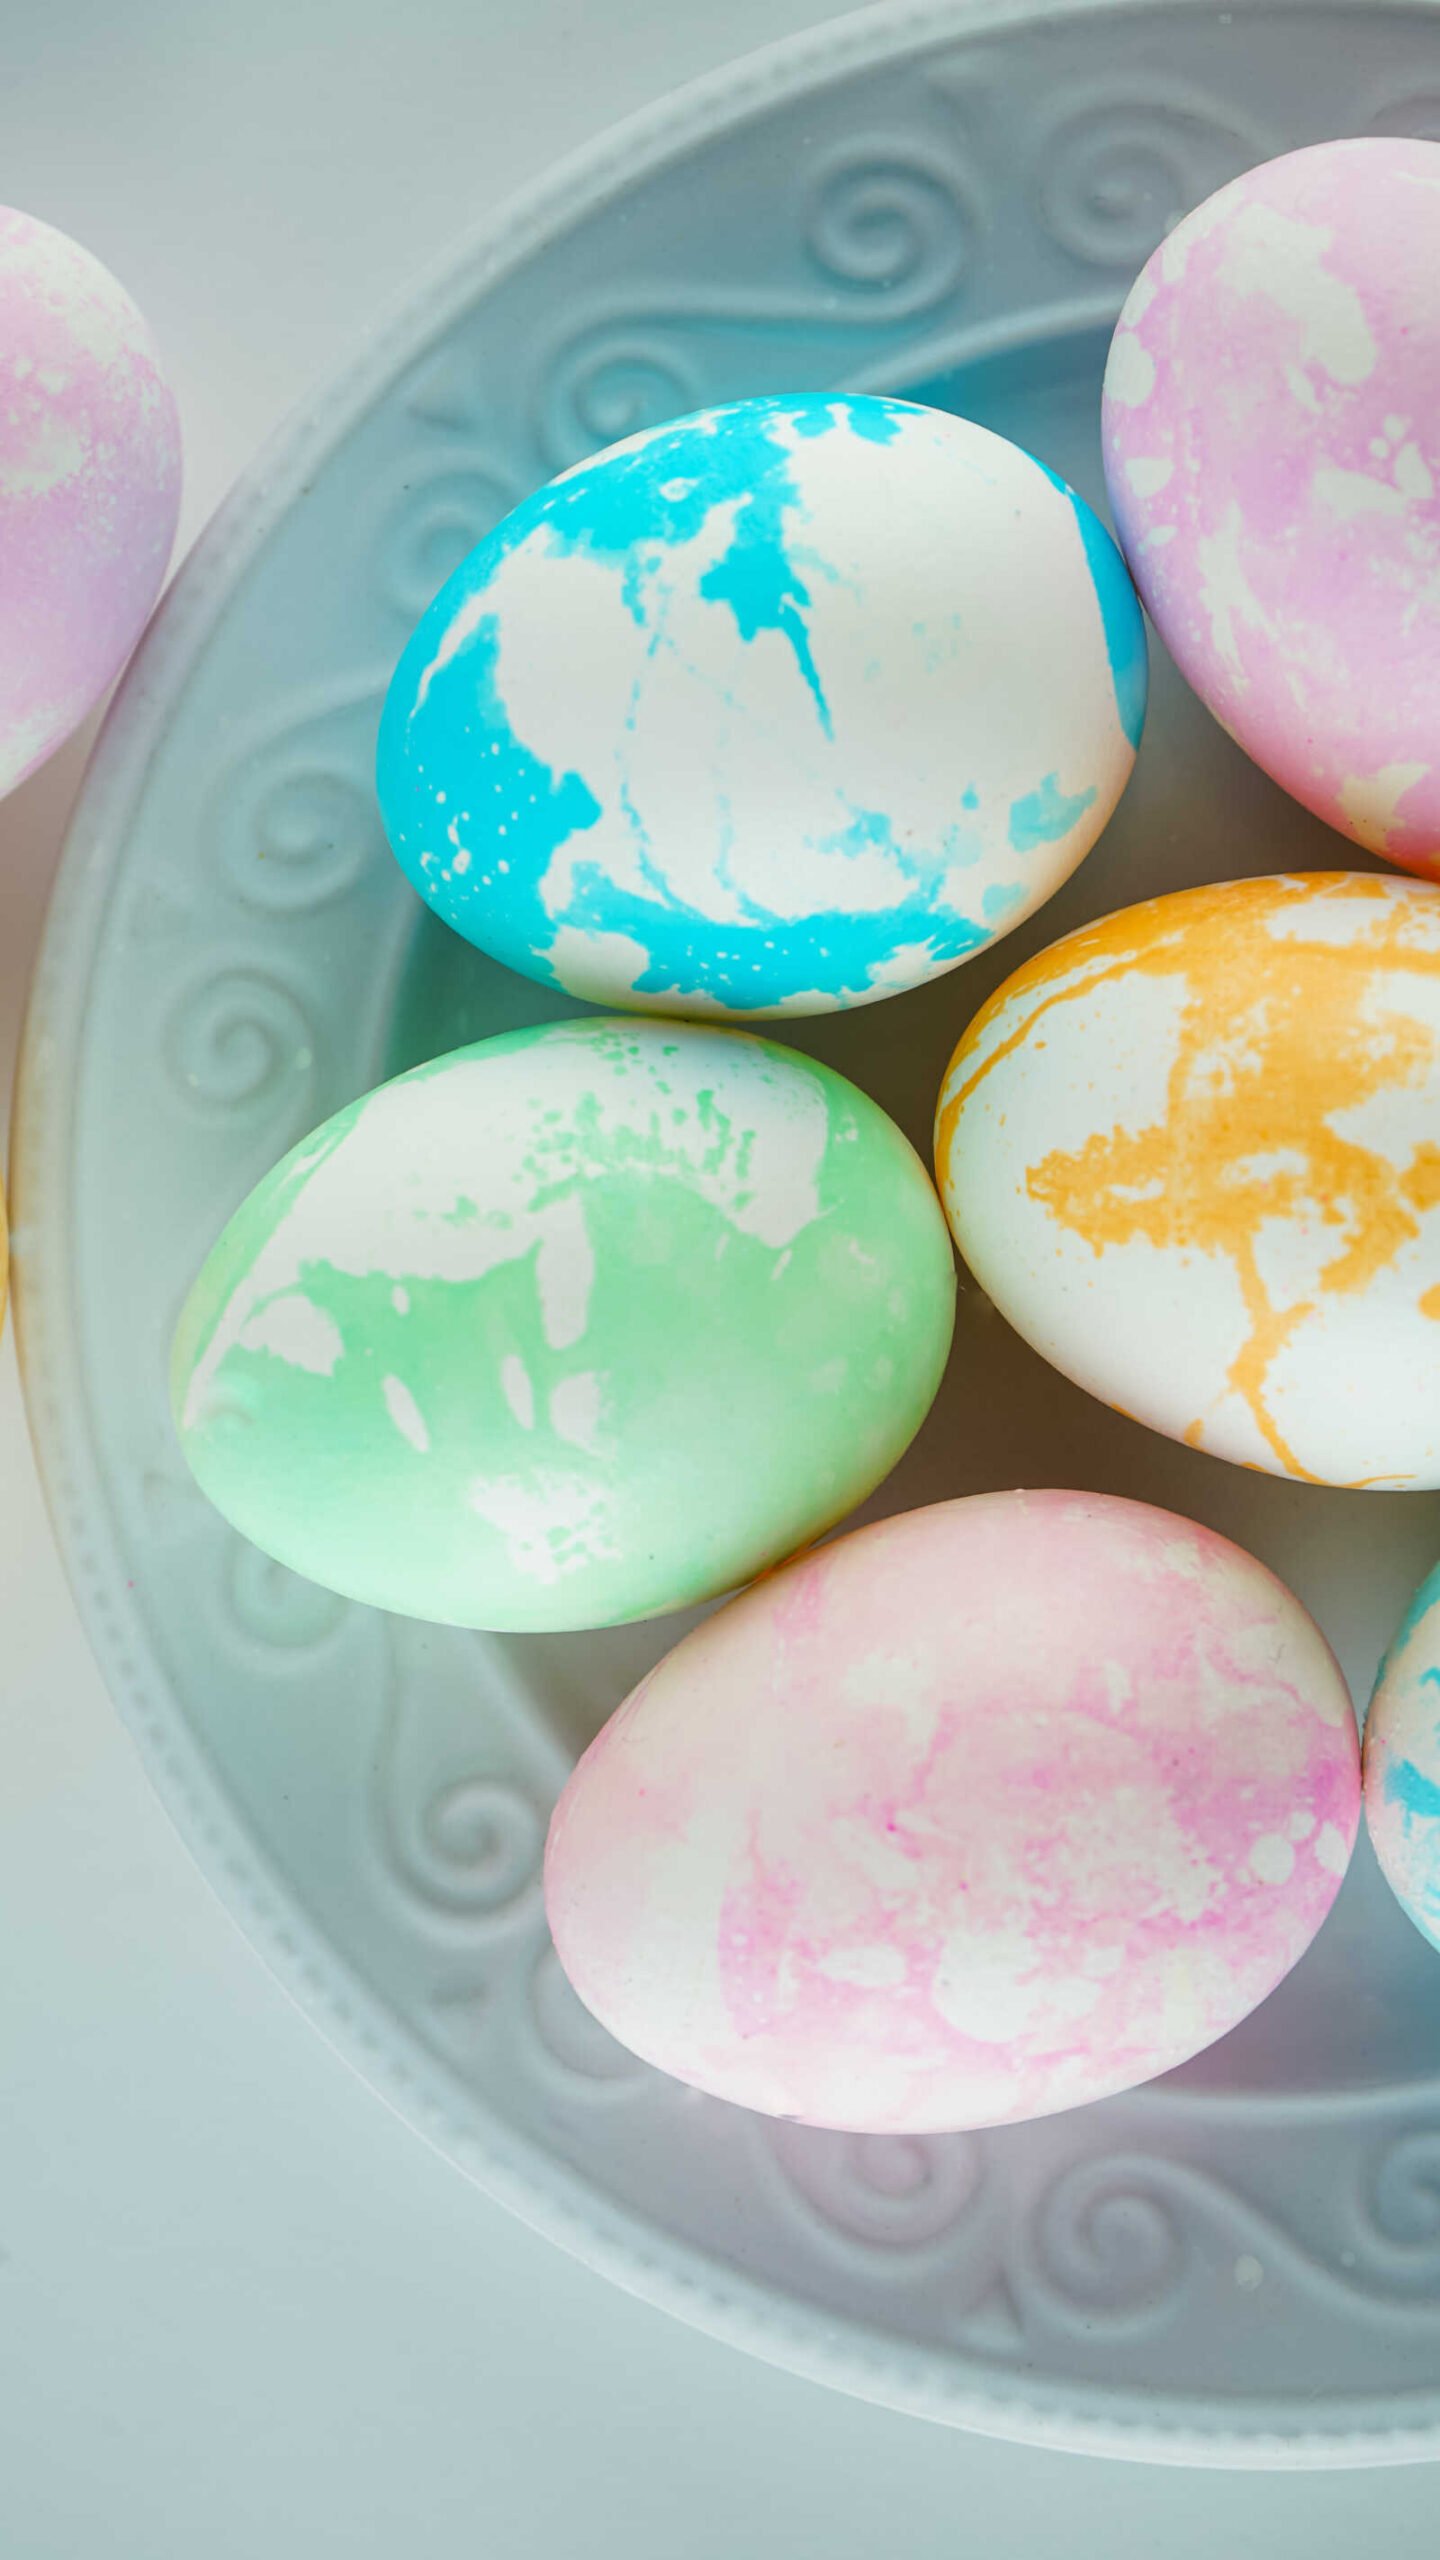
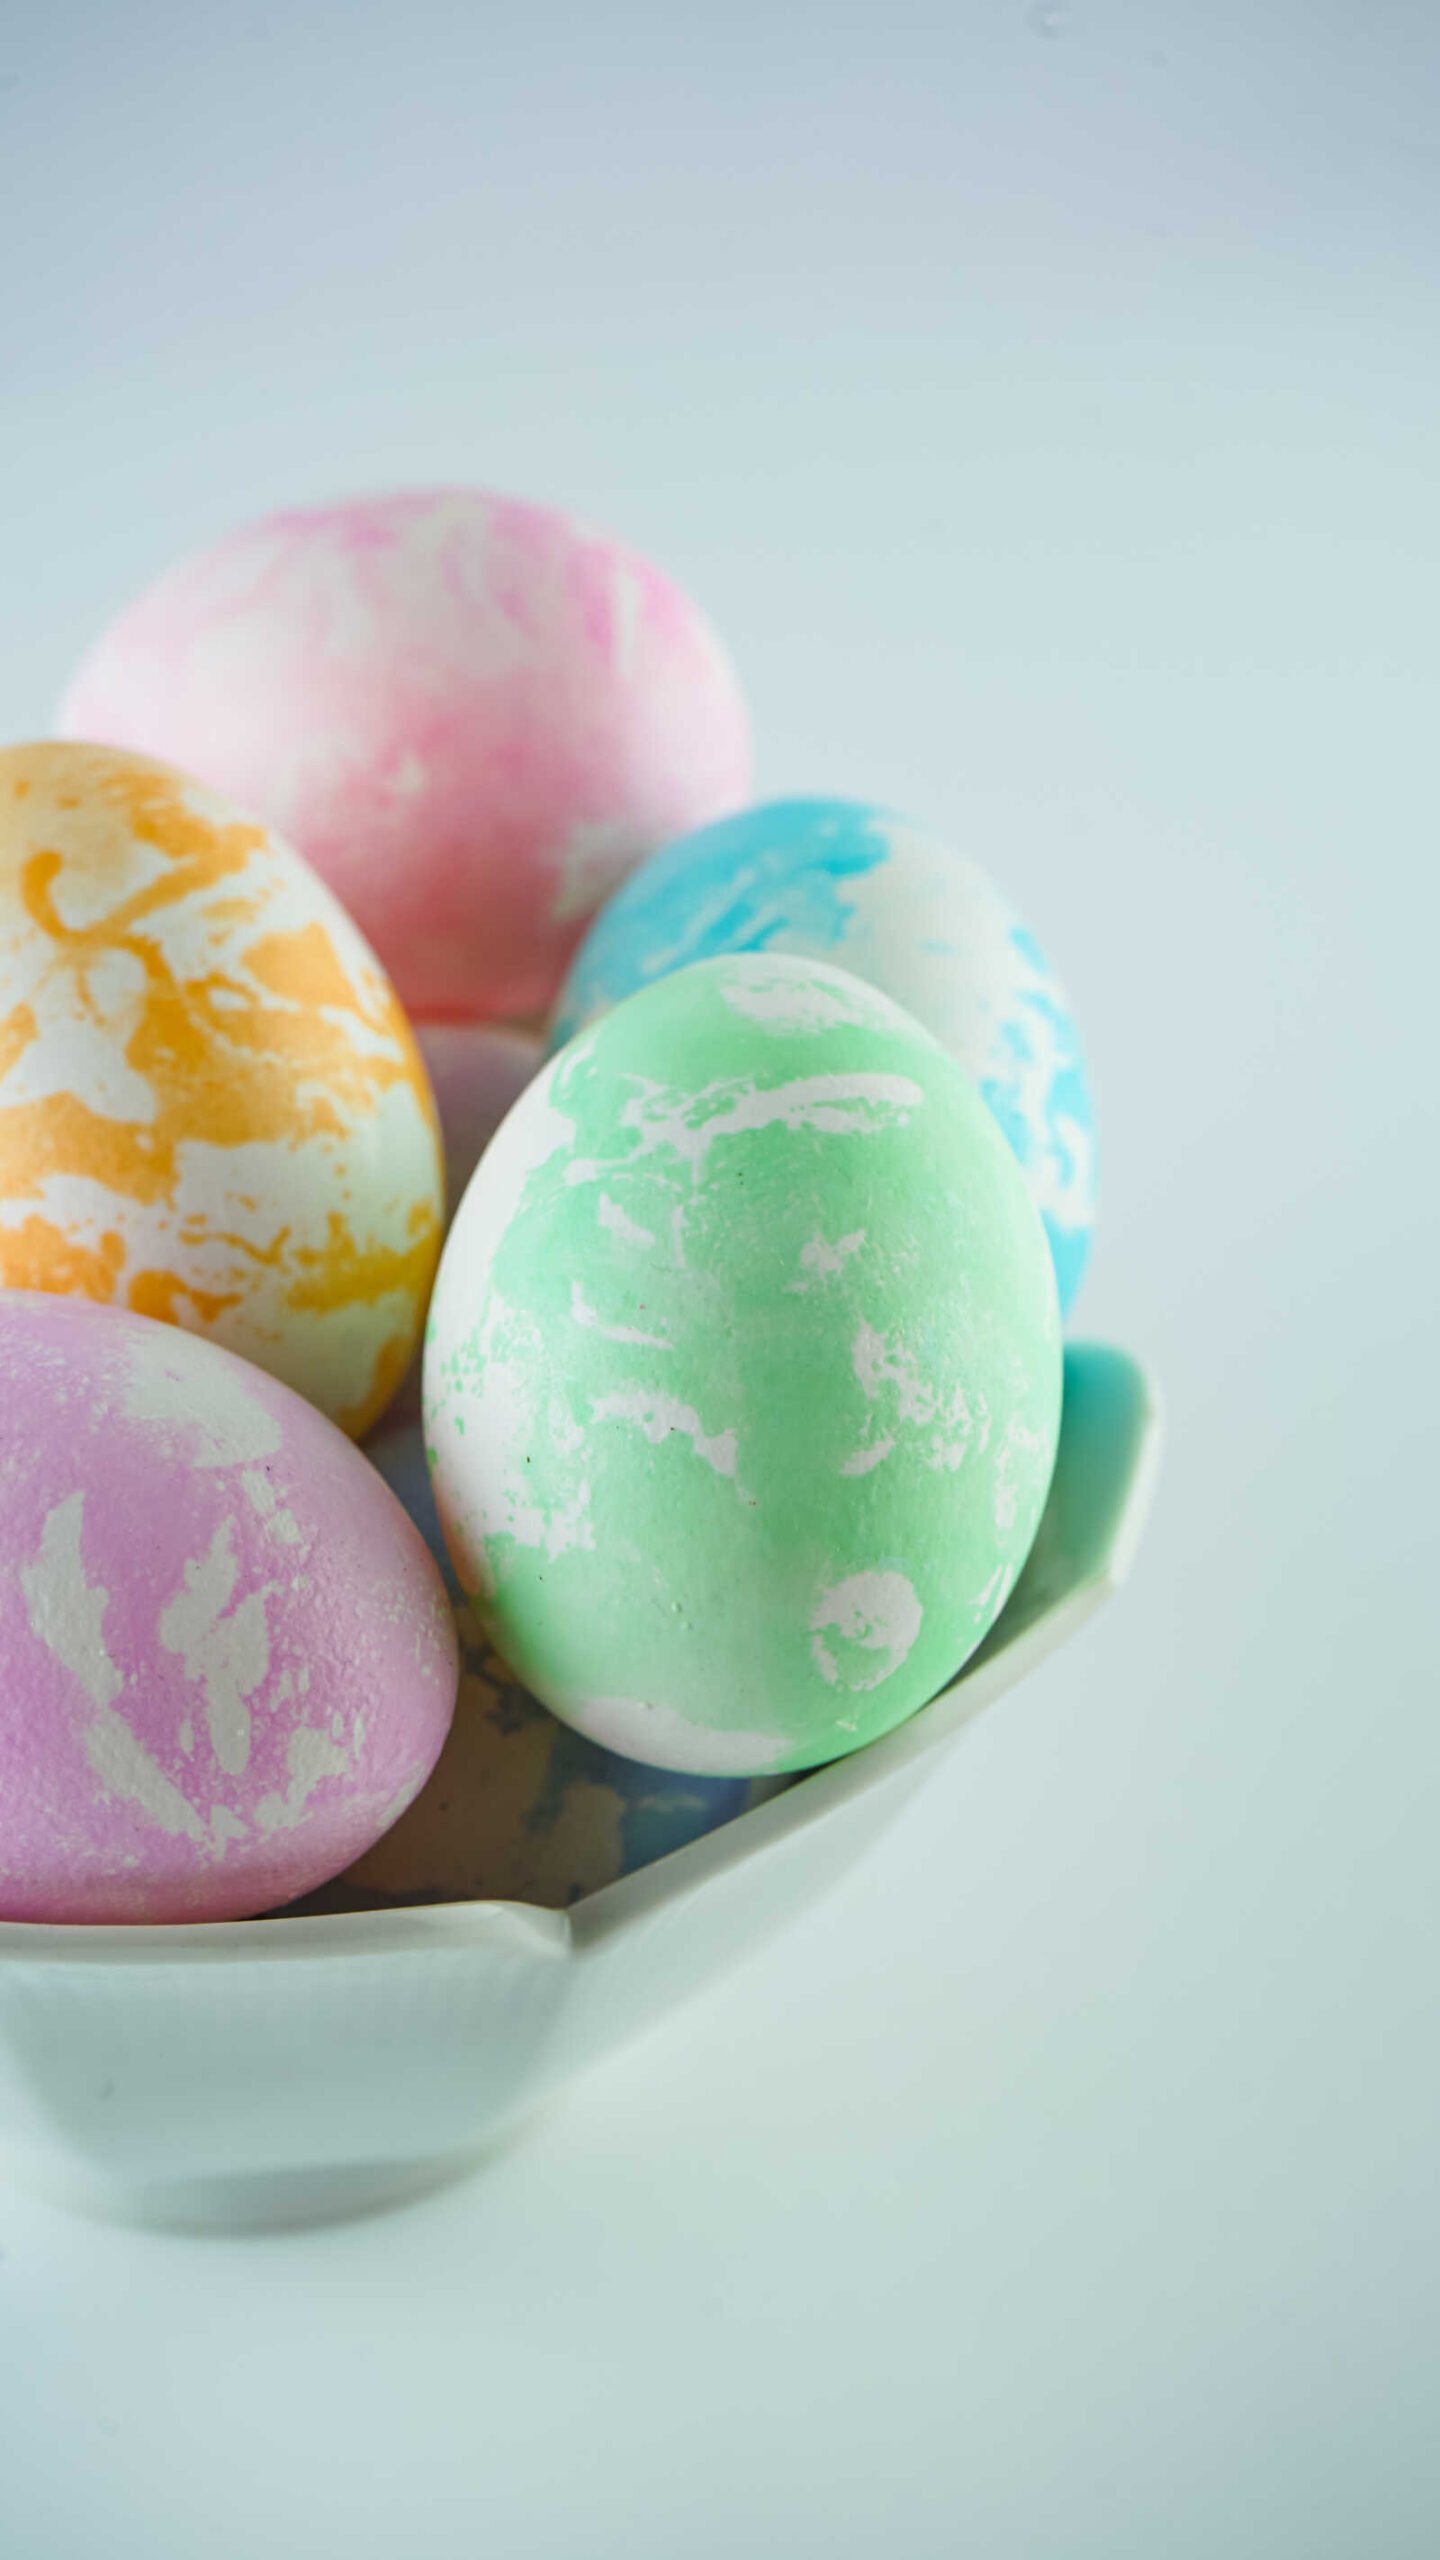
Table of Contents
A Fun Twist on Traditional Easter Eggs
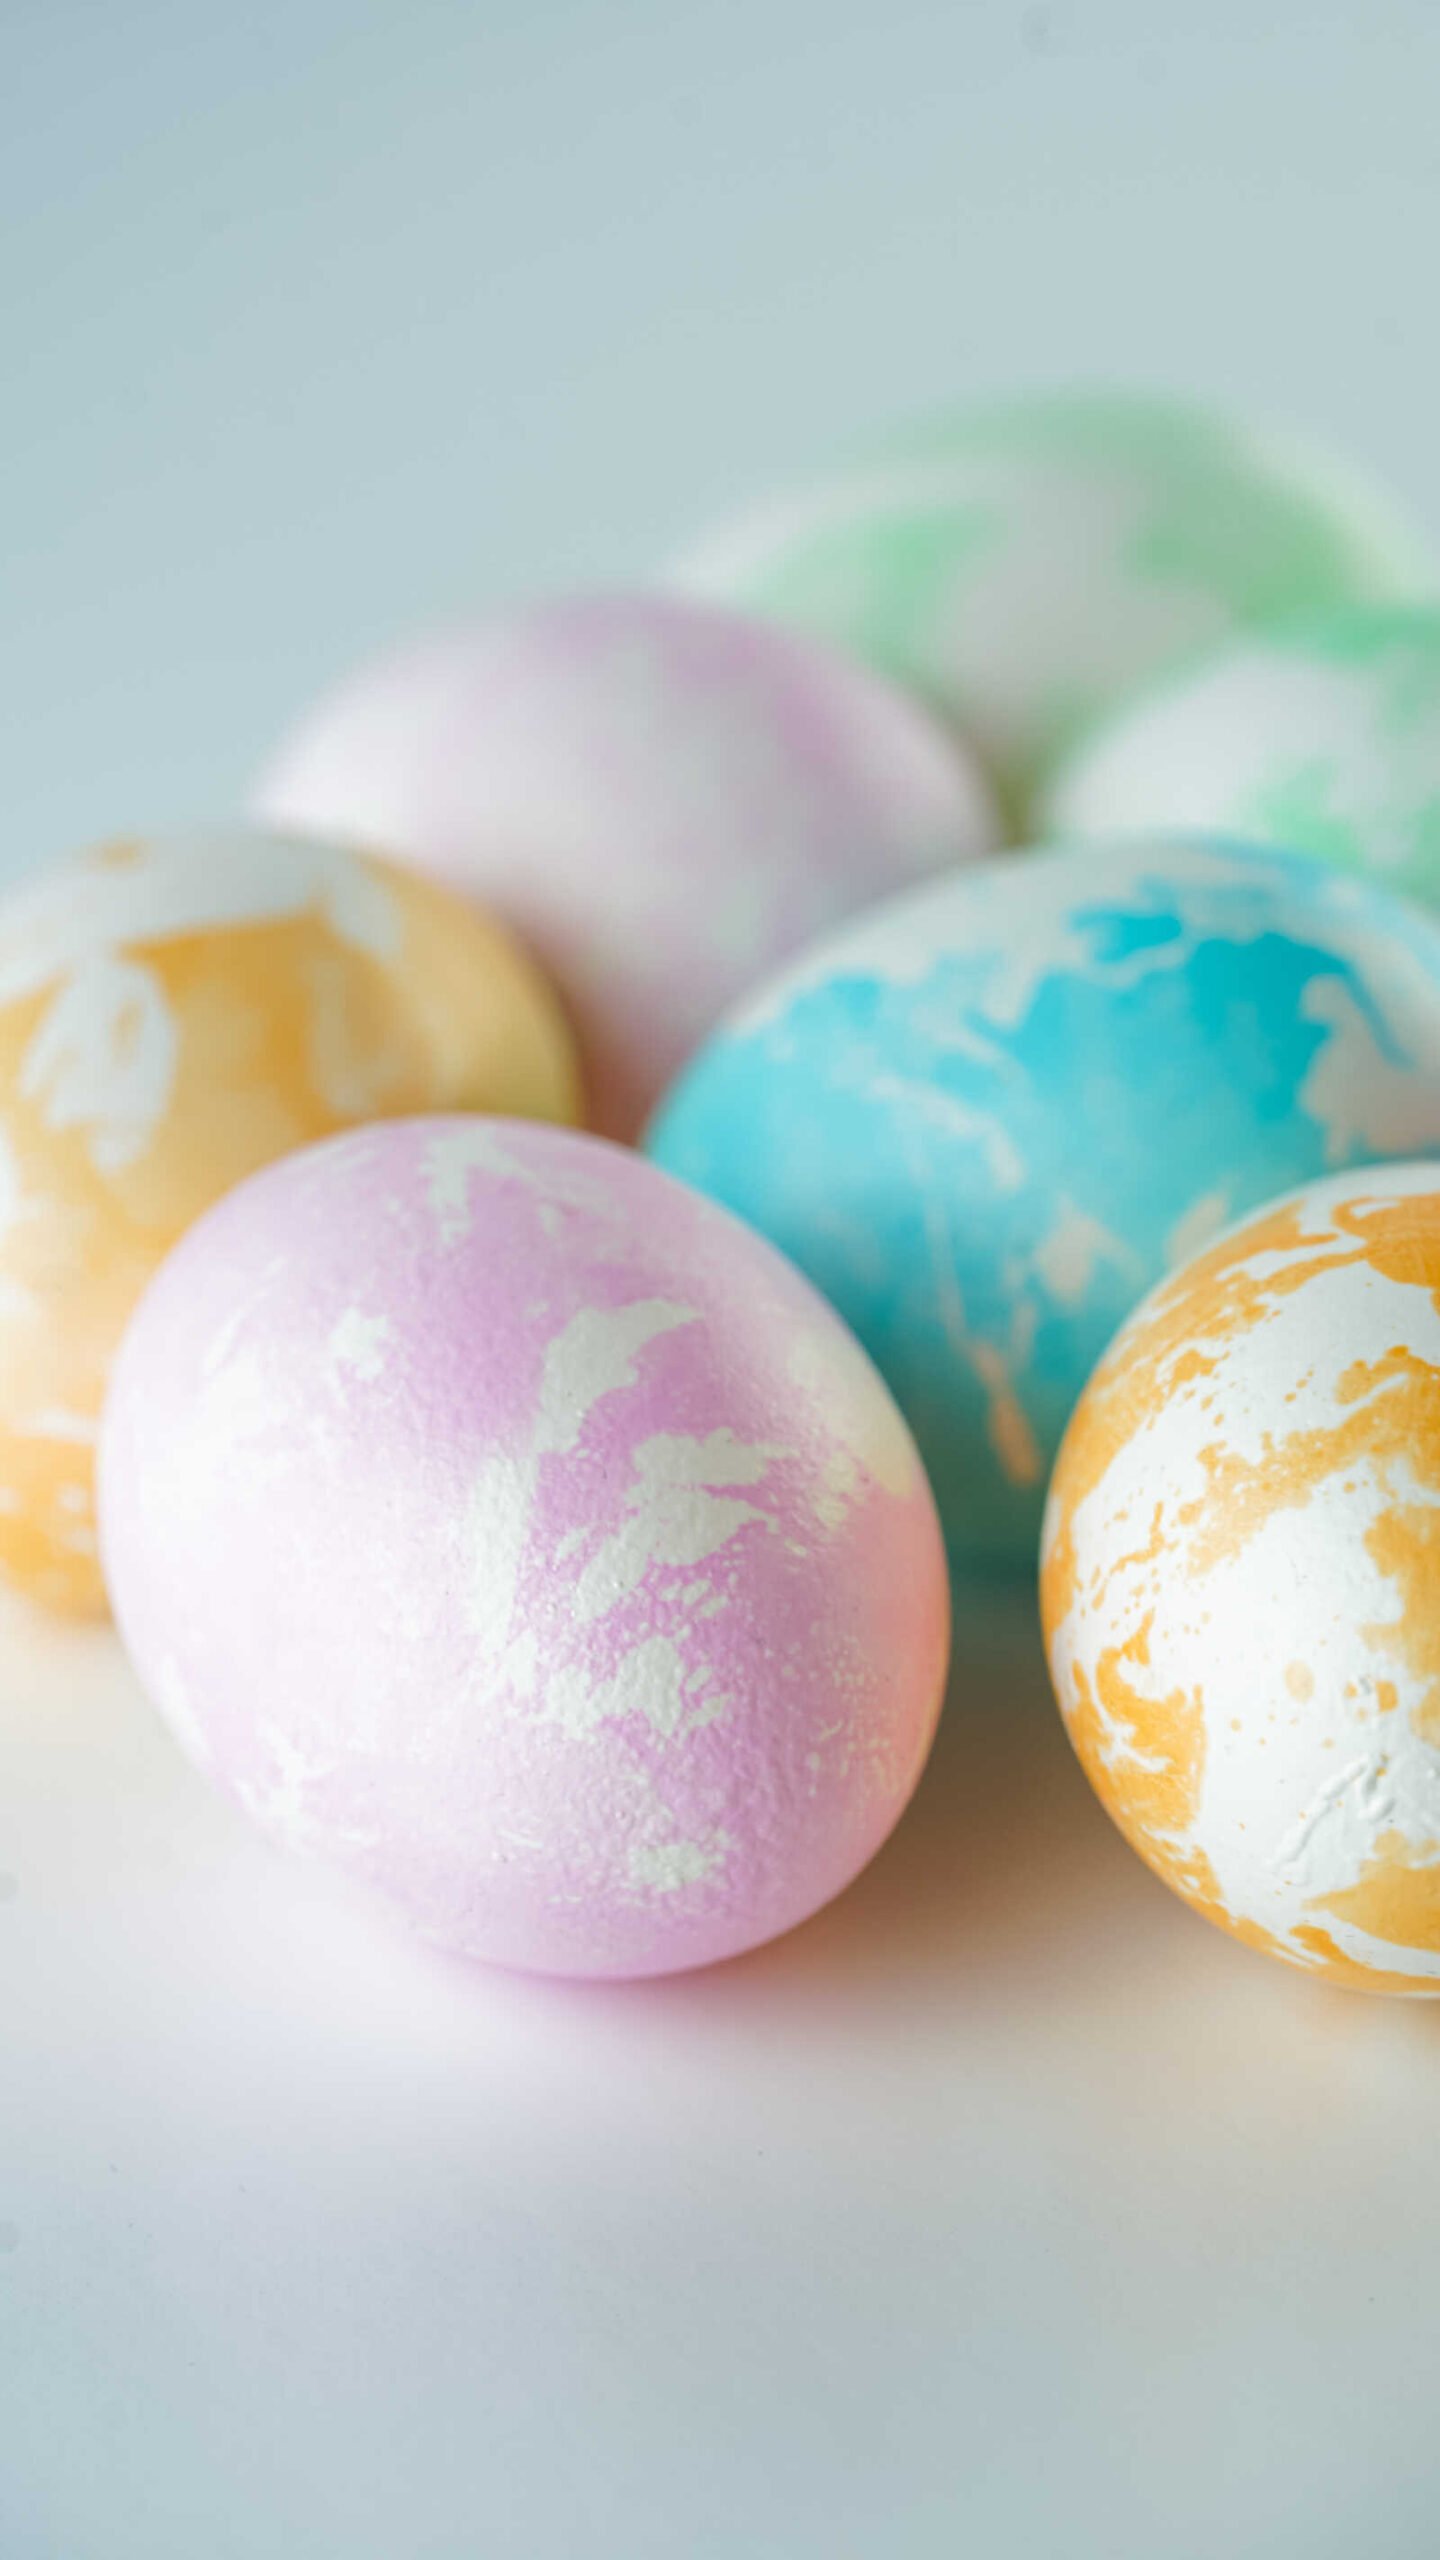
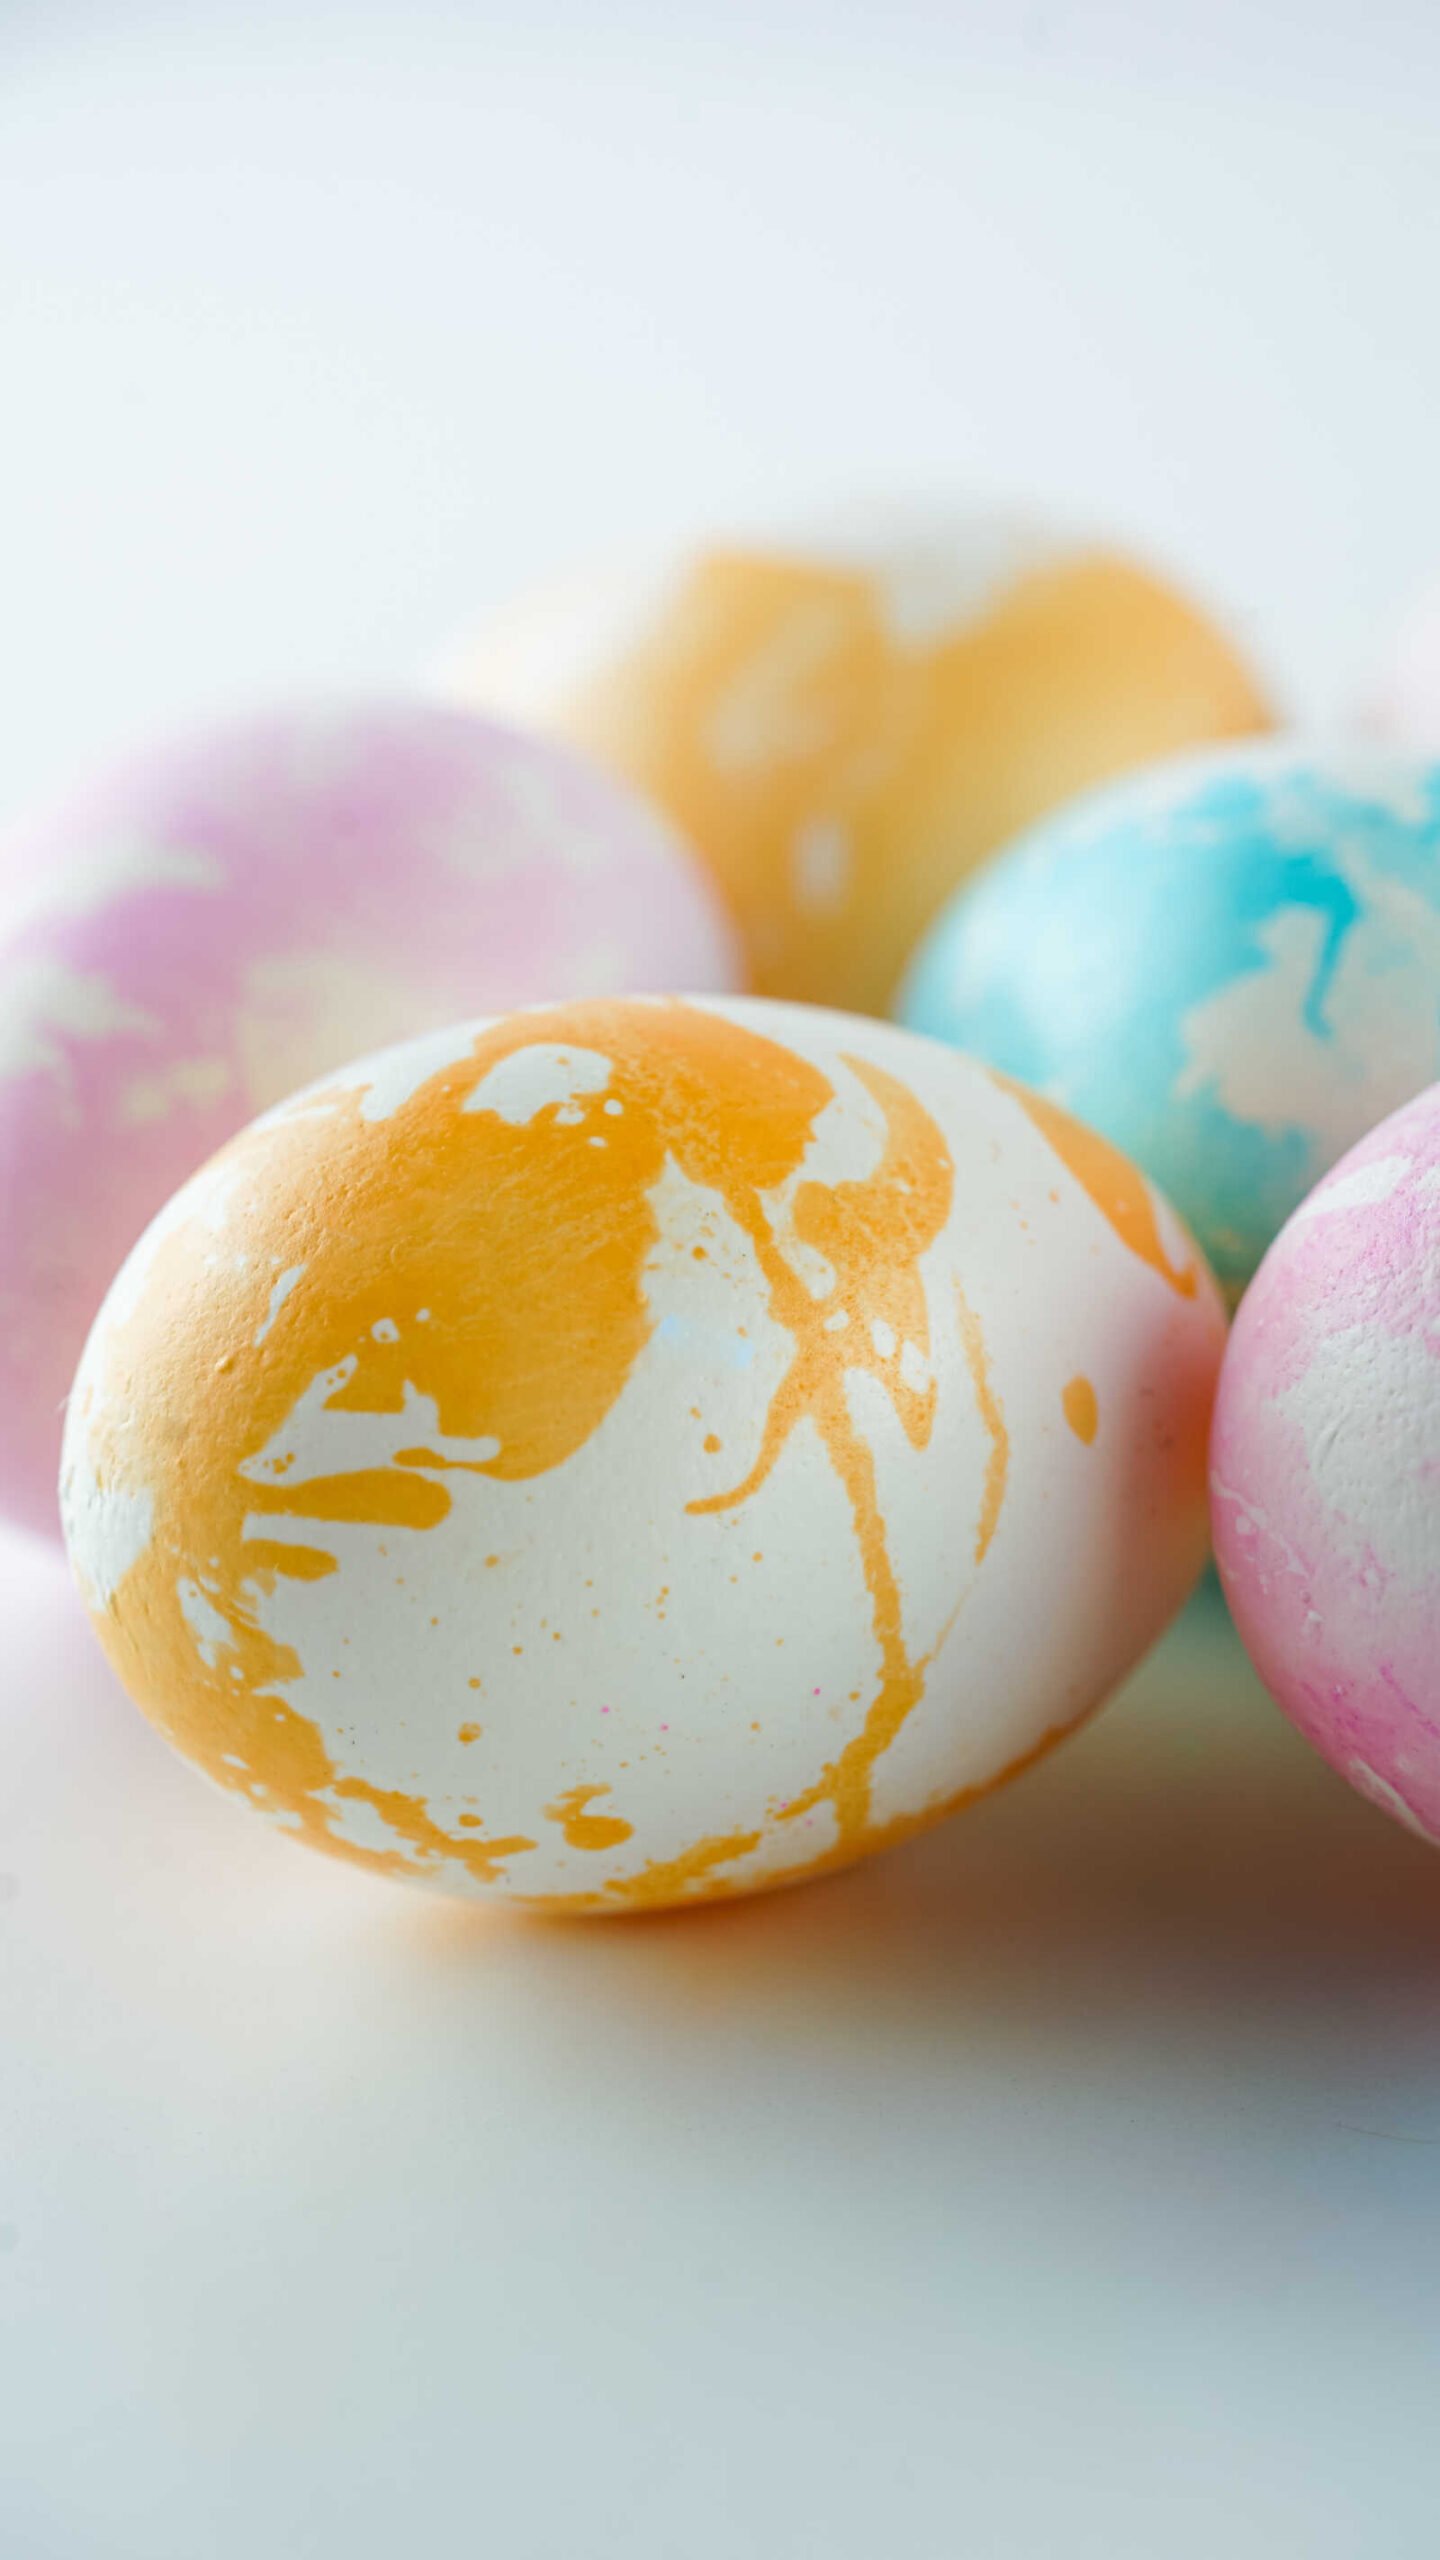
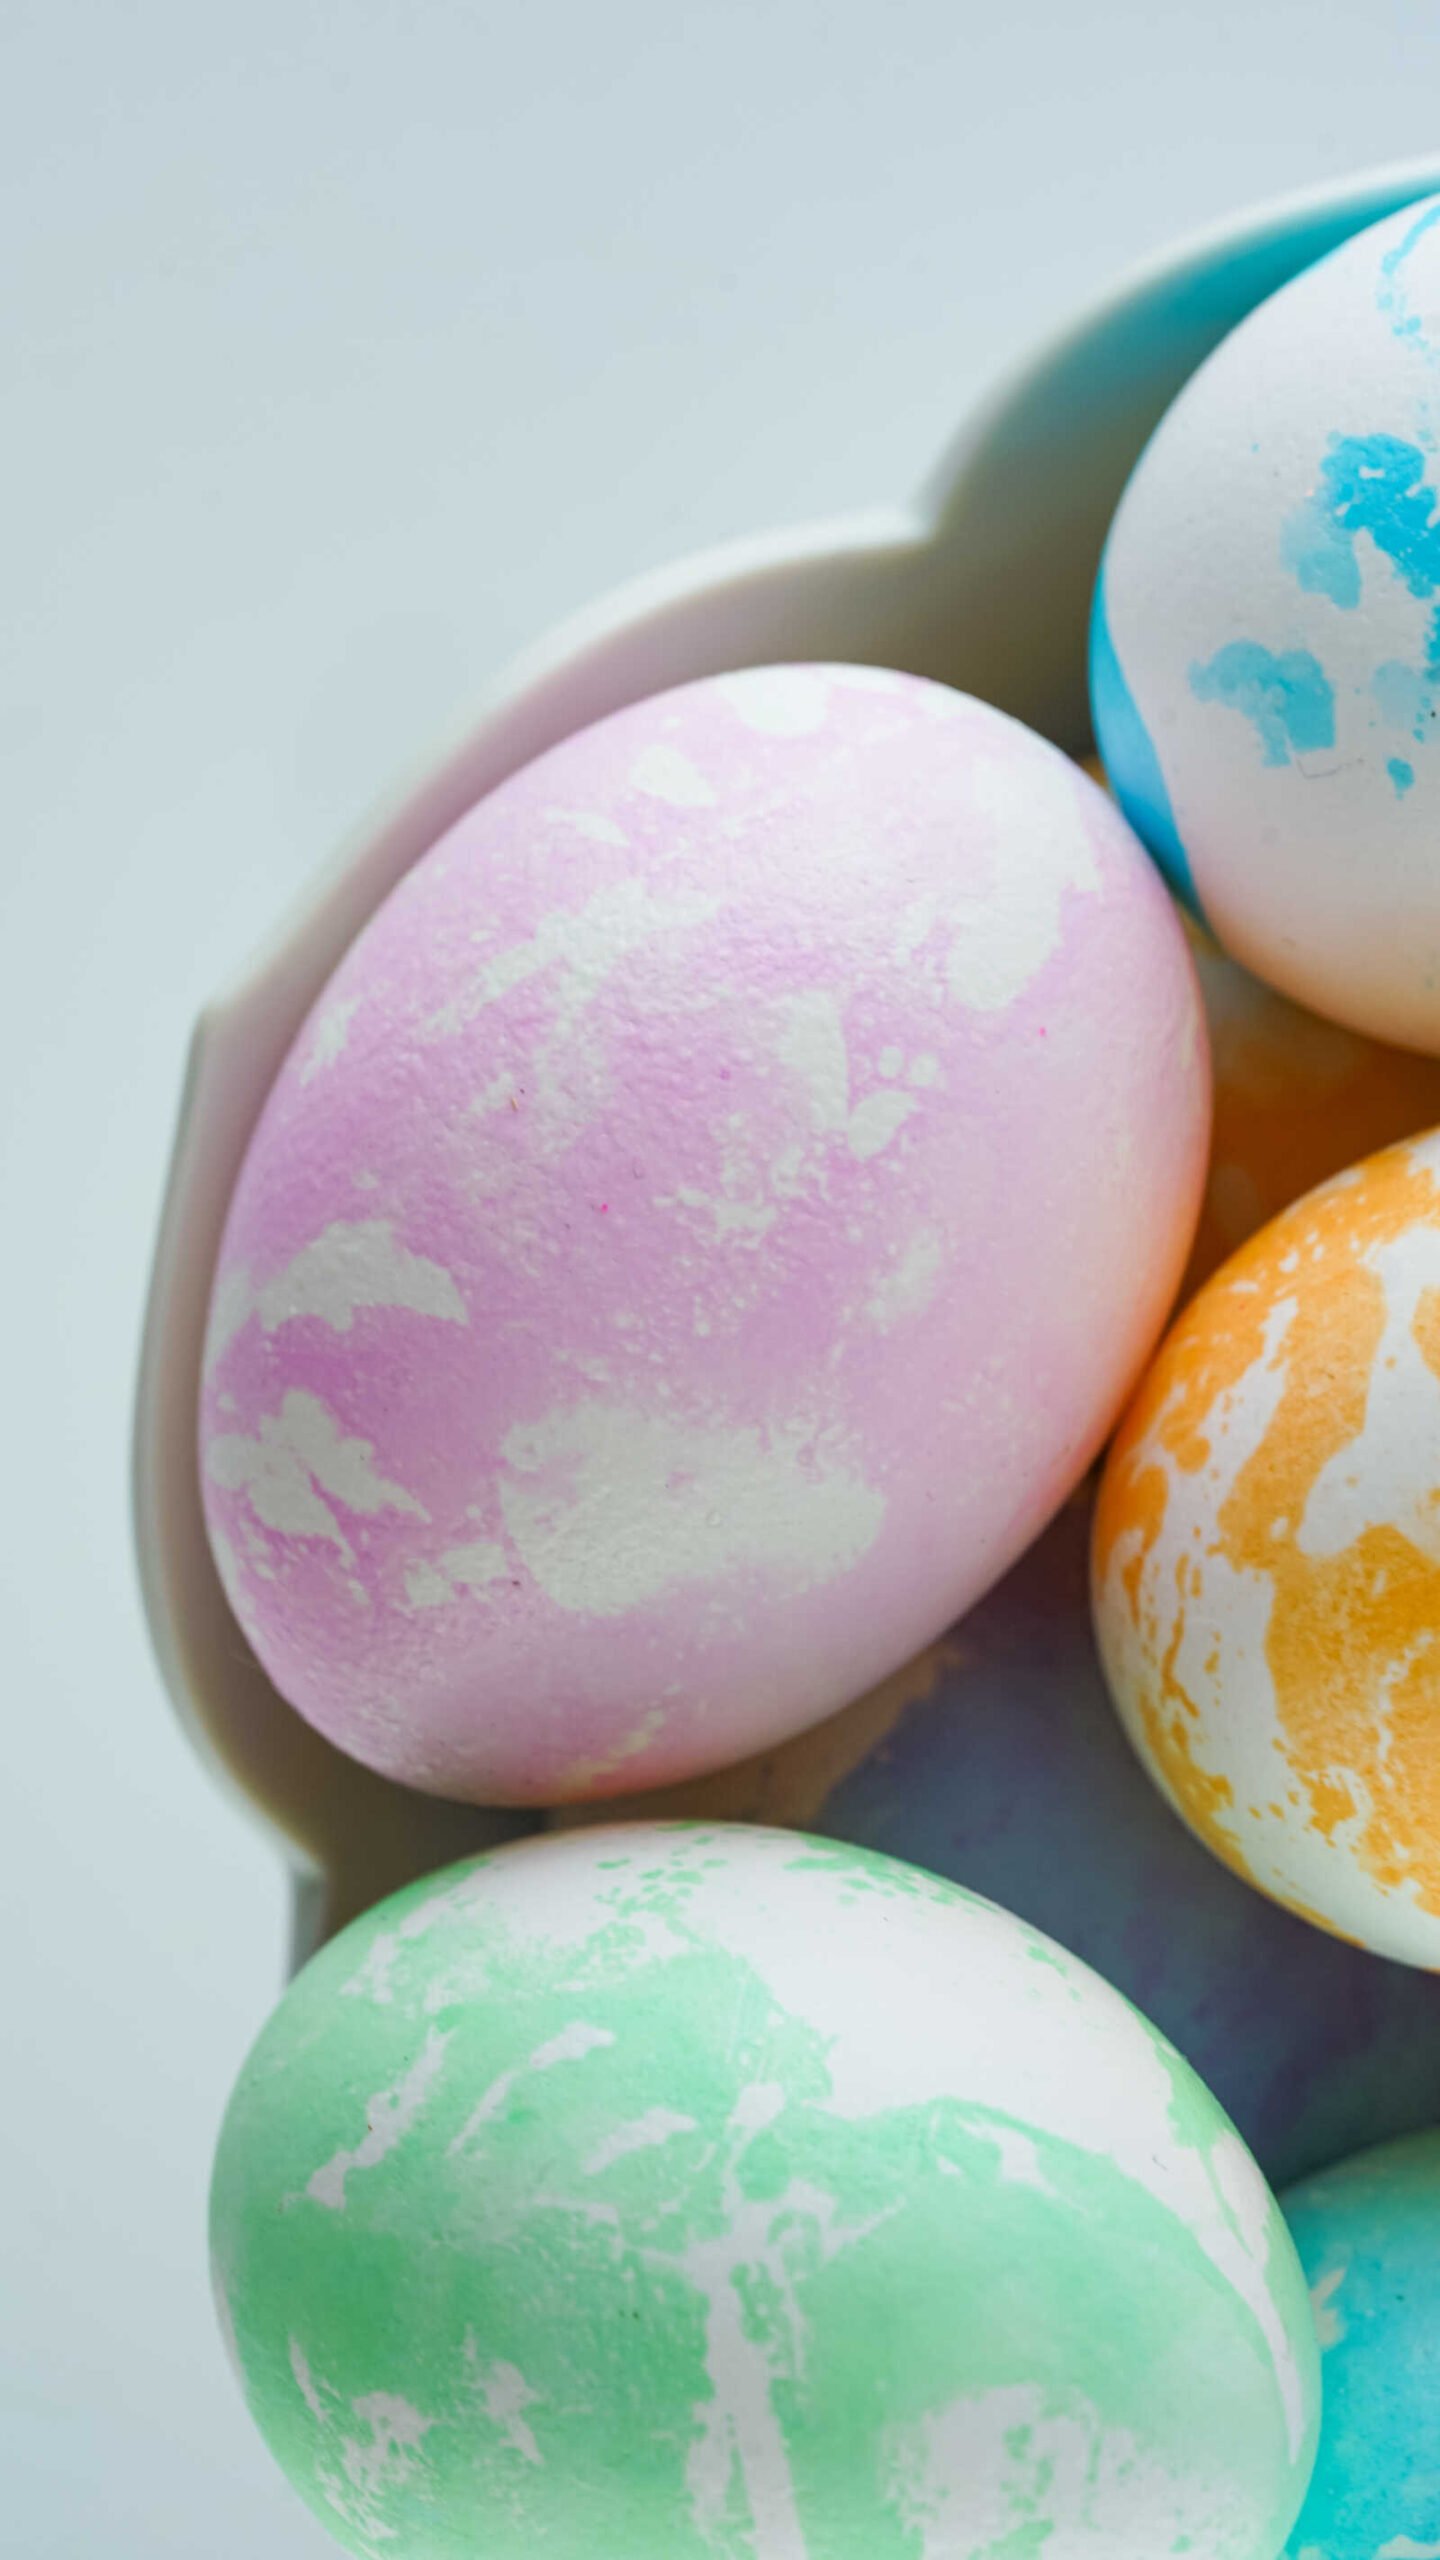
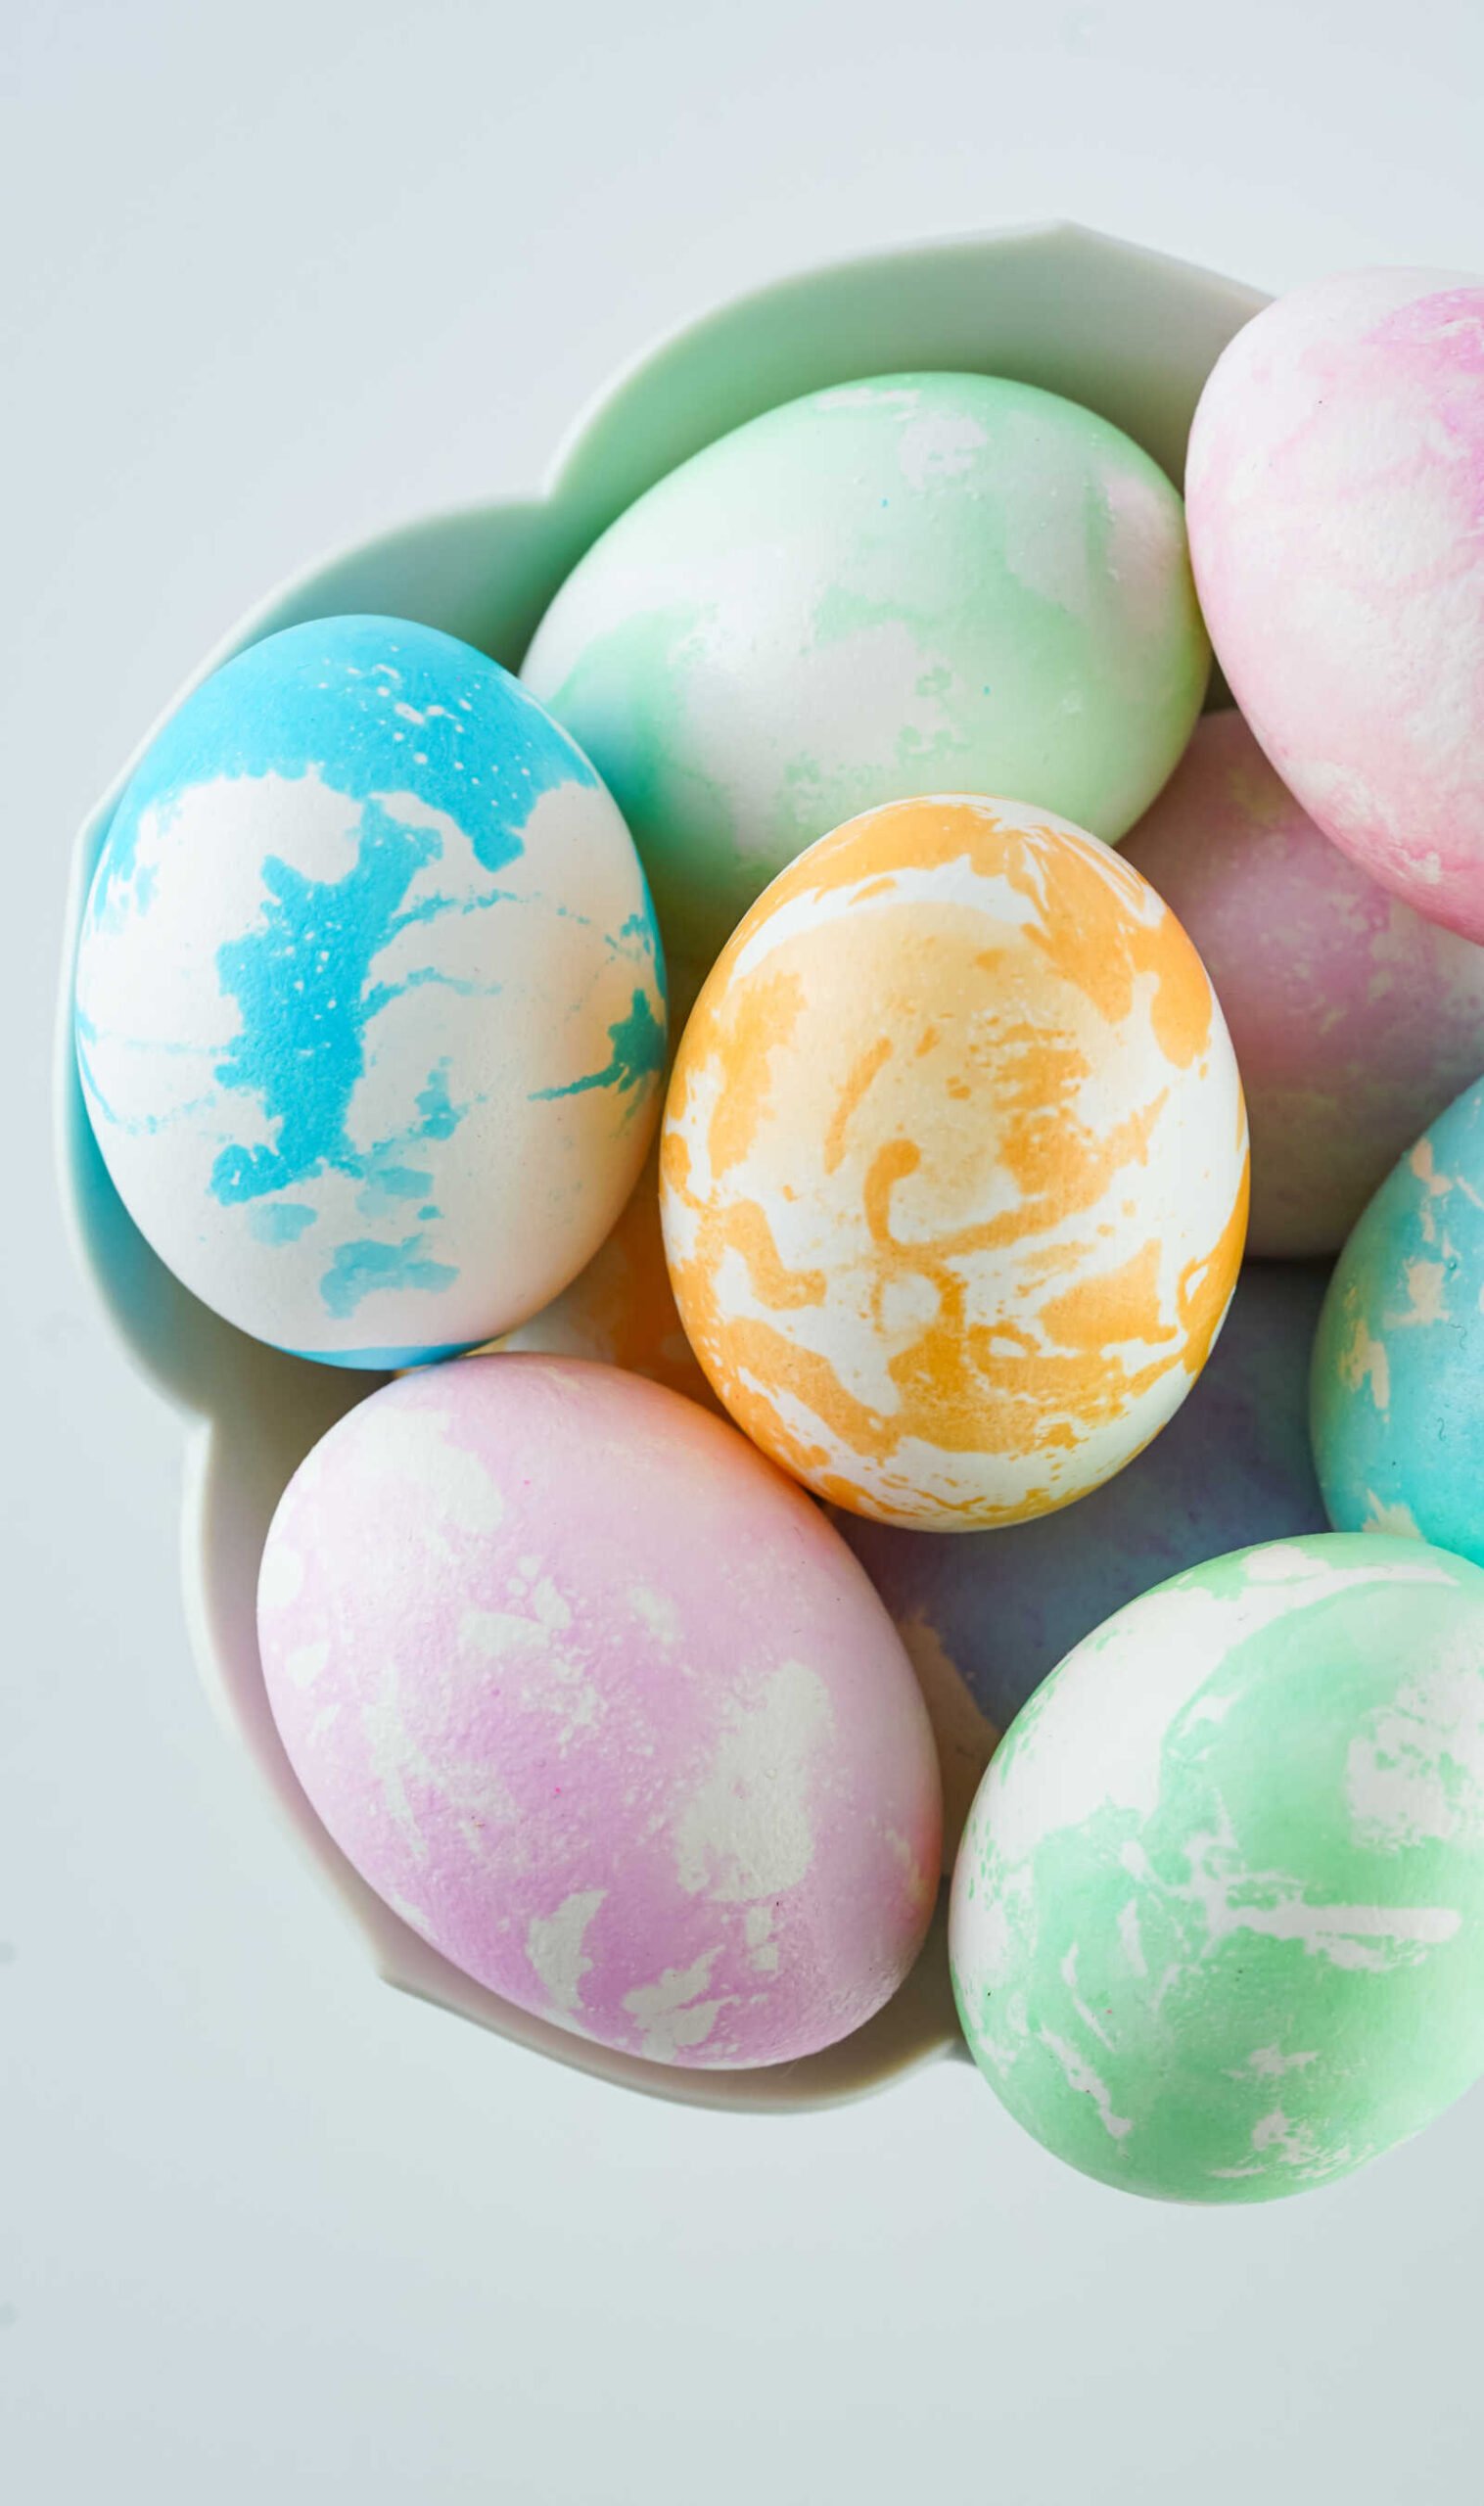
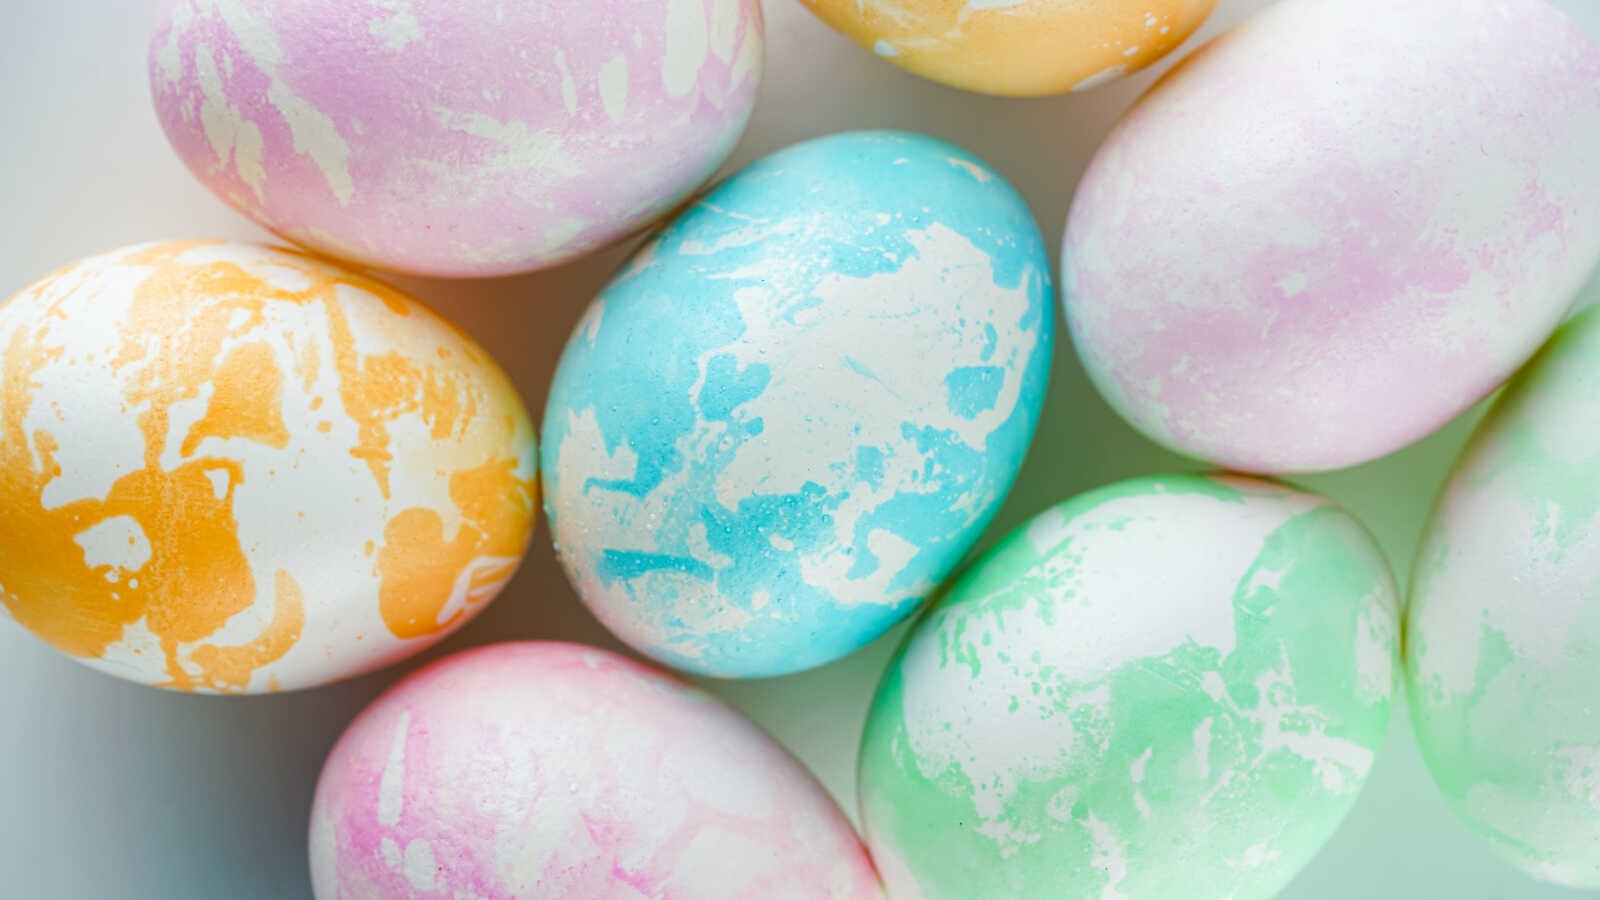
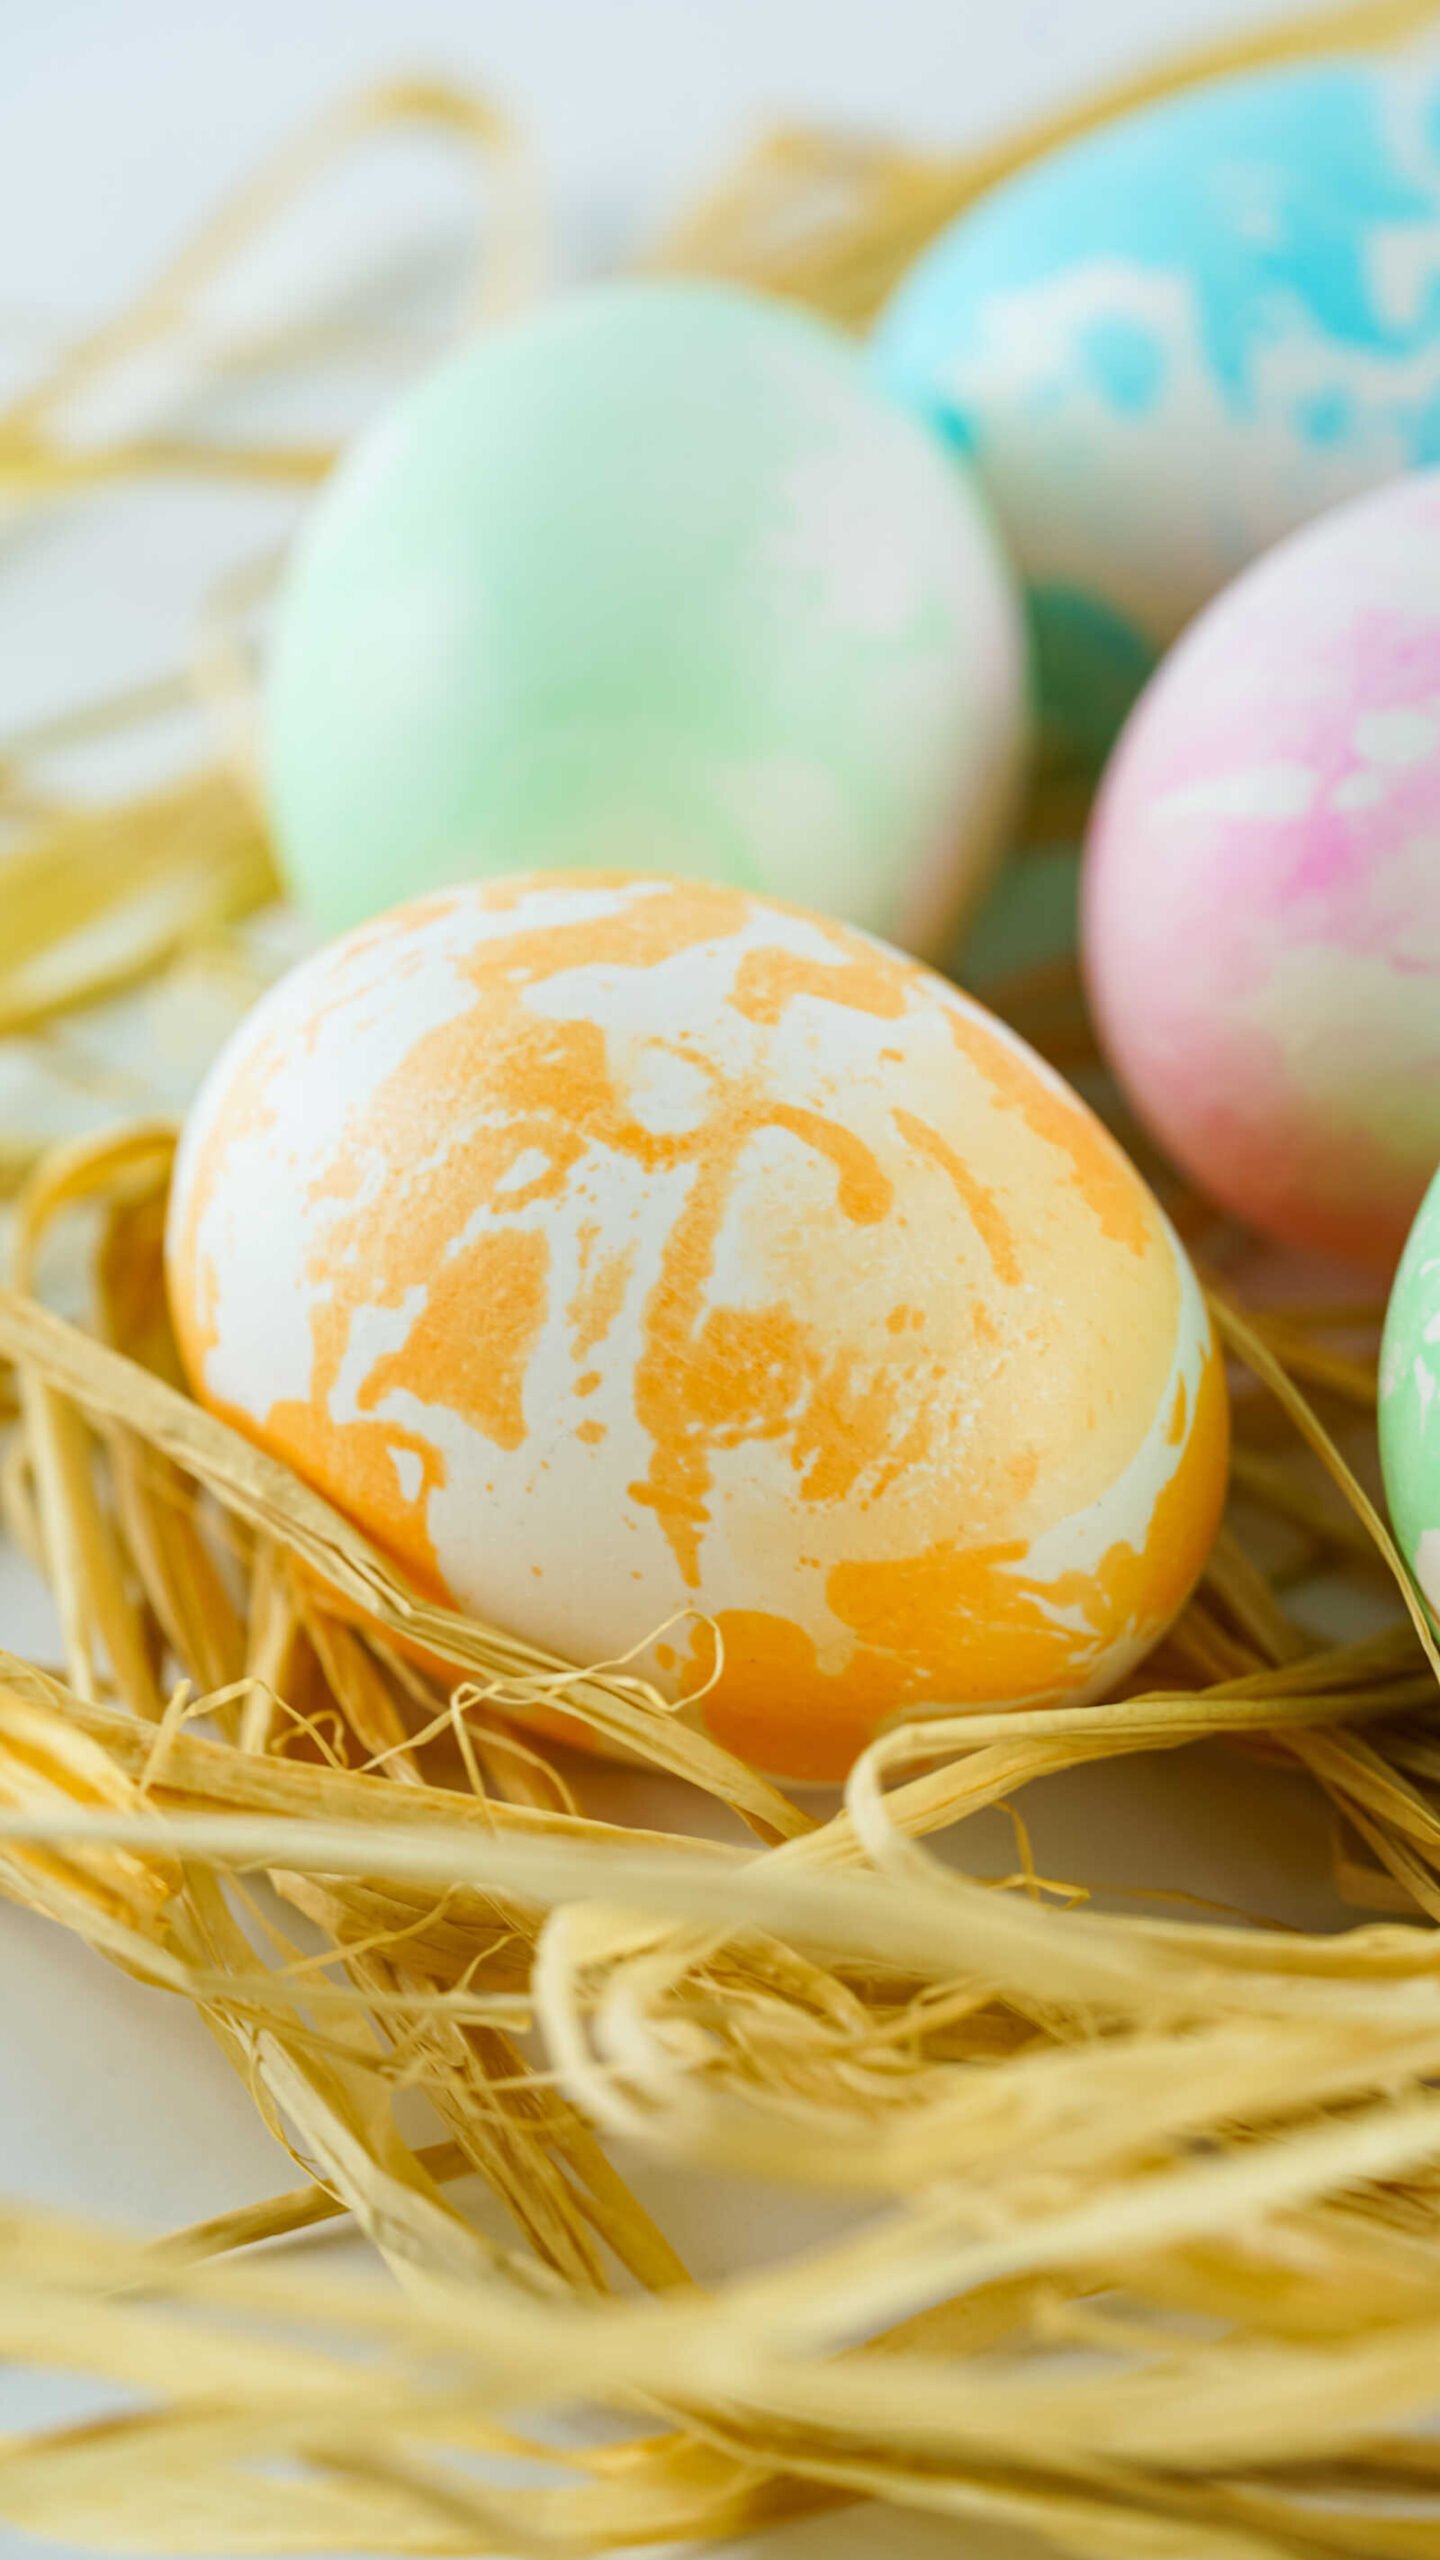
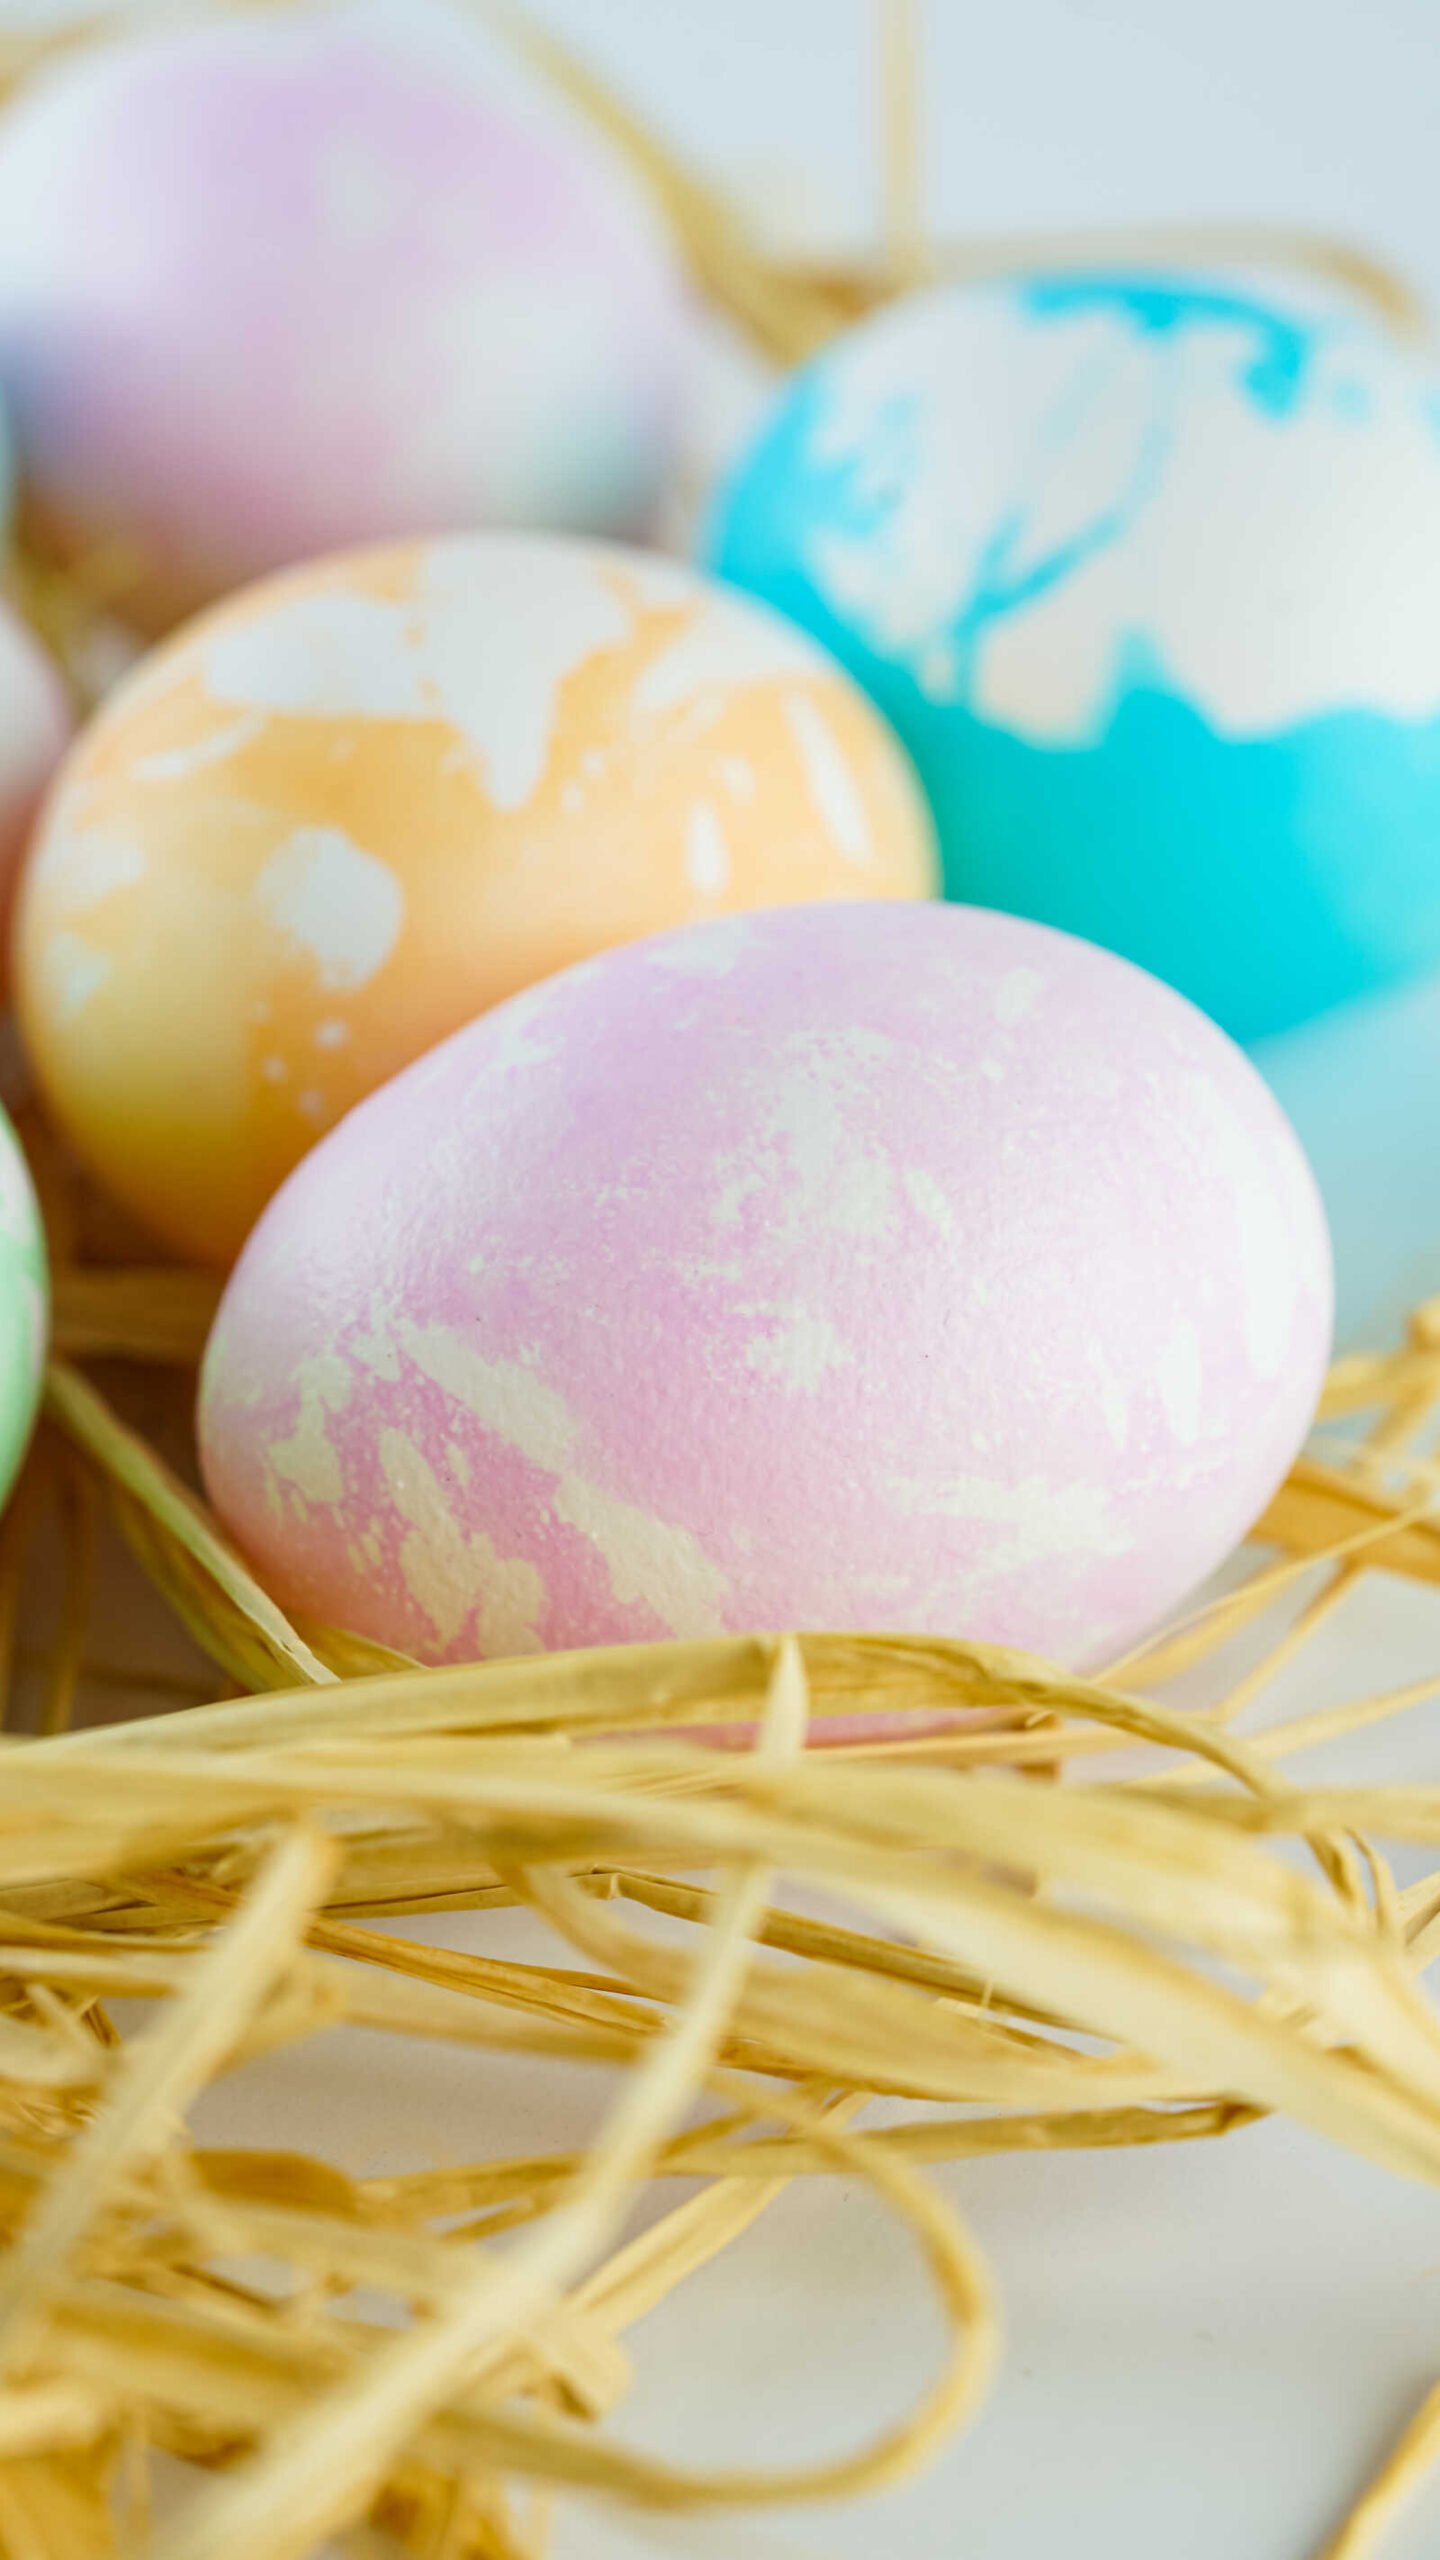
Add a twist to your festivities and try these Marbled Easter Eggs Using Oil. These aren’t quite as easy as just dropping boiled eggs in cups, but it’s a blast. Bring out your crafty side and grab the oil and dye for this holiday fun.
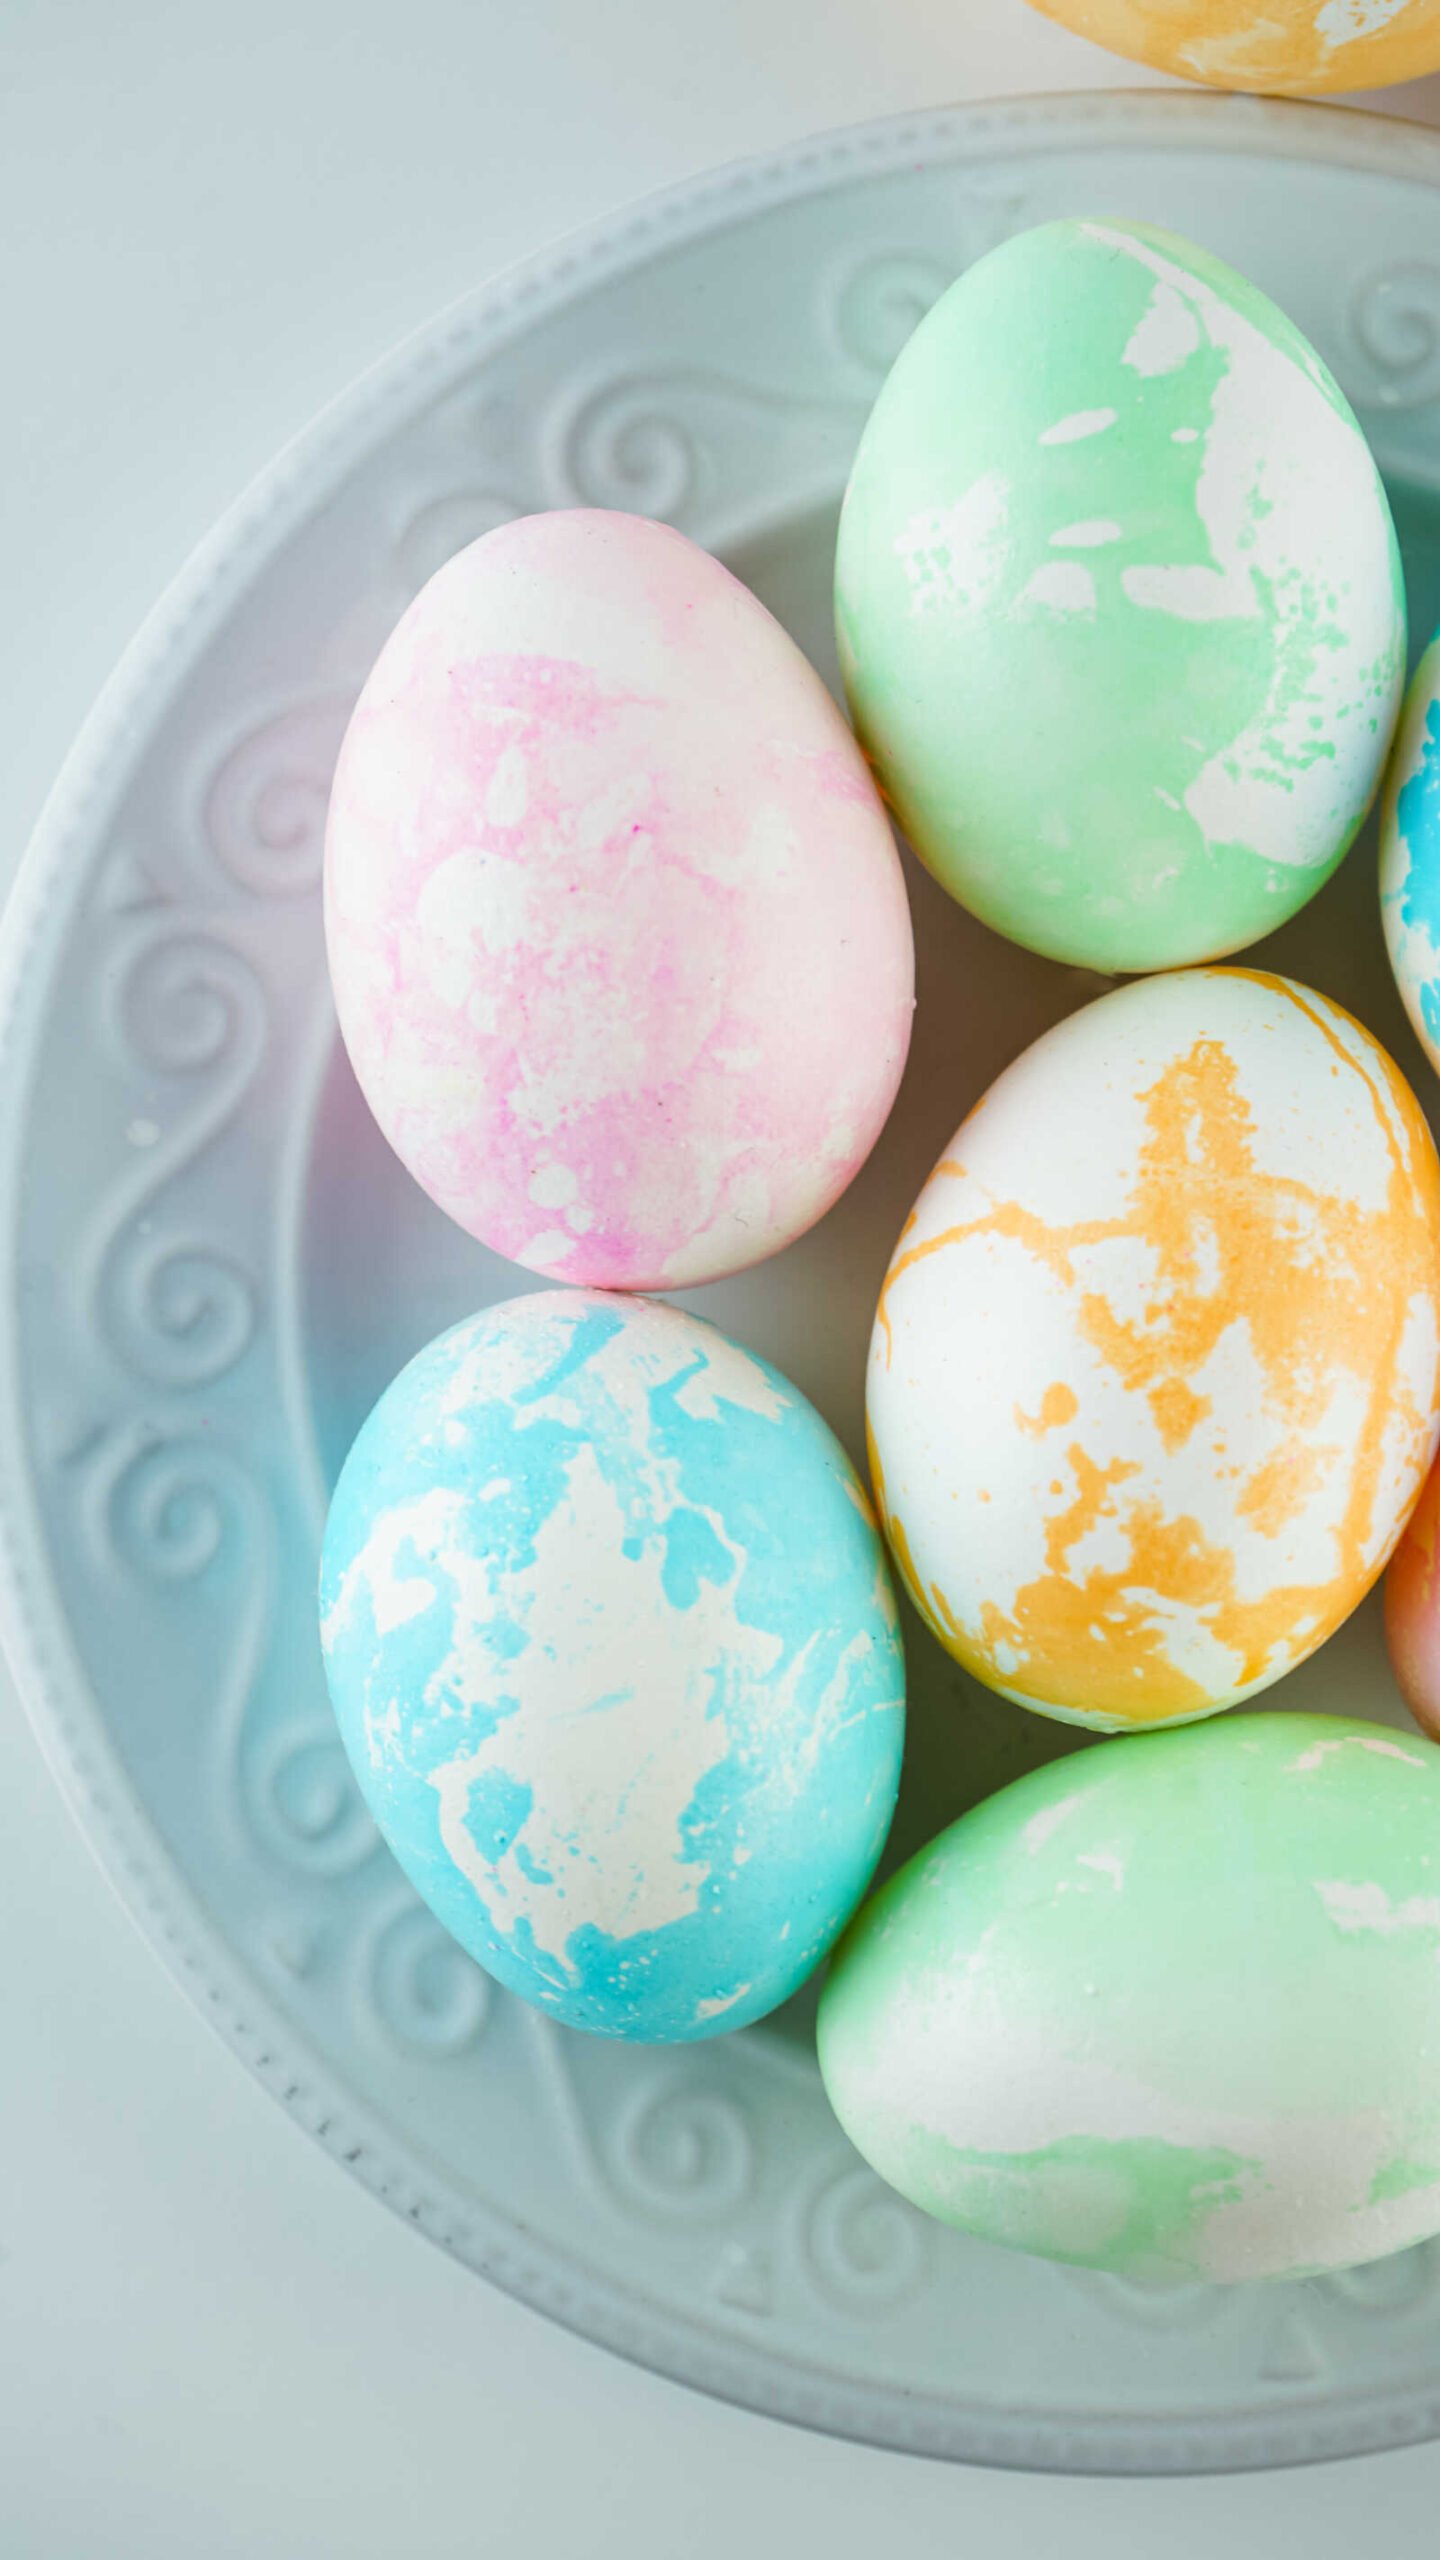
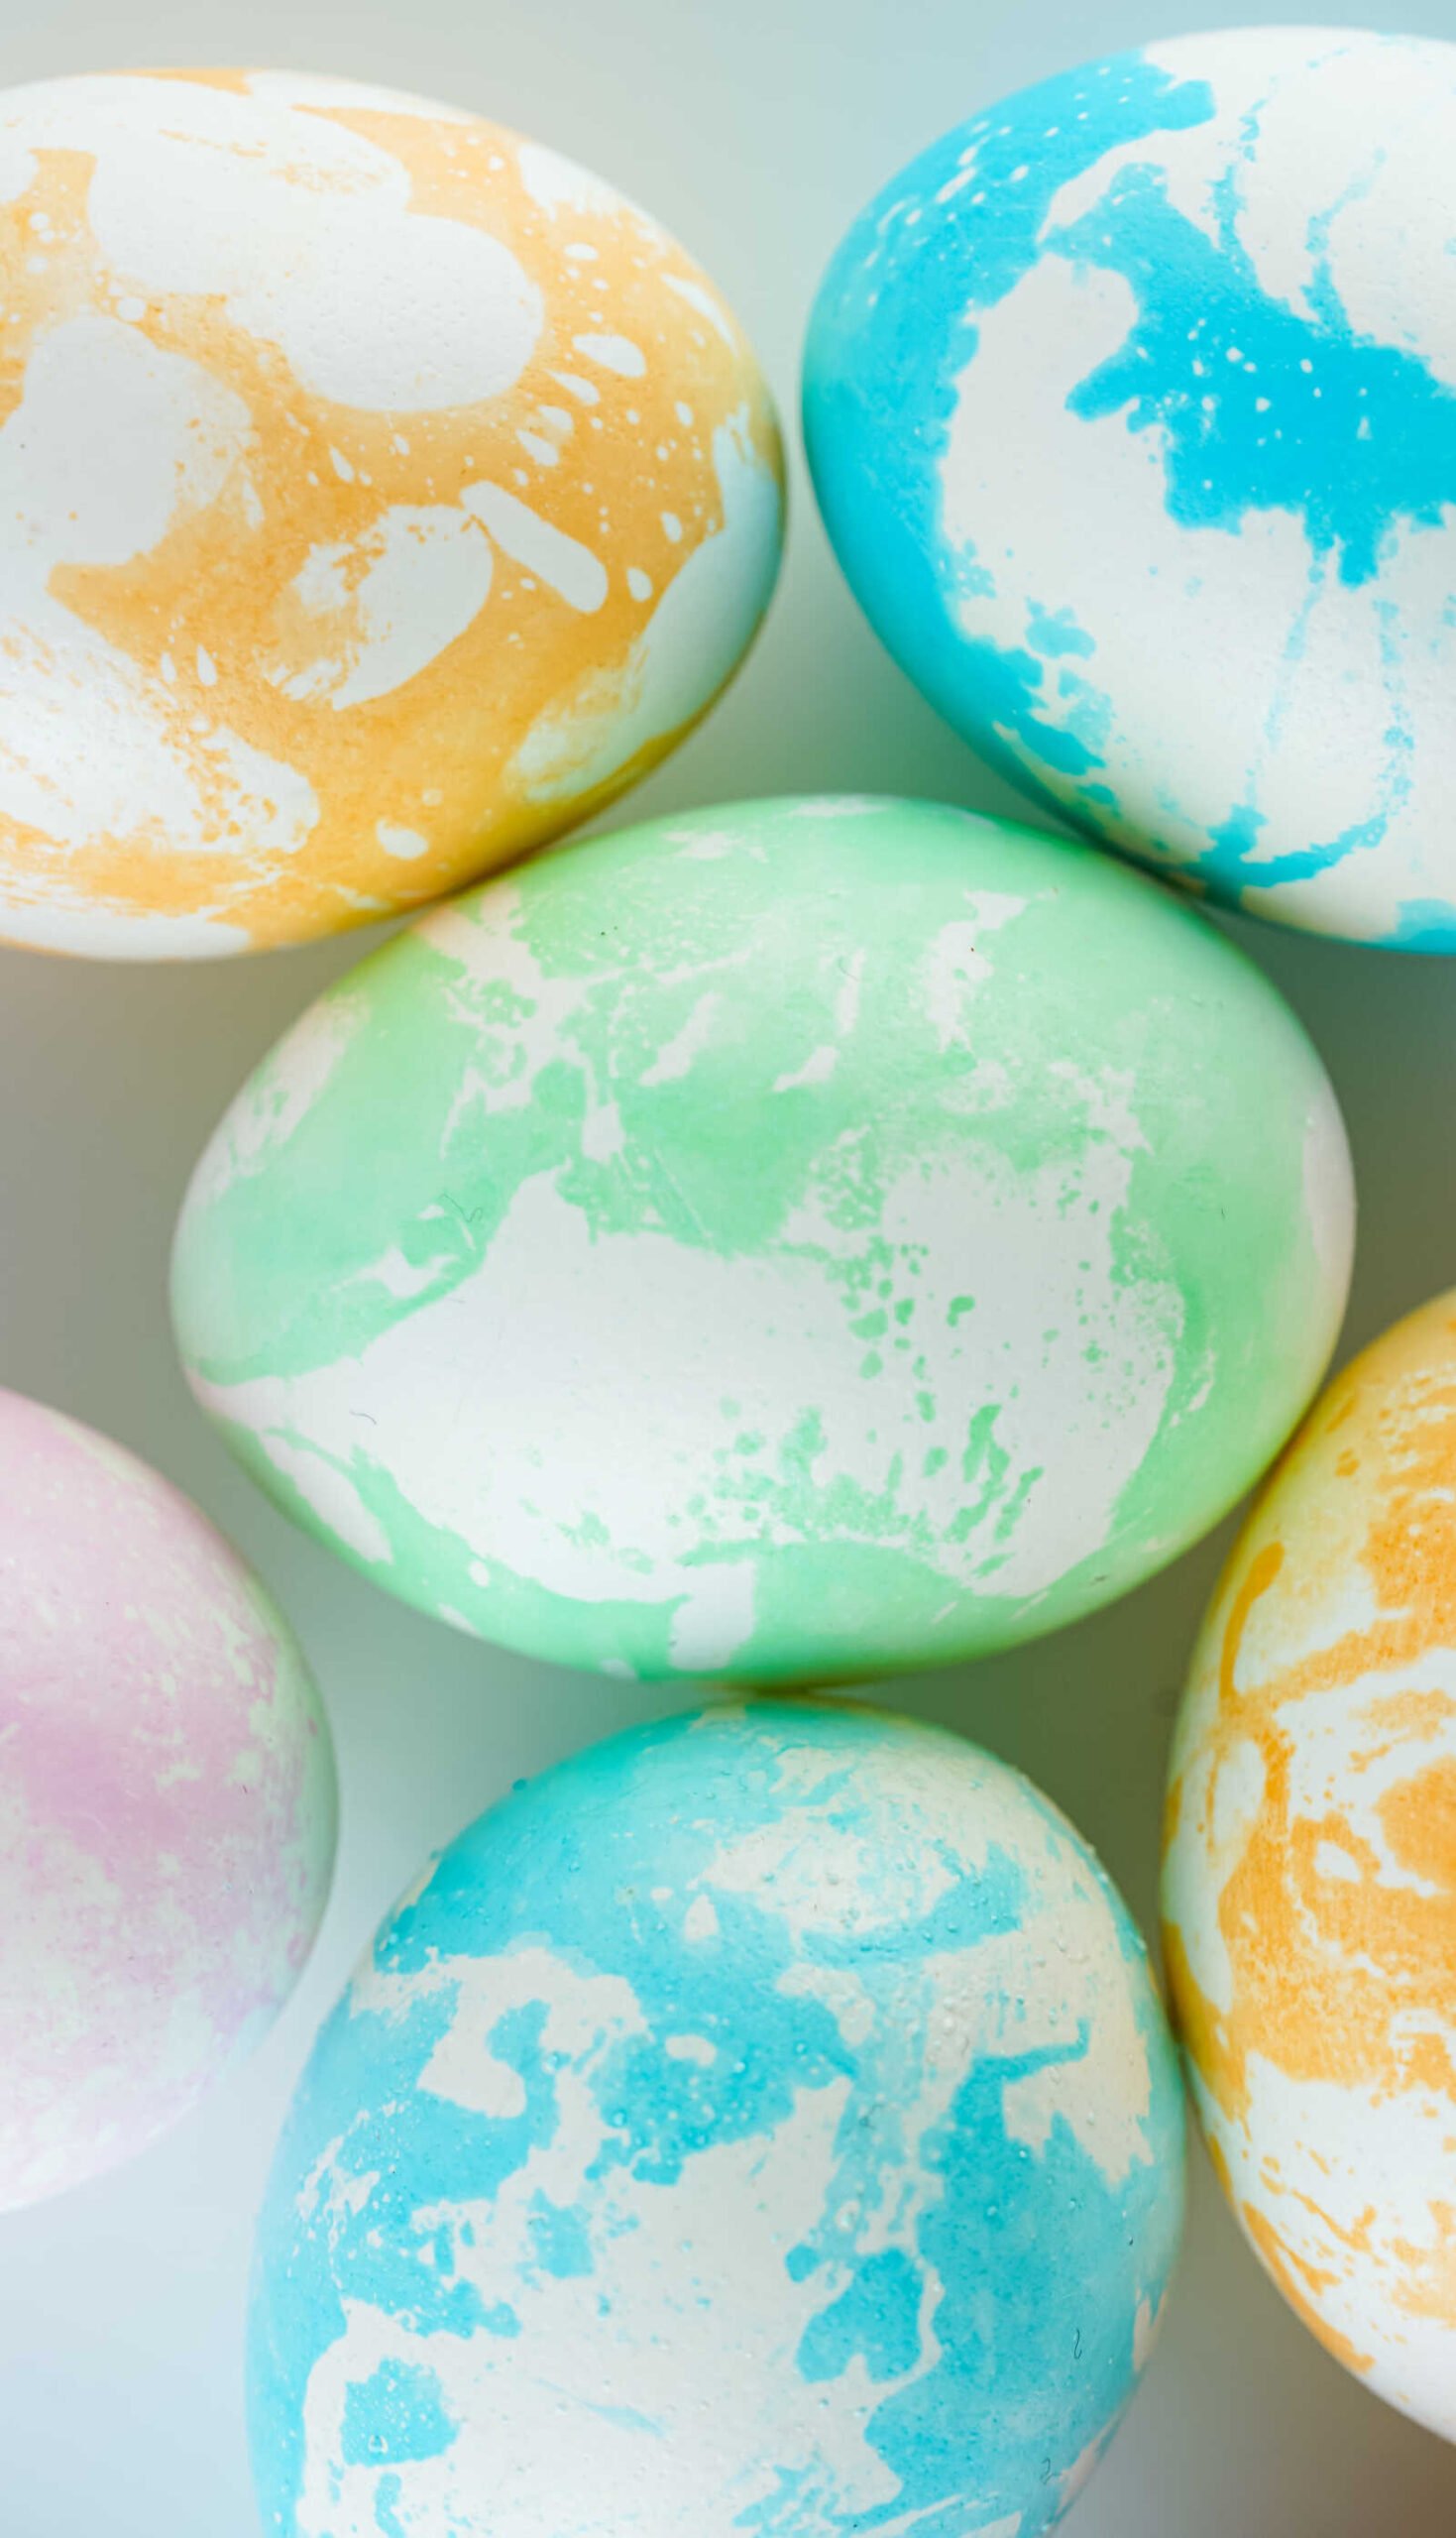
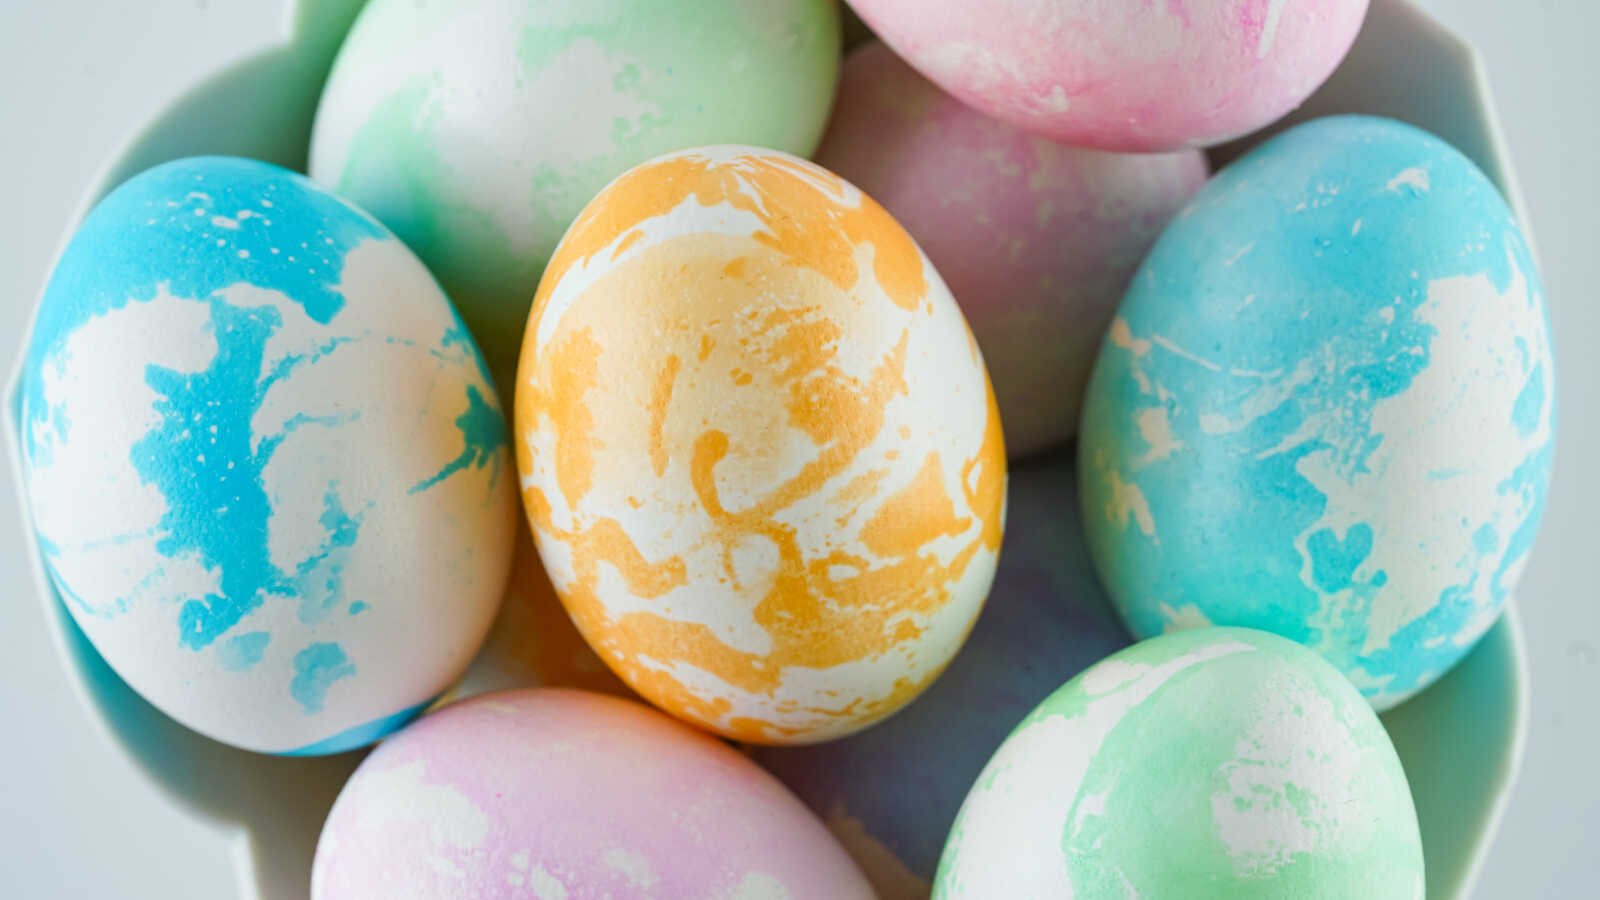
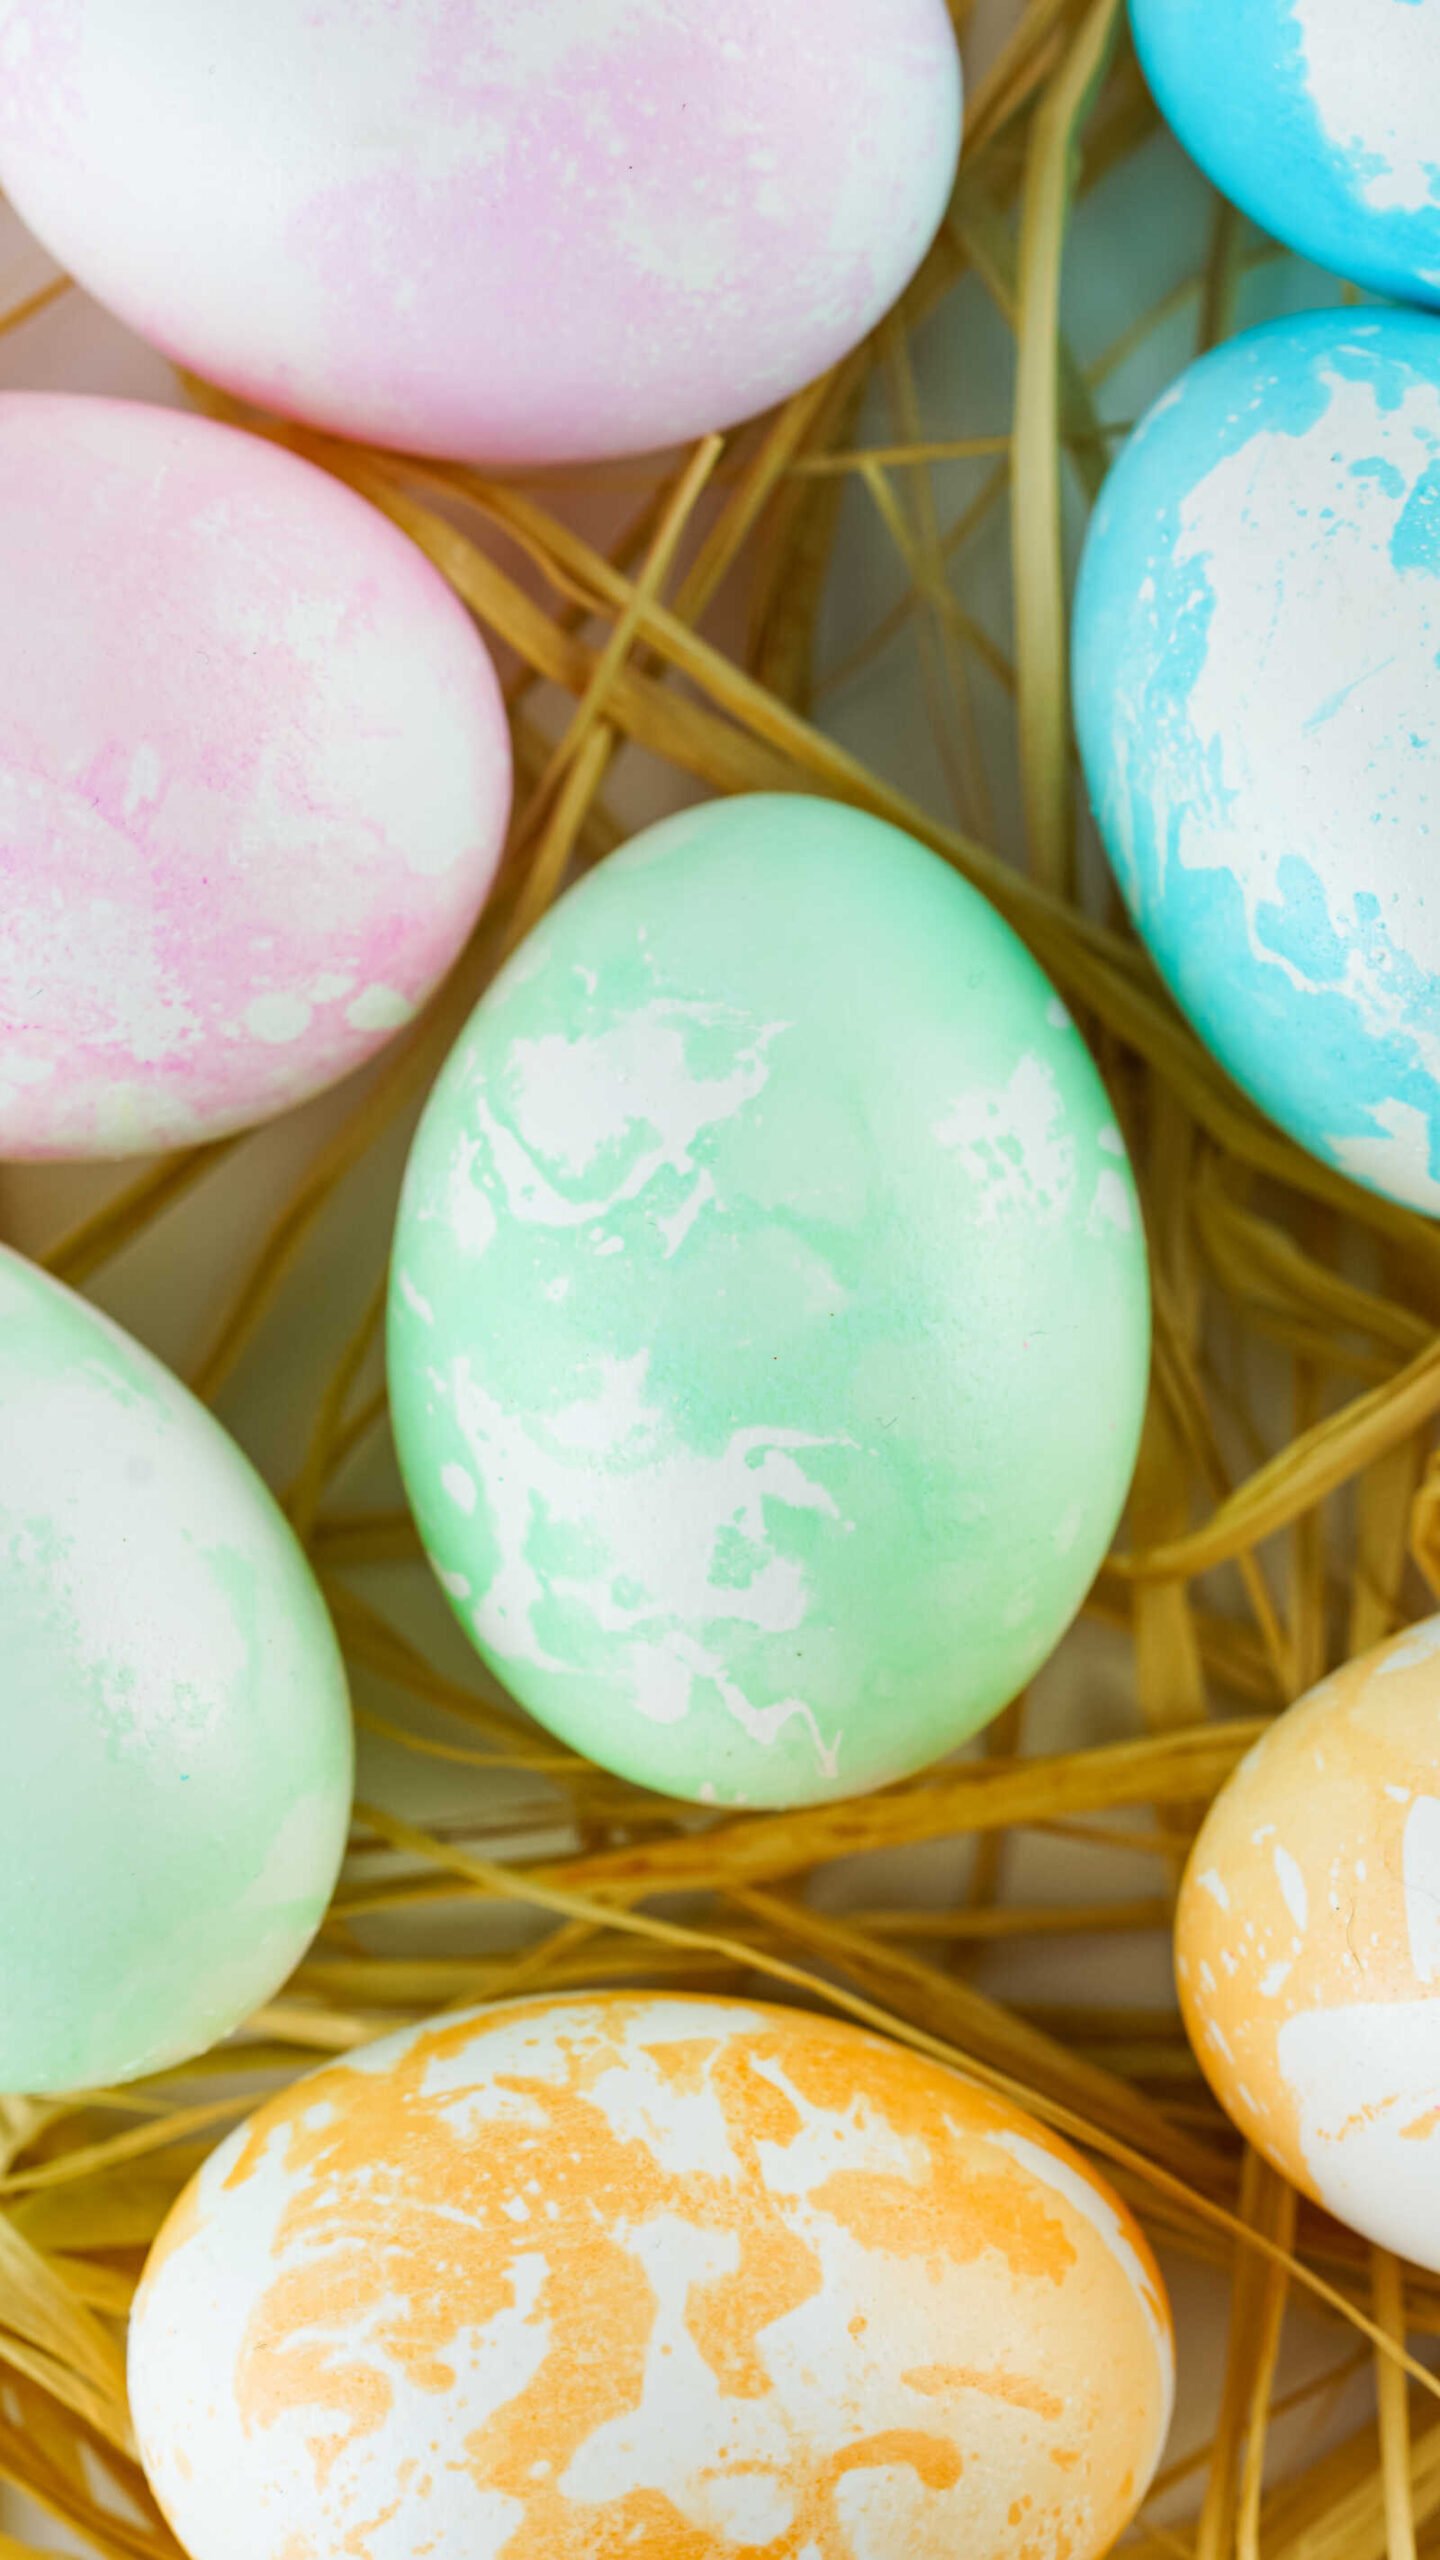
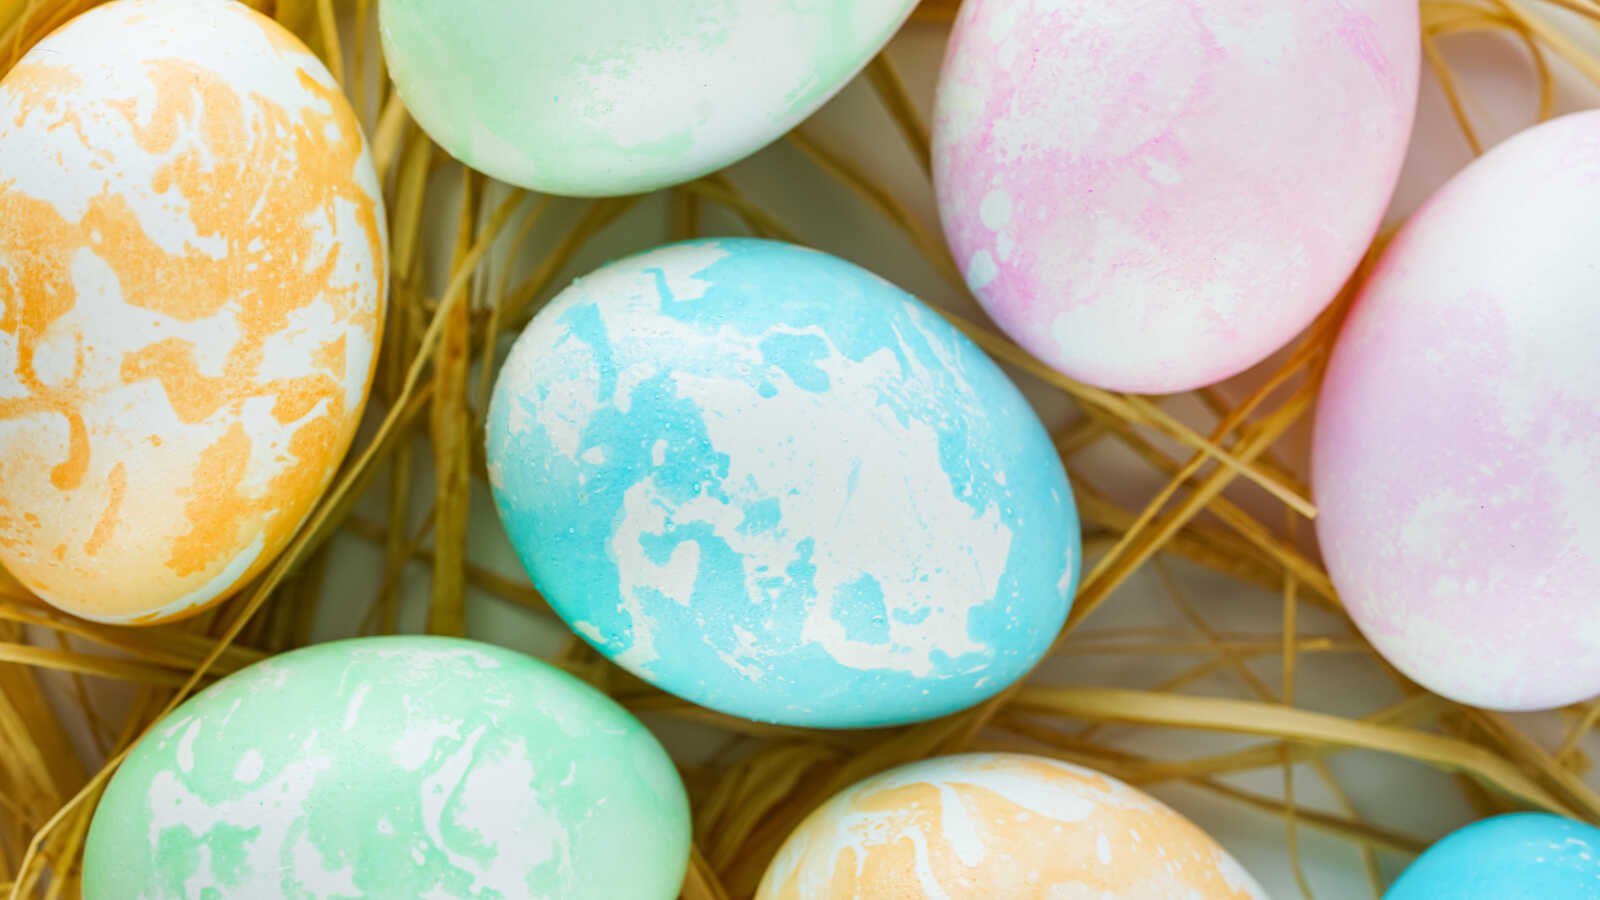
If you’re looking for a creative Easter activity that feels a little more elevated than traditional egg dyeing—but still totally doable with kids—this is it. The oil technique creates stunning, one-of-a-kind marbled patterns that look almost like watercolor art. No two eggs turn out the same, which makes the process just as exciting as the final result.
Whether you’re decorating eggs for an Easter brunch centerpiece, a festive egg hunt, or just a fun afternoon craft with your kids, this method adds a beautiful and artistic touch to your holiday traditions.
Why the Oil Method Works
Before diving in, it helps to understand why this technique creates that gorgeous marbled effect.
Oil and water don’t mix—so when you add oil to your dye bath, it creates tiny pockets that resist the dye. When your egg rolls through the mixture, those oil spots prevent the color from sticking evenly, leaving behind those dreamy swirls and streaks.
It’s a little bit of science mixed with a whole lot of creativity—and the results are always stunning.
Details and Planning
Prep Time: 10 Minutes
Dye Time: 5 Seconds
Dry Time: 5 Minutes
Yields: As many as you like
Items Needed
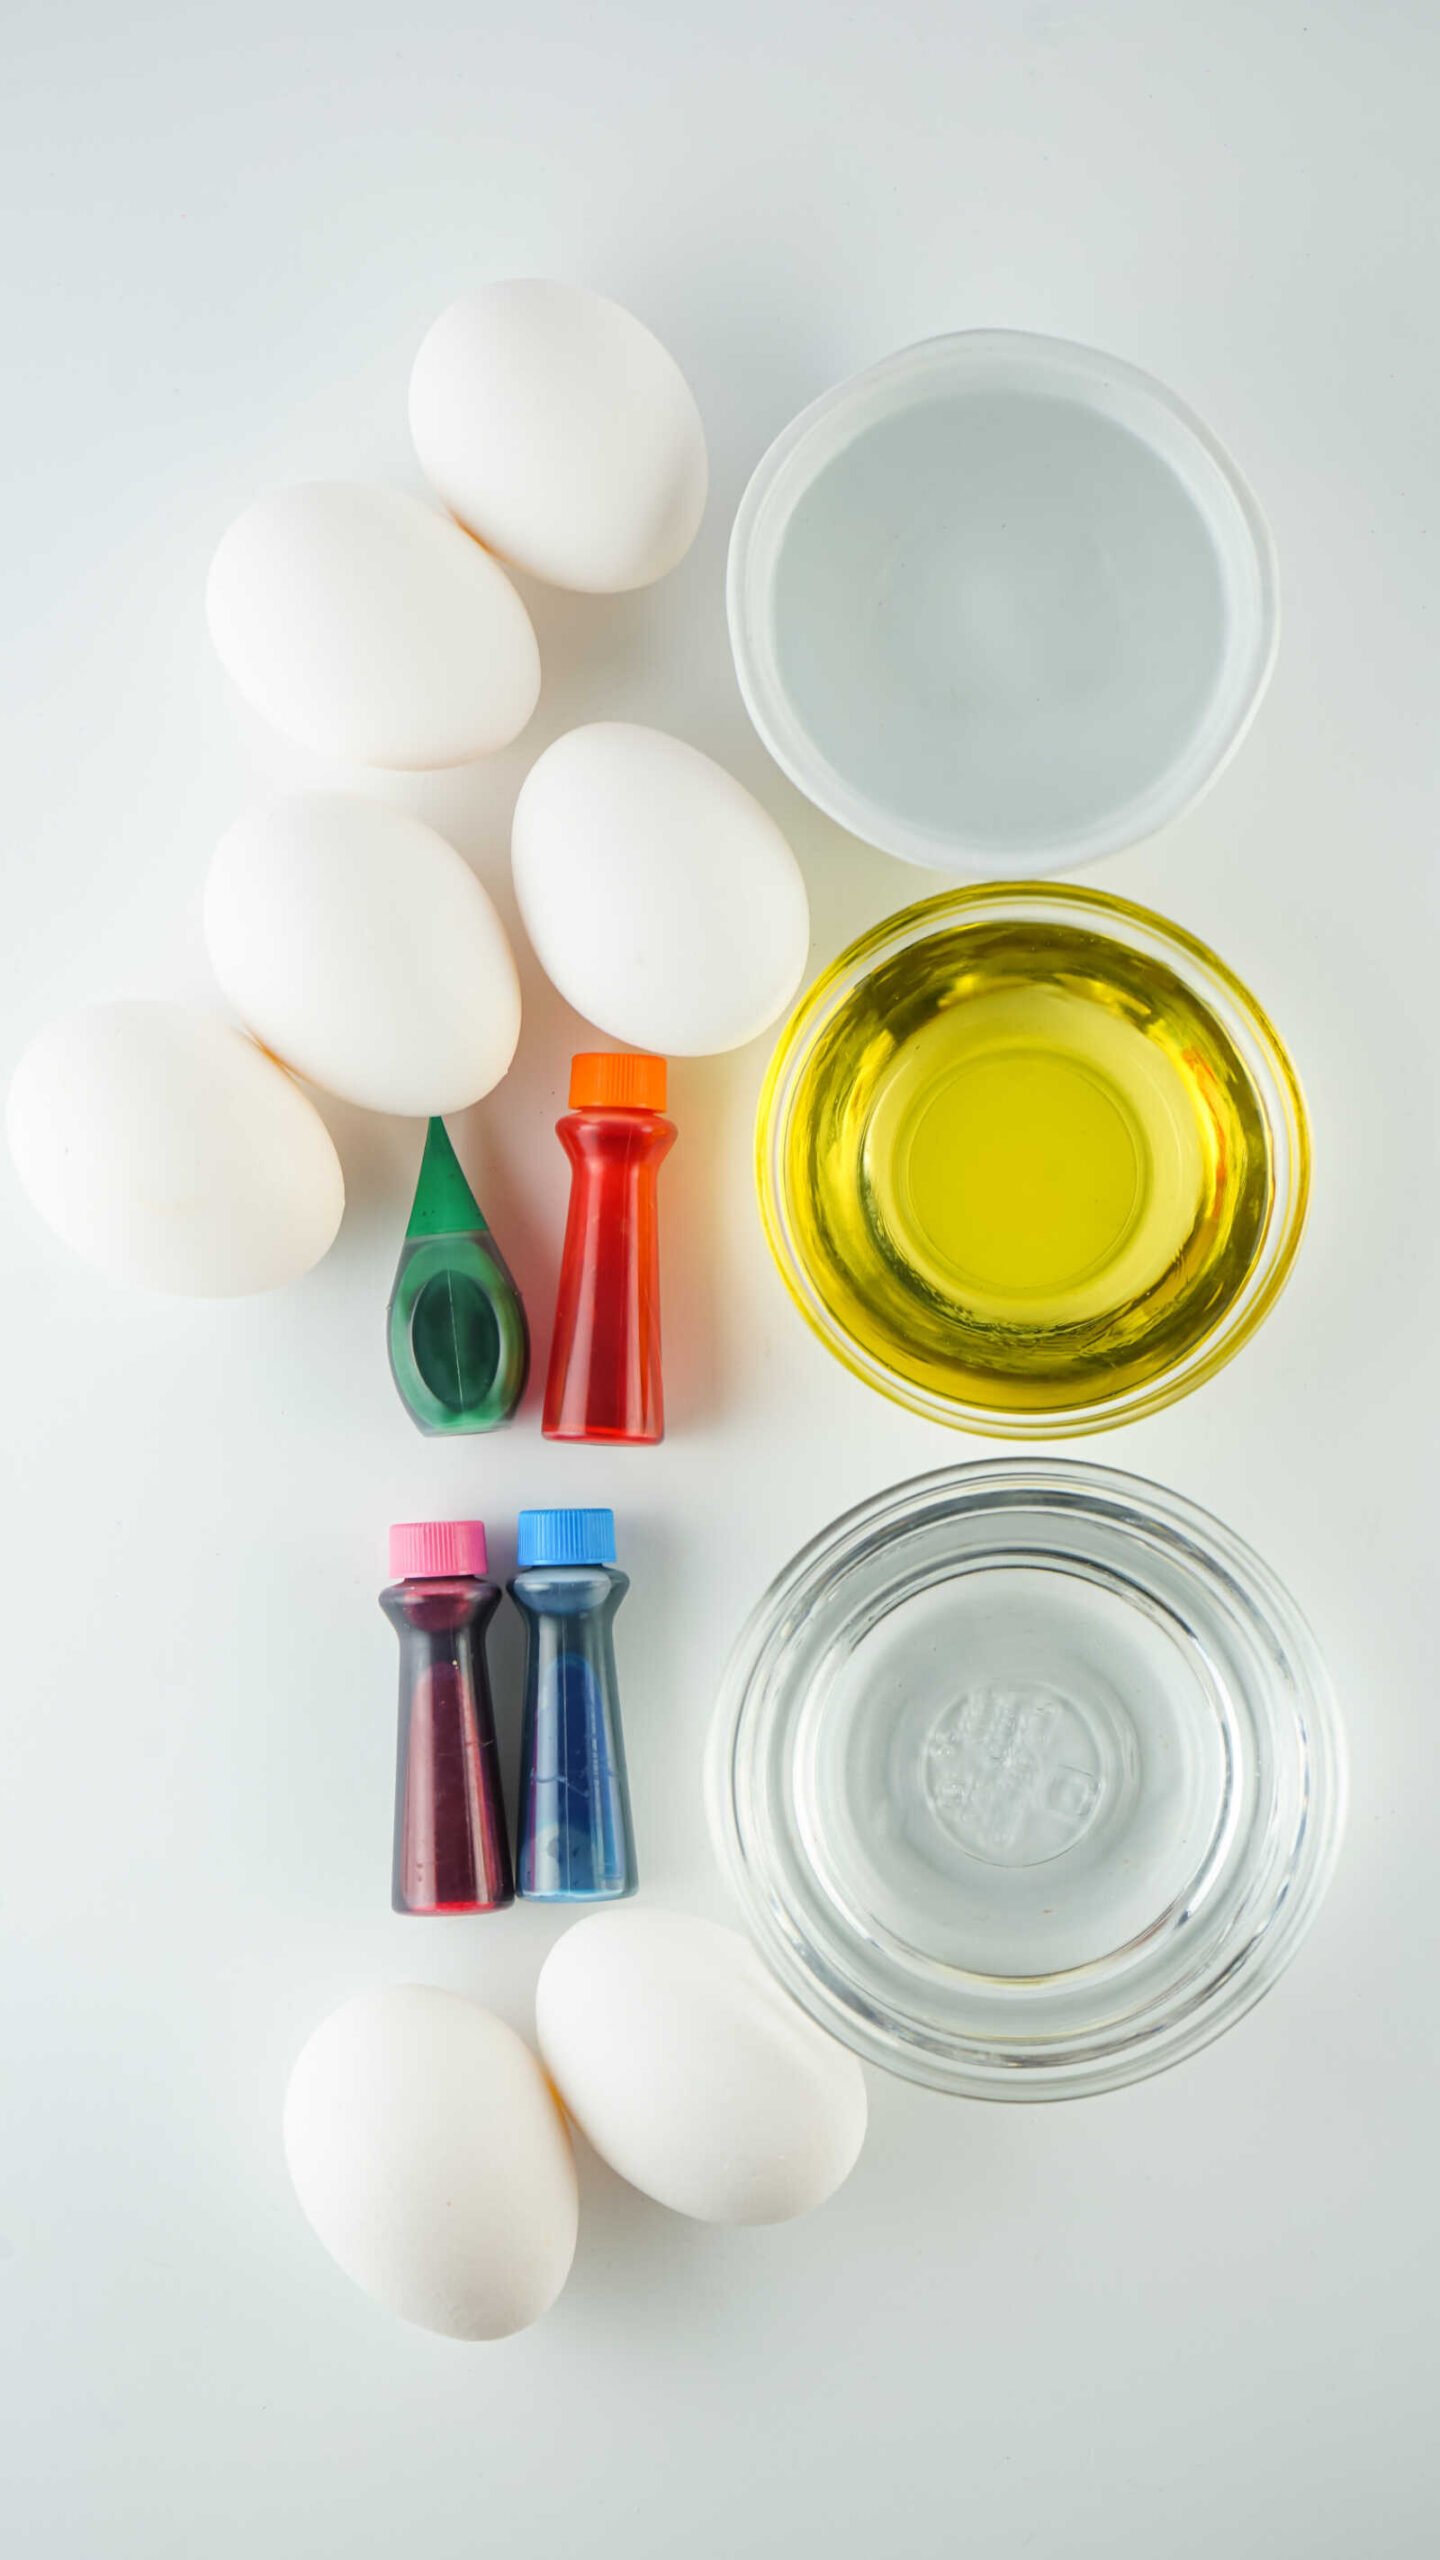
To get started, gather the following supplies:
- Boiled Eggs
- ½ Cup Boiling Water
- 1 Tablespoon Cooking Oil (plus just a dab extra)
- ½ Tablespoon Vinegar
- 10–20 Drops Food Dye
- Plastic Cereal Bowls
- Paper Towels
- Rubber Gloves
- Forks or Spoons
Step-by-Step Directions
Follow these steps carefully to get the best marbled effect:
1. Prepare Your Dye Bowls
You’ll need one bowl per color you would like to use. I used inexpensive cereal bowls because they’re the perfect size and easy to clean up.
Make sure the water level stays low—no more than about half an inch. This is key because you don’t want the egg fully submerged.
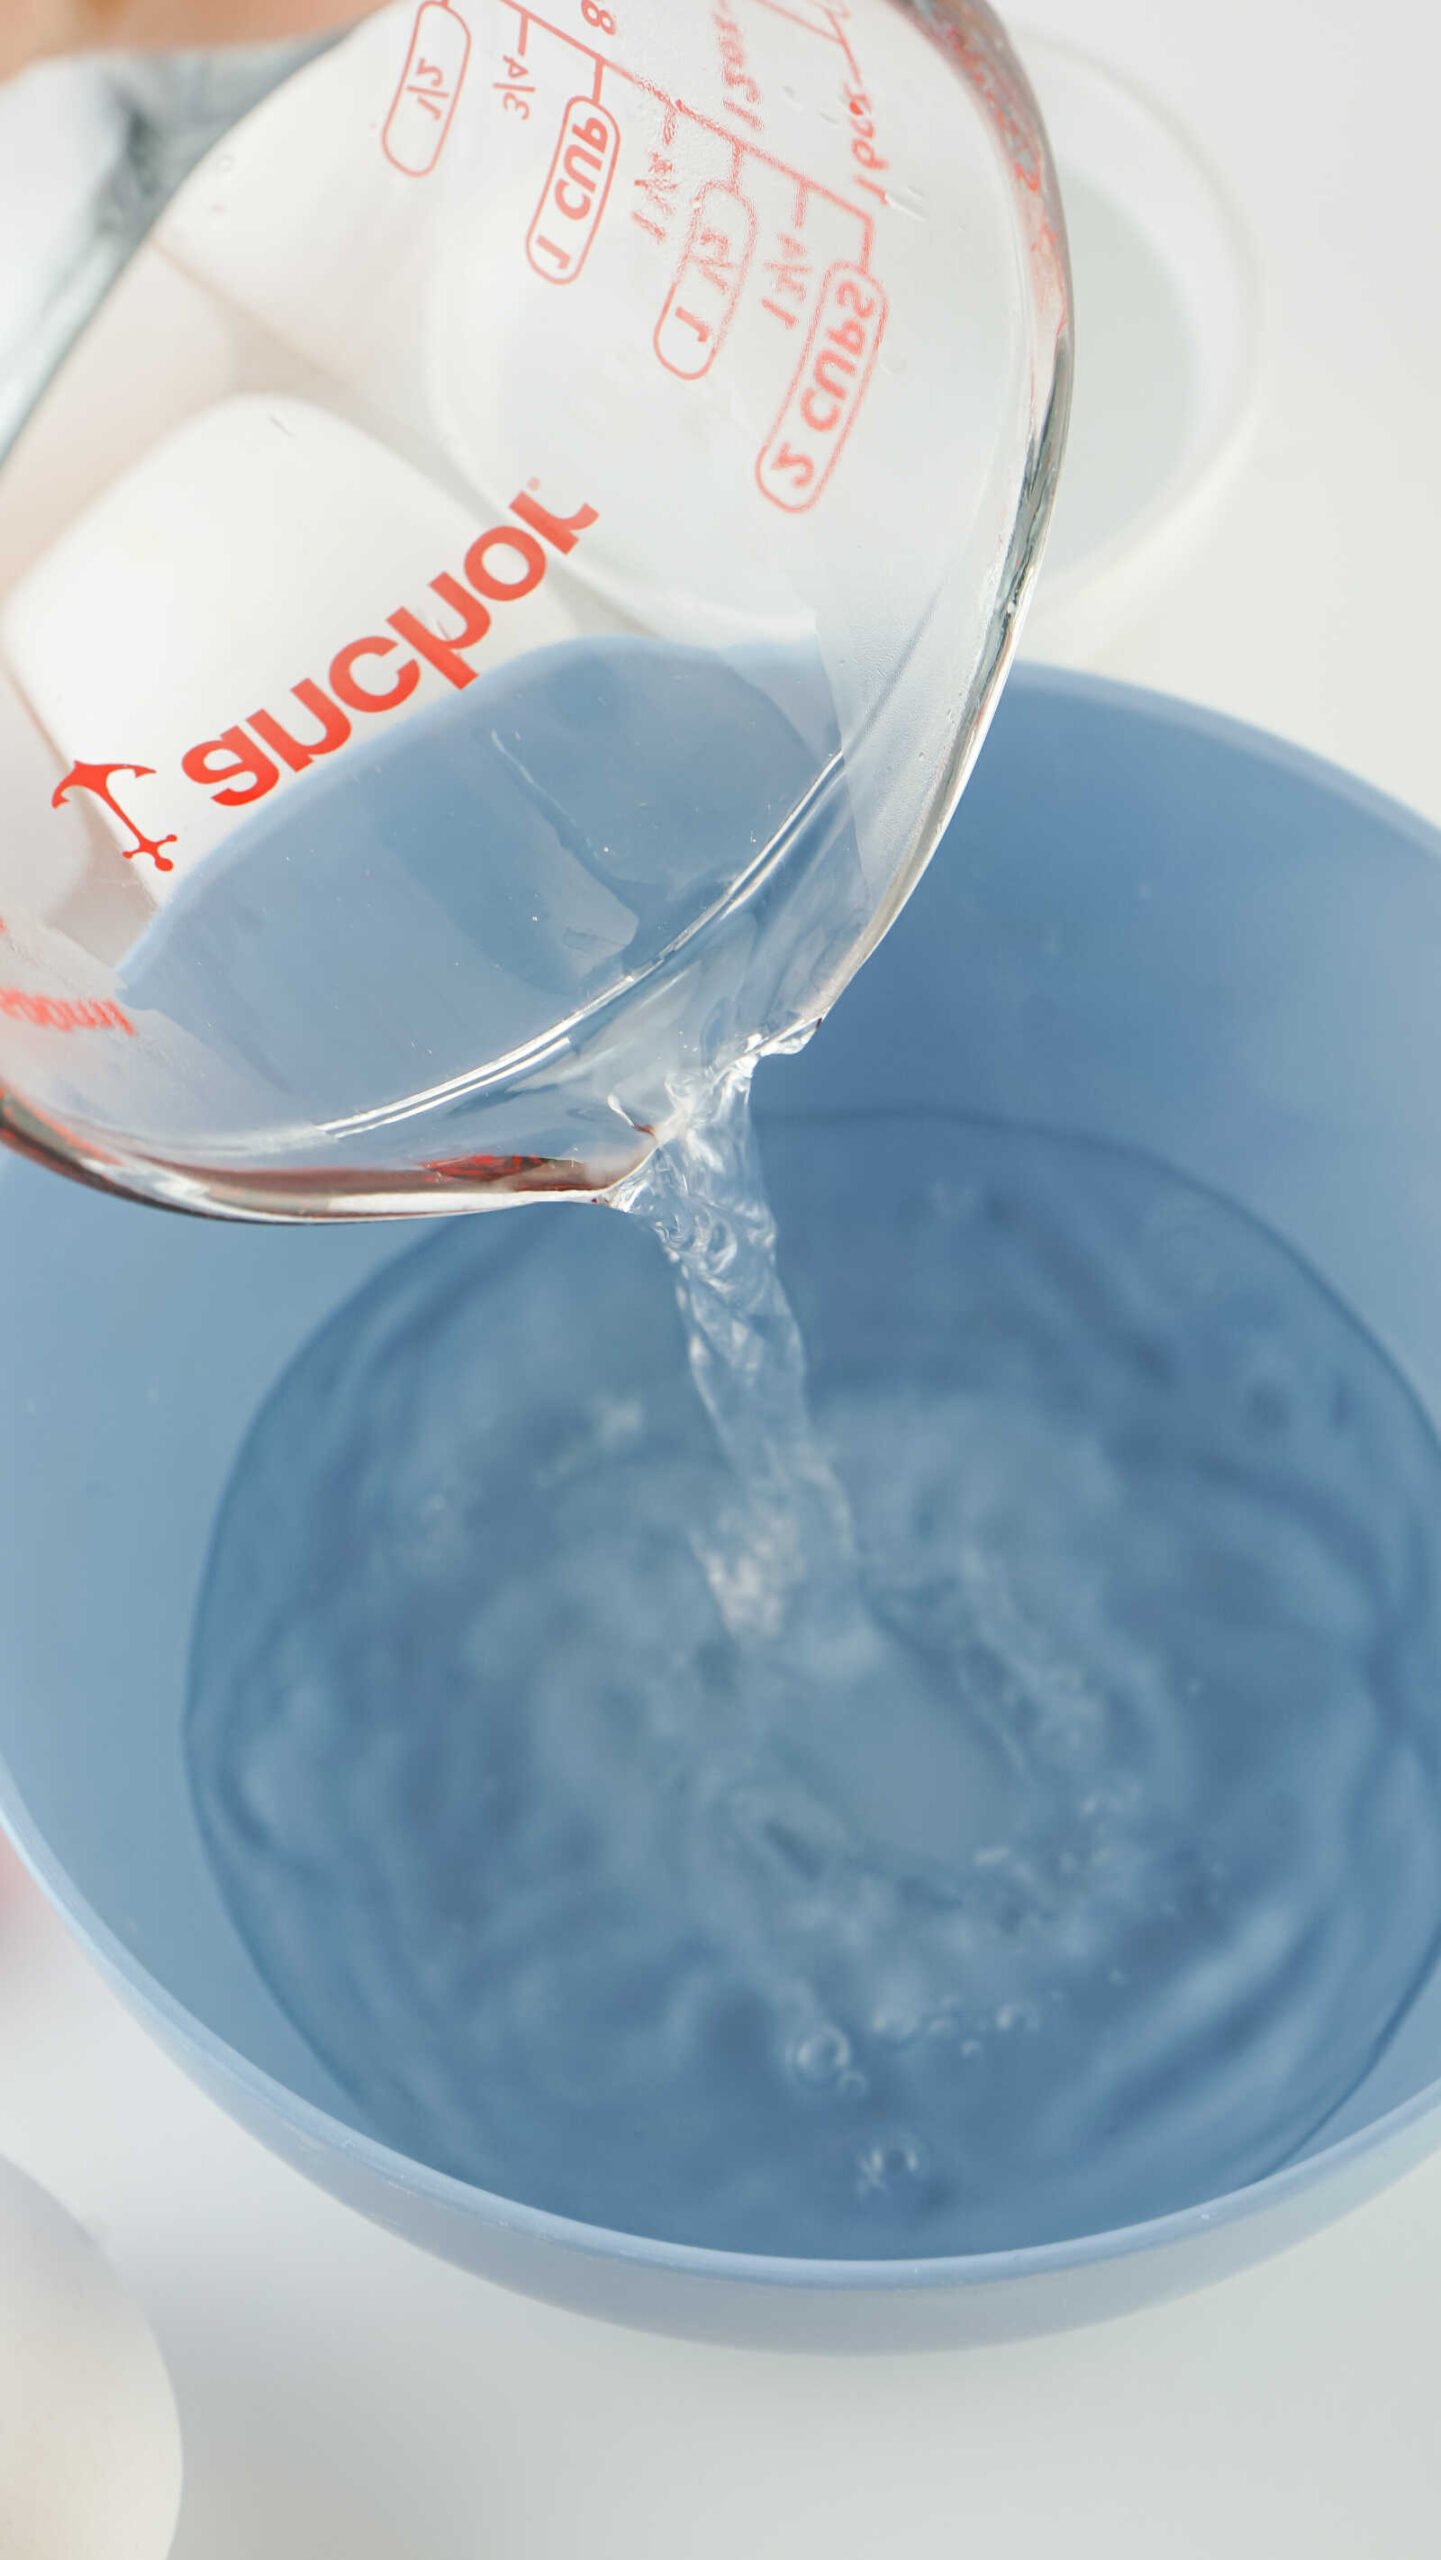

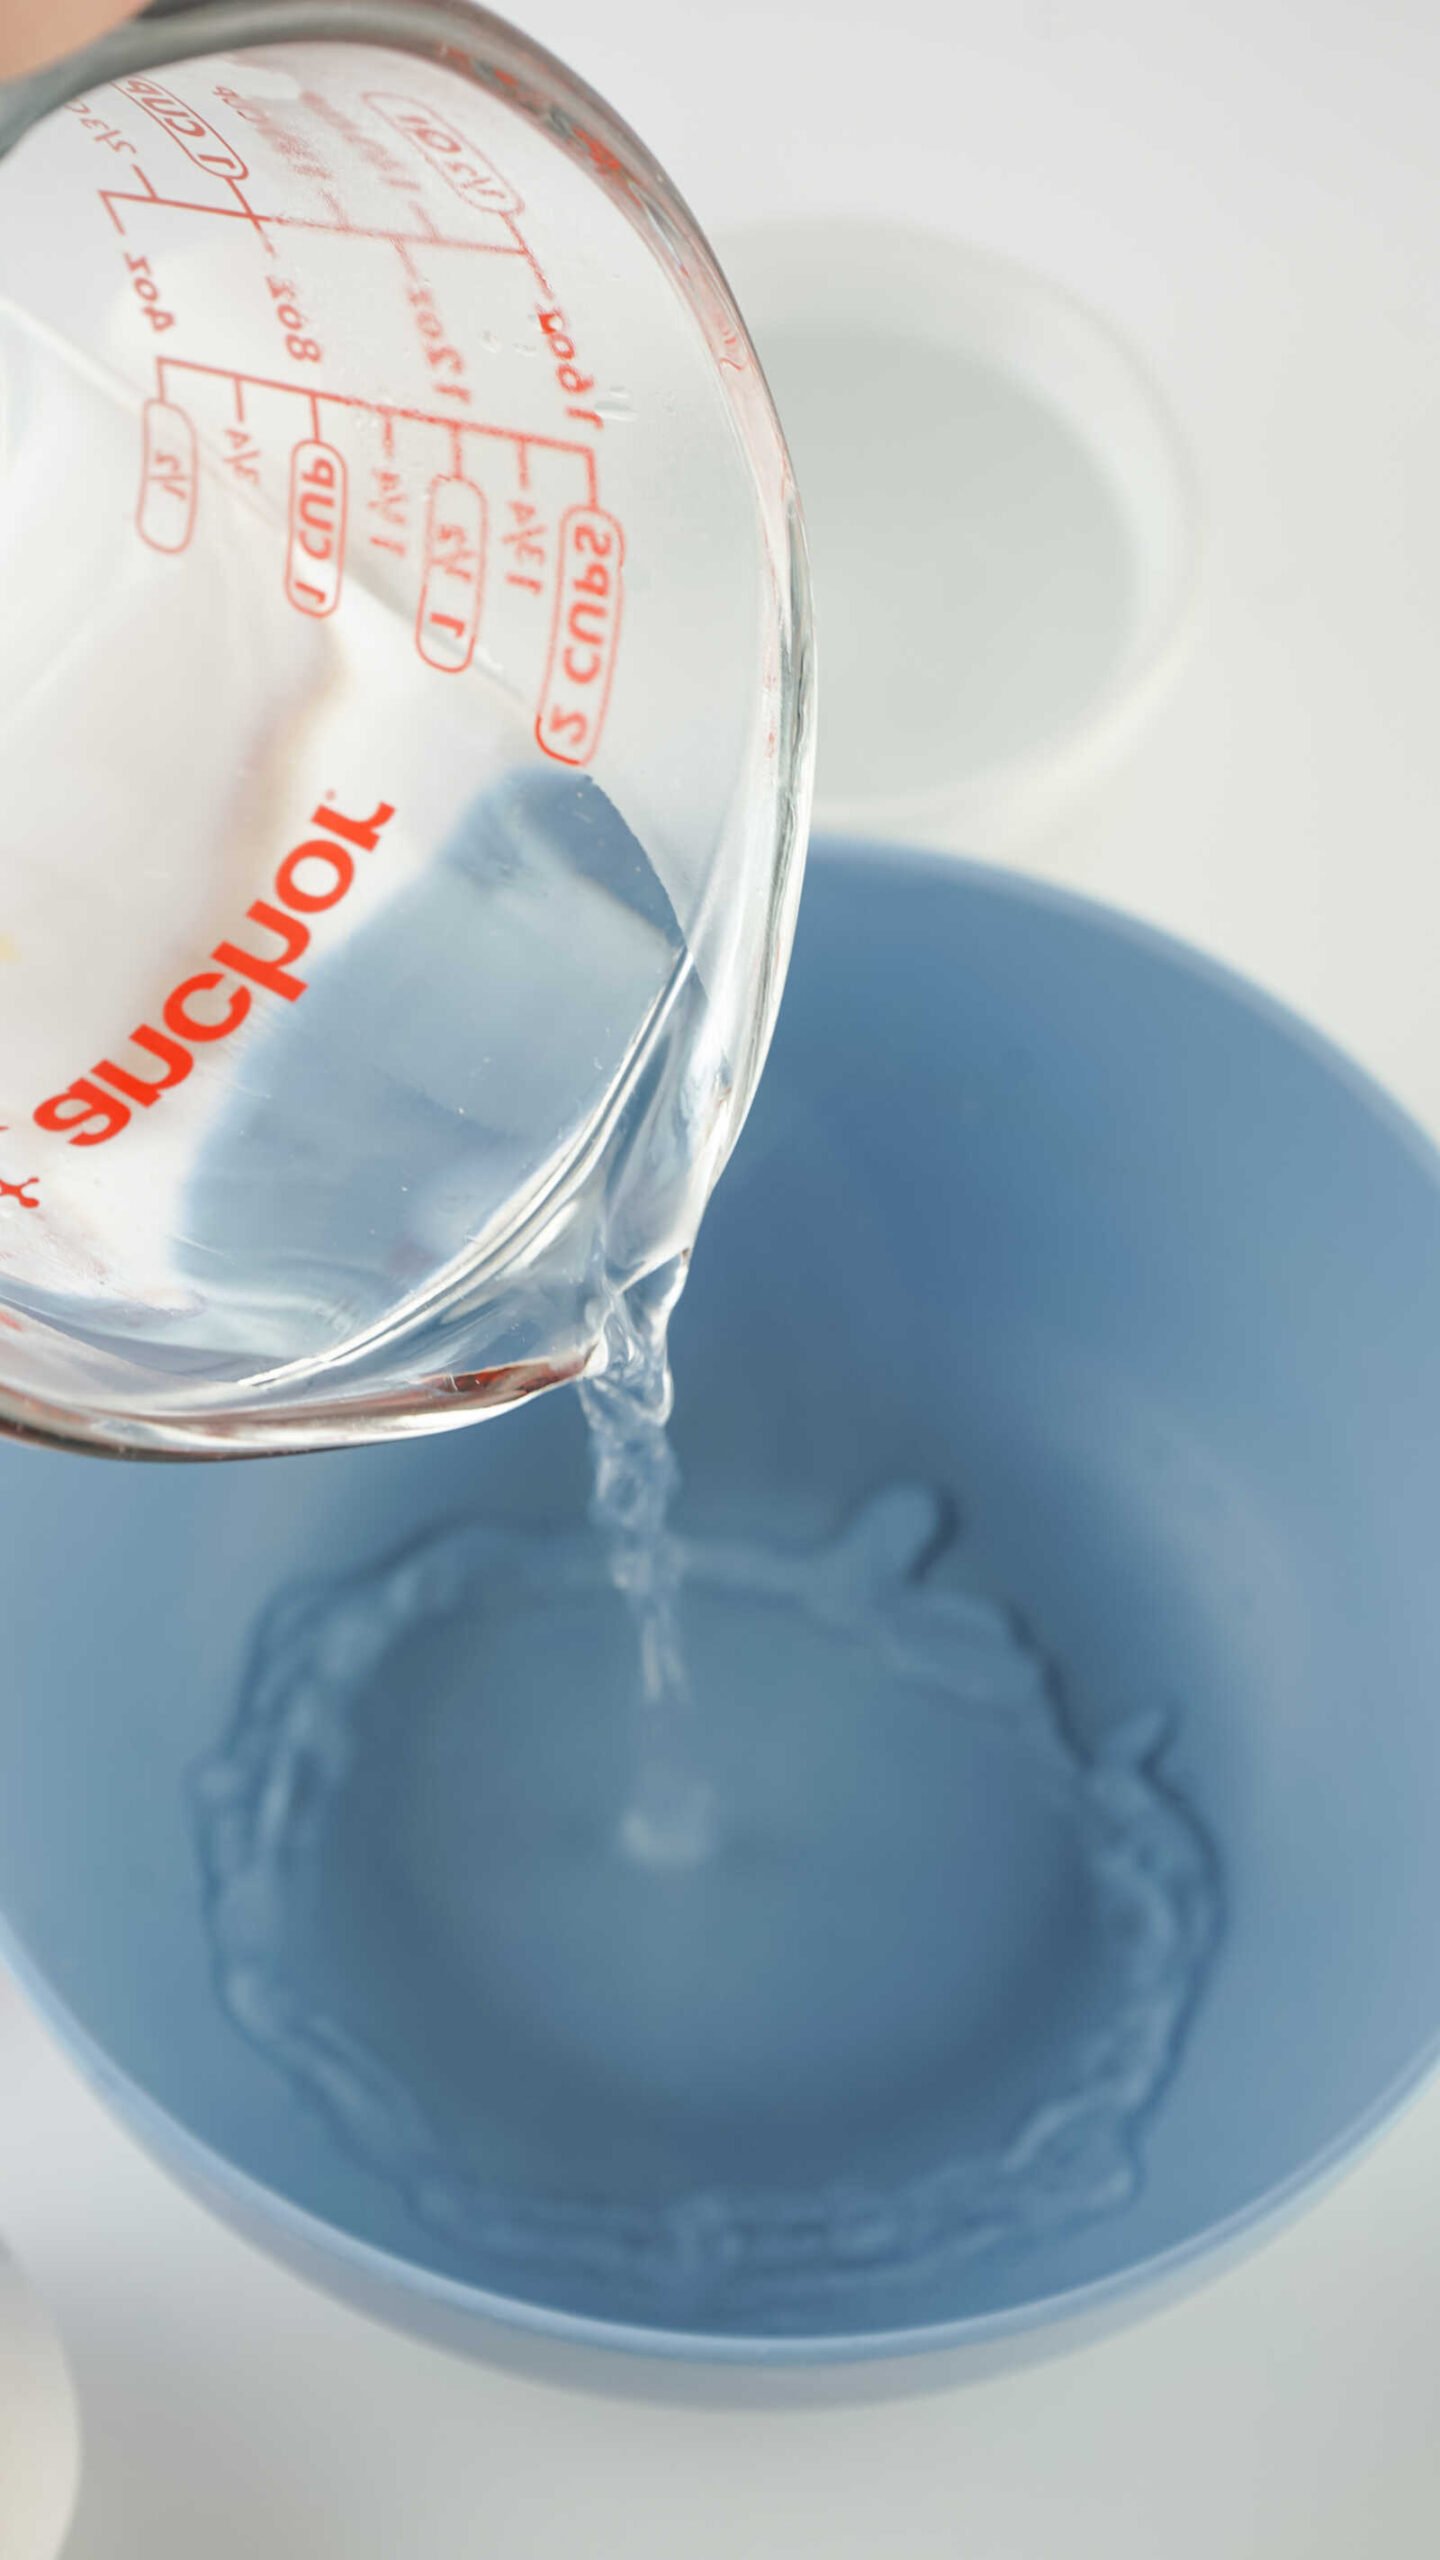
2. Add Water and Vinegar
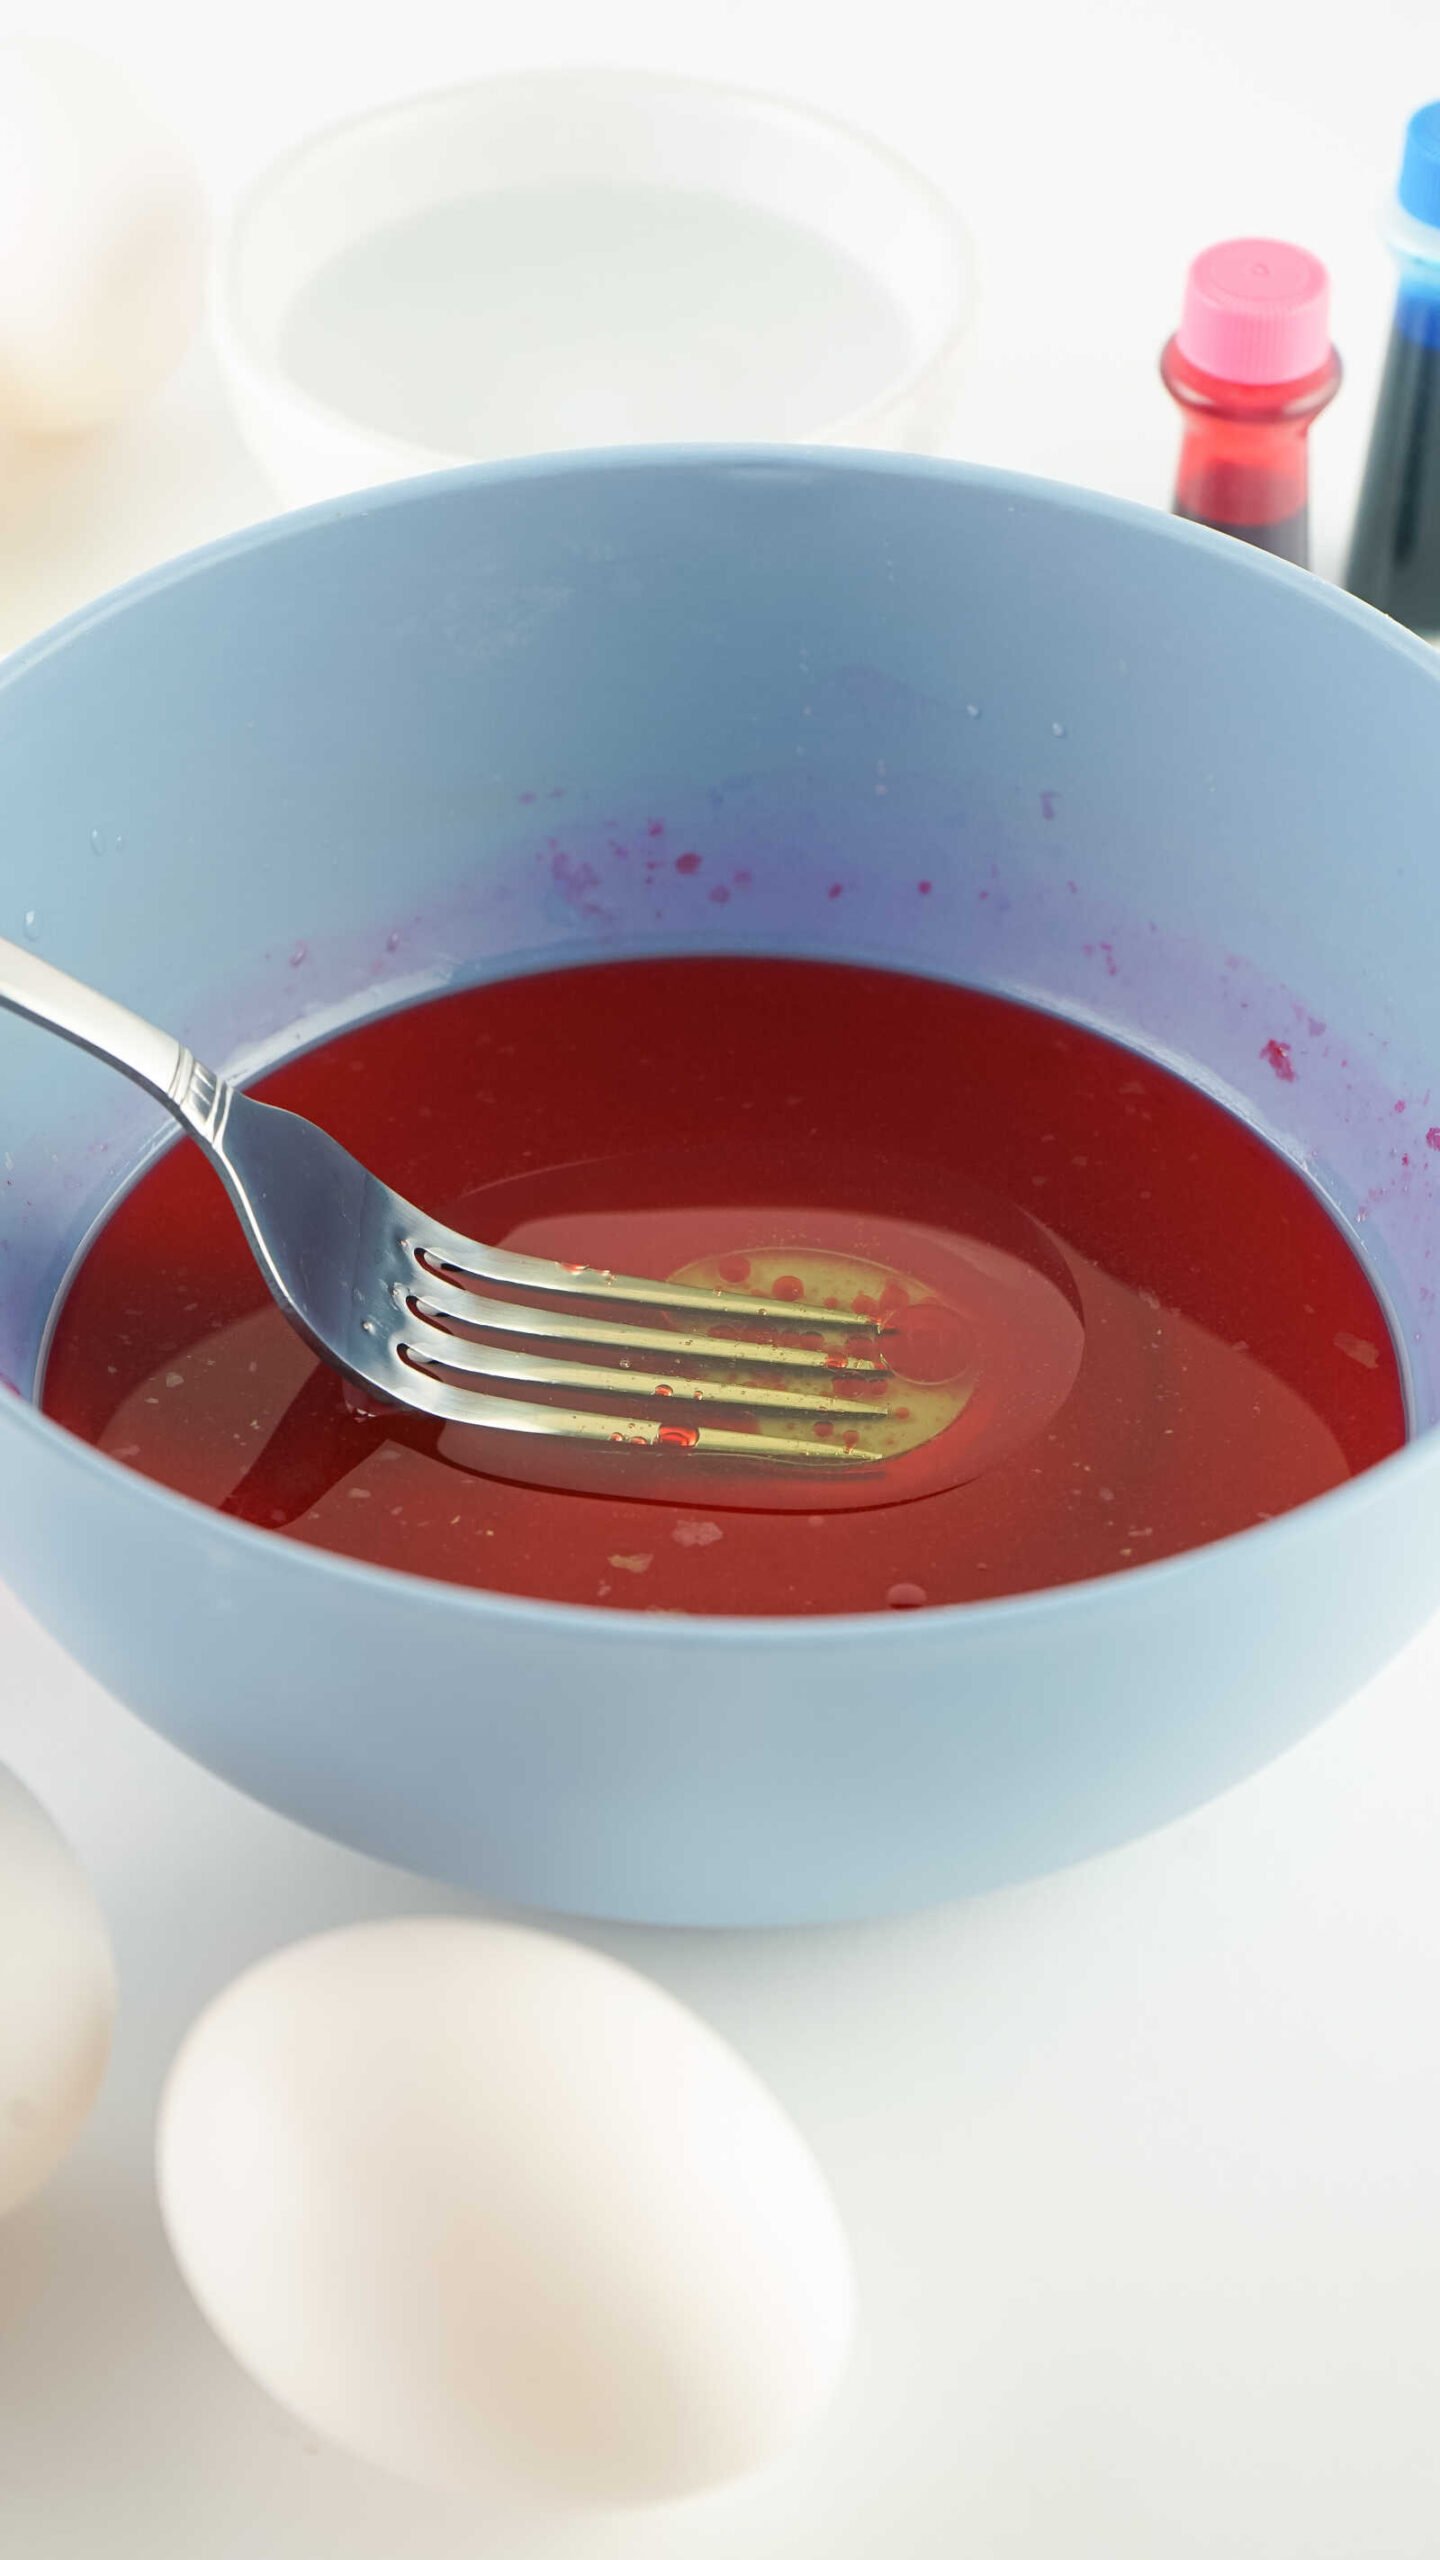
Pour ½ cup of boiling water into each bowl. Then add ½ tablespoon of vinegar to help the dye stick to the eggs.
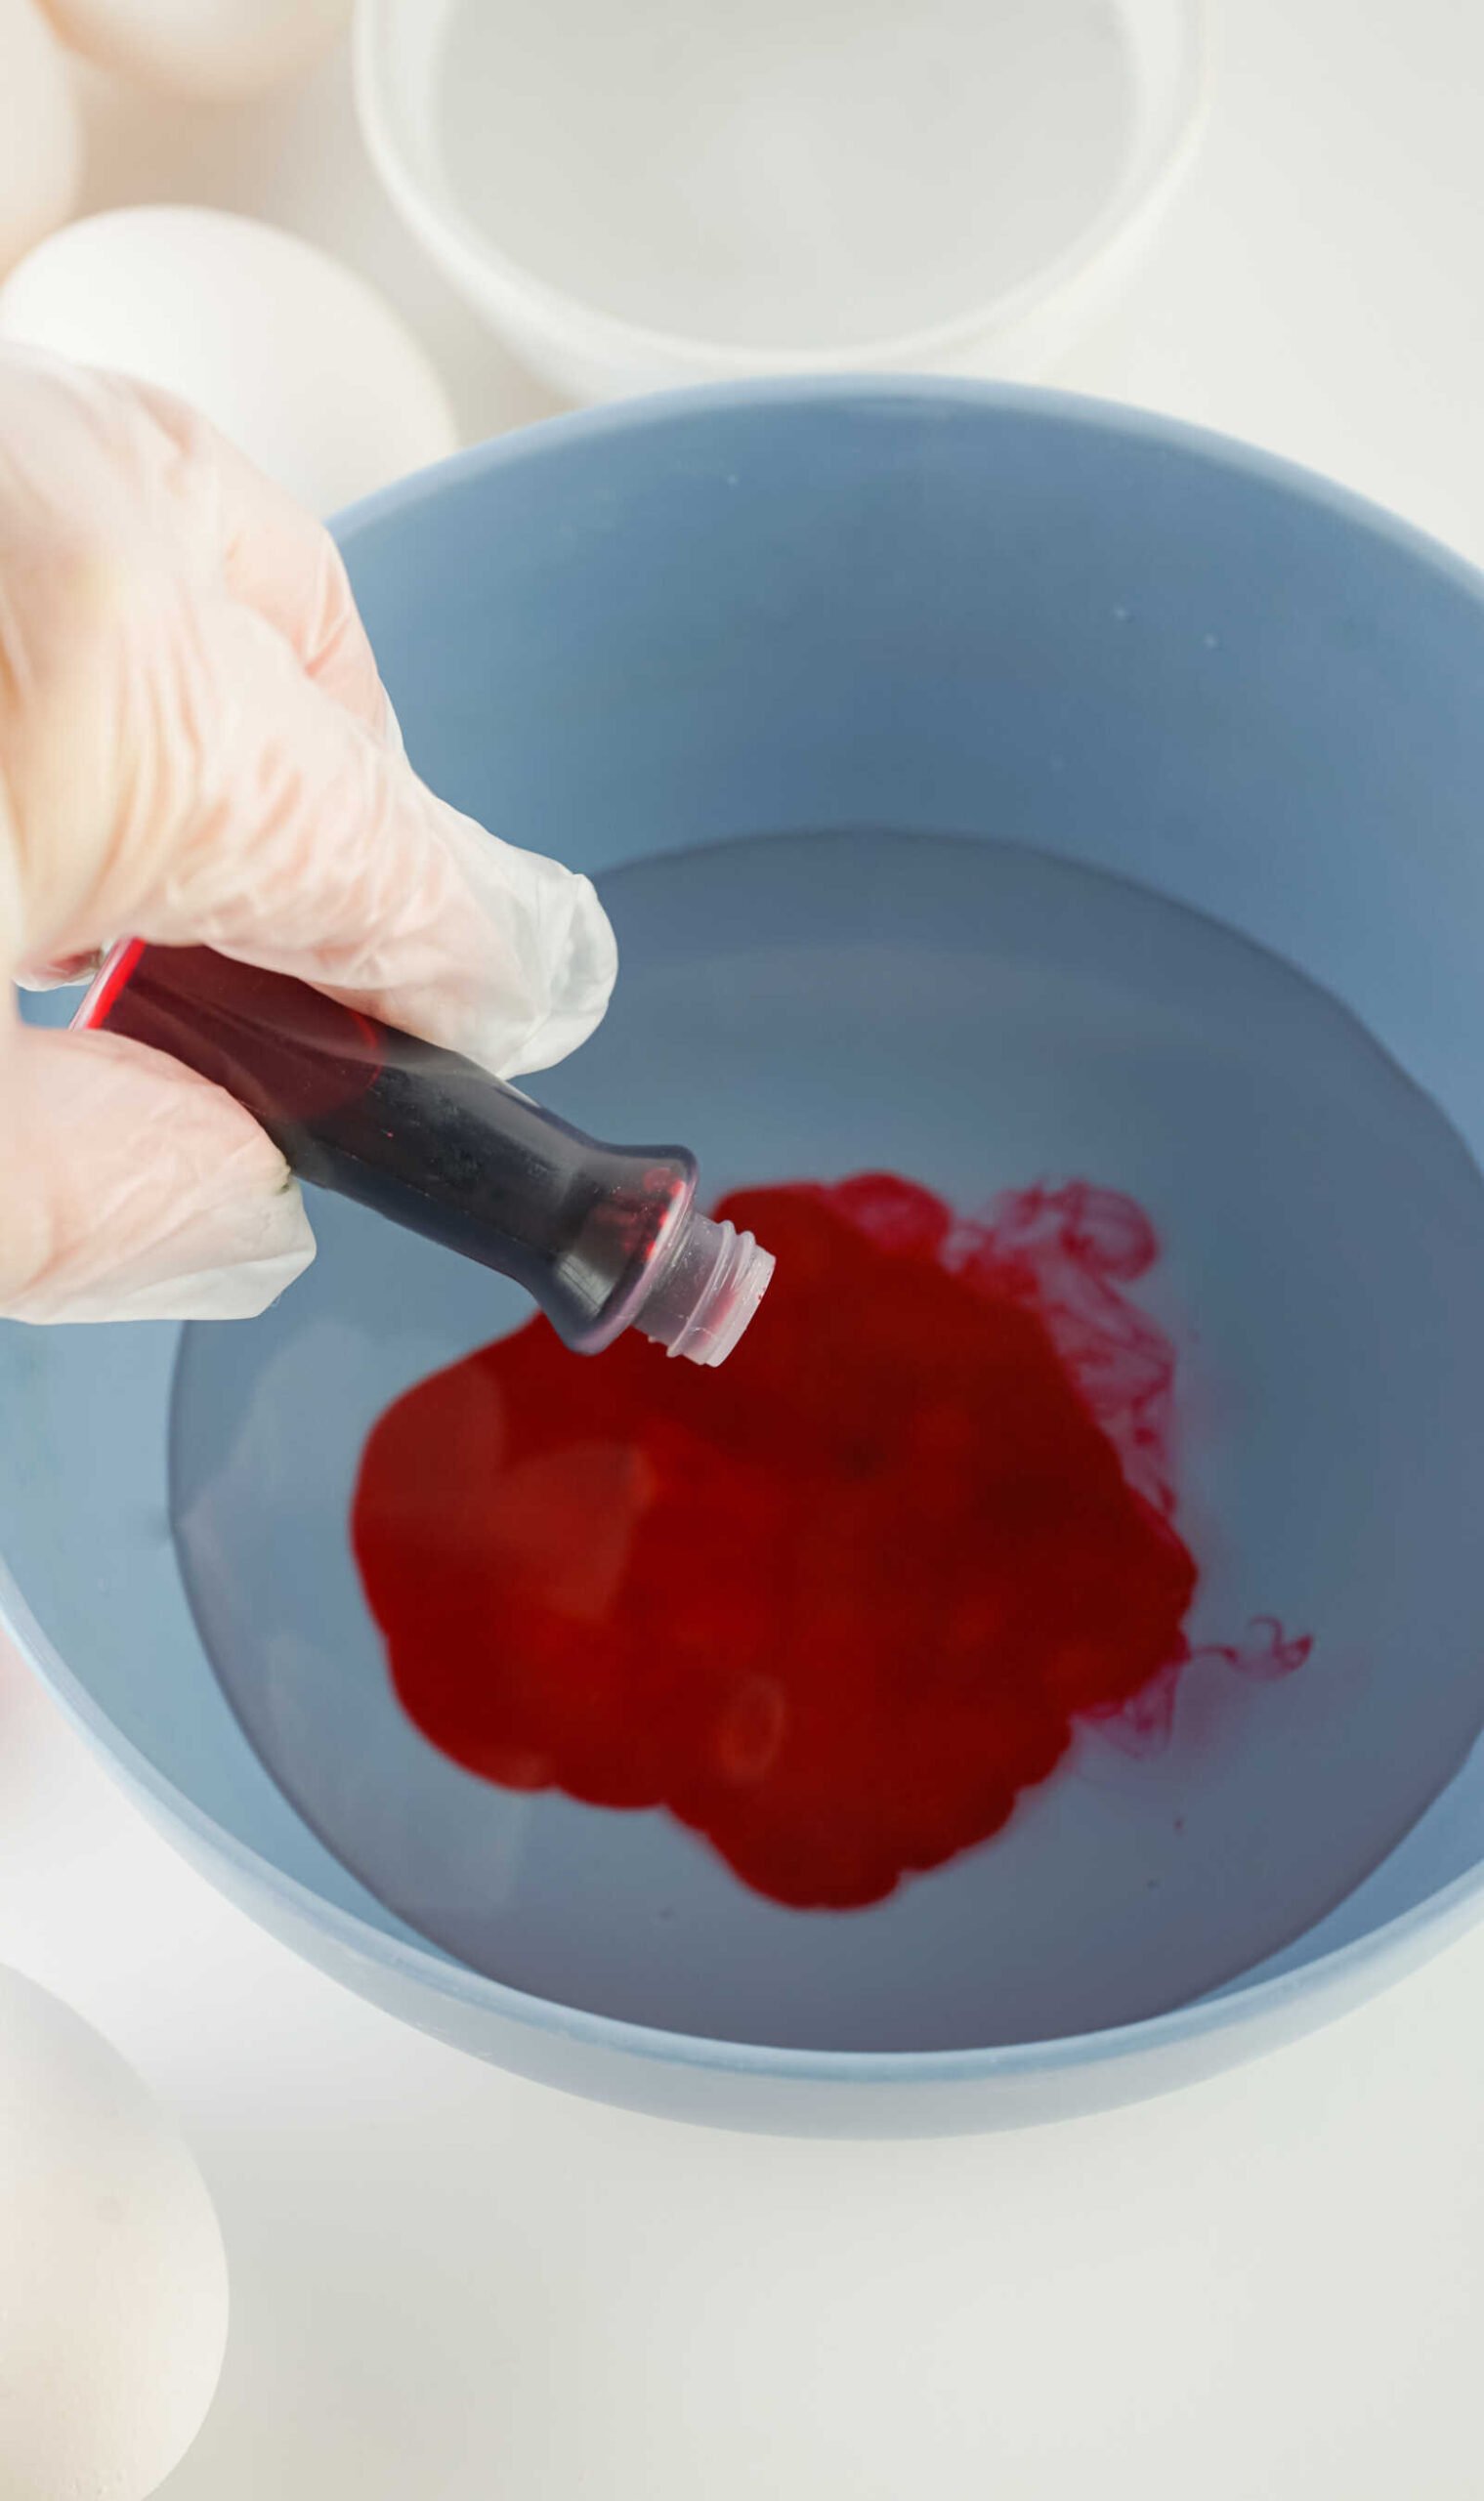
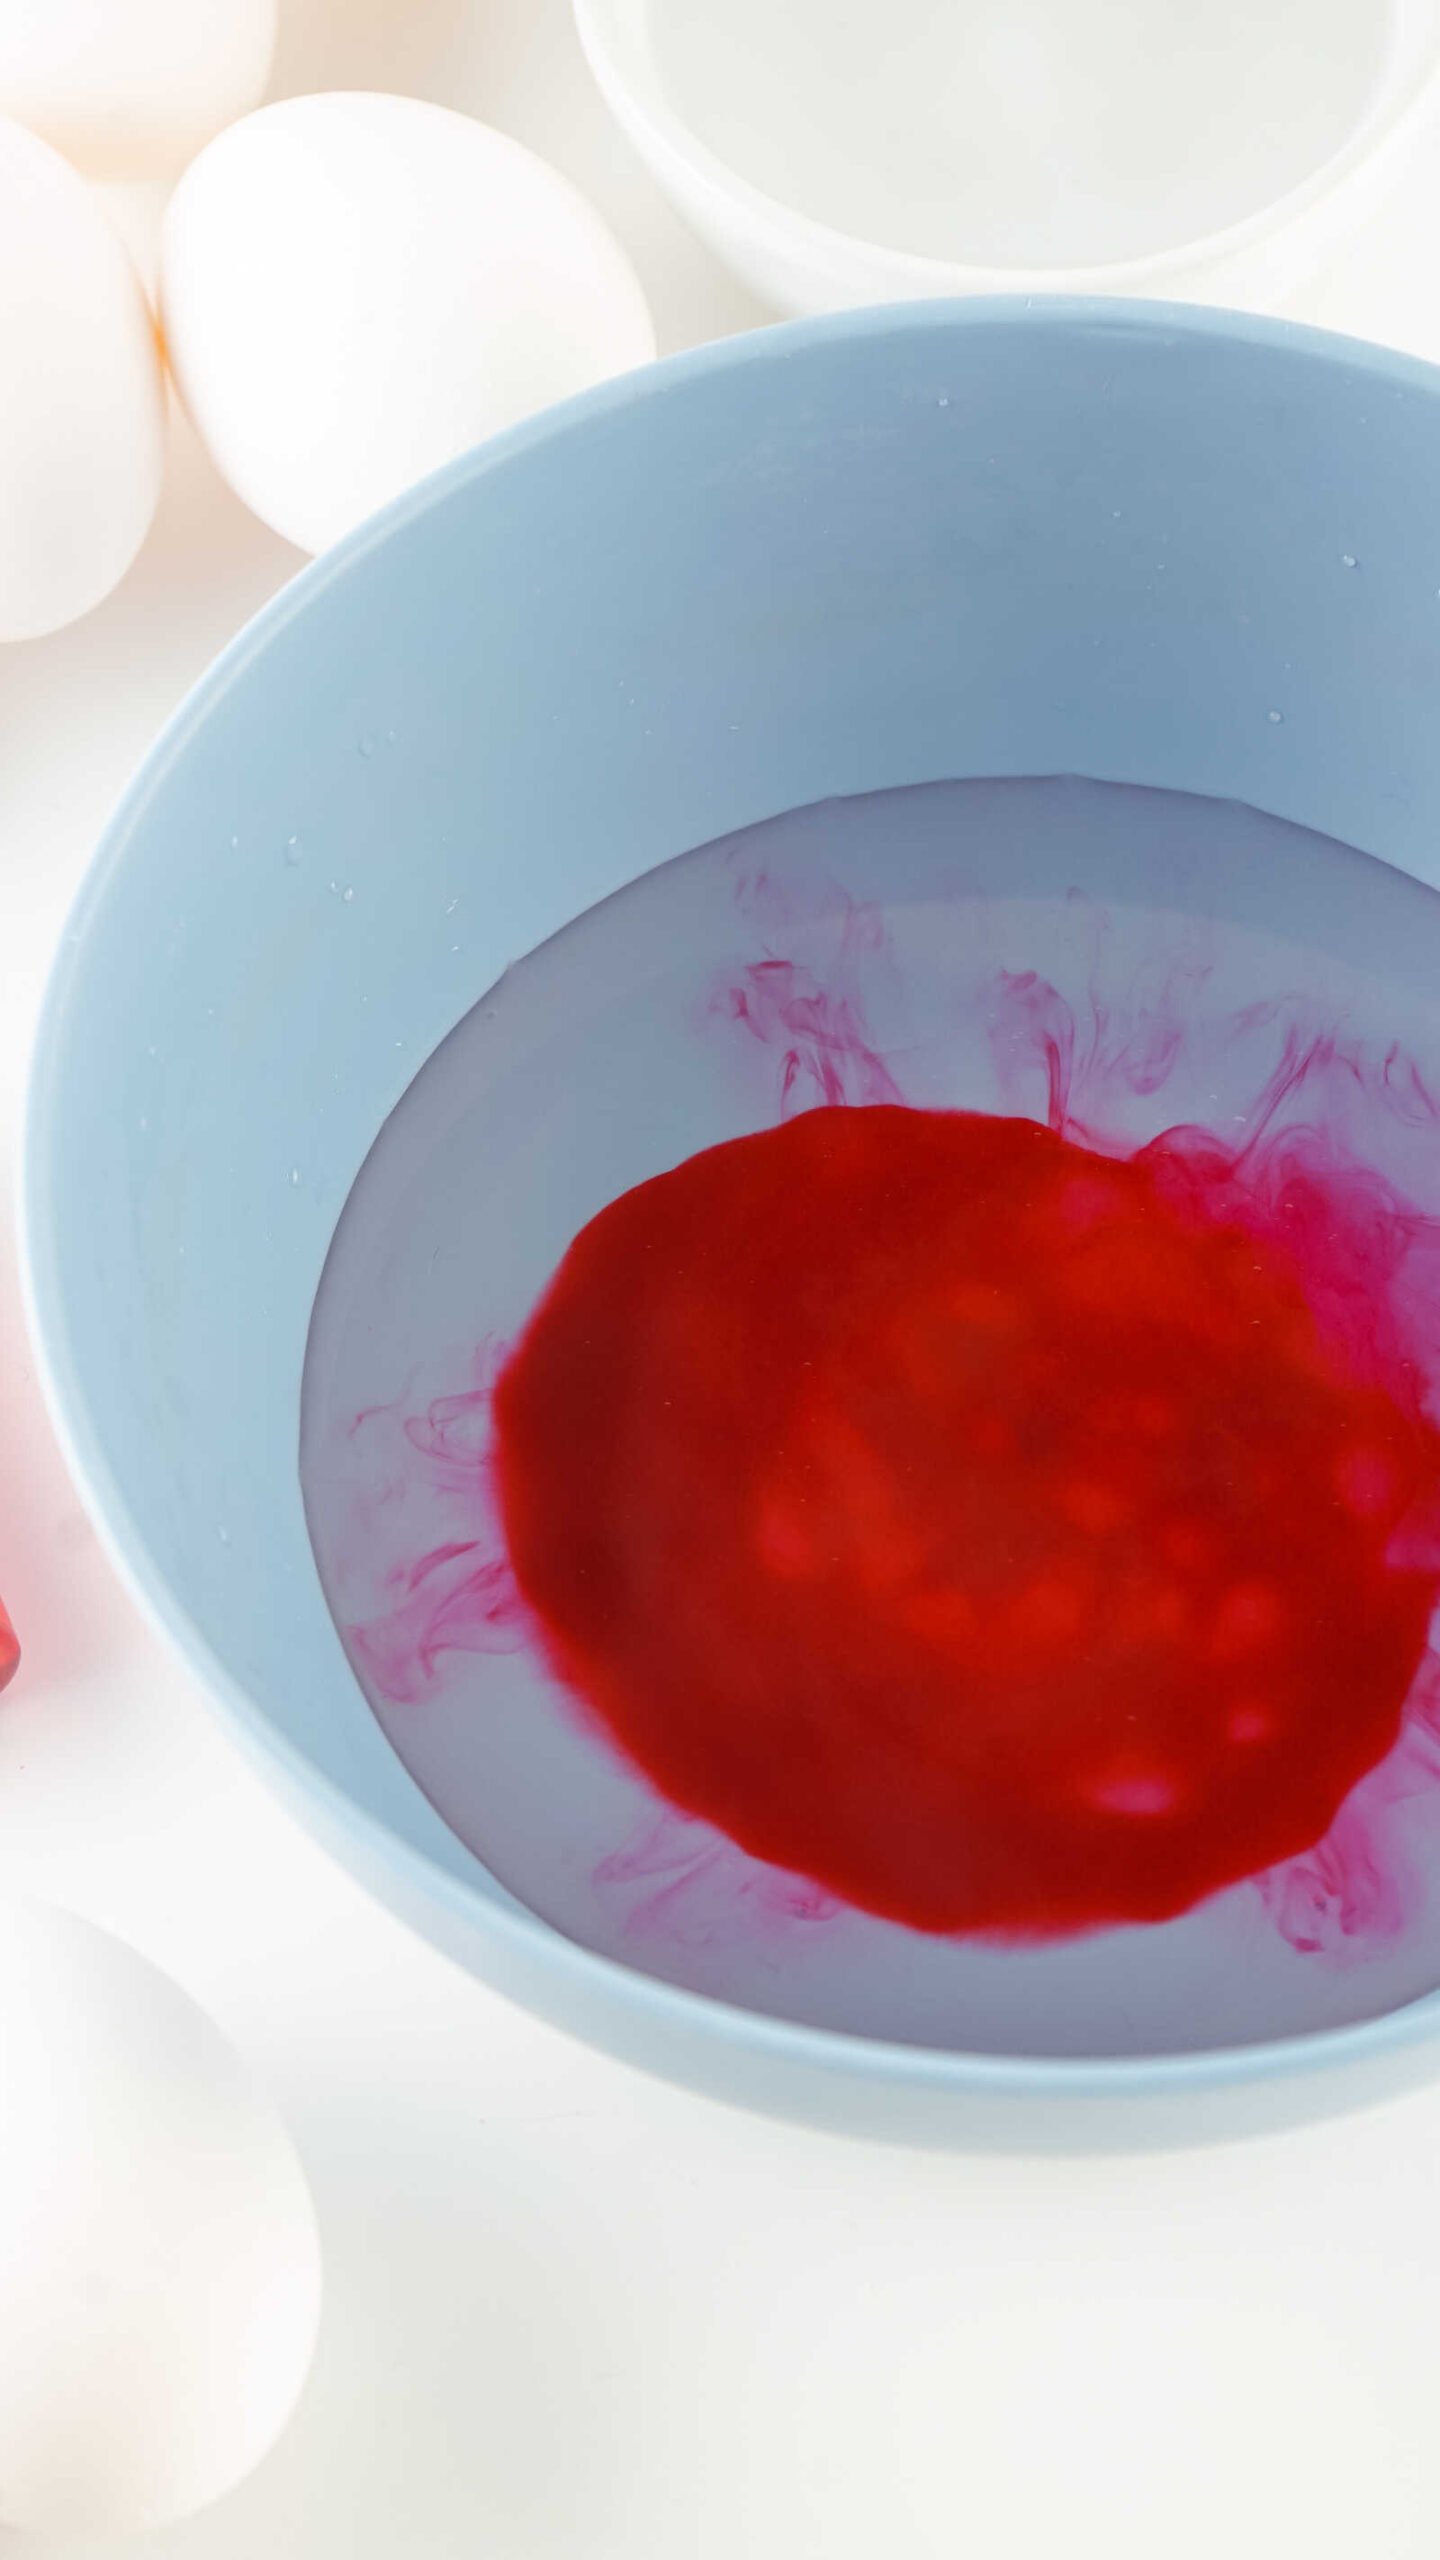
3. Add Food Coloring
Add 10–20 drops of food dye to each bowl (one color per bowl).
- Darker colors like blue and purple: start with 10 drops
- Lighter colors like pink and green: use closer to 20 drops
Stir thoroughly so the color is evenly distributed.
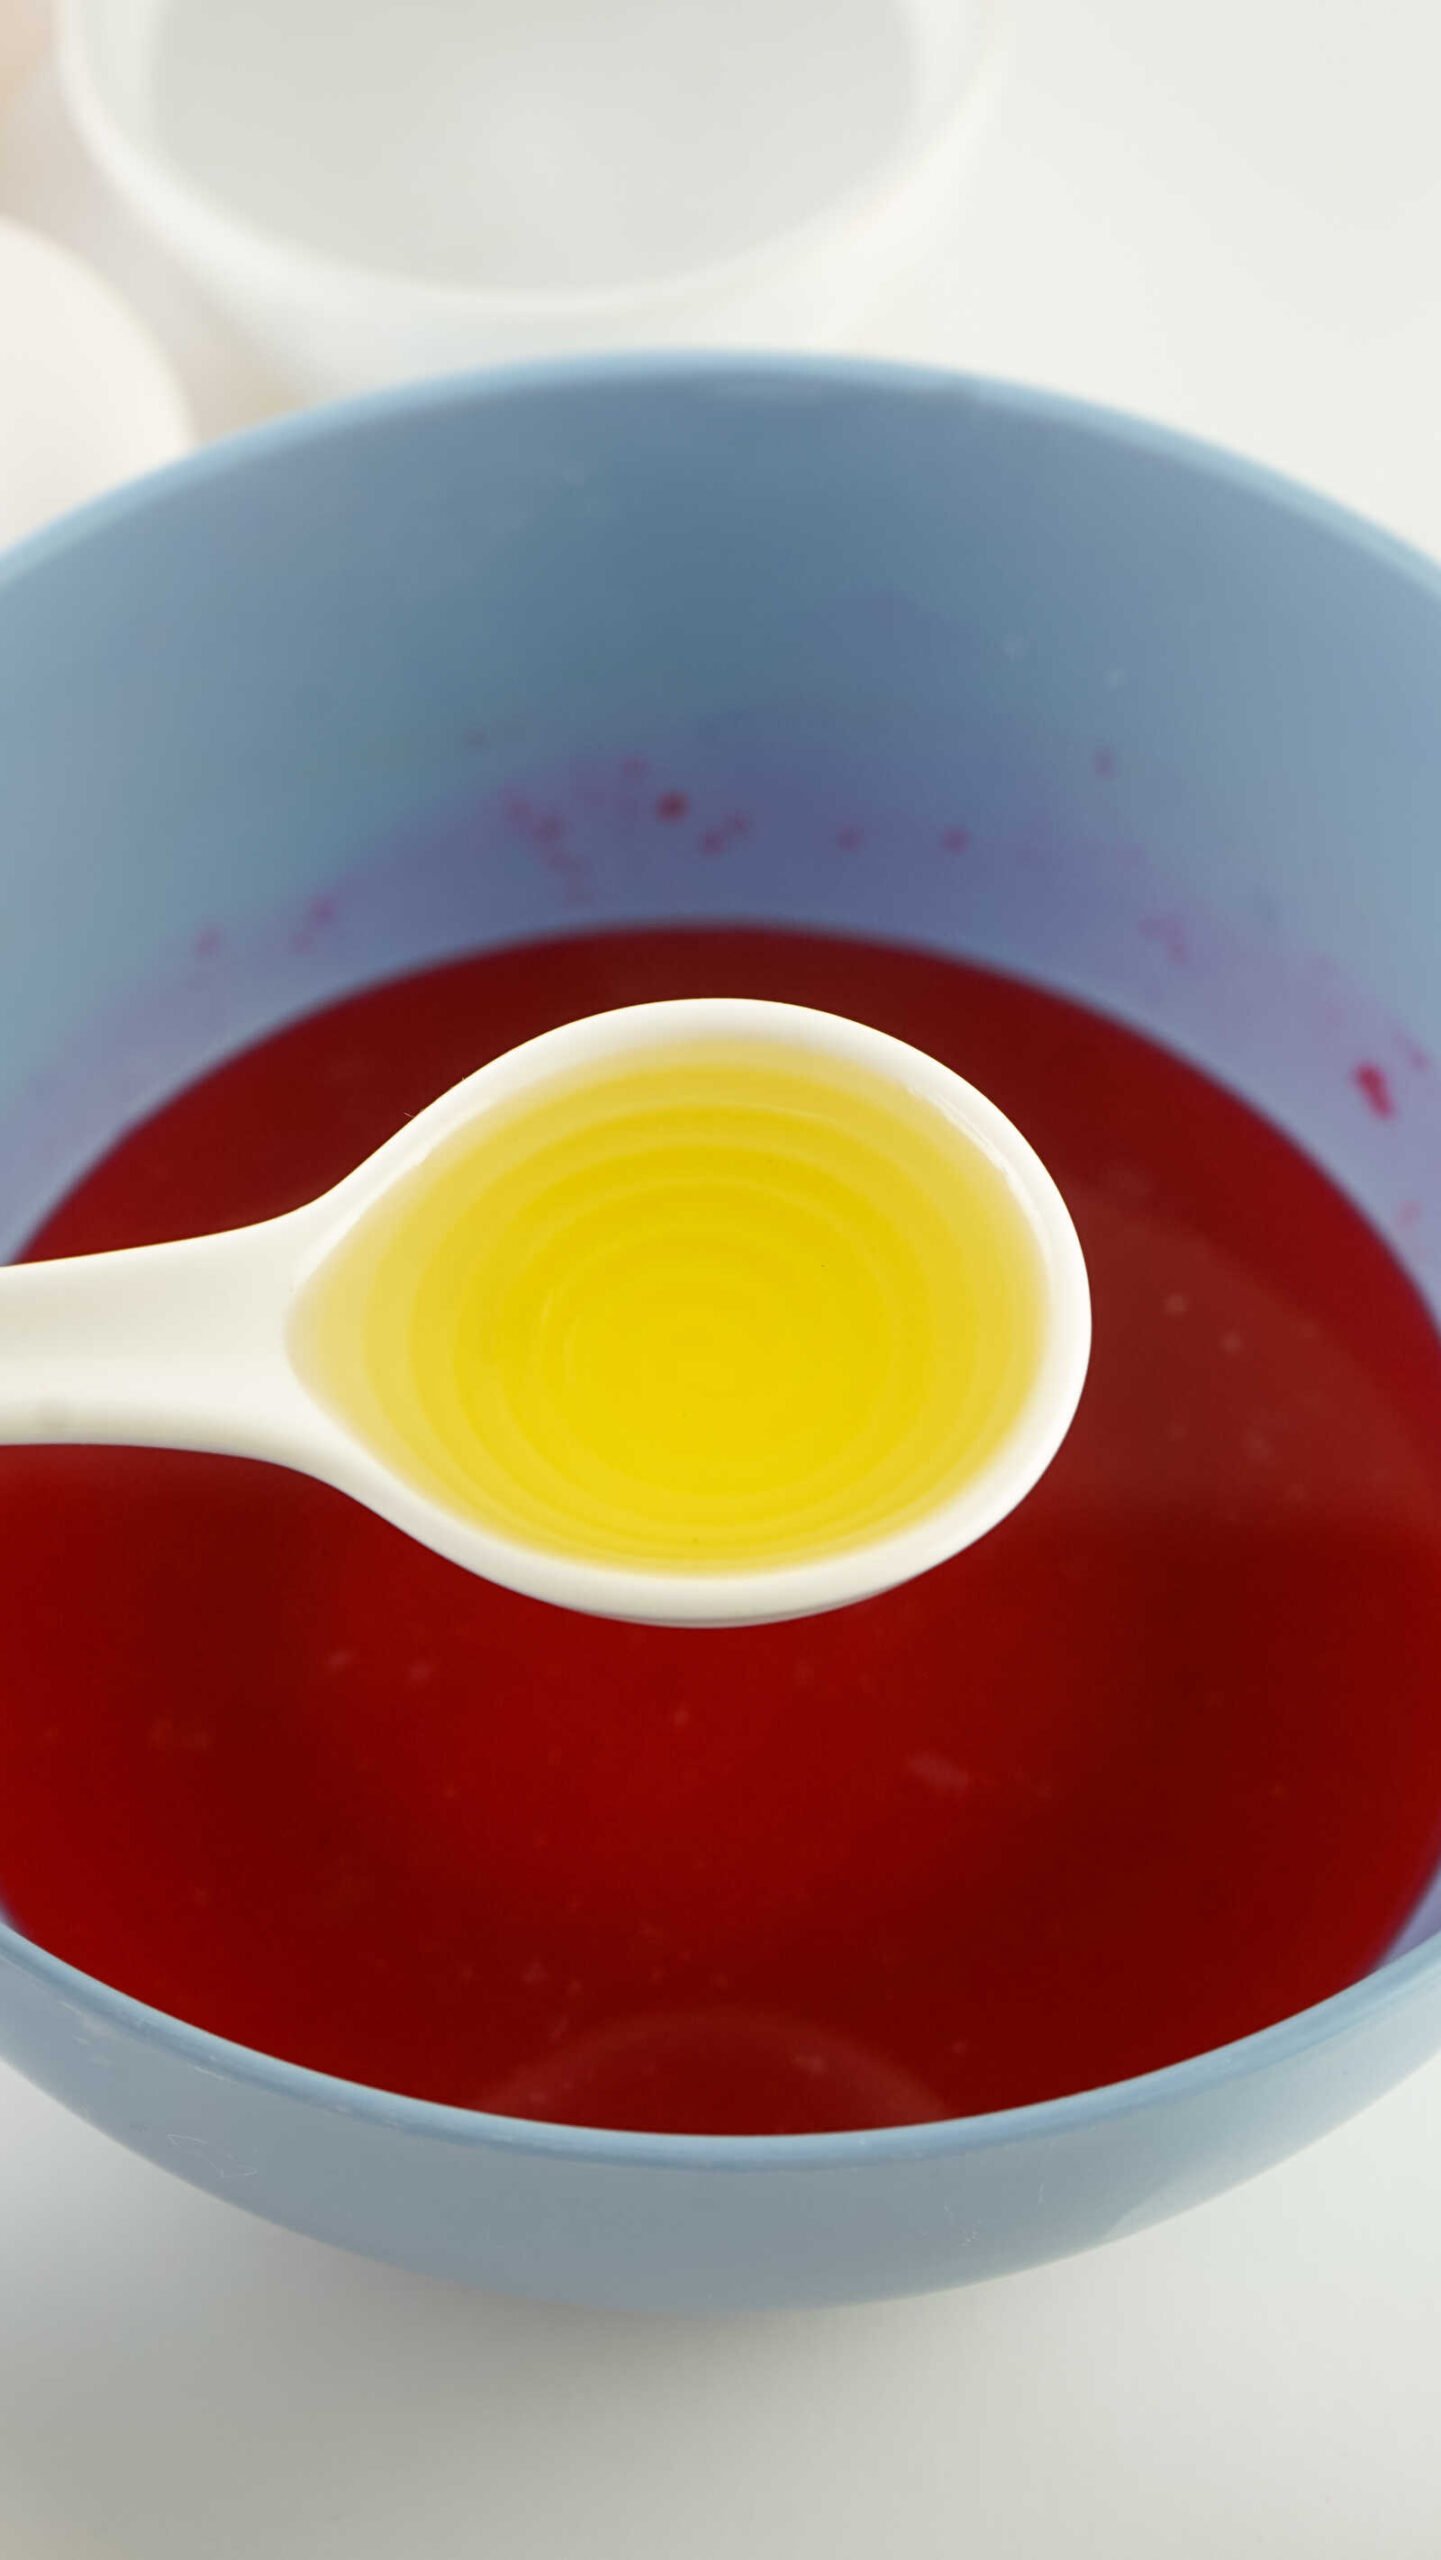
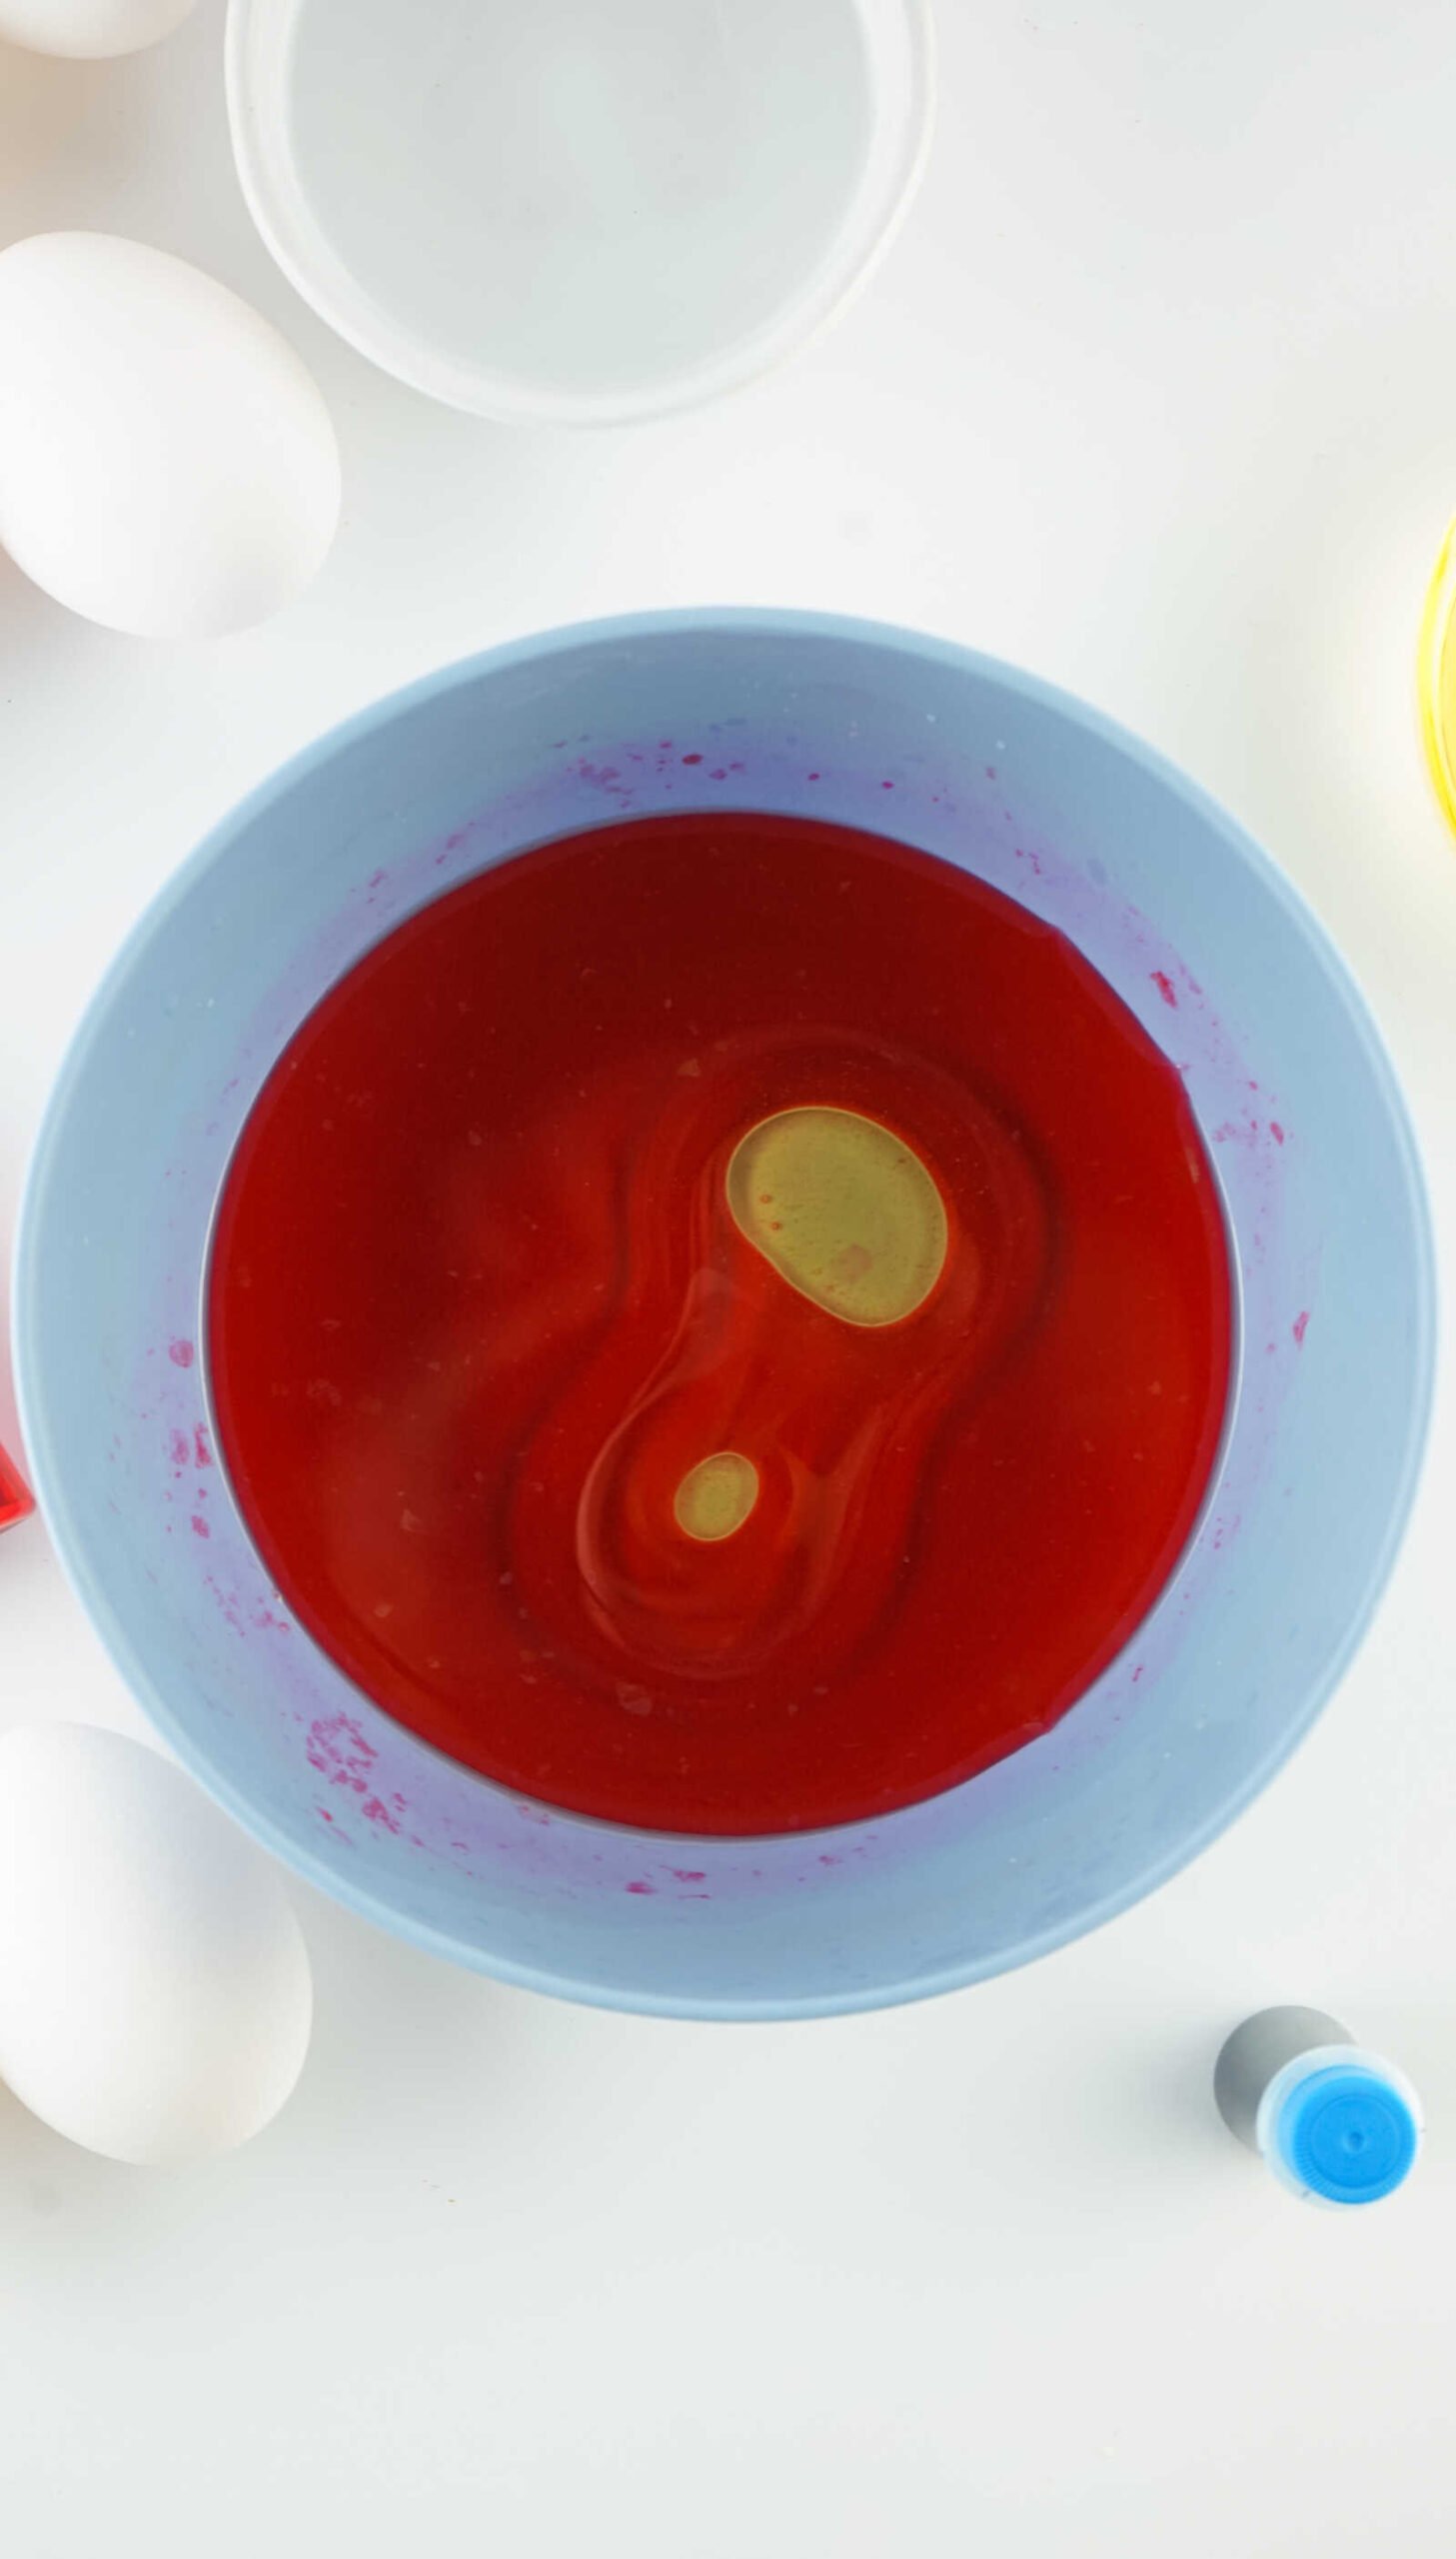
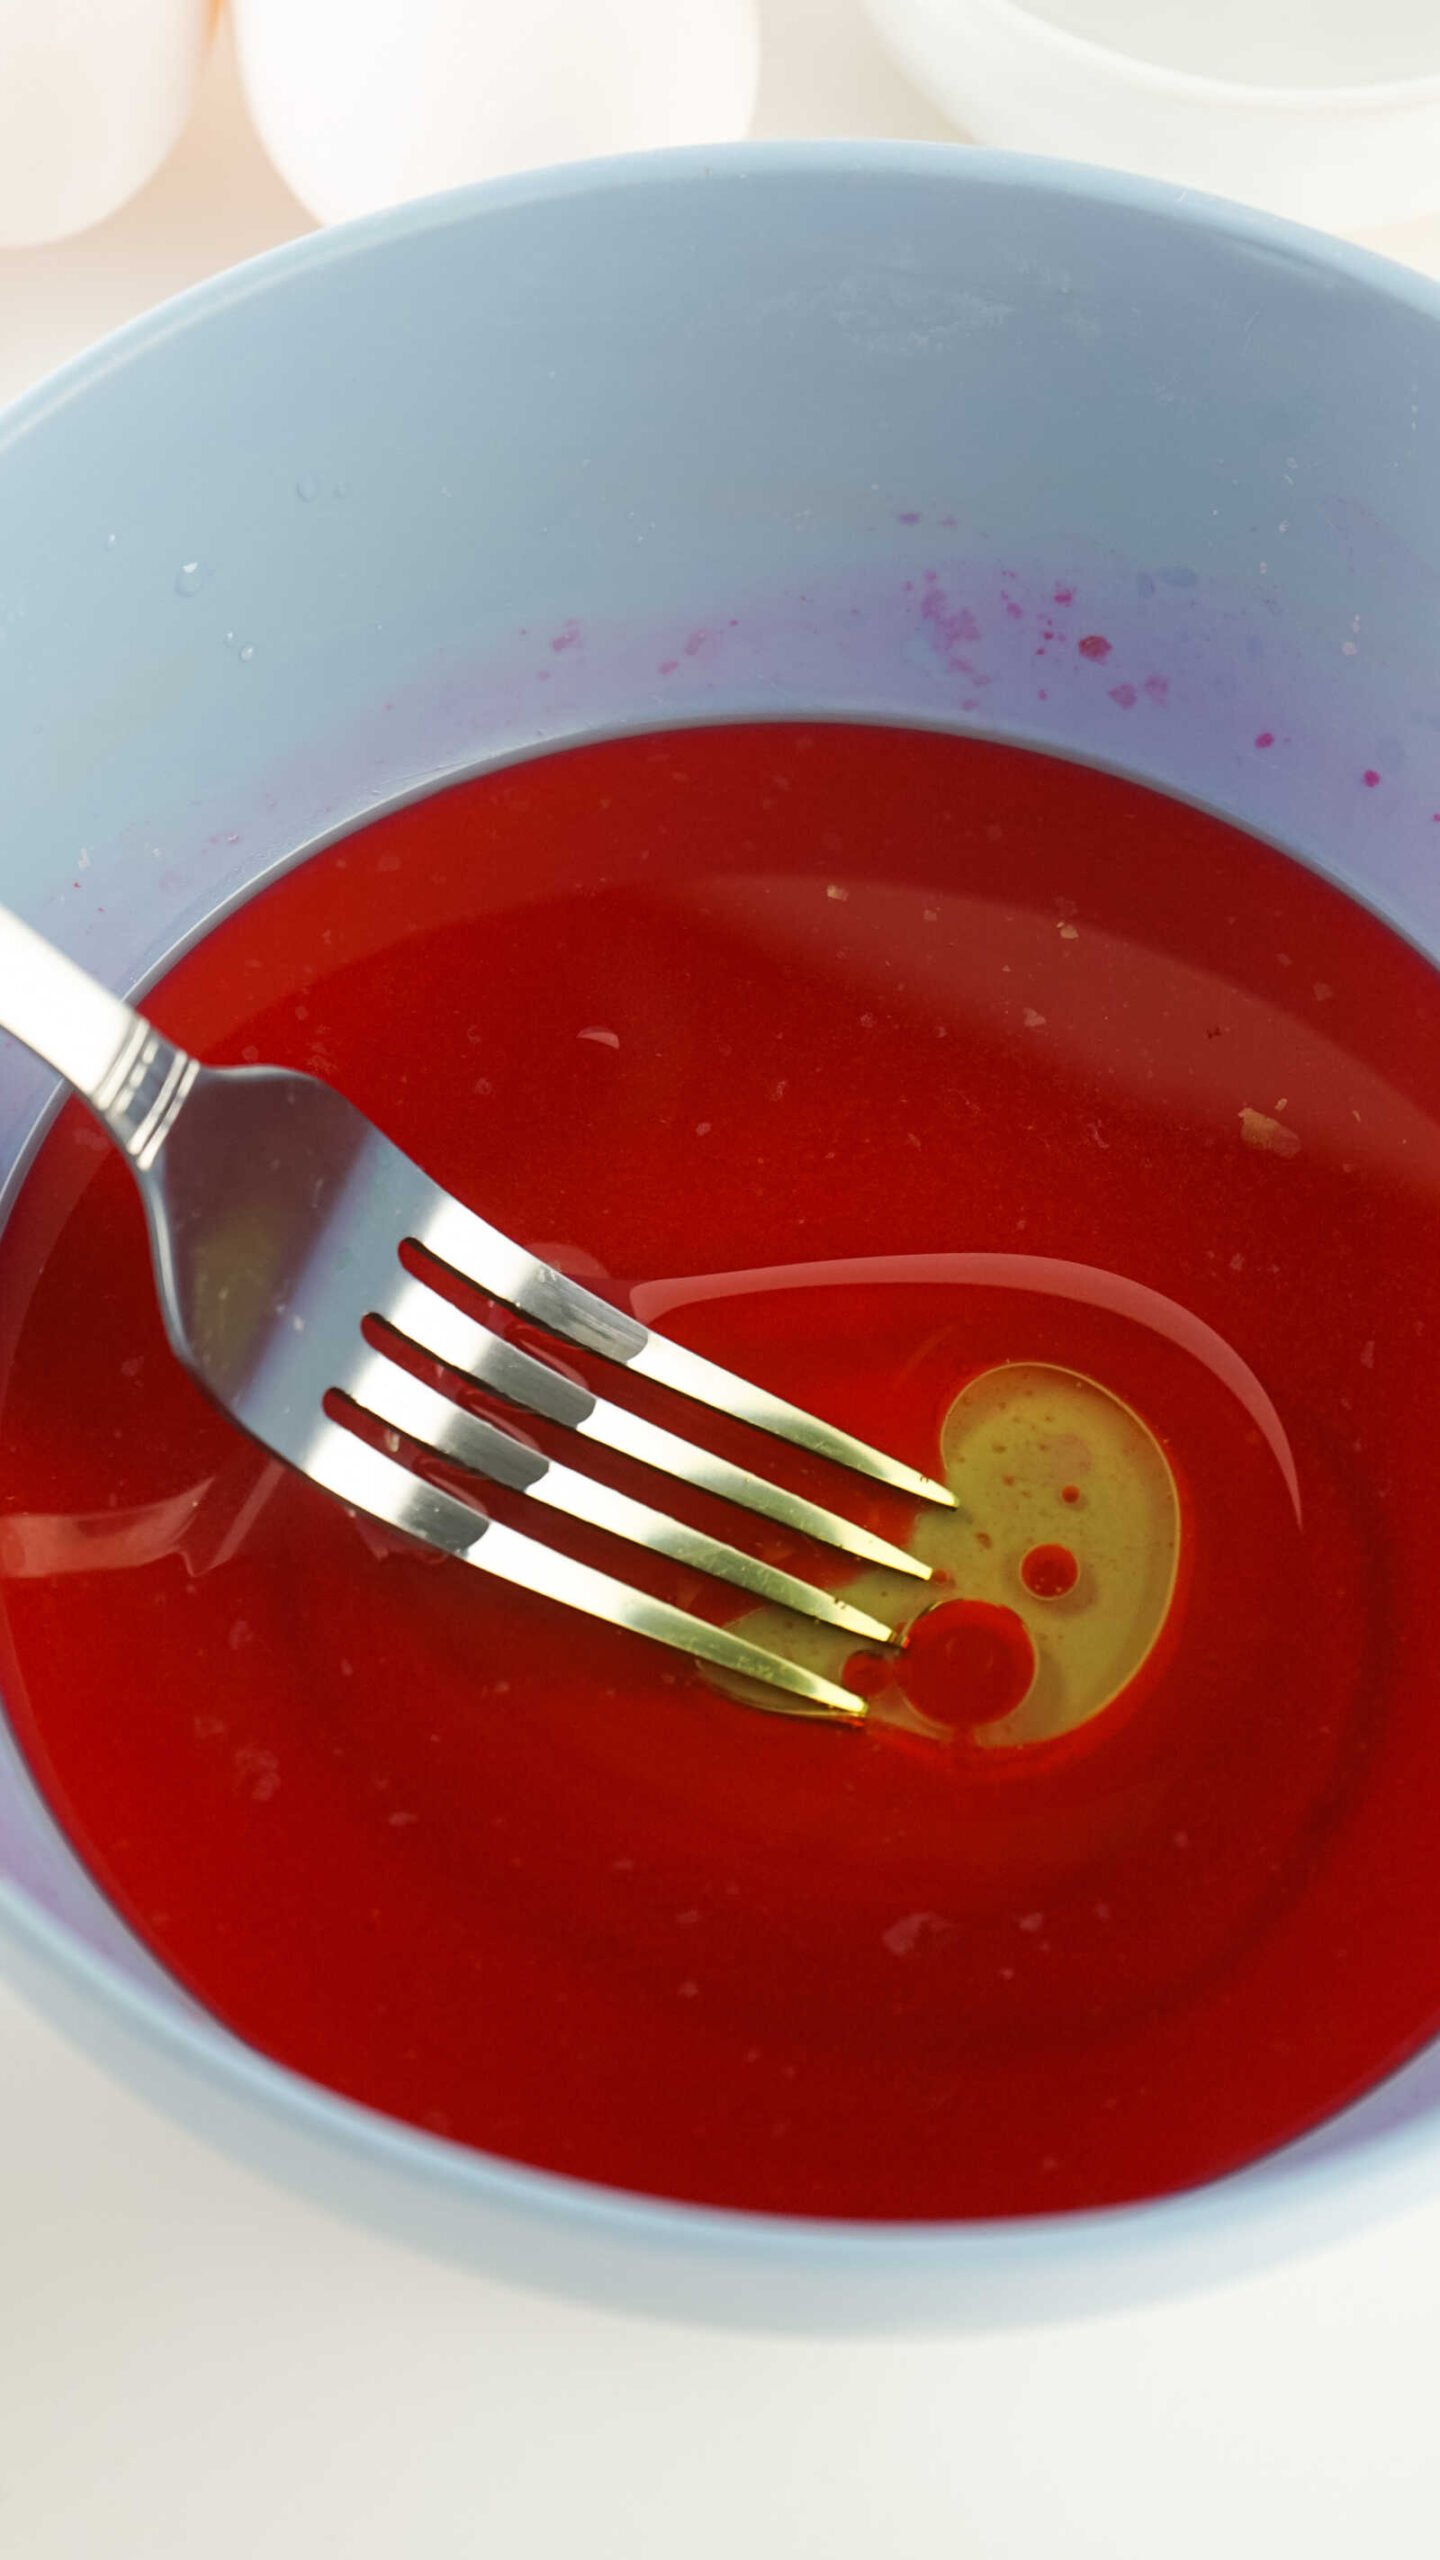
4. Mix in the Oil
Add 1 tablespoon of cooking oil to each bowl and gently stir. You’ll notice the oil forming droplets—this is exactly what you want.
Set aside a small dish with a bit of extra oil for the next step.
Preparing the Eggs
5. Get Your Eggs Ready
Make sure your eggs are:
- Fully cooled to room temperature
- Completely dry
At this point, you may want to put on rubber gloves to avoid stained hands.

6. Add Oil to the Egg
Using your finger or a small paintbrush, apply small streaks and dots of oil directly onto the egg.
Important:
Do NOT coat the entire egg. You want random spots and streaks—this is what creates the marbled effect.
The Magic Step: Dyeing the Eggs
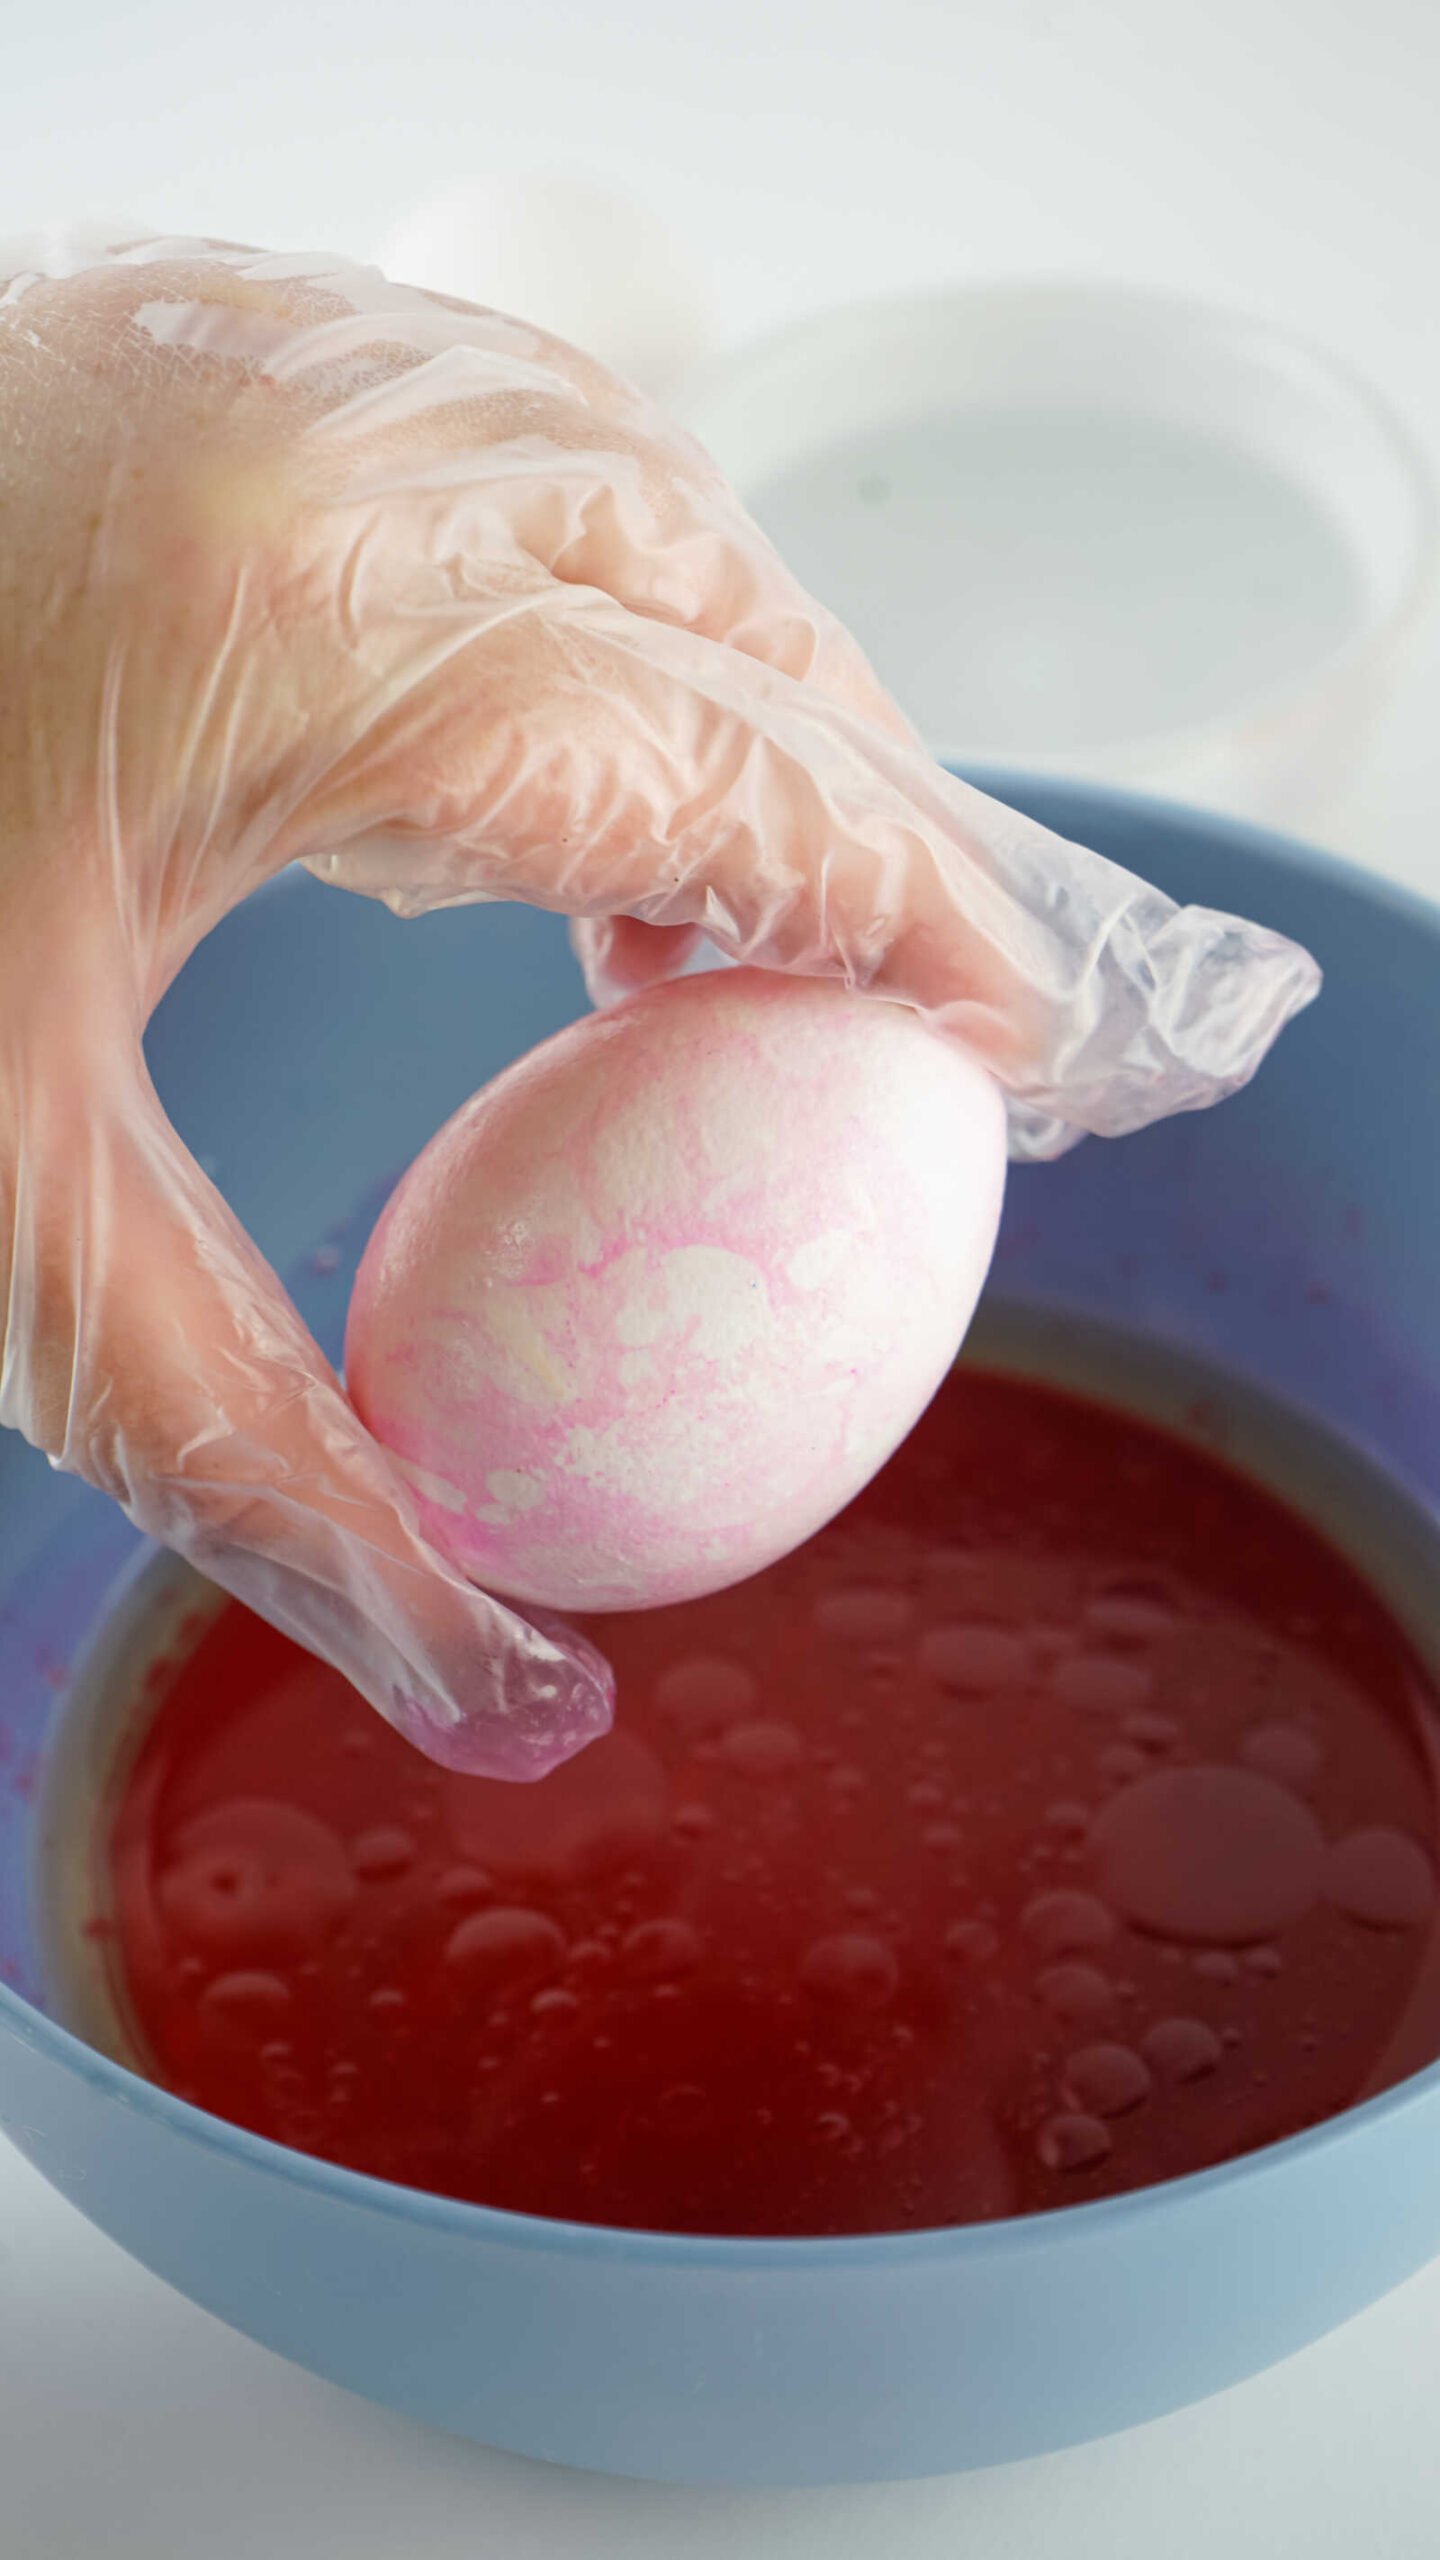
7. Swirl and Roll Quickly
Using a spoon or fork, stir the oil and dye mixture to get it moving.
Immediately place the egg into the bowl and quickly roll it around, making sure all sides touch the dye at least once.
This step should only take a few seconds—speed is key here.
8. Remove and Wipe Immediately
Pull the egg out right away and gently wipe it clean with a paper towel.
If you leave the egg in the dye too long, it will absorb too much color and lose the marbled look.
Drying Your Eggs
9. Let Them Set
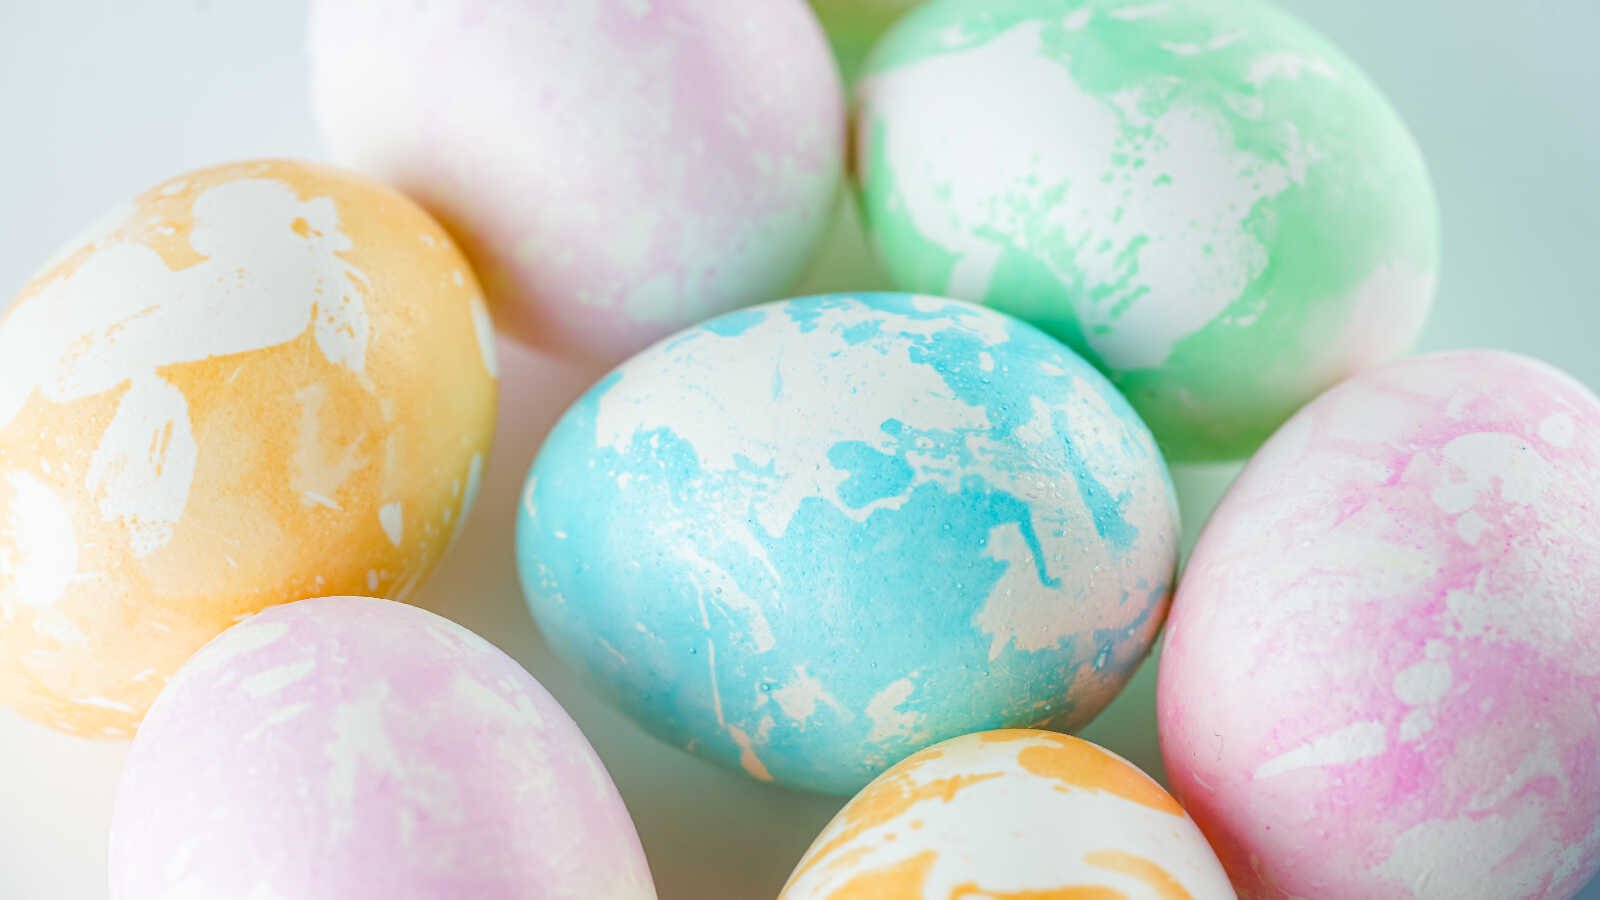
Place your finished egg back into the carton and let it sit for about 5 minutes to fully dry.
As it dries, the marbled pattern becomes even more defined and beautiful.
10. Repeat
Continue the process with as many eggs and colors as you like. Try mixing colors or layering dips for even more unique designs.
Tips for Perfect Marbled Eggs
Getting that perfect marbled look comes down to a few key details. These tips will help you avoid common mistakes and get consistent results every time:
Color Tips
- Green dye can be tricky—one of the best results came from using a water-based green dye.
- Gel dye works well too, but make sure it’s fully dissolved before adding oil.
- Use more dye for lighter colors like pink and green to keep them vibrant.
Technique Tips
- Do not let the egg sit in the dye—it needs to be a quick dip.
- Always wipe the egg immediately after removing it.
- Applying oil to the egg beforehand is essential for consistent marbling.
Bowl Setup Matters
- Keep the water shallow—just enough to cover about one-third of the egg.
- Too much water will overpower the marbling and create a solid color instead.
Oil Options
You can use any cooking oil you have on hand:
- Vegetable oil
- Olive oil
- Avocado oil
They all produce similar results, so just use what’s convenient.
Egg Variations
- White eggs create bright, bold colors
- Brown or farm-fresh eggs give a softer, more muted, earthy look
Both are beautiful in their own way!
Creative Ideas to Try
Once you’ve mastered the basic technique, you can get even more creative:
- Layered Colors: Dip the egg in multiple colors (one at a time) for a layered marbled look
- Metallic Touch: Add a light brush of gold or silver paint after drying
- Pastel Palette: Use soft spring colors for a delicate, elegant finish
- Bold & Bright: Combine neon dyes for a more modern look
You can even mix finishes for a full Easter basket that looks straight out of a magazine.
Making It a Family Activity
This is such a fun project to do with kids, especially because the results feel a little magical.
A few tips if you’re crafting with little ones:
- Set up a covered workspace (things can get messy!)
- Let kids choose their own color combinations
- Help younger kids with the quick dip step
- Turn it into a friendly “best egg design” contest
It’s a simple way to create lasting memories while making something beautiful together.

Why This Method Stands Out
There are countless tutorials out there for marbled eggs—but many of them:
- Take too long
- Require complicated steps
- Don’t produce consistent results
This method is different. It’s quick, reliable, and produces gorgeous eggs every time—as long as you follow each step carefully.
After trying multiple methods, this approach stands out as the most efficient and beginner-friendly while still delivering that wow-factor.
Final Thoughts
Marbled Easter Eggs Using Oil are a fun and creative way to elevate your holiday traditions. While they require a bit more attention than basic dyeing, the payoff is absolutely worth it.
Each egg becomes its own little piece of art—unique, colorful, and full of personality.
So grab your supplies, embrace the process, and enjoy the creativity that comes with making something truly one-of-a-kind this Easter season.
Happy crafting!