Bunny Handprint Craft: Easy Spring & Easter Activity for Kids
If you’re looking for a simple, meaningful, and totally adorable craft to celebrate spring or Easter, this Bunny Handprint Craft is a must-try. It transforms a child’s handprint into a sweet bunny keepsake that parents will treasure and kids will love creating. Best of all, it requires minimal supplies and comes together quickly—making it perfect for classrooms, playdates, or a cozy afternoon at home.
Handprint crafts have a special charm because they capture a moment in time. Those tiny fingers won’t stay tiny forever, and this project turns them into something you can hold onto for years. Whether you’re a parent, teacher, or caregiver, this craft checks all the boxes: it’s easy, budget-friendly, creative, and full of personality.
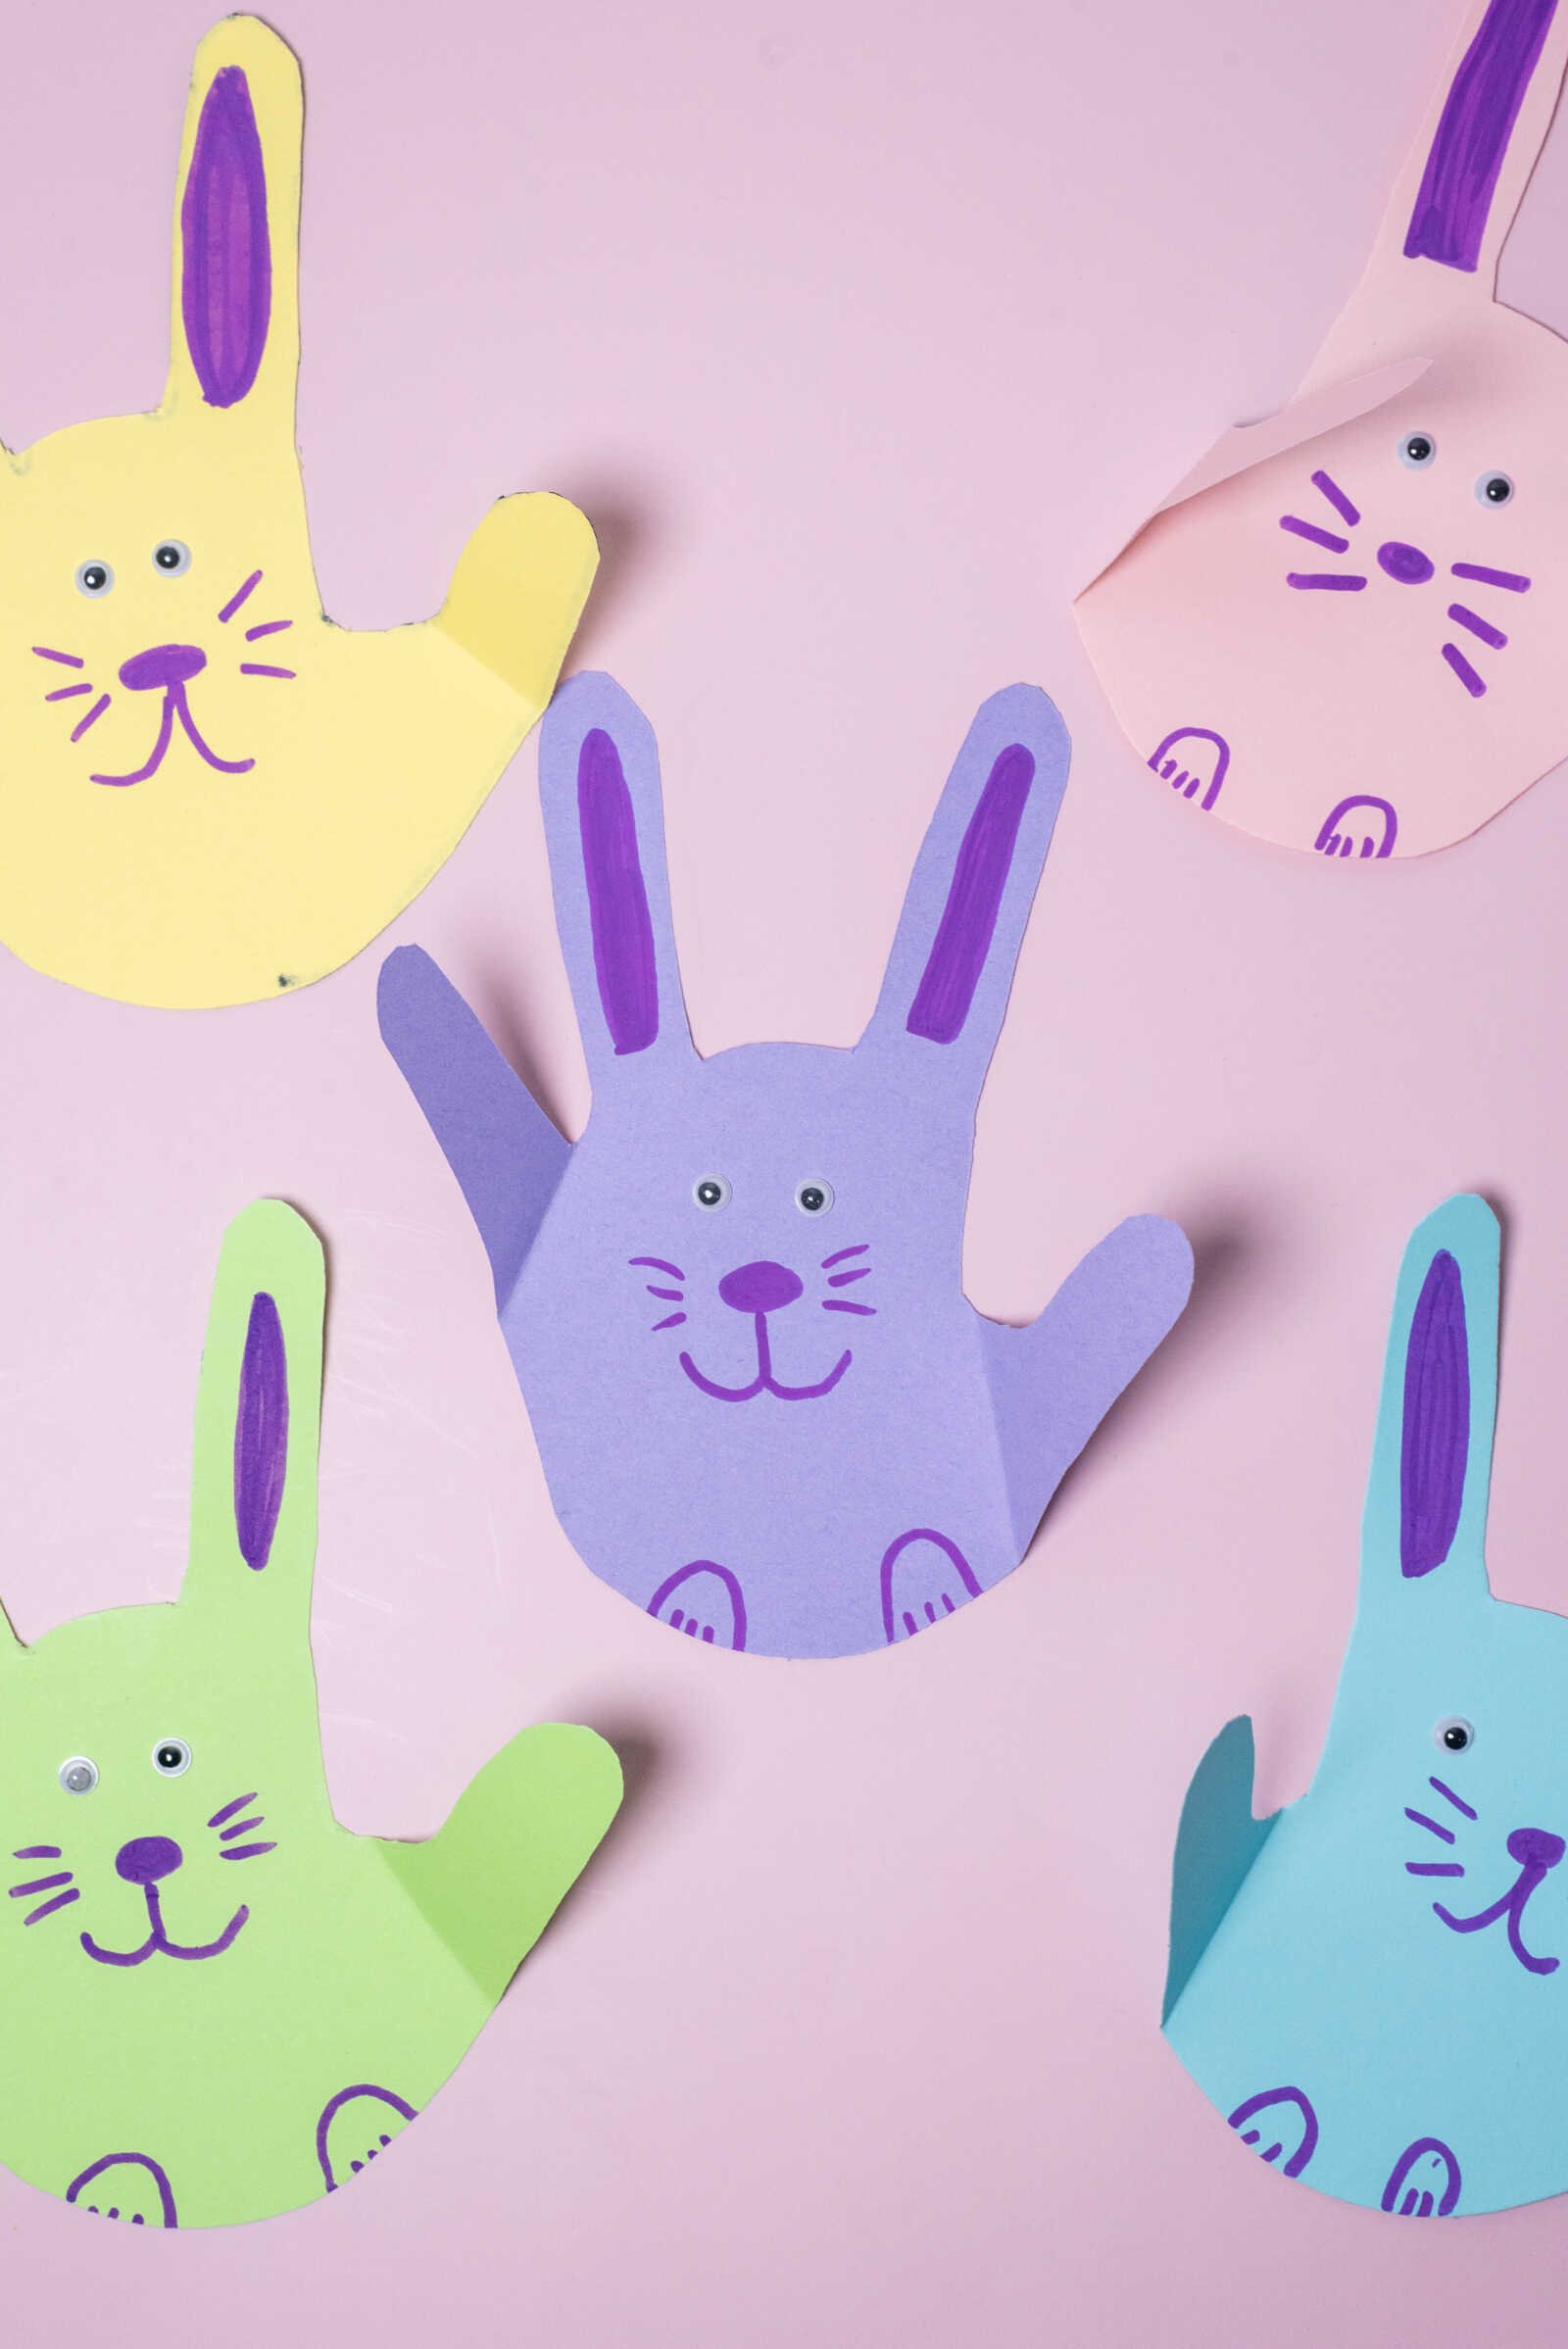
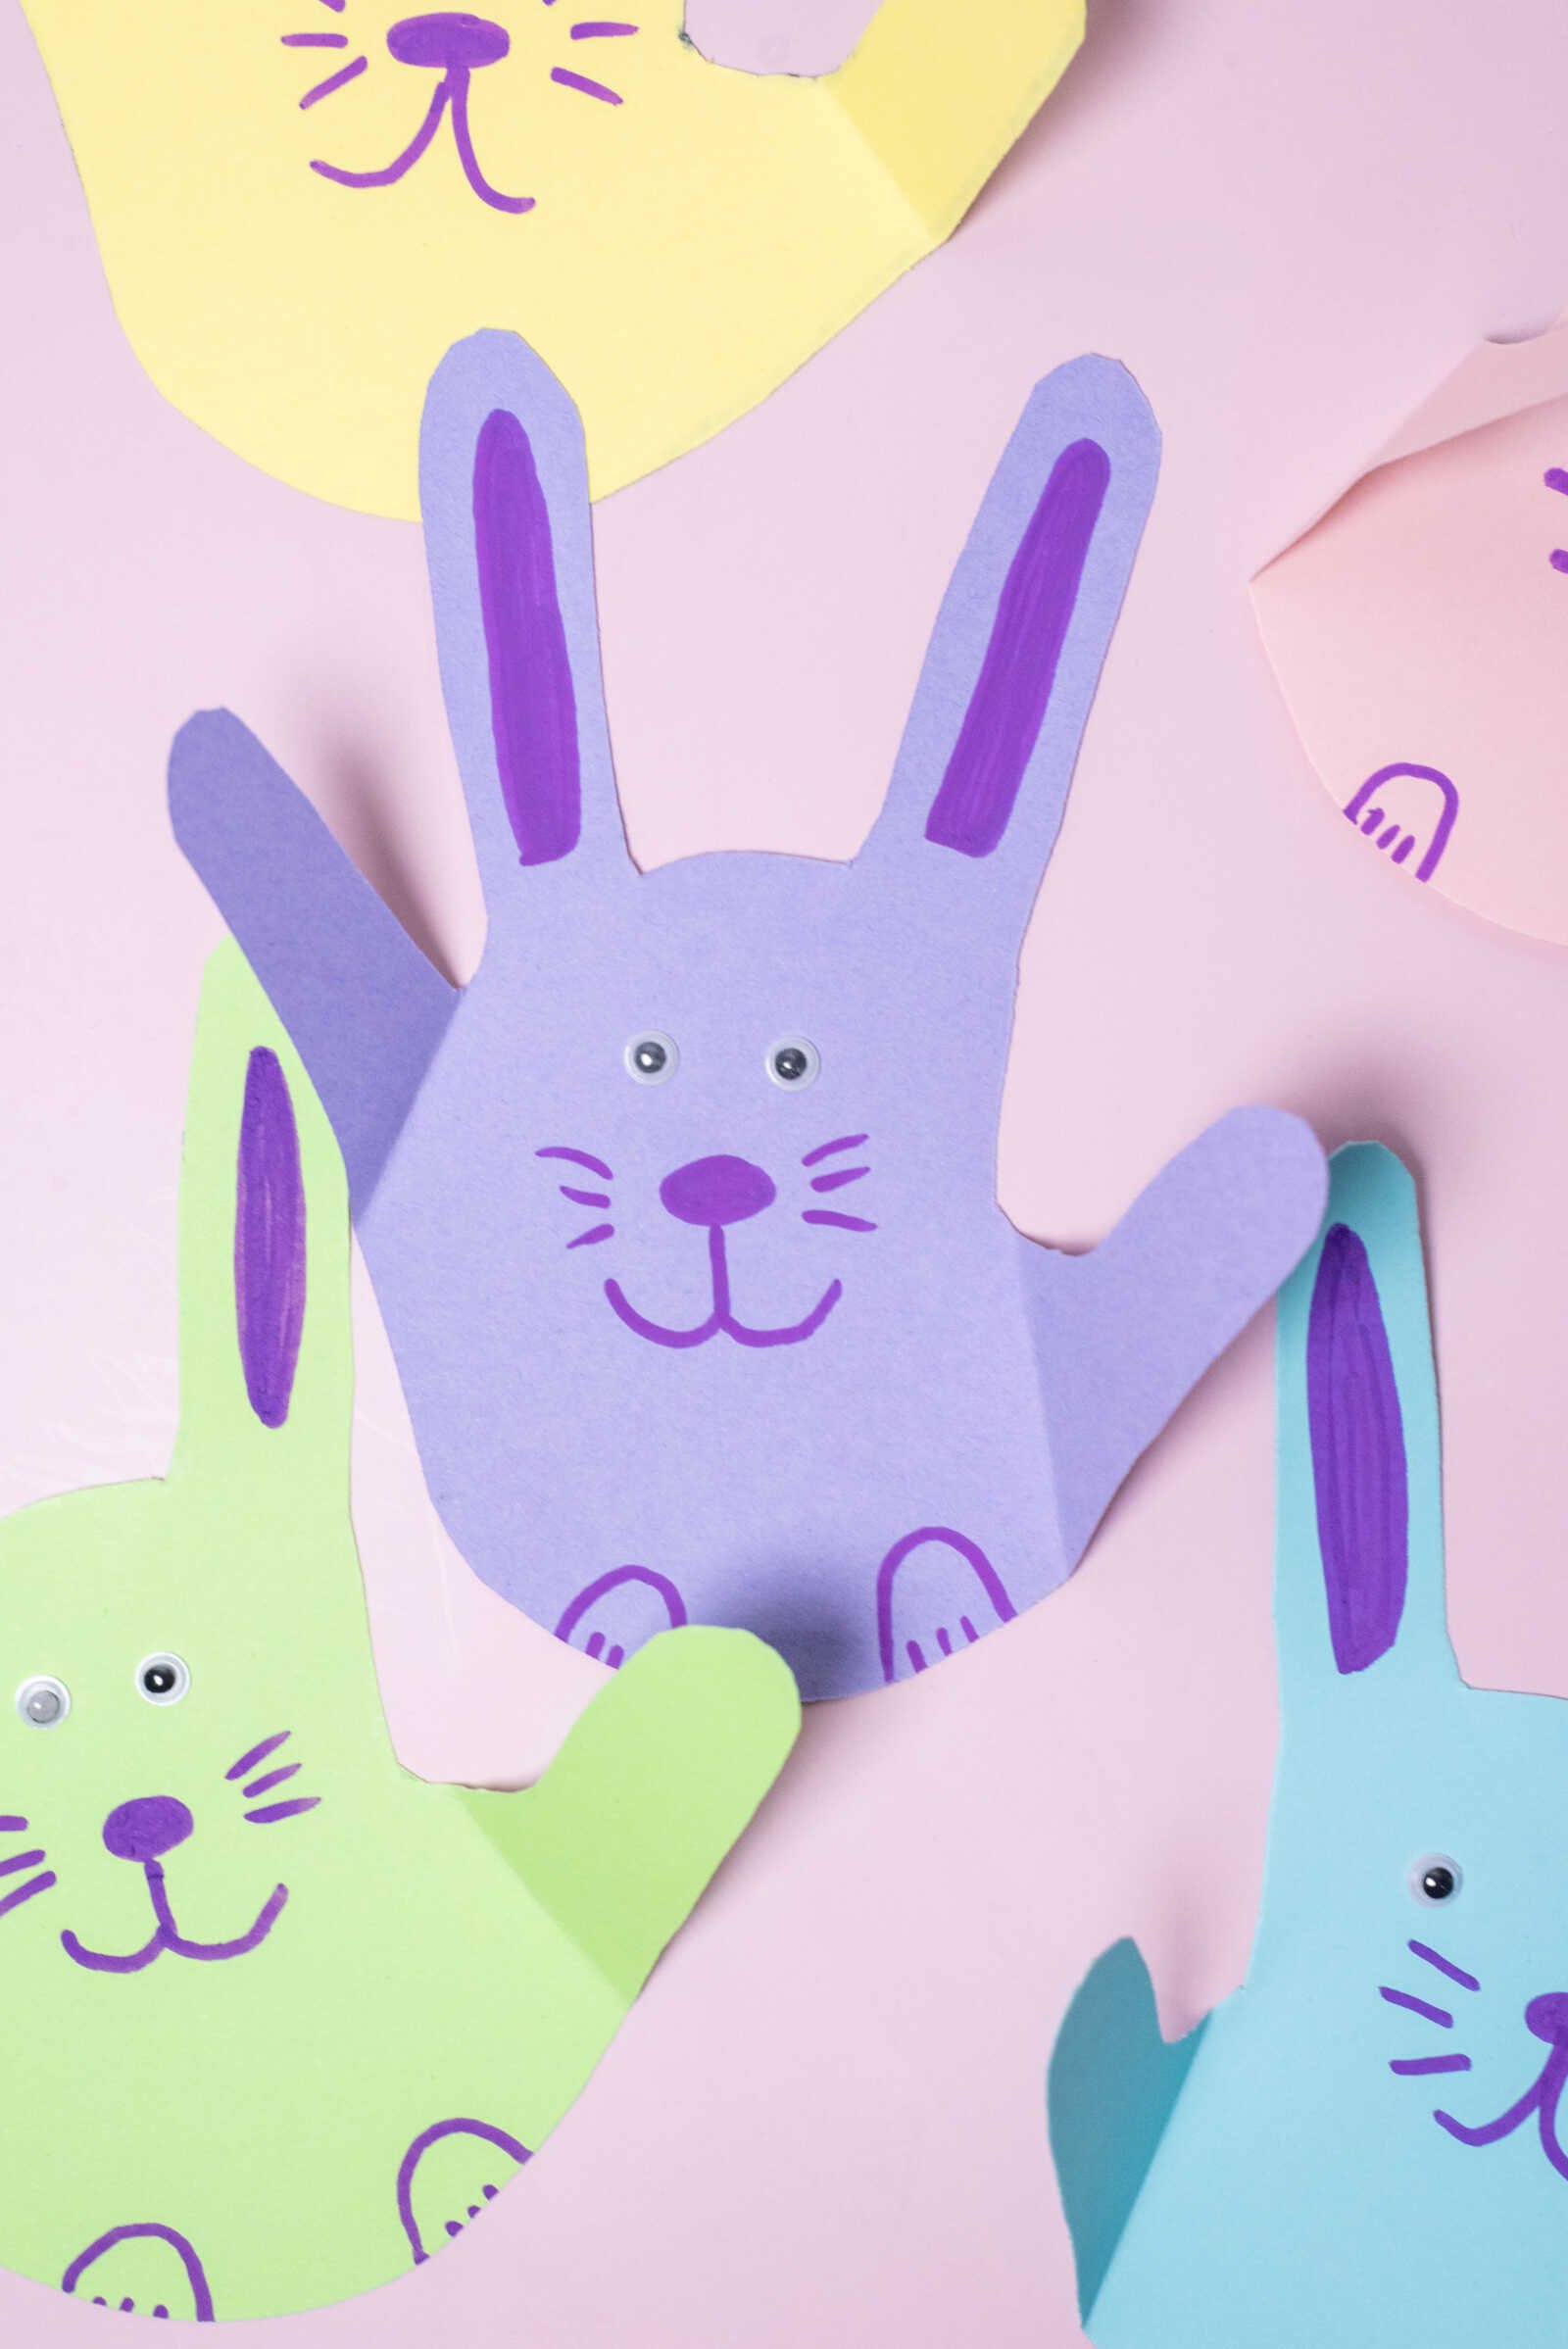
Table of Contents
Why Kids Love This Bunny Handprint Craft
This isn’t just another kids craft—it’s one that blends creativity with memory-making. Here’s why it’s such a favorite:
- Simple and beginner-friendly: Even toddlers and preschoolers can participate with a little help.
- Minimal supplies: You likely already have everything you need at home or in the classroom.
- Perfect for spring themes: Great for Easter activities, spring bulletin boards, or seasonal crafts.
- Keepsake-worthy: A sweet reminder of your child’s growth over time.
- Customizable: Kids can decorate their bunny however they want, making each one unique.
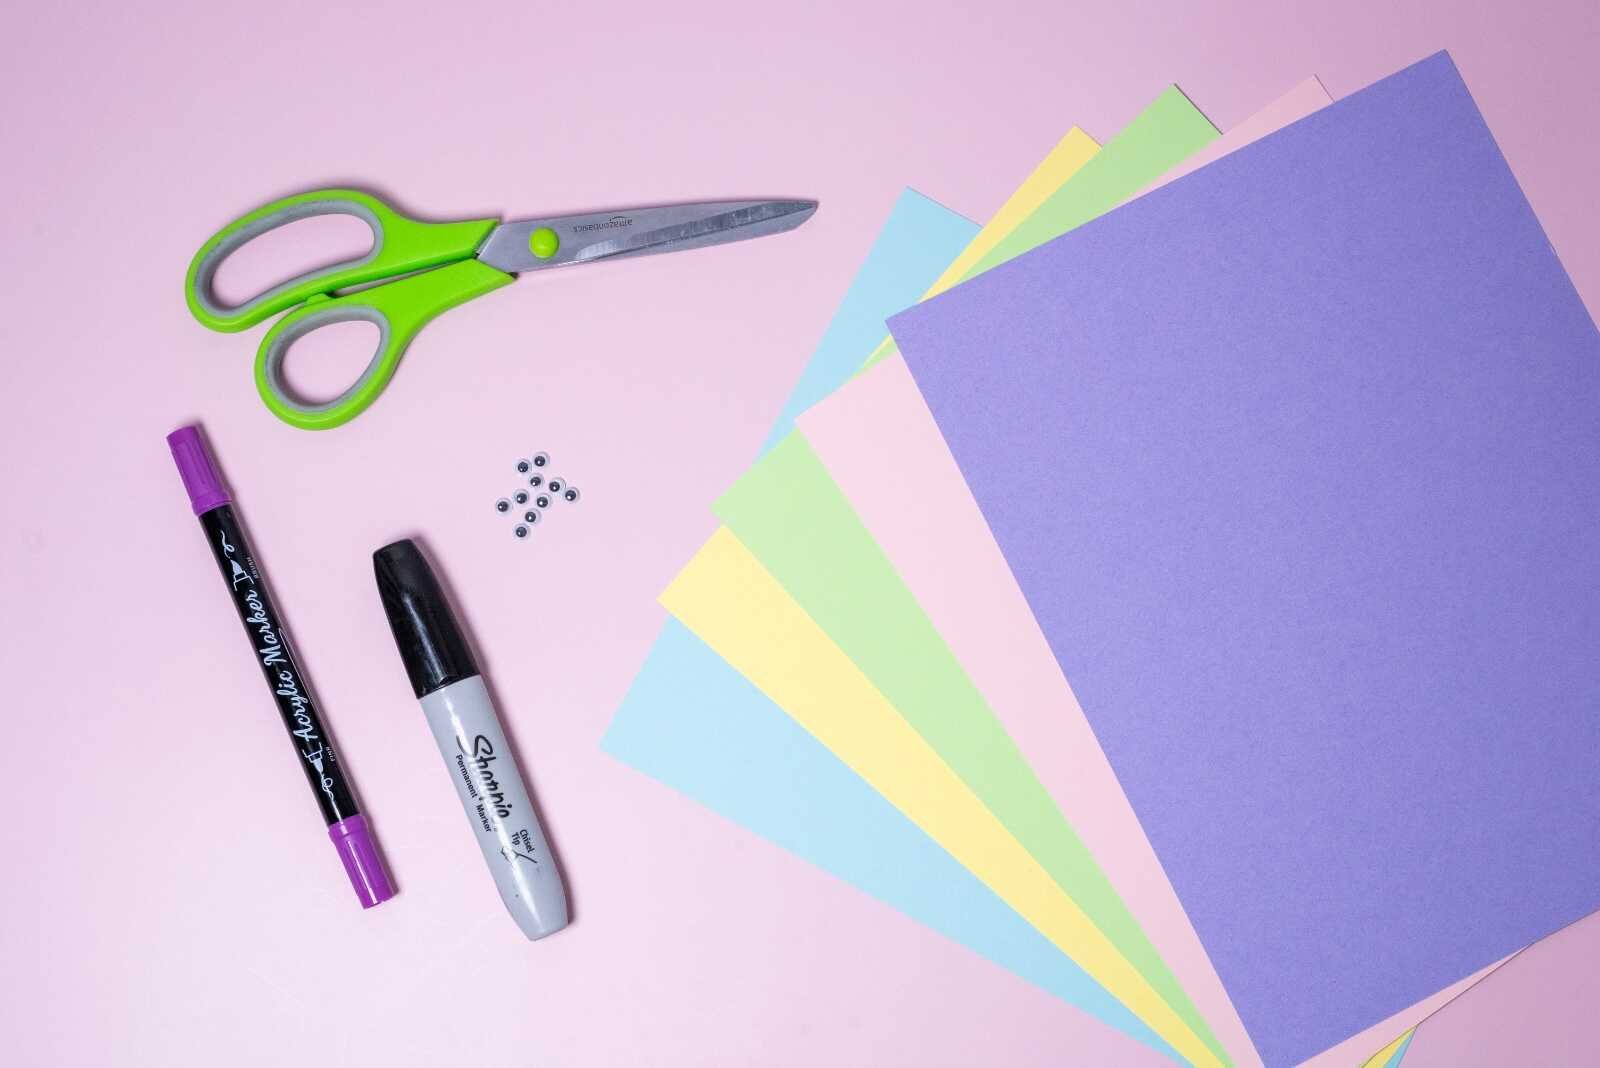
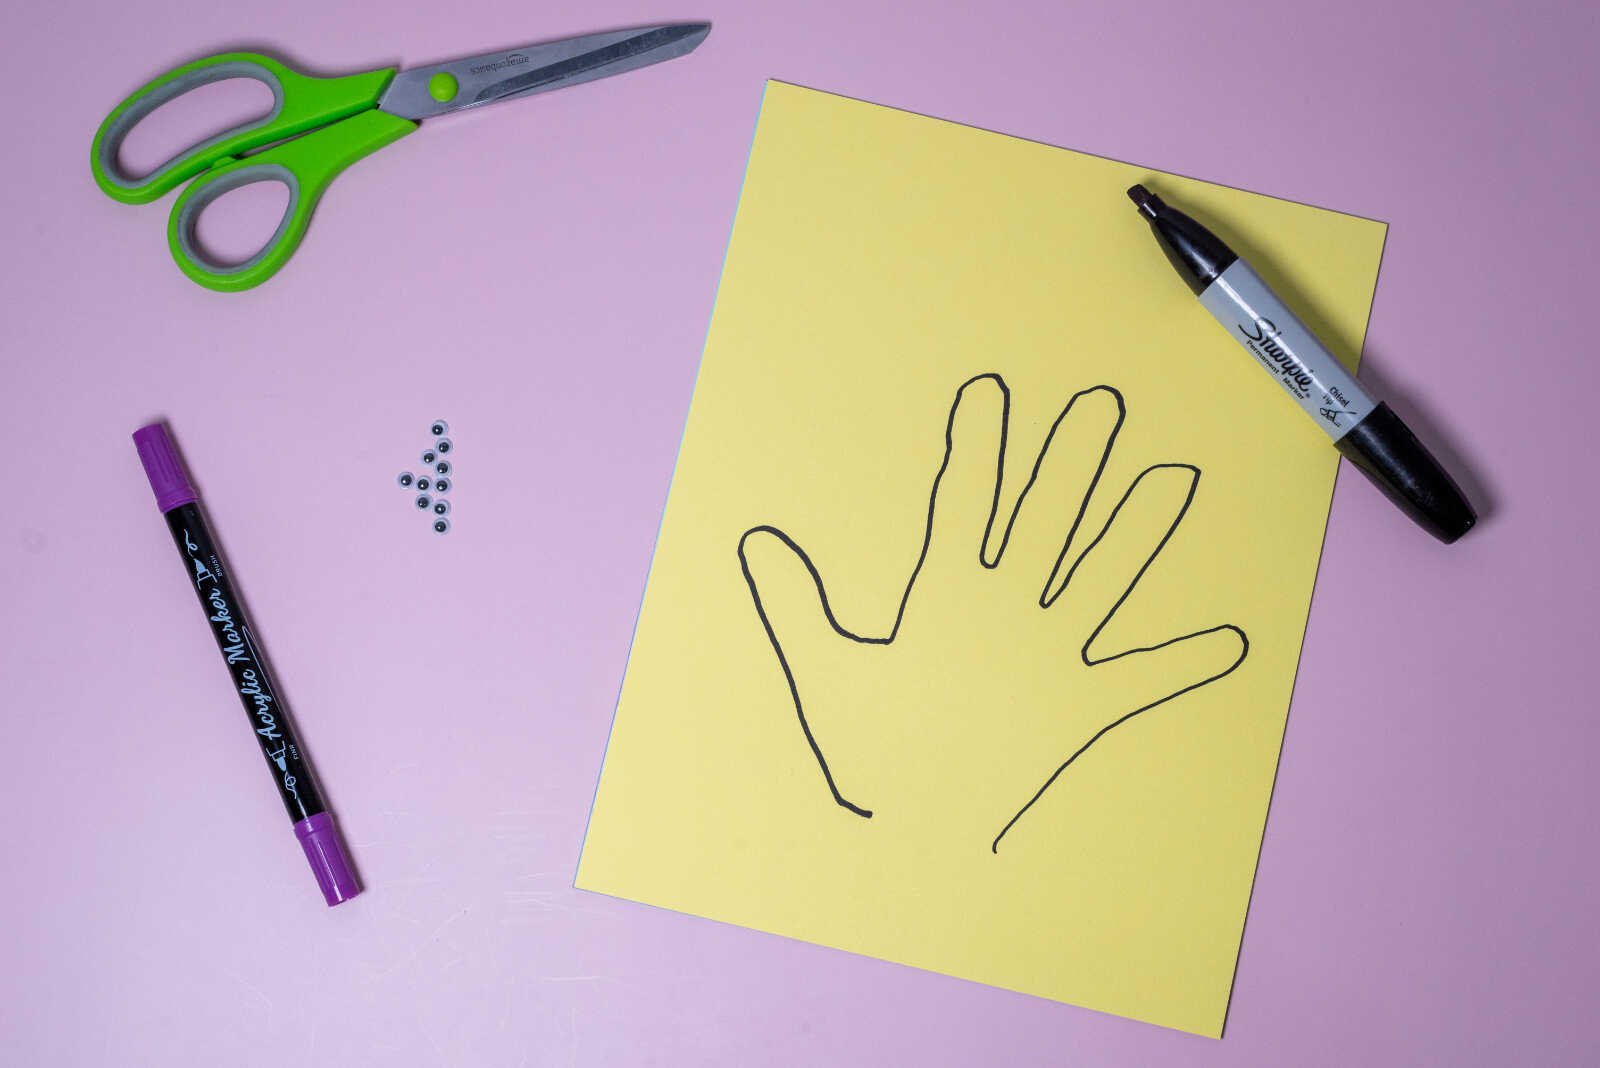
Materials Needed
Gather your supplies before you begin so everything flows smoothly:
- Colored cardstock or construction paper
- Glue
- Marker
- Optional: googly eyes
Tools Needed
- Scissors
- Pencil
Step-by-Step Instructions
Follow these easy steps to create your bunny handprint craft:
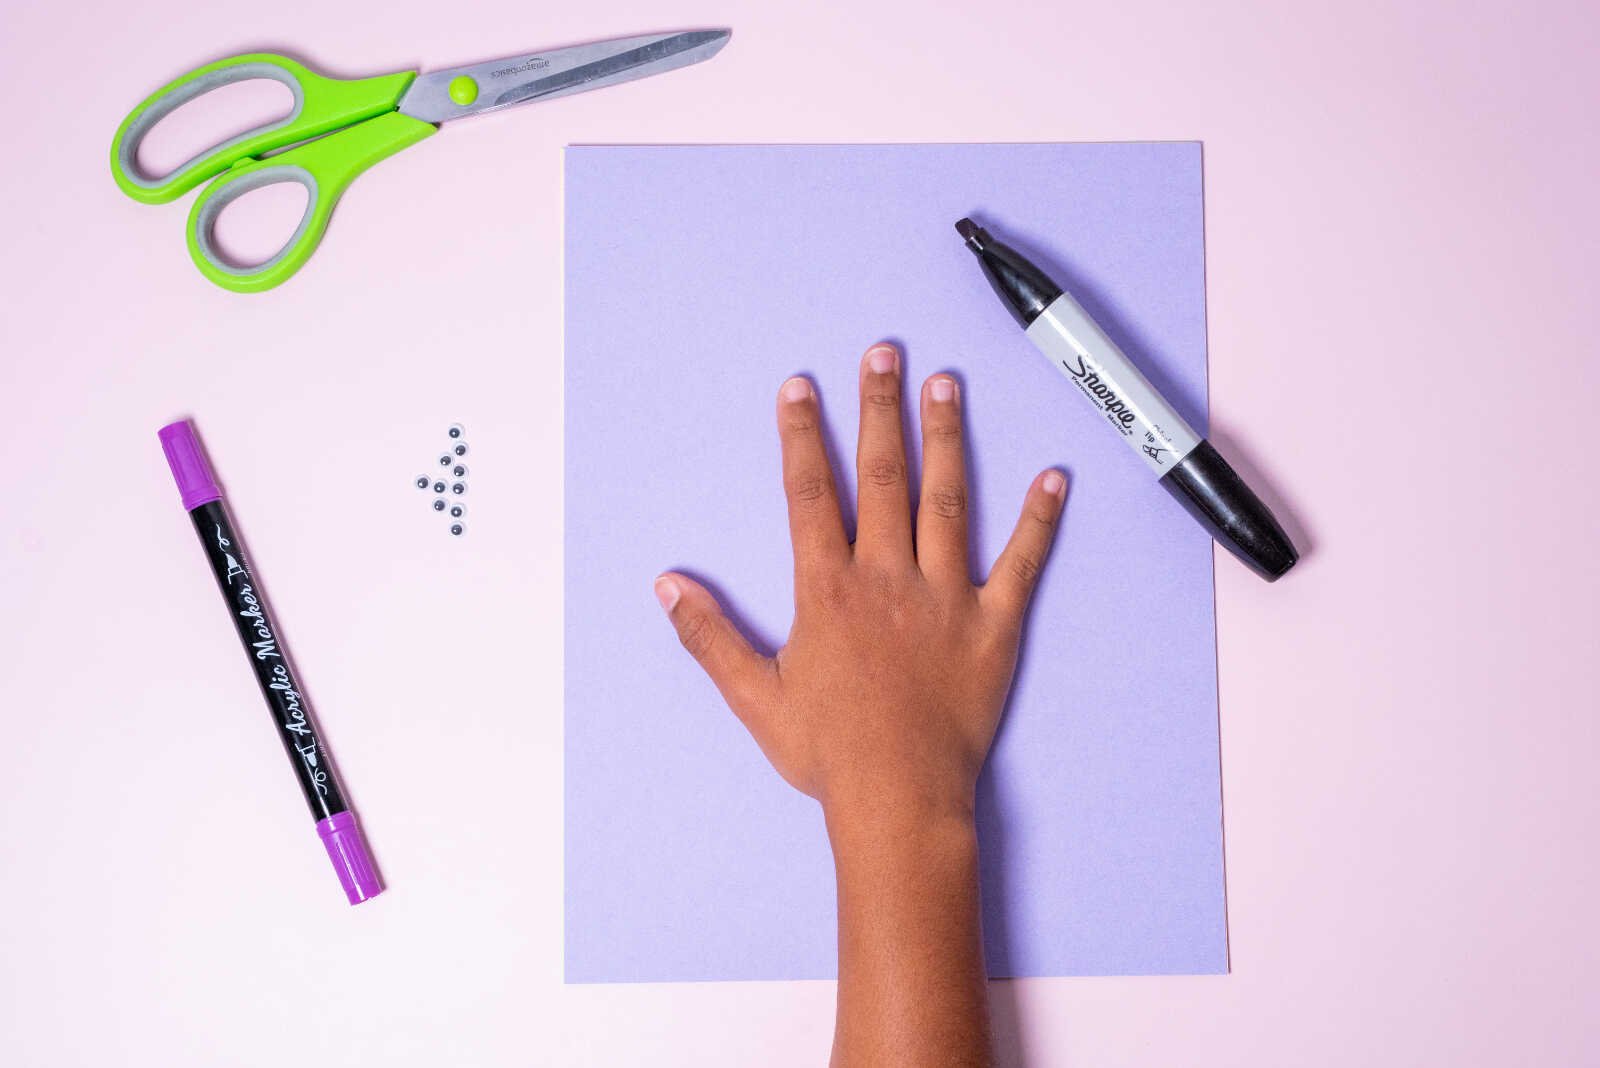
1. Trace the Hand
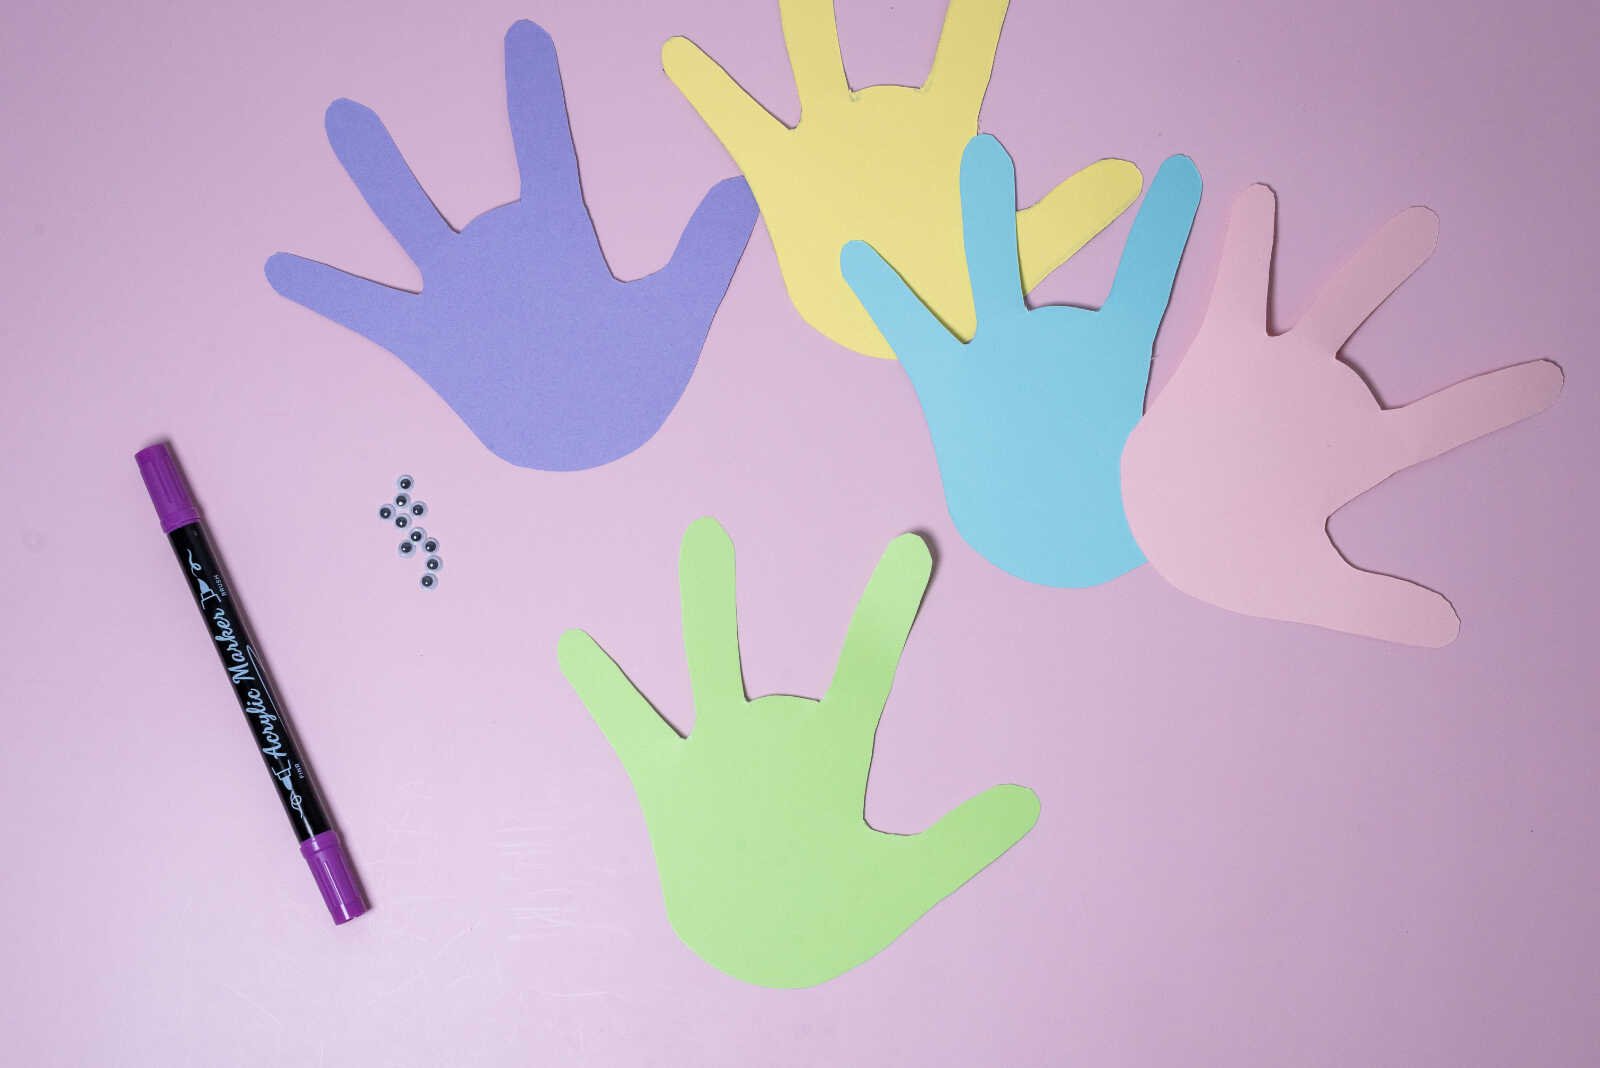
Start by placing your child’s hand flat on a piece of colored paper. Use a pencil to carefully trace around their hand, keeping the fingers together and the thumb slightly out. This shape will become the base of your bunny.
Once traced, cut out the handprint. Younger kids may need help with this step, especially around the fingers.

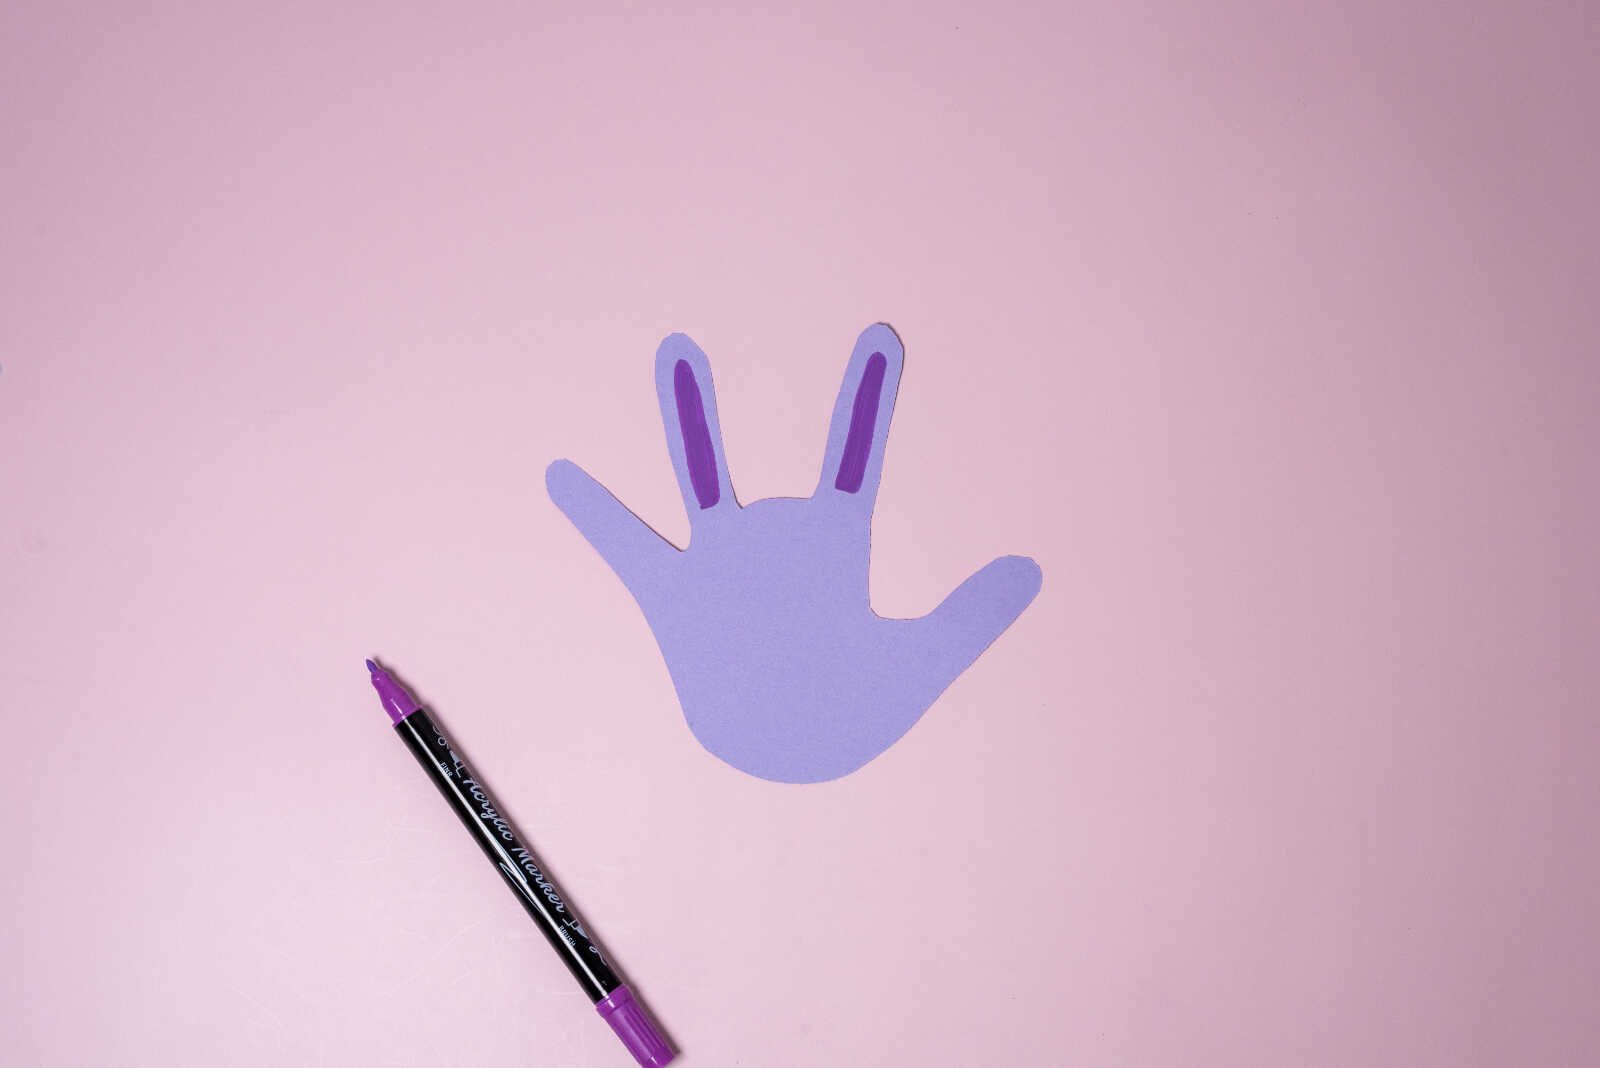
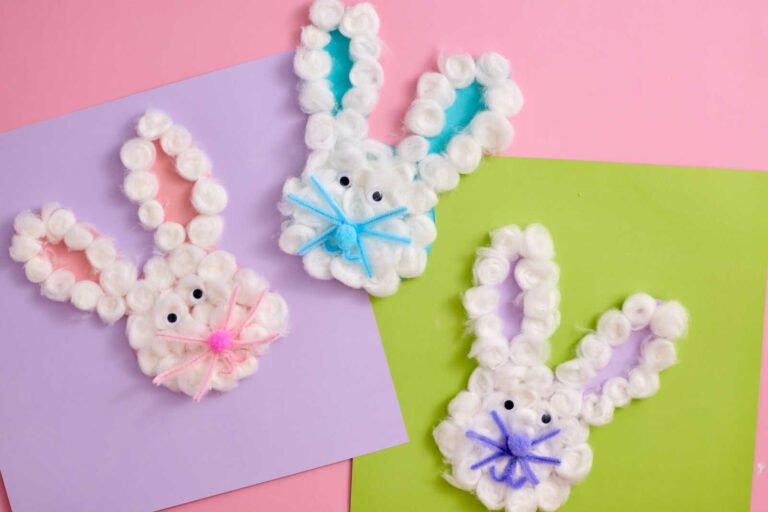
2. Turn It Into a Bunny
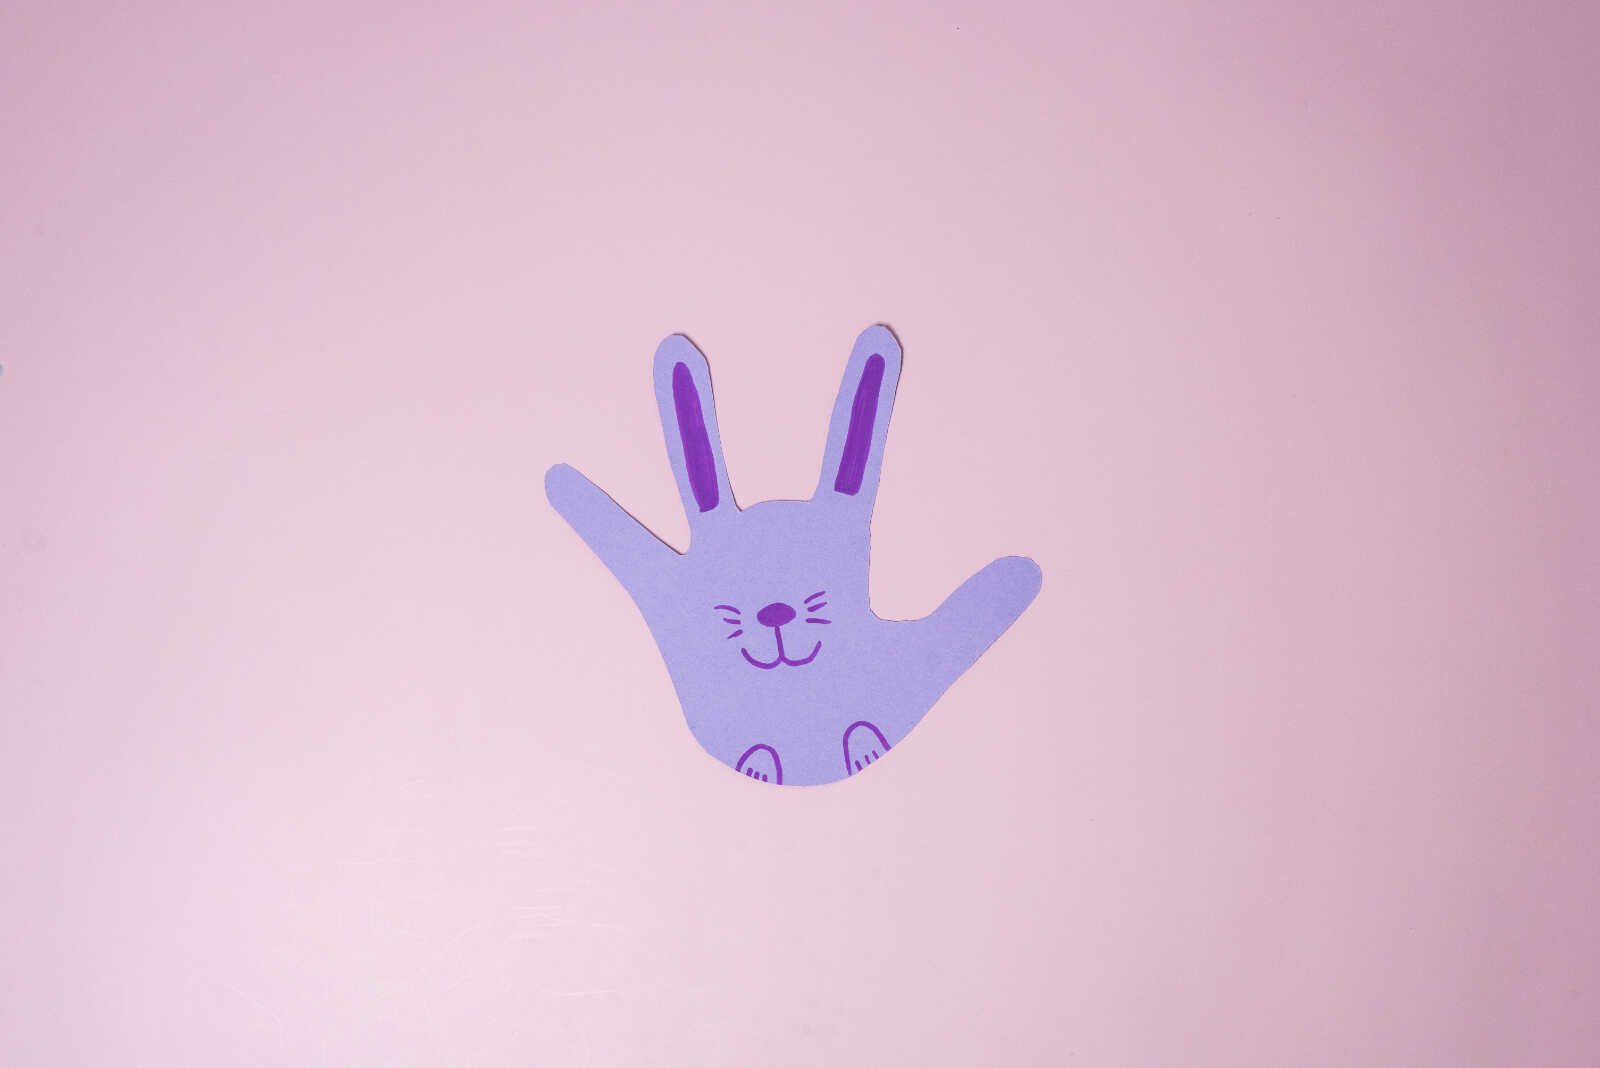
Rotate the handprint so the fingers are pointing upward. These will become the bunny’s long ears. The palm becomes the bunny’s face, and the thumb can act as a cheek or side of the head.
This is where the magic starts to happen—suddenly that simple handprint begins to look like a bunny!
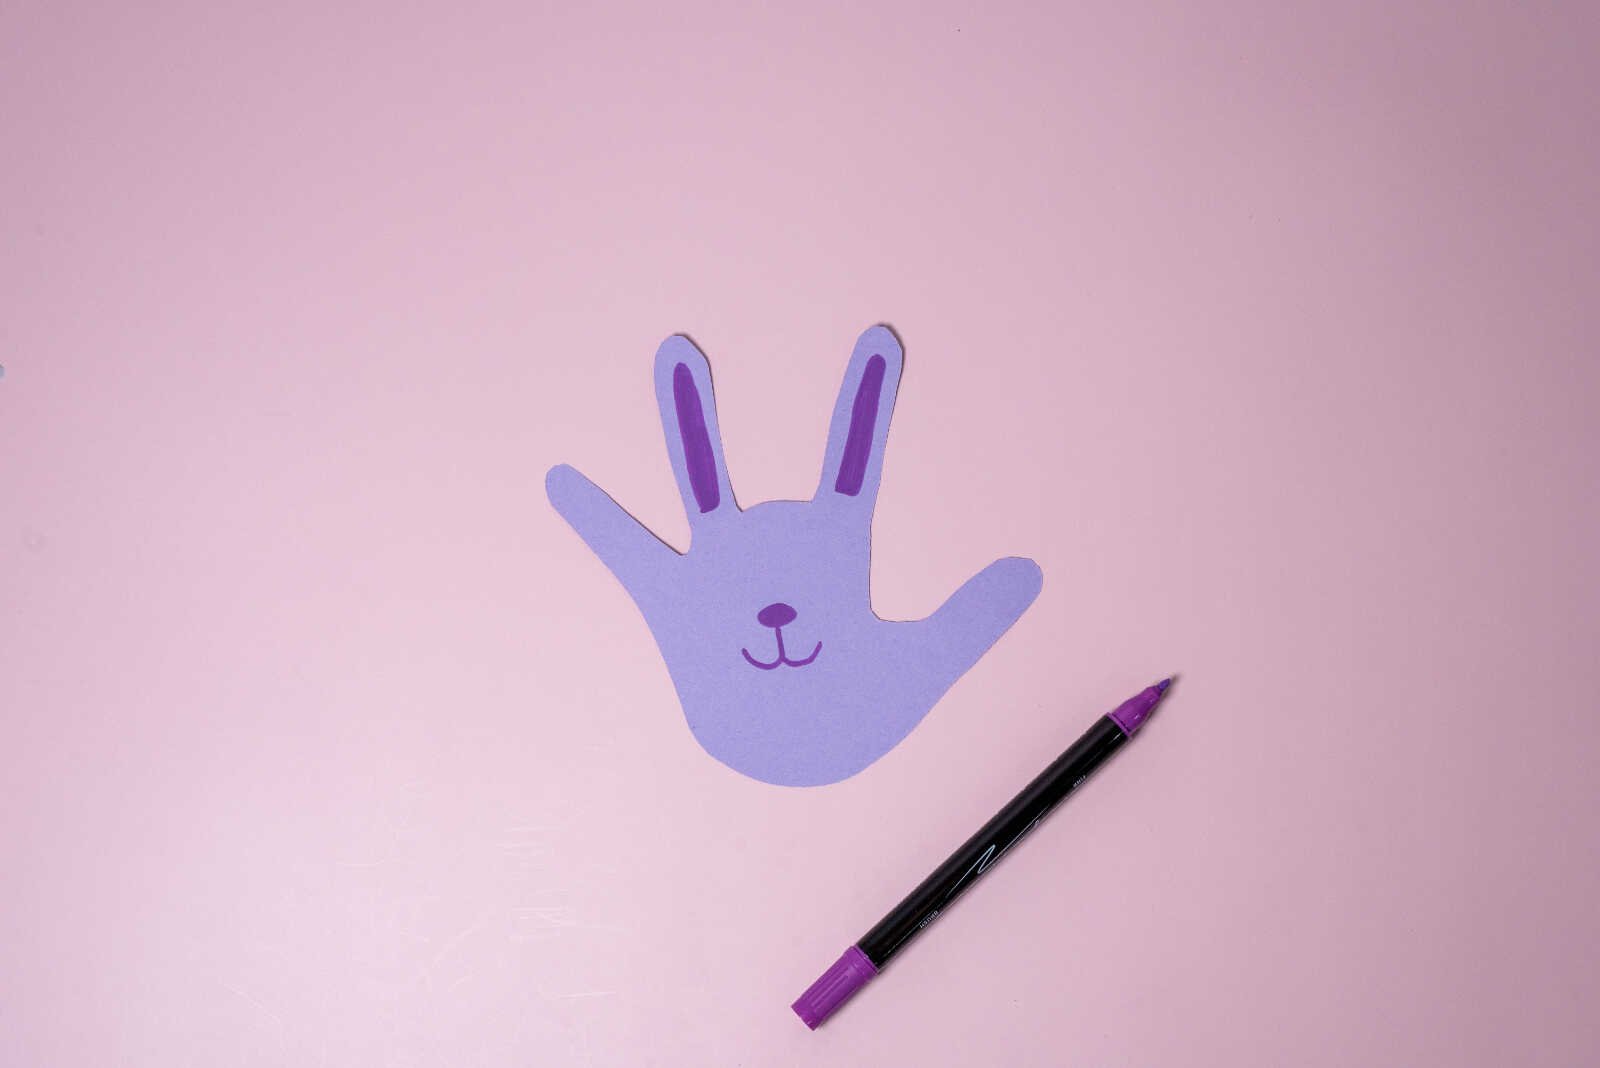
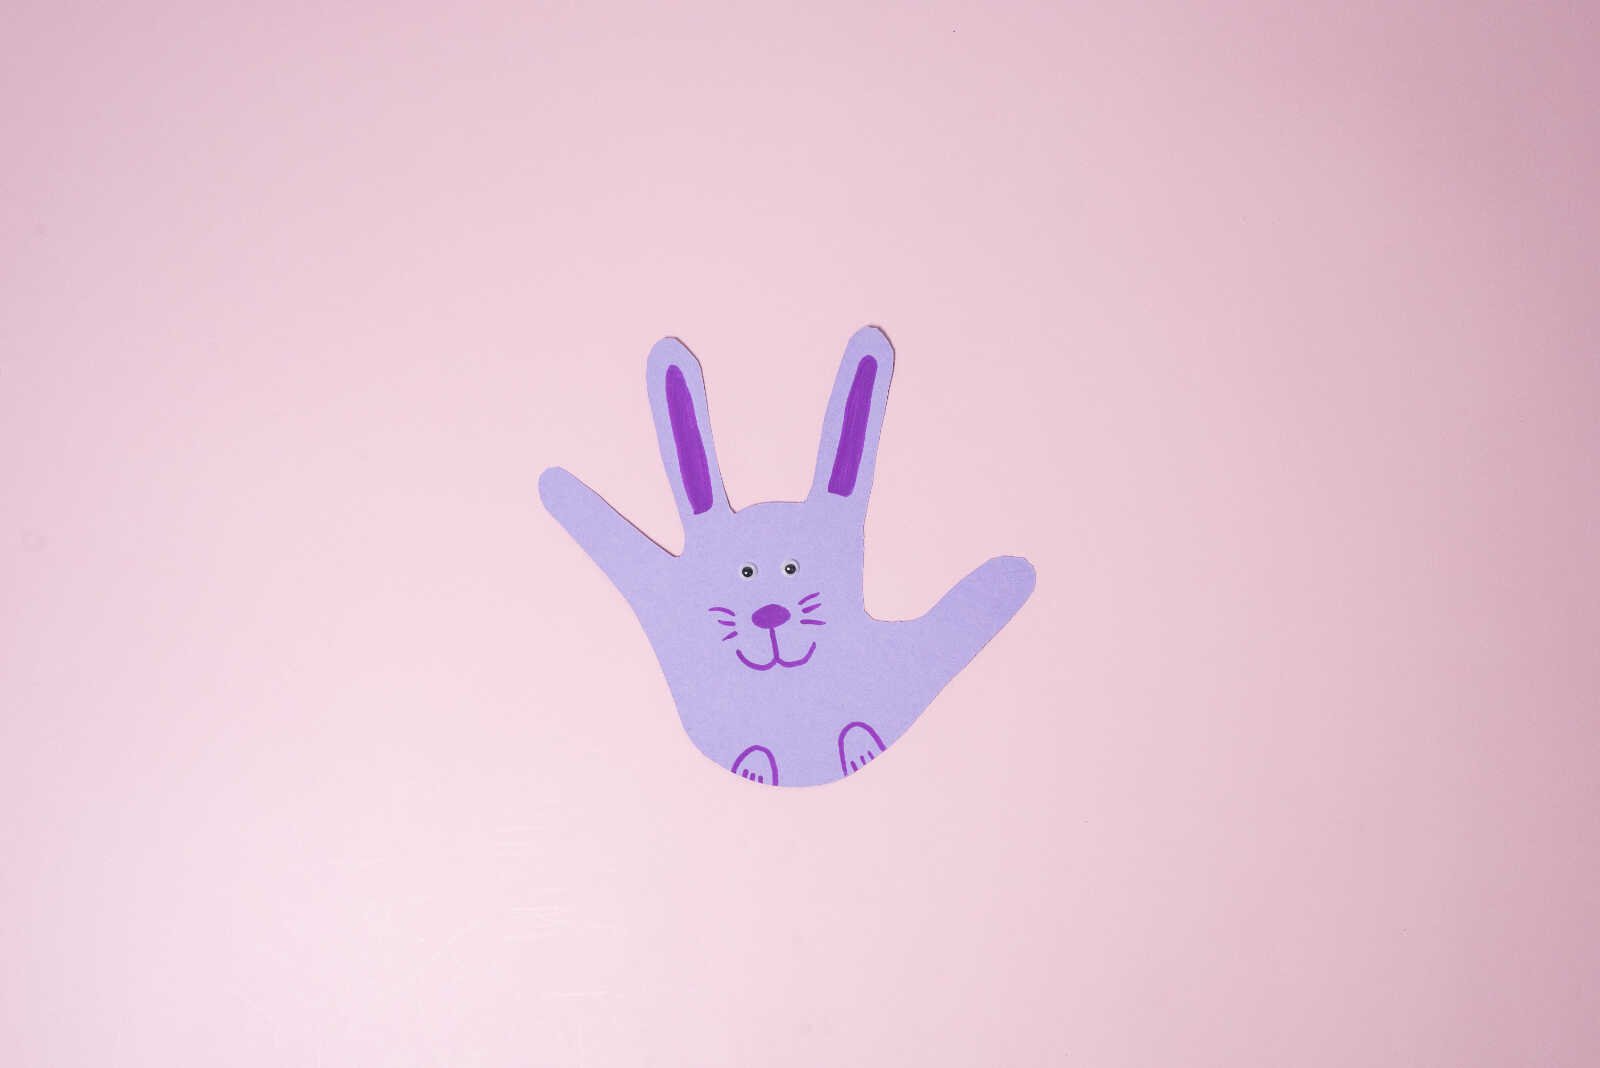
3. Add Facial Features
Now it’s time to bring your bunny to life. Use markers or small cut-out paper shapes to add:
- Eyes (or glue on googly eyes)
- A small nose
- Whiskers
- A smiling mouth
Encourage kids to get creative—some might want silly faces, sleepy bunnies, or even rainbow-colored features.
4. Decorate Your Bunny
This step is optional but adds extra personality. You can:
- Add inner ear details using a different color paper
- Draw rosy cheeks
- Glue on bows, flowers, or tiny accessories
- Add glitter or stickers for sparkle
Let kids explore their creativity here—there’s no “right” way to decorate.
5. Secure and Dry
Once everything is glued and decorated, allow the craft to dry completely. This helps ensure all pieces stay in place and the bunny is sturdy enough to display.
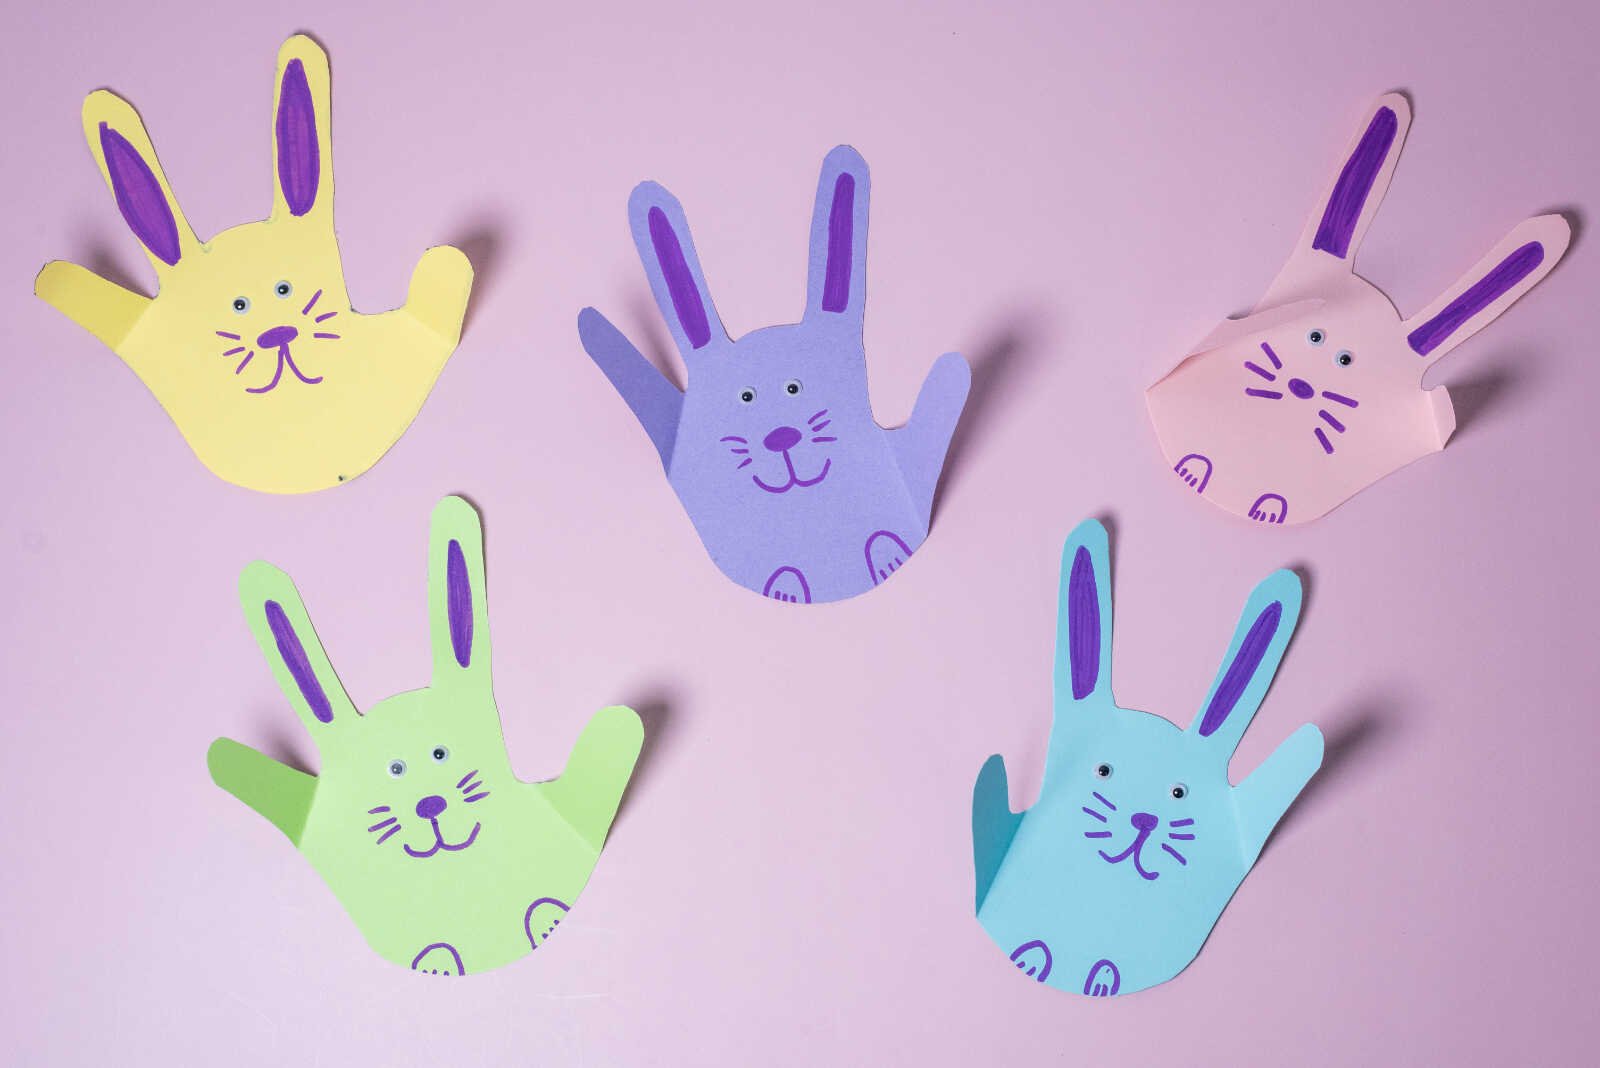
Creative Variations to Try
Once you’ve made one bunny, you might find yourself wanting to make more! Here are some fun variations to keep things interesting:
Pastel Easter Bunnies
Use soft pastel paper (pink, yellow, lavender, mint) for a classic Easter look. These are perfect for decorating an Easter table or classroom wall.
Patterned Paper Bunnies
Try using scrapbook paper with polka dots, stripes, or floral prints to give your bunny a stylish twist.
Painted Handprint Version
Instead of tracing, dip your child’s hand in washable paint and press it onto paper. Once dry, decorate it the same way.
Bunny Family
Create multiple handprints in different sizes to represent a whole bunny family—great for siblings!
Add a Background
Glue your bunny onto a larger piece of paper and create a scene:
- Grass and flowers
- Easter eggs
- Sunshine and clouds
Tips for Success
To make your crafting experience smooth and enjoyable, keep these tips in mind:
- Use thicker paper: Cardstock holds up better than thin construction paper.
- Pre-cut for younger kids: If working with toddlers, cut the handprint ahead of time.
- Keep wipes nearby: Especially helpful if using glue or paint.
- Encourage independence: Let kids make their own design choices—even if it gets a little messy.
- Label and date: Write your child’s name and the year on the back for a sweet keepsake.
Educational Benefits of This Craft
This bunny handprint craft isn’t just fun—it’s also a great learning activity. Here’s what kids are developing while they create:
- Fine motor skills: Cutting, gluing, and drawing help strengthen hand muscles.
- Creativity and self-expression: Kids choose colors, shapes, and designs.
- Following directions: Step-by-step instructions help build listening and sequencing skills.
- Shape recognition: Understanding how a handprint transforms into a bunny encourages visual thinking.
Perfect Occasions for This Craft
This craft fits beautifully into a variety of settings and celebrations:
- Easter parties
- Spring classroom activities
- Sunday school crafts
- Playdates or rainy day fun
- Homeschool art lessons
It’s also a great last-minute activity when you need something quick but meaningful.
Display Ideas
Once your bunny is complete, don’t let it sit in a pile—show it off! Here are a few fun ways to display your finished craft:
- Hang on the refrigerator
- Create a spring-themed bulletin board
- String multiple bunnies into a garland
- Frame it as a keepsake
- Add it to a scrapbook or memory box
Making It a Keepsake
One of the most special parts of this craft is how easily it becomes a treasured memory. To turn it into a keepsake:
- Add your child’s name and age
- Write the date
- Include a short note or message
- Store it in a memory book or folder
Years from now, you’ll love looking back at how small those hands once were.
Frequently Asked Questions
What age is this craft best for?
This craft works well for toddlers, preschoolers, and early elementary-aged kids. Younger children may need help with tracing and cutting.
Can I make this without googly eyes?
Absolutely! You can draw eyes with a marker or cut them out from paper.
What type of glue works best?
A standard school glue or glue stick works perfectly for this project.
How long does it take?
Most bunny handprint crafts can be completed in 15–30 minutes, depending on how detailed the decorations are.
Final Thoughts
This Bunny Handprint Craft is one of those simple projects that delivers big joy. It’s quick to set up, easy to customize, and creates something truly meaningful. Whether you’re crafting with your kids at home or leading a group activity, this project is guaranteed to bring smiles.
More than anything, it’s about capturing a moment—turning a tiny handprint into an adorable bunny that you’ll cherish long after the season has passed. So grab your paper, trace those little hands, and enjoy a creative moment together this spring.

One Comment